4th-year | Spring 2026 | IARC480 | Professor Felicia Dean | Team: Rachel Amos, Molly Johnston, Charlotte Albright, & Logan Smith | University of Tennessee, Knoxville
Curved Contrast is a collaborative furniture design project exploring the transformation of historical furniture leg precedents into an adaptive, ergonomic footstool system through the contrast between rigid columnar forms, fluid cabriole-inspired legs, and materiality. The final concept investigated the shift from architectural order towards embodied disruption by reinterpreting the permanence and repetition of the columnar leg alongside the soft, organic curvature of the cabriole leg, responding to human ergonomics. Here, the natural S-curve and rigid columnar forms allow ergonomic movement and craftsmanship to emerge through the fabricated wood and rope upholstery.
During the concept development phase, our team researched historical precedents, ergonomic studies, concept imagery, and AI-generated design explorations to investigate ideas of structure, craftsmanship, and human comfort. In this phase, my primary contributions included leading the collection and organization of concept research, graphics, precedent studies, and ergonomic analysis. In the design development phase, I contributed sketch iterations that informed the final design direction, which combined elements from both of my sketches and another group member's proposals. I also produced the Rhino 8 digital models for multiple iterations of the footstool system and developed the final digital model, including the footstool framing, rope upholstery, and joinery. While another group member produced the final orthographic drawings for the overall footstool system, each group member was responsible for creating their own set of orthographic drawings of their footstool. Throughout the fabrication of our footstool system, I documented much of the process photography. I also participated extensively in the construction of our footstool system, including selecting and milling lumber, creating domino floating mortise and tenon joinery, shaping and routing the legs, assembling components, applying the Danish oil finish, and weaving the rope upholstery for my individual footstool. I also photographed my completed footstool and assembled the final process book that compiled the group's work and documentation.

Concept Development
Historical Precedents
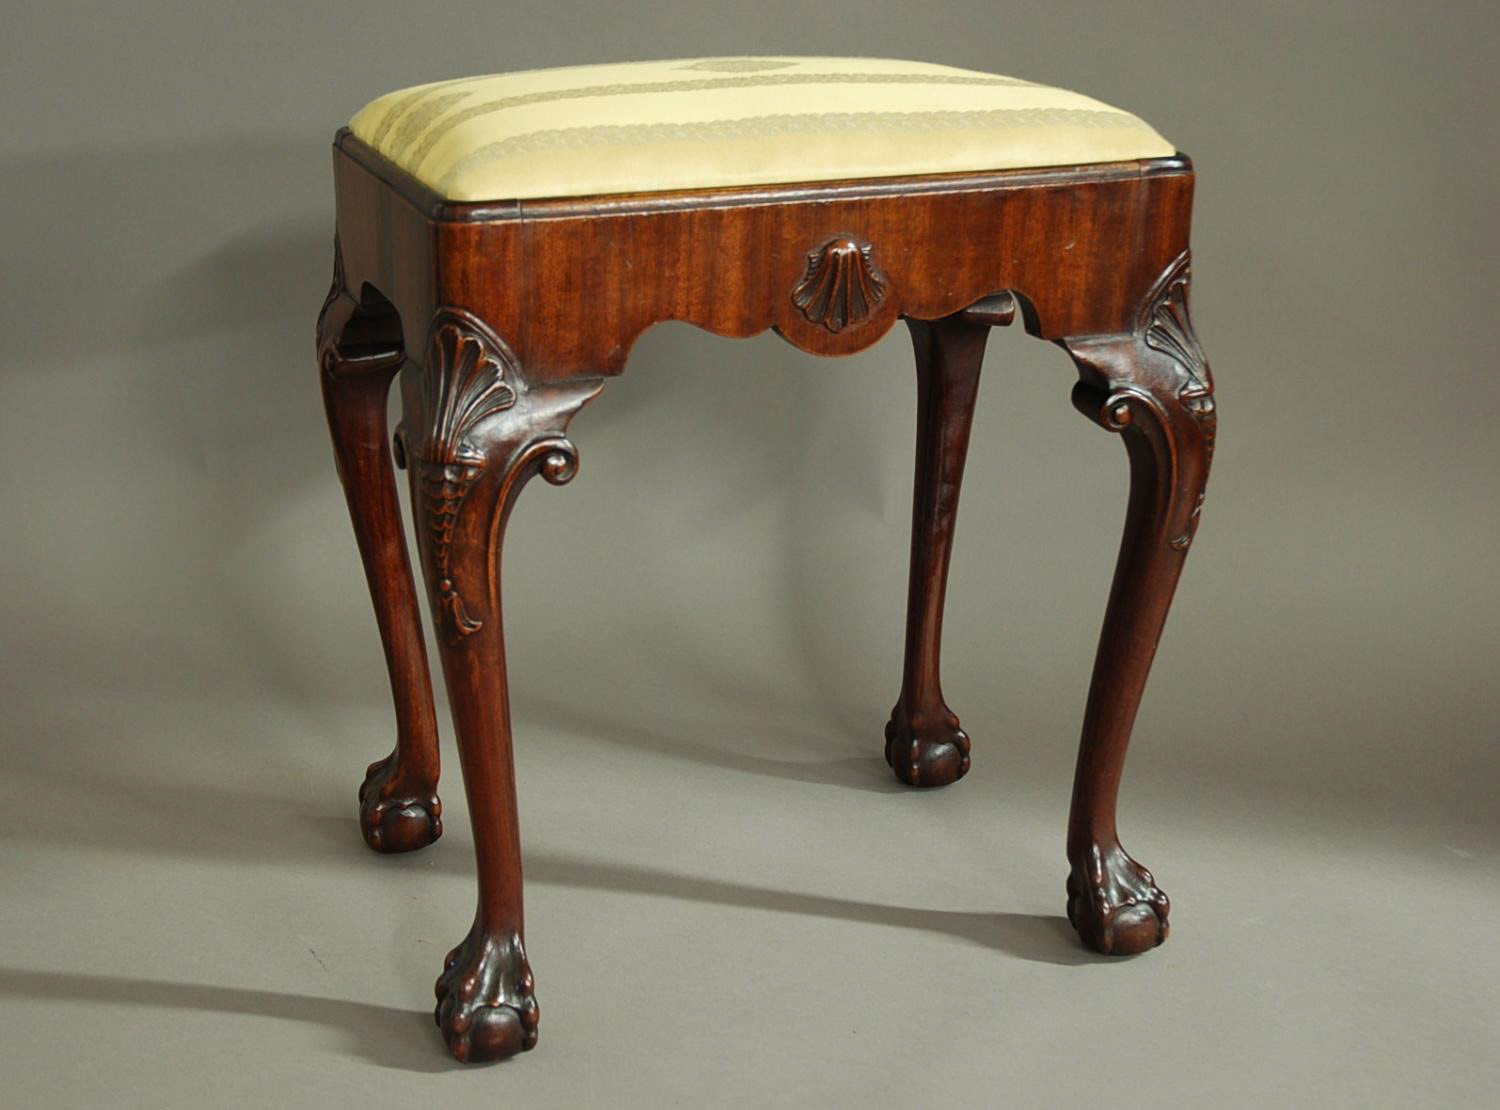
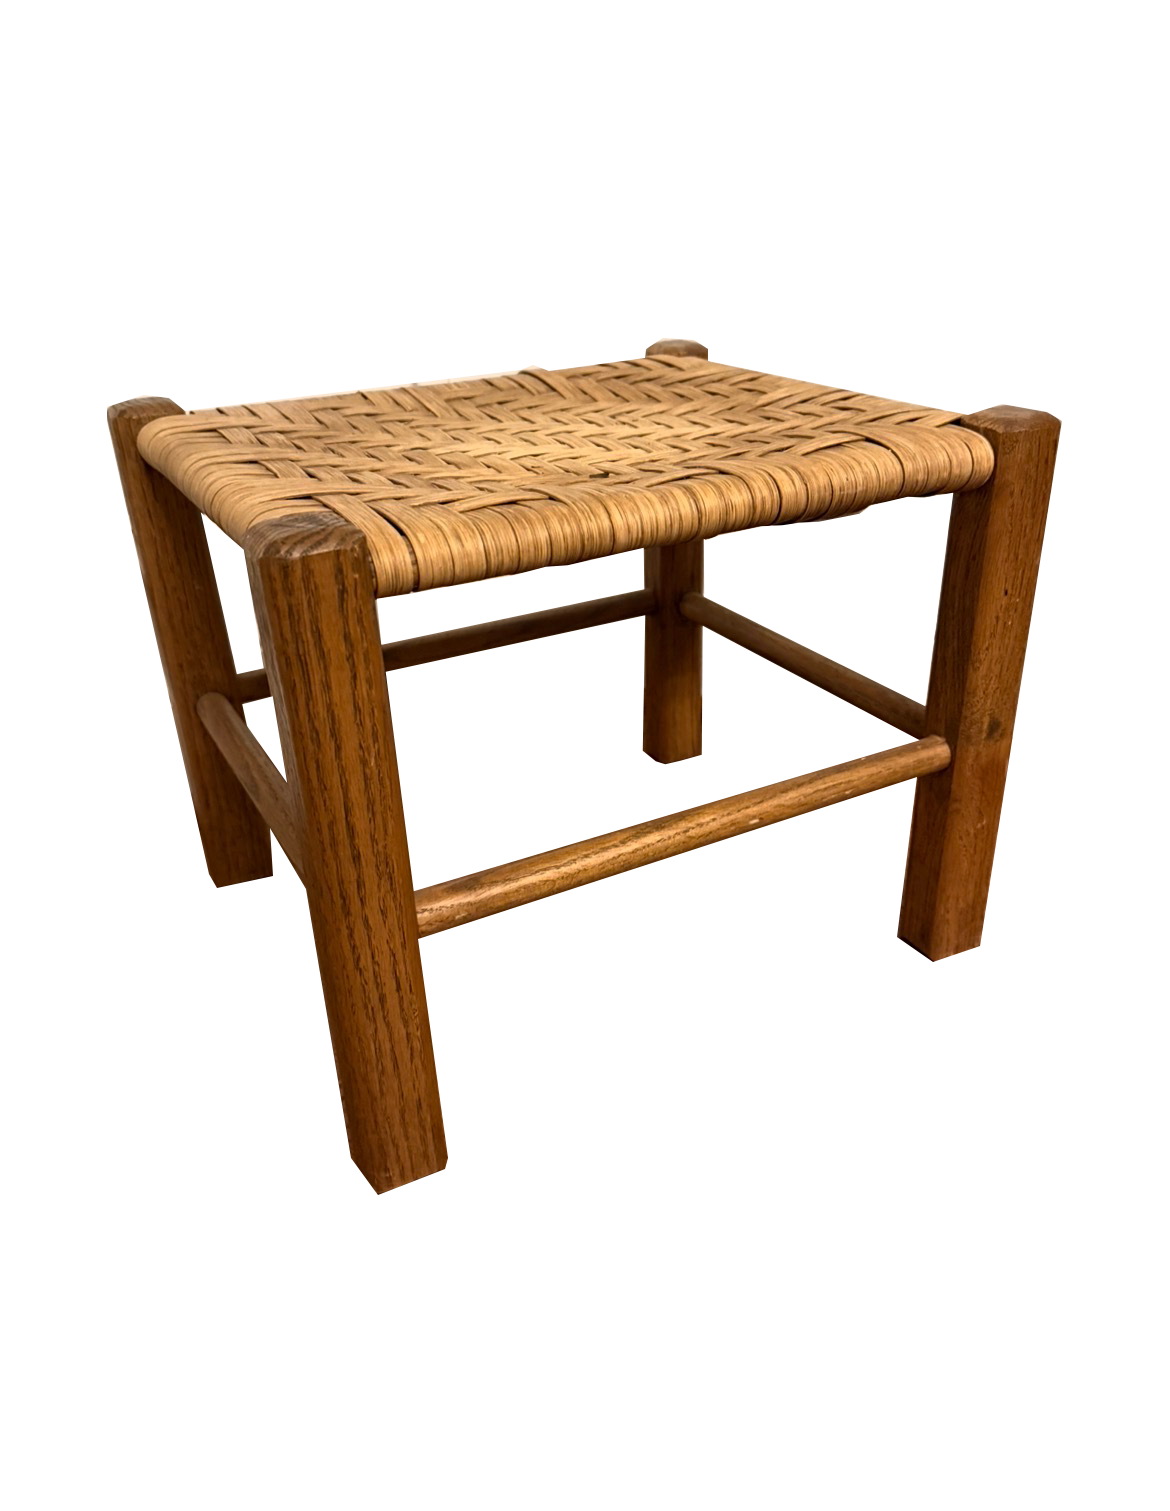
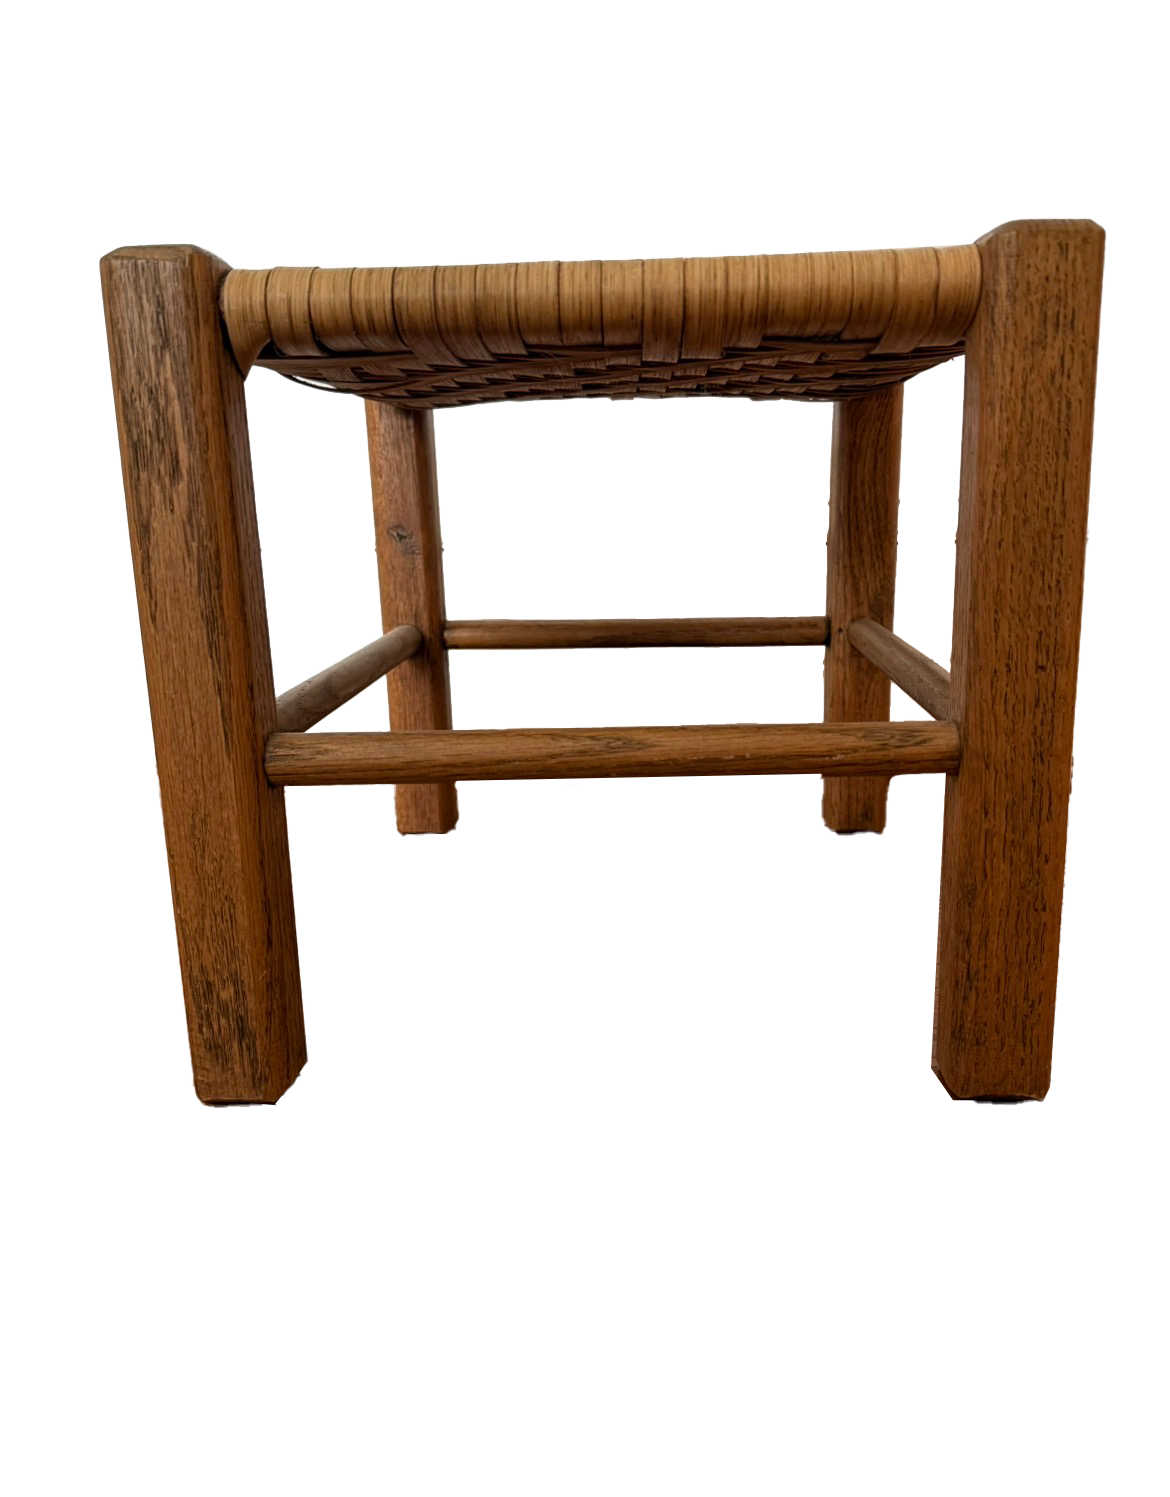
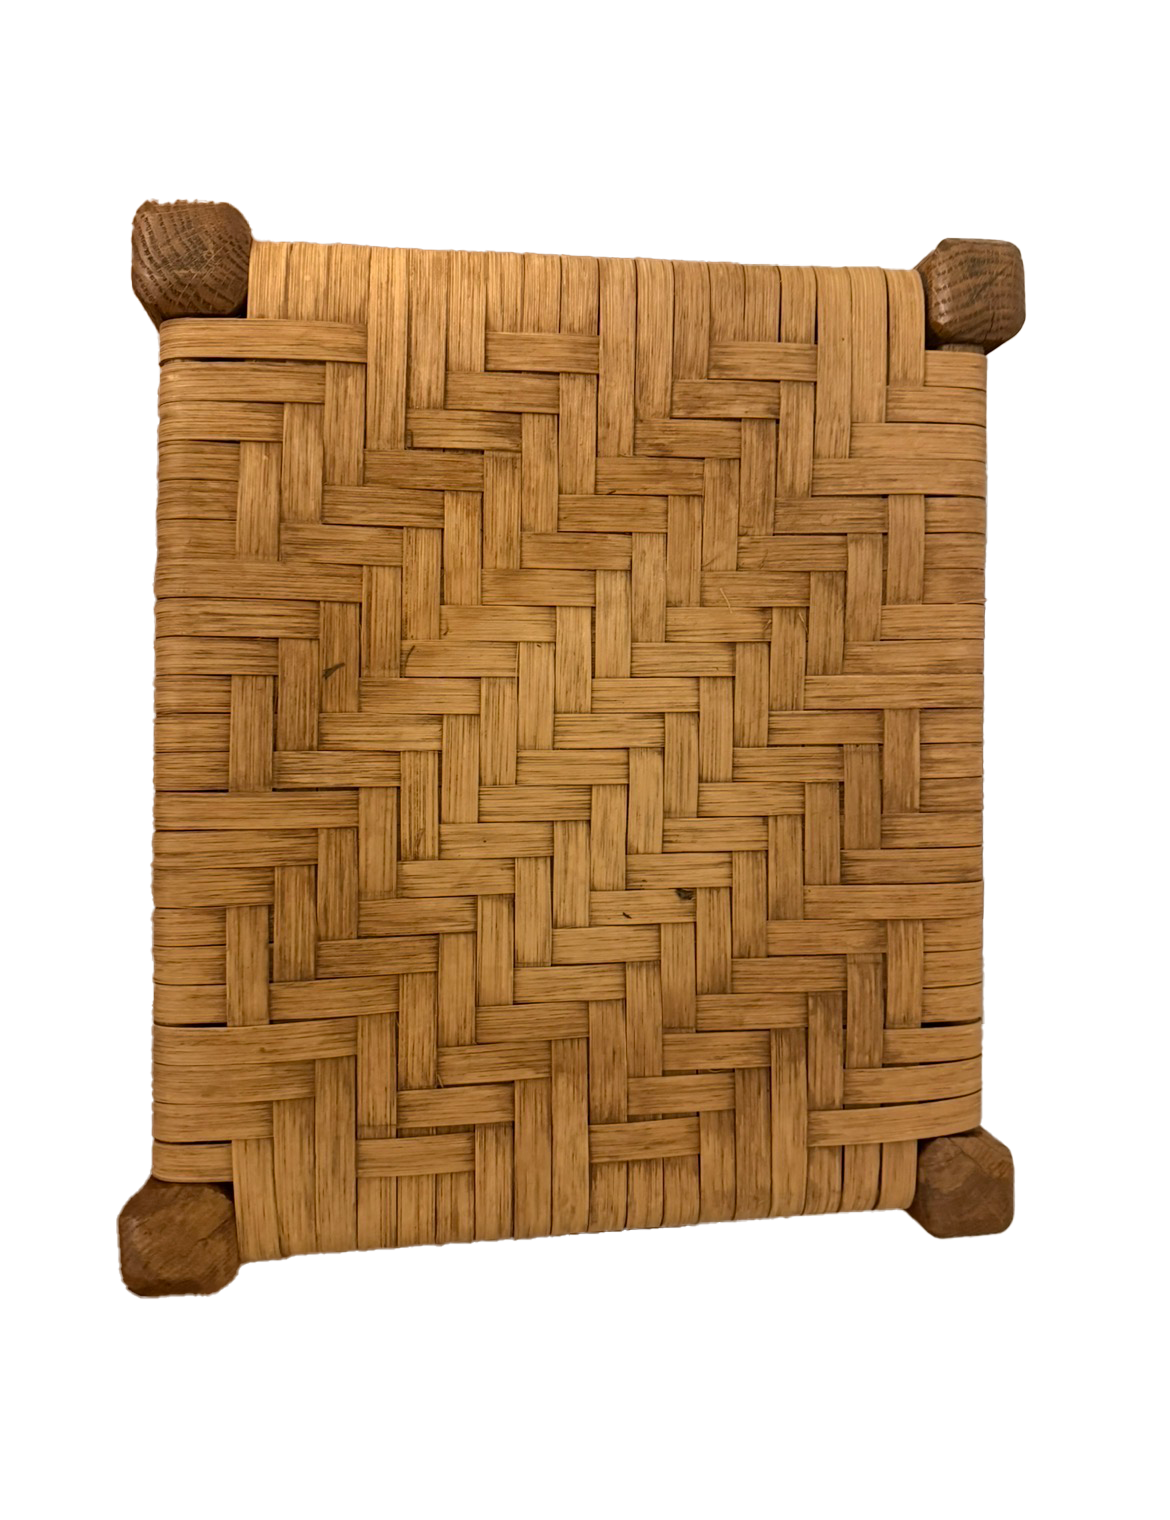
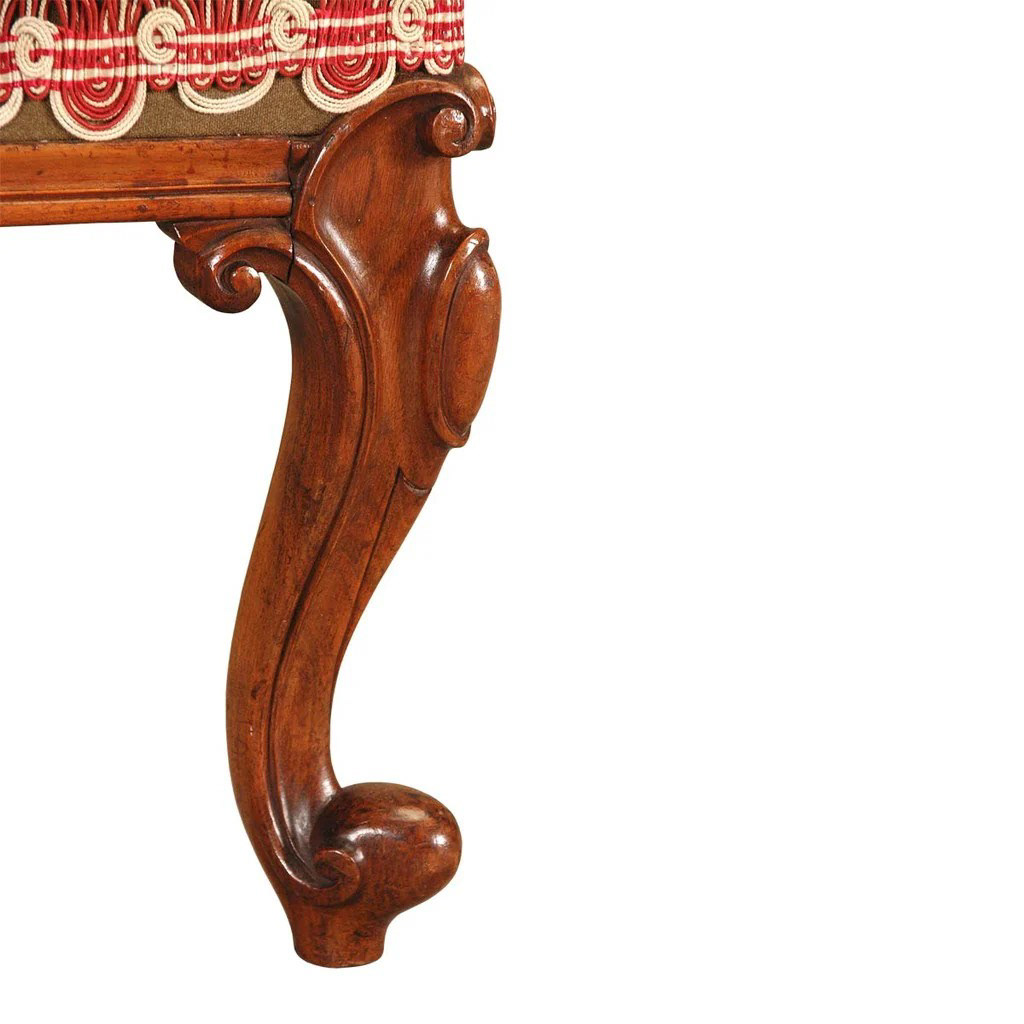
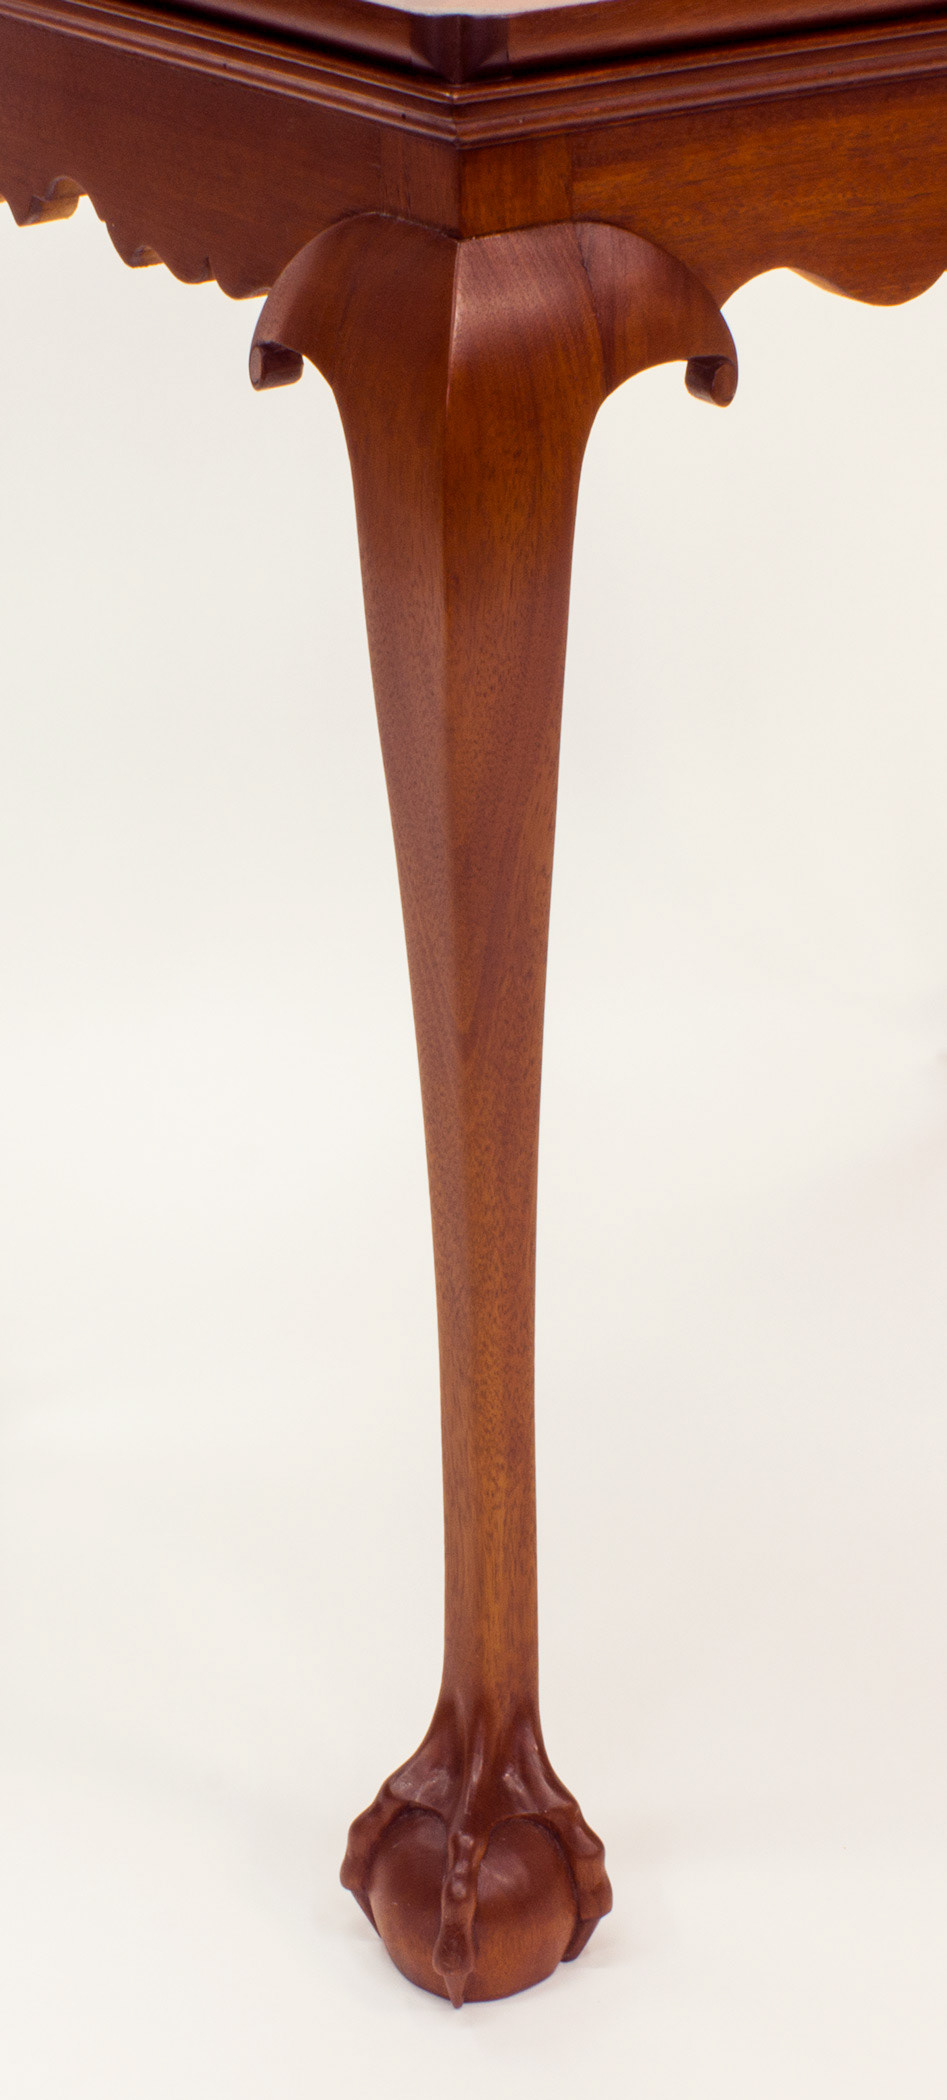
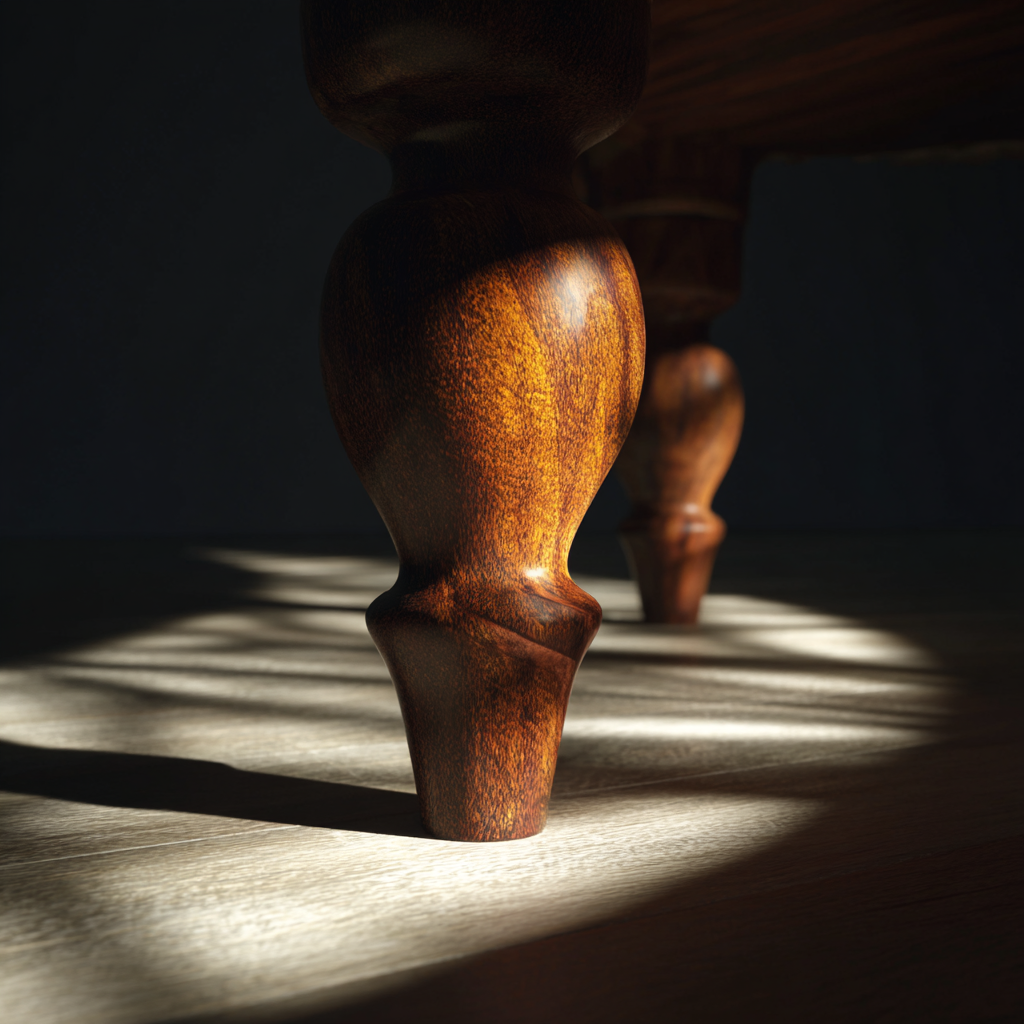
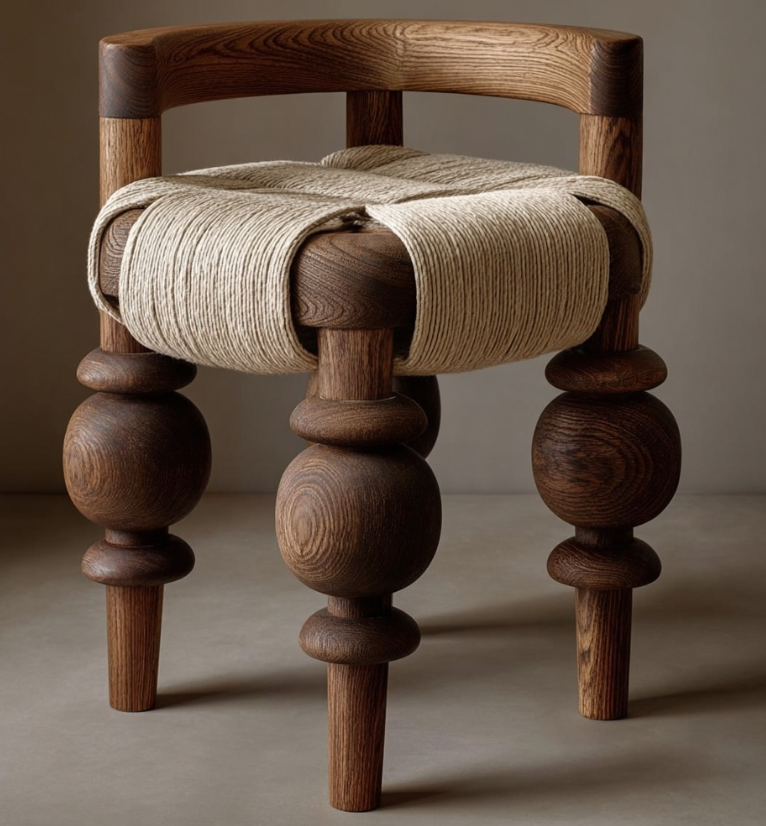
Historical Precedent - Cabriole Furniture Leg

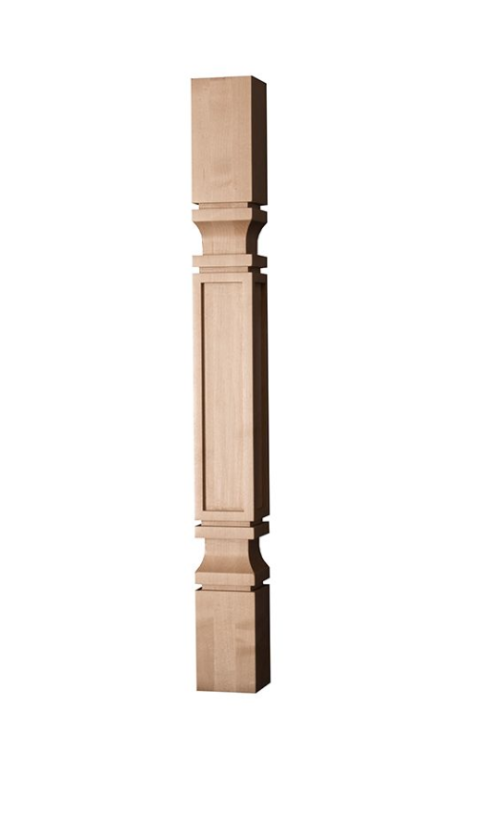
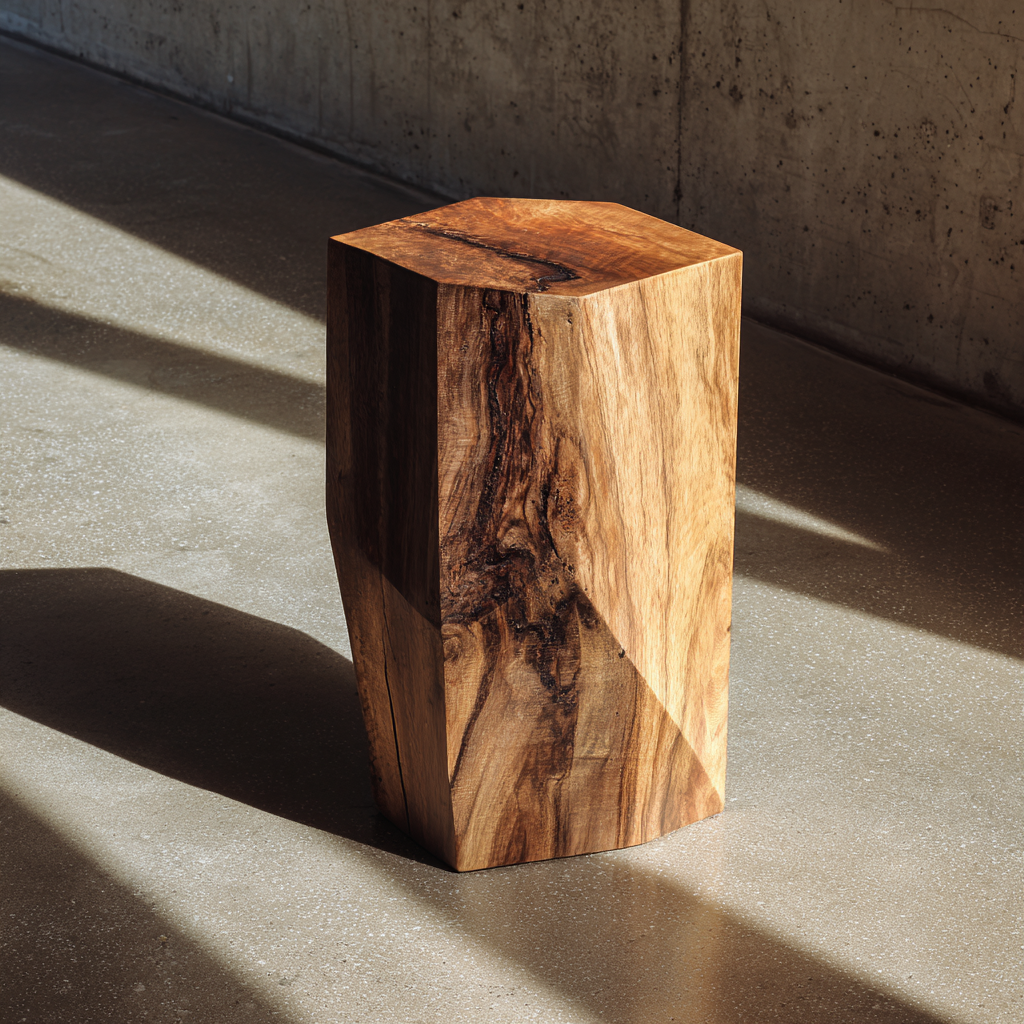
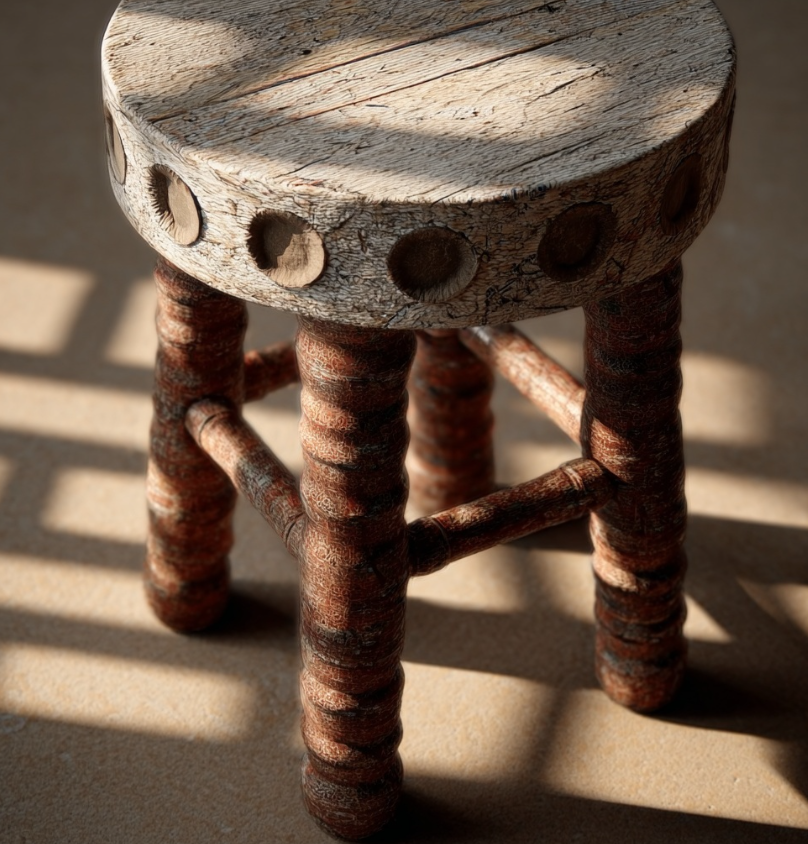
Historical Precedent - Columnar Furniture Leg
The concept design development of our footstool began by looking at the history of the columnar furniture leg and the cabriole furniture leg. The columnar leg comes from a more architectural tradition, using straight, ordered forms to show strength, stability, and permanence. The cabriole leg, which became popular in historical furniture design, brought in a more organic and decorative language through its curved S-shape, showing craftsmanship, movement, and a closer relationship to the human body.
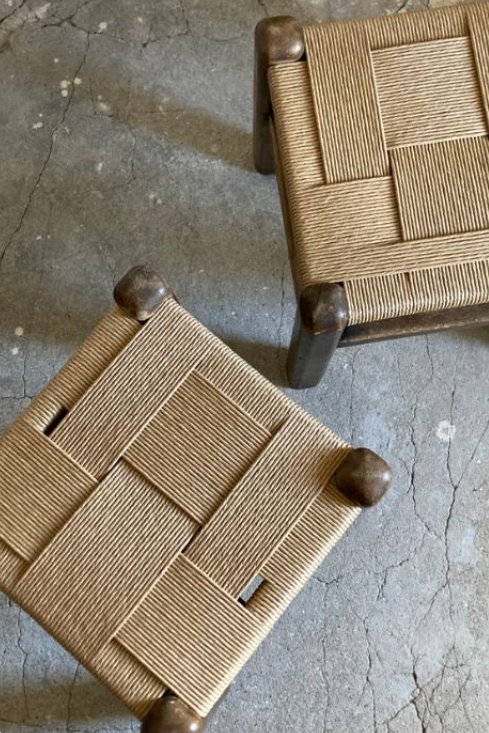
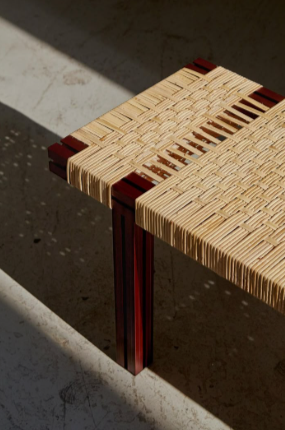
Ergonomic Studies
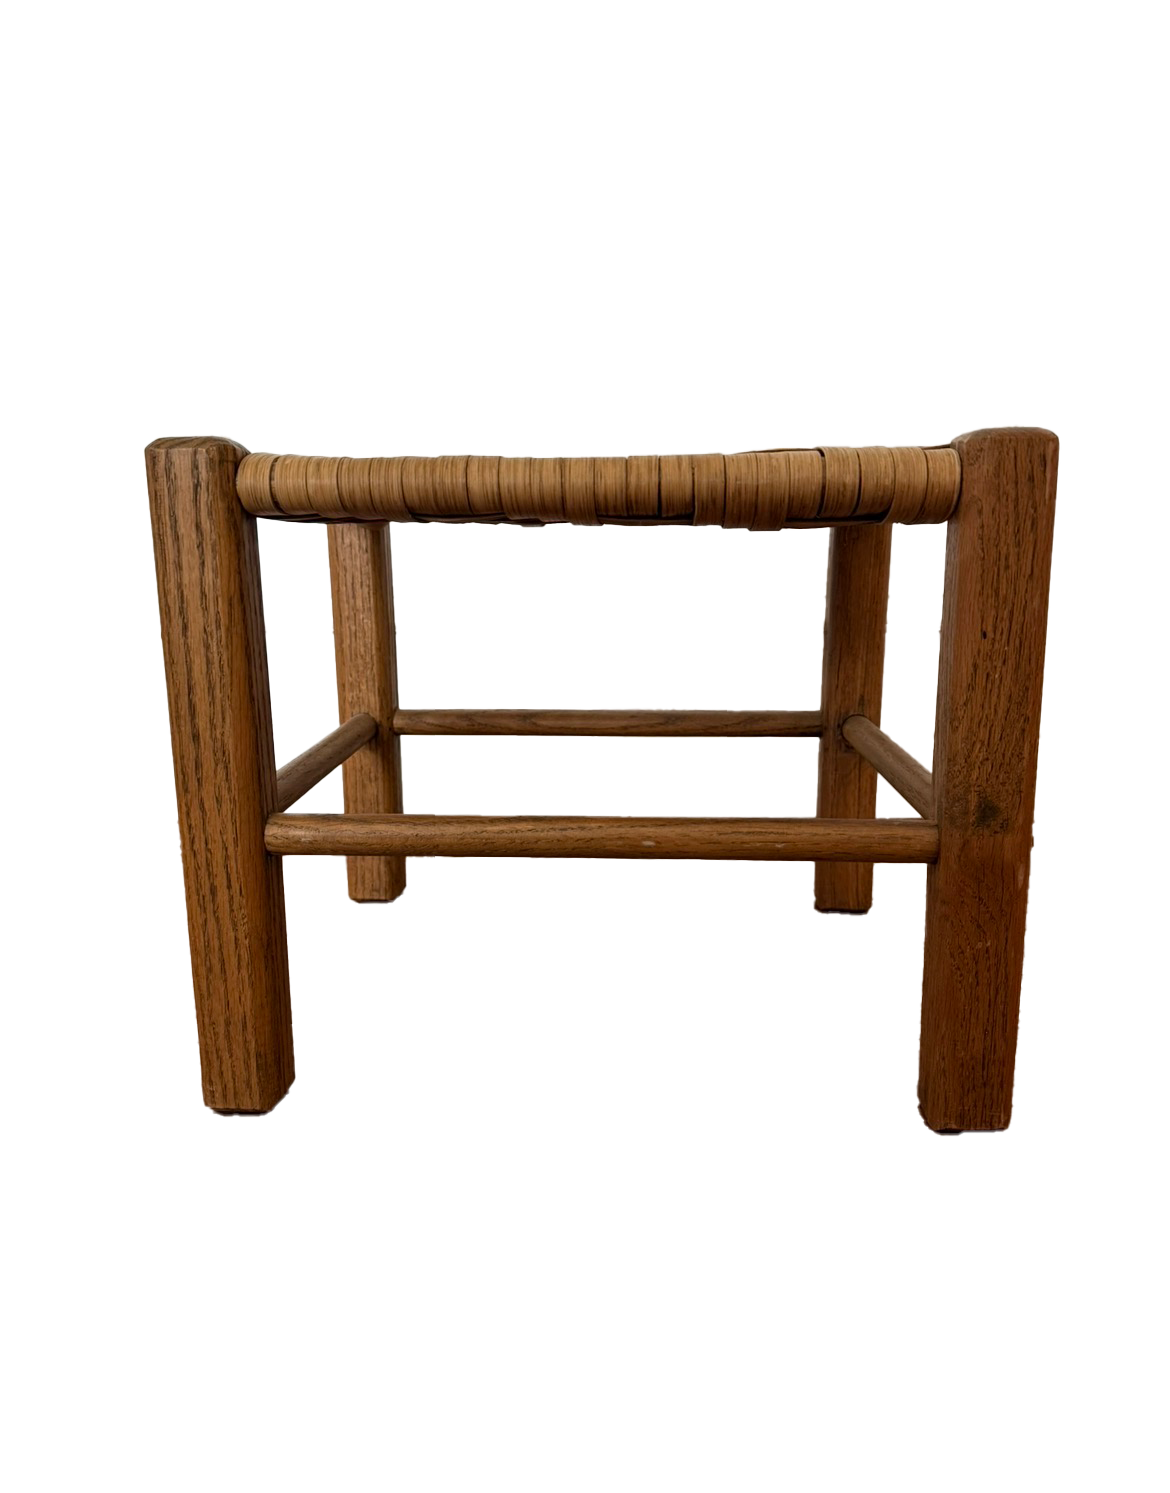
Footstool Ergonomic Study View 1

Footstool Ergonomic Study View 2
Footstool Ergonomic Study View 3
Footstool Ergonomic Study View 4
Footstool Ergonomic Study View 5
Curved Contrast addressed the ergonomics of the footstool by seeing how the columnar leg and cabriole leg respond differently to the body. The columnar leg creates stability and support through its straight, rigid structure, while the cabriole leg introduces a softer curve that feels more connected to natural movement and comfort. Our woven rope upholstery builds on this idea because it forms slightly to the curve of the body, creating a more flexible and comfortable seating surface while still being supported by the stool’s stronger wood structure. While many of the footstools we encountered through our ergonomic studies had a more rigid structure, we found that the woven seat and the height of the overall footstool made the entire stool easier to use, as it relates to the comfort of the human body.
Concept
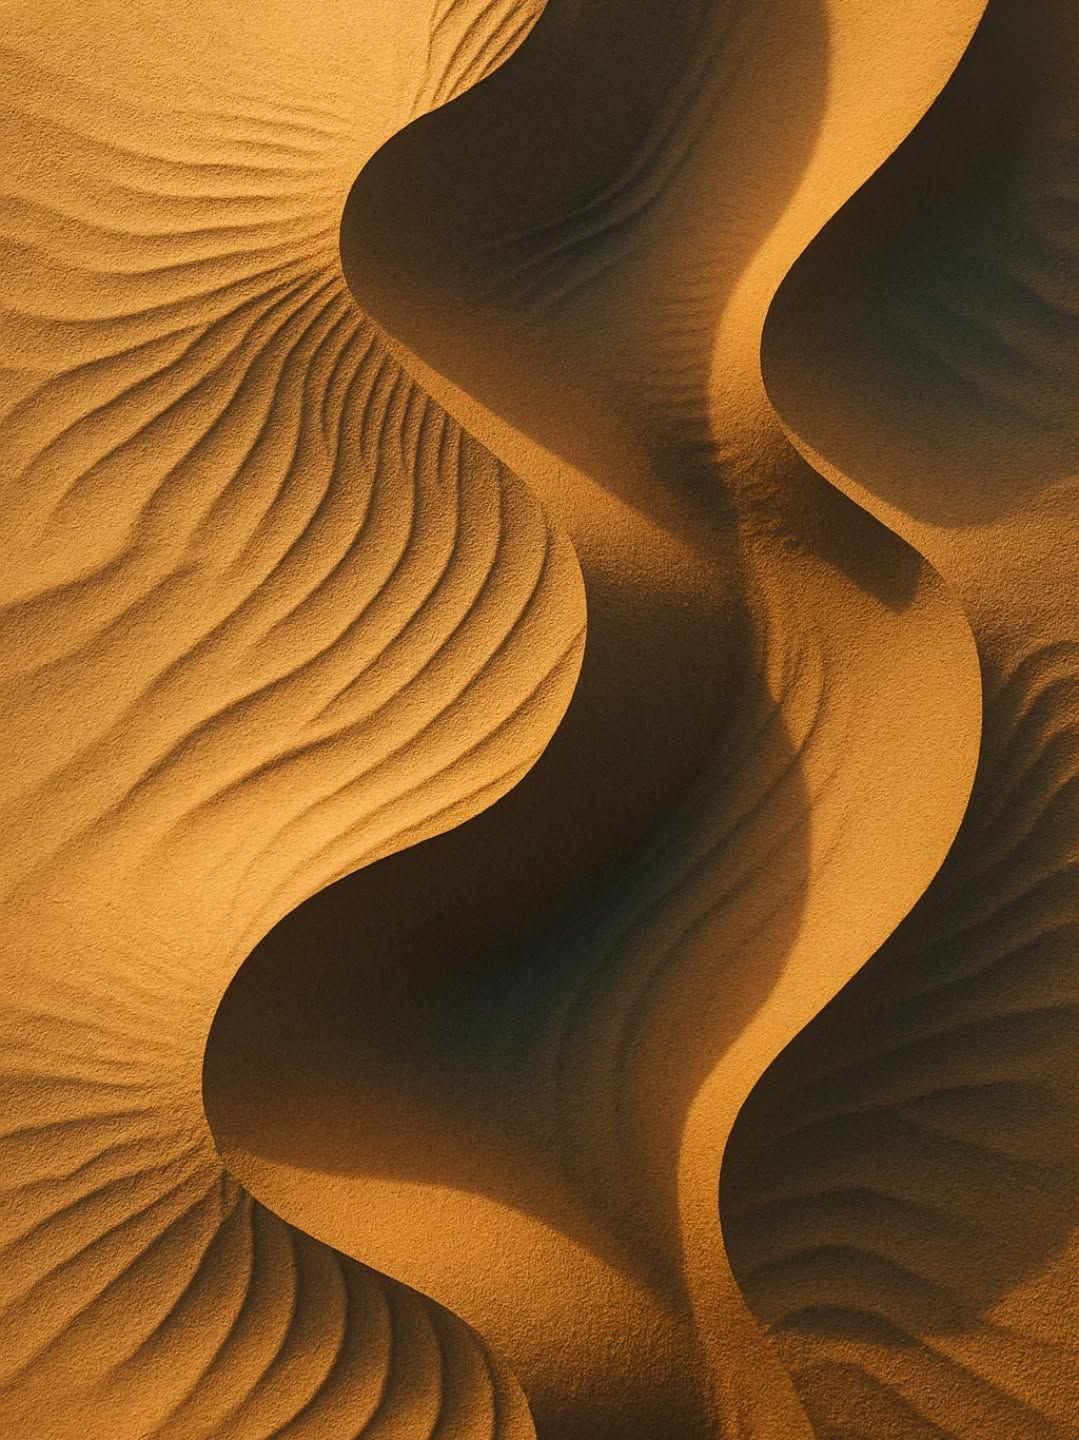
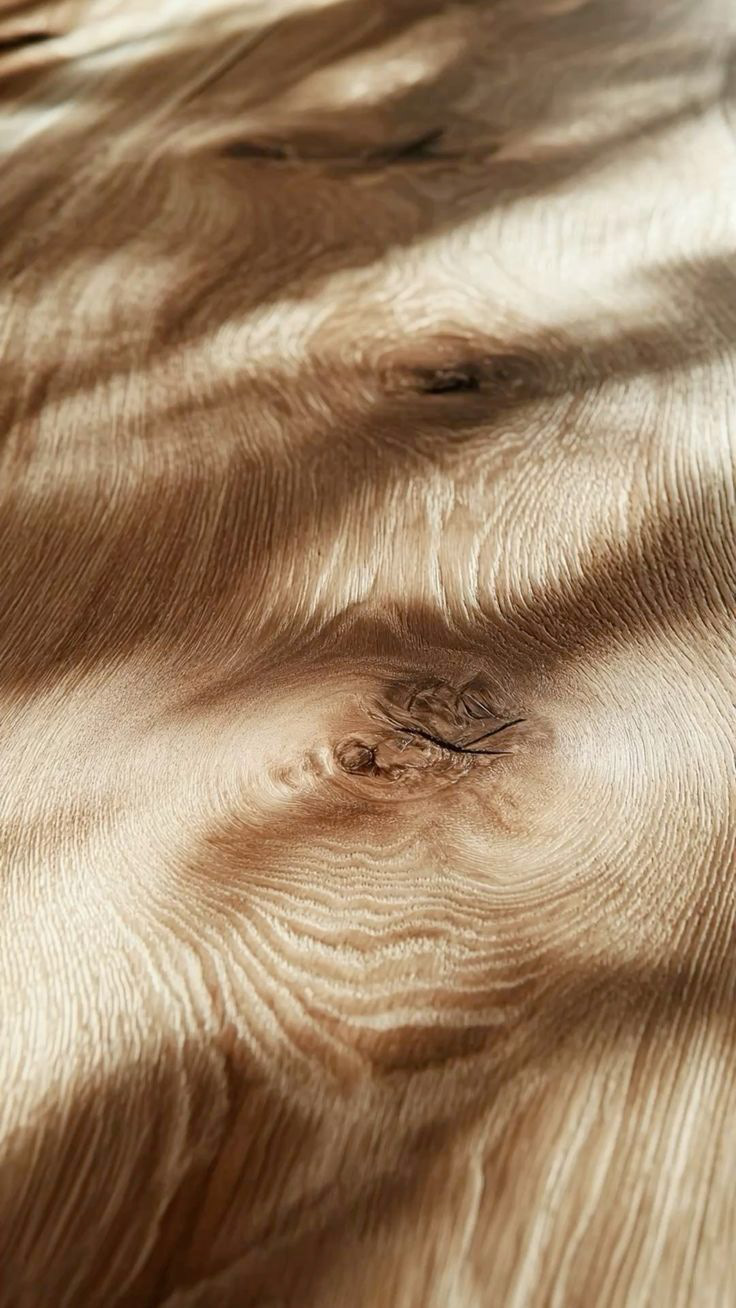
The juxtaposition of the rigid columnar furniture leg to the organic cabriole furniture leg reflects a shift from architectural order toward embodied disruption, with the fluid S-curve of the cabriole leg leading the dialogue. While the column relied on parallel repetition and clear intersections to convey permanence, the cabriole embraced comfort and craftsmanship through nature-inspired curved forms that align with the human body. As it guides growth and curvature of fragments in nature, contrast is treated as an evolving force that pulls the hardwood into subtle S-curves, revealing movement and softness within the wood grain. In an un-formalized future, these historical furniture legs are iterated into parametric forms that balance disruption and order, allowing structure to converge in response to ergonomic needs. This idea becomes a system of fabricated fragments where digital processes, natural elements, and human craftsmanship transform the furniture leg into an adaptive, ergonomic form, revealing curved movement through contrast.
Concept Image 1
Concept Image 2
Concept Image 3

Concept Image 4
Concept Image 5
Concept Image 6
Concept Image 7
Concept Image 8
Concept Image 9
Our concept of contrast brings together the ergonomics and material choices of the stool. We used the columnar leg to represent structure, order, and stability, while the cabriole leg inspired the curved forms that show movement craftsmanship. We chose walnut because its darker tone and visible grain added warmth while emphasizing the difference between the strong wooden frame and the softer woven rope upholstery.
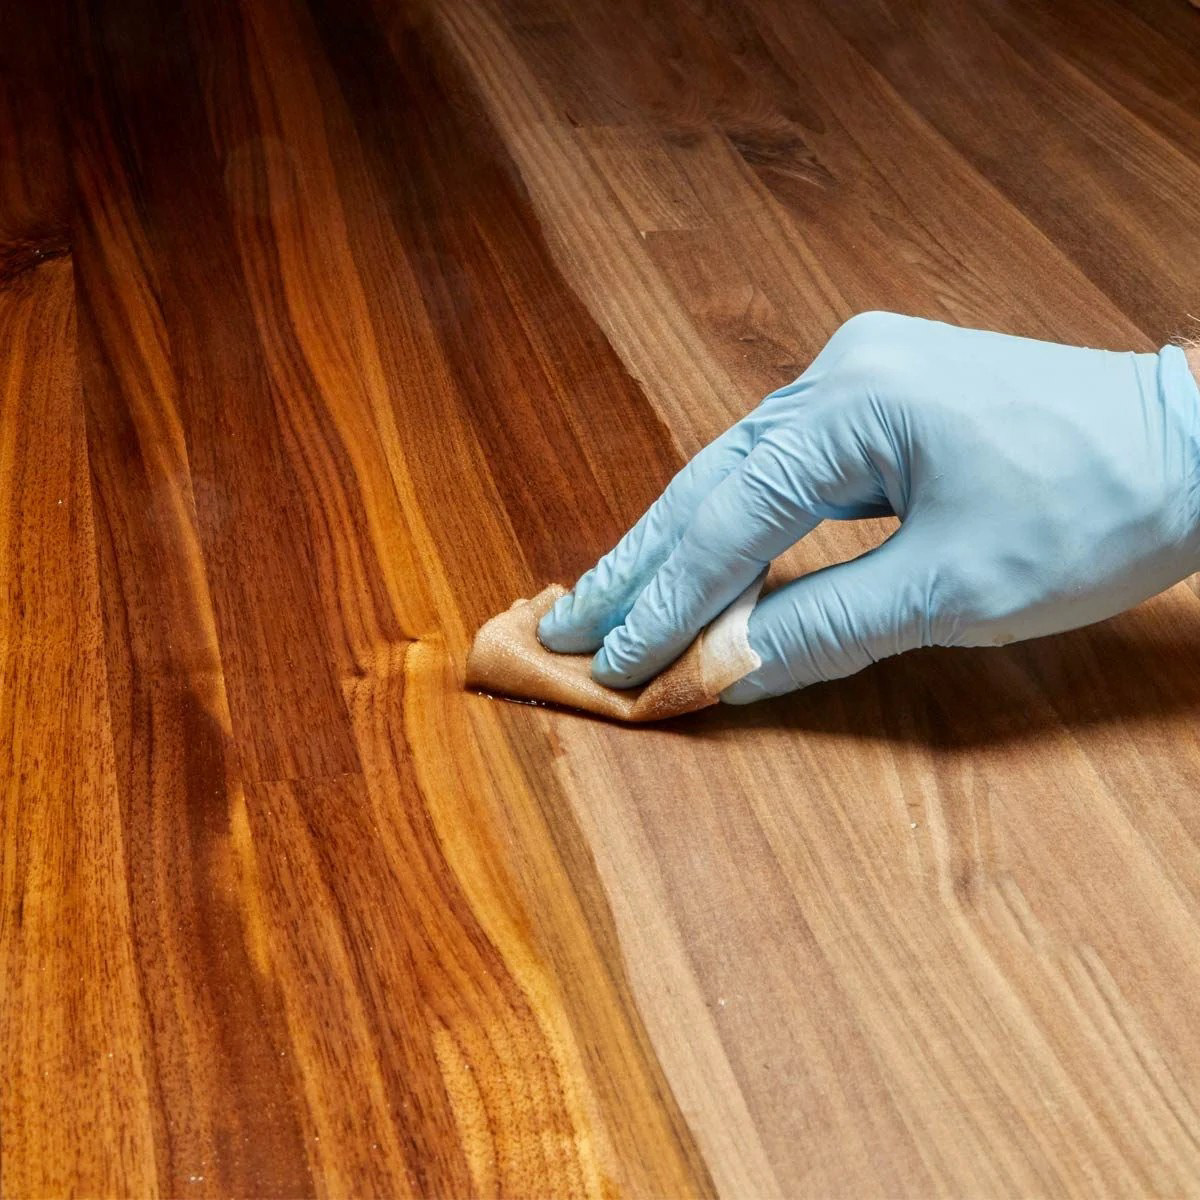
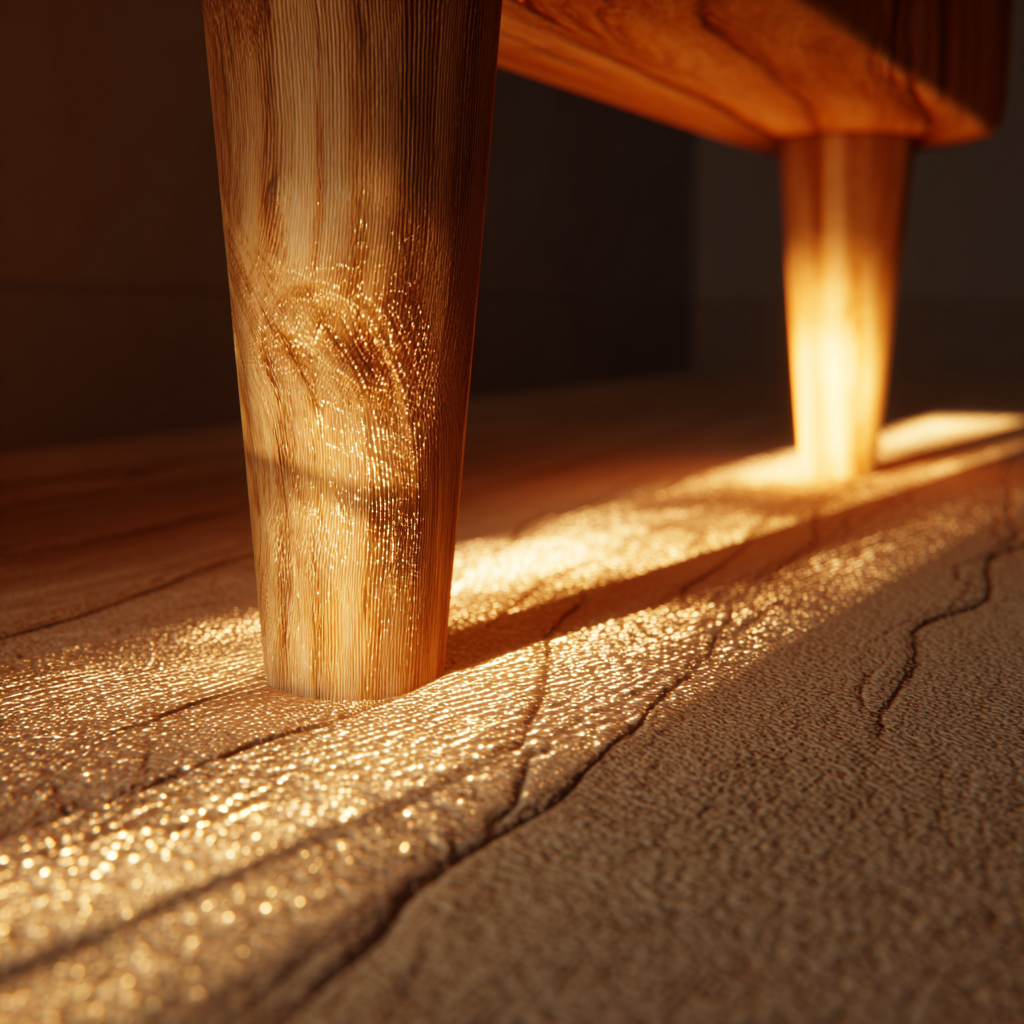
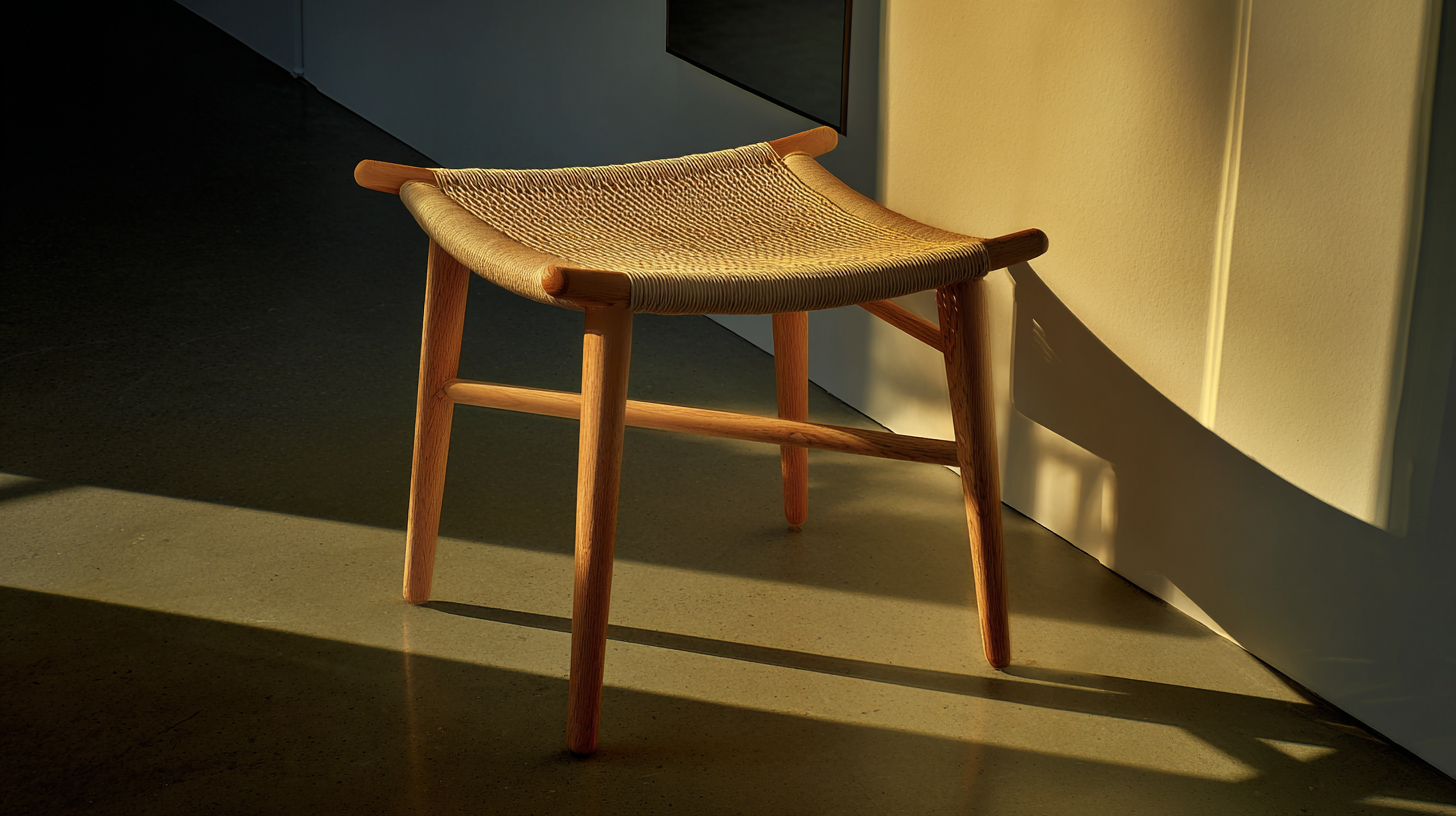
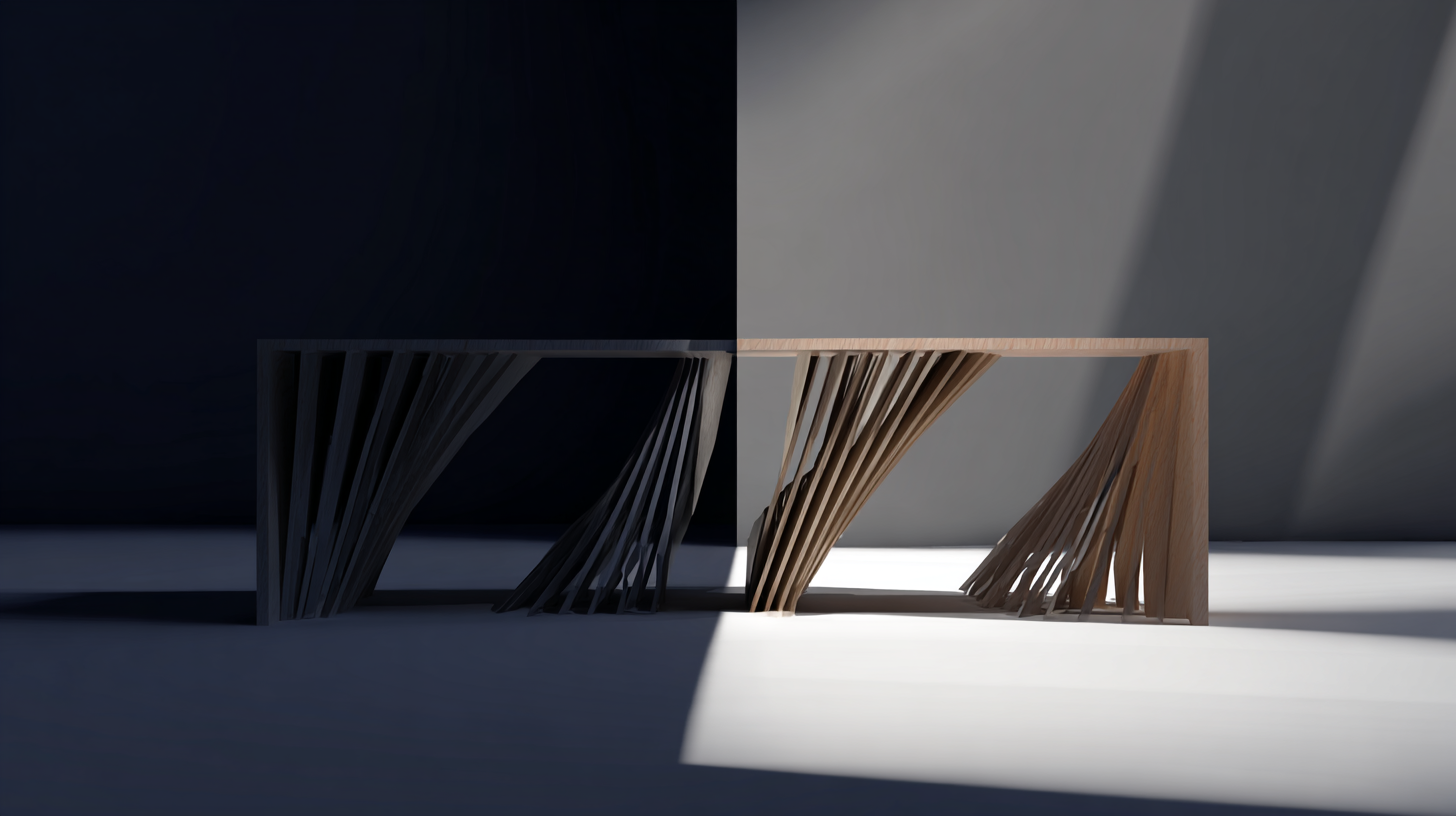
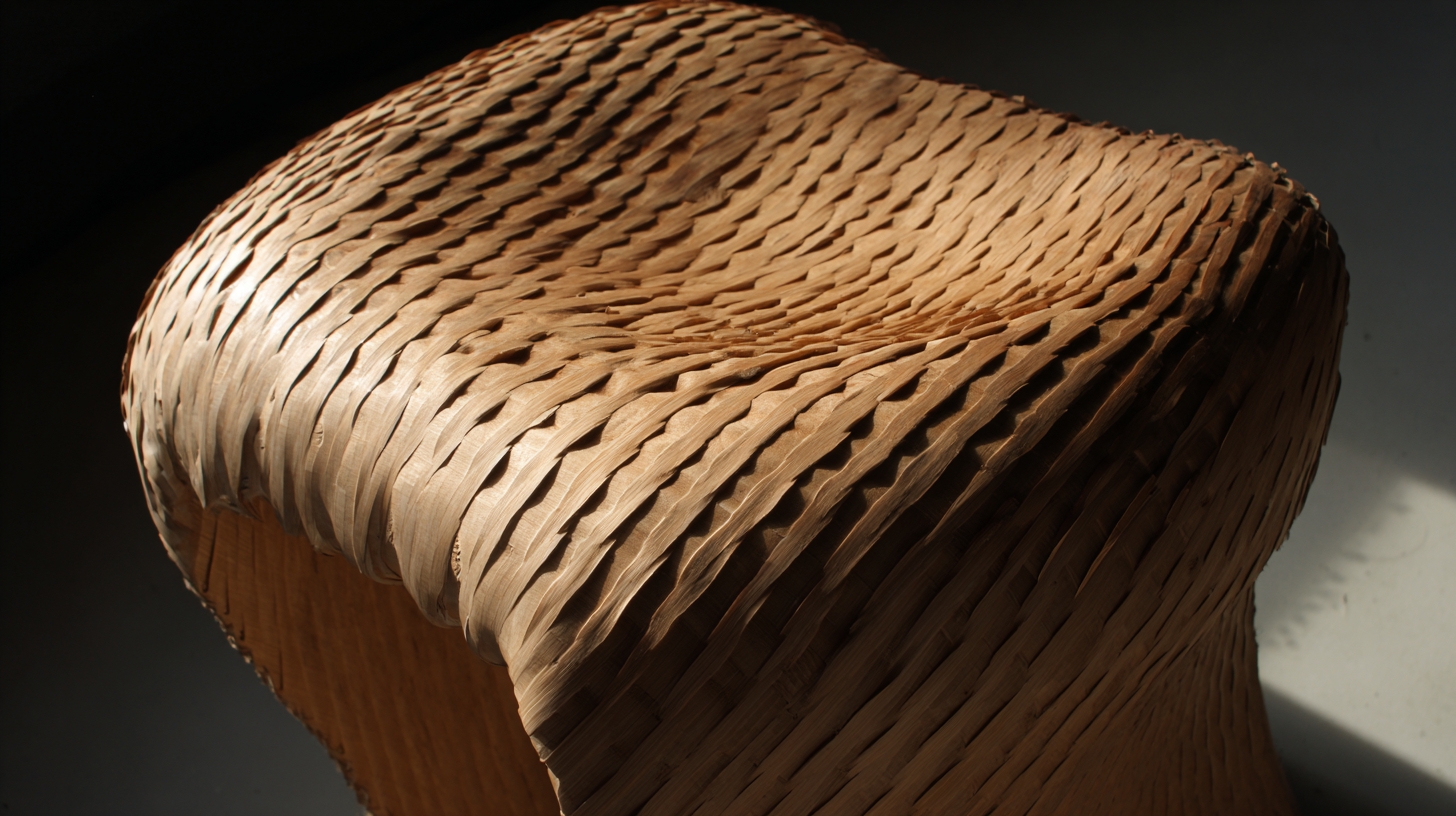
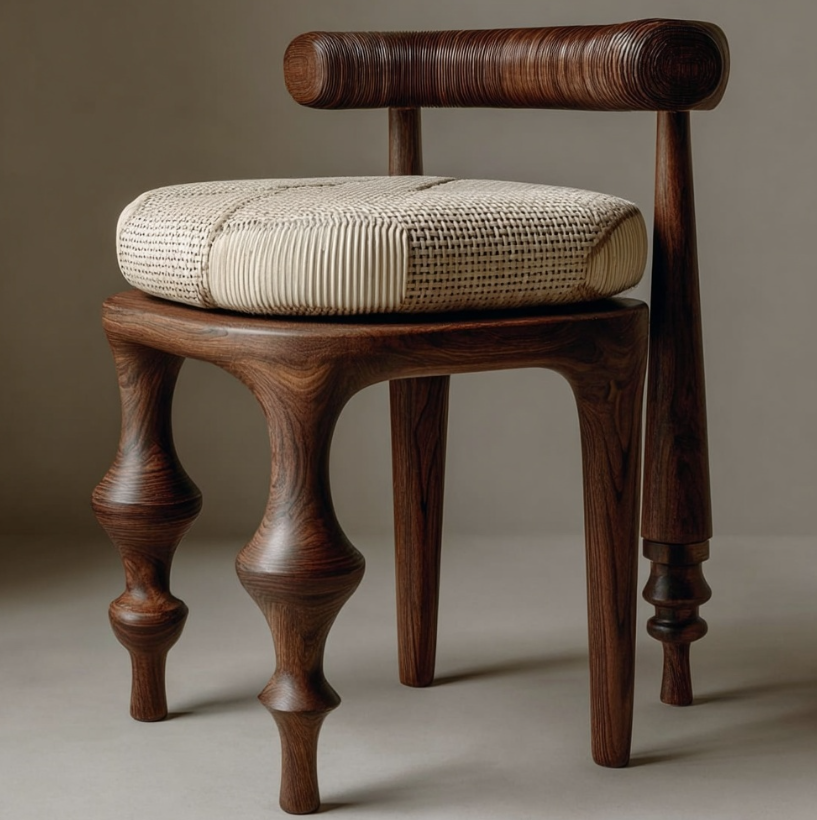
AI Studies

Midjourney AI Study Image 1
Midjourney AI Study Image 2
Midjourney AI Study Image 3
Midjourney AI Study Image 4
Midjourney AI Study Image 5
Midjourney AI Study Image 6
Midjourney AI Study Image 7
Midjourney AI Study Image 8
Midjourney AI Study Image 9
Midjourney AI Study Image 10
Midjourney AI Study Image 11
Midjourney AI Study Image 12
The AI image-generating software, Midjourney, was part of the design process to help generate ideas for what the stool could become. We plugged in inspiration images of both cabriole and columnar legs so we could explore different ways those two historical forms could be combined and reinterpreted. This helped us visualize possibilities early in the process and gave us a range of ideas that we could then refine into a design that fit our concept of contrast.
Design Development
Initial Sketches
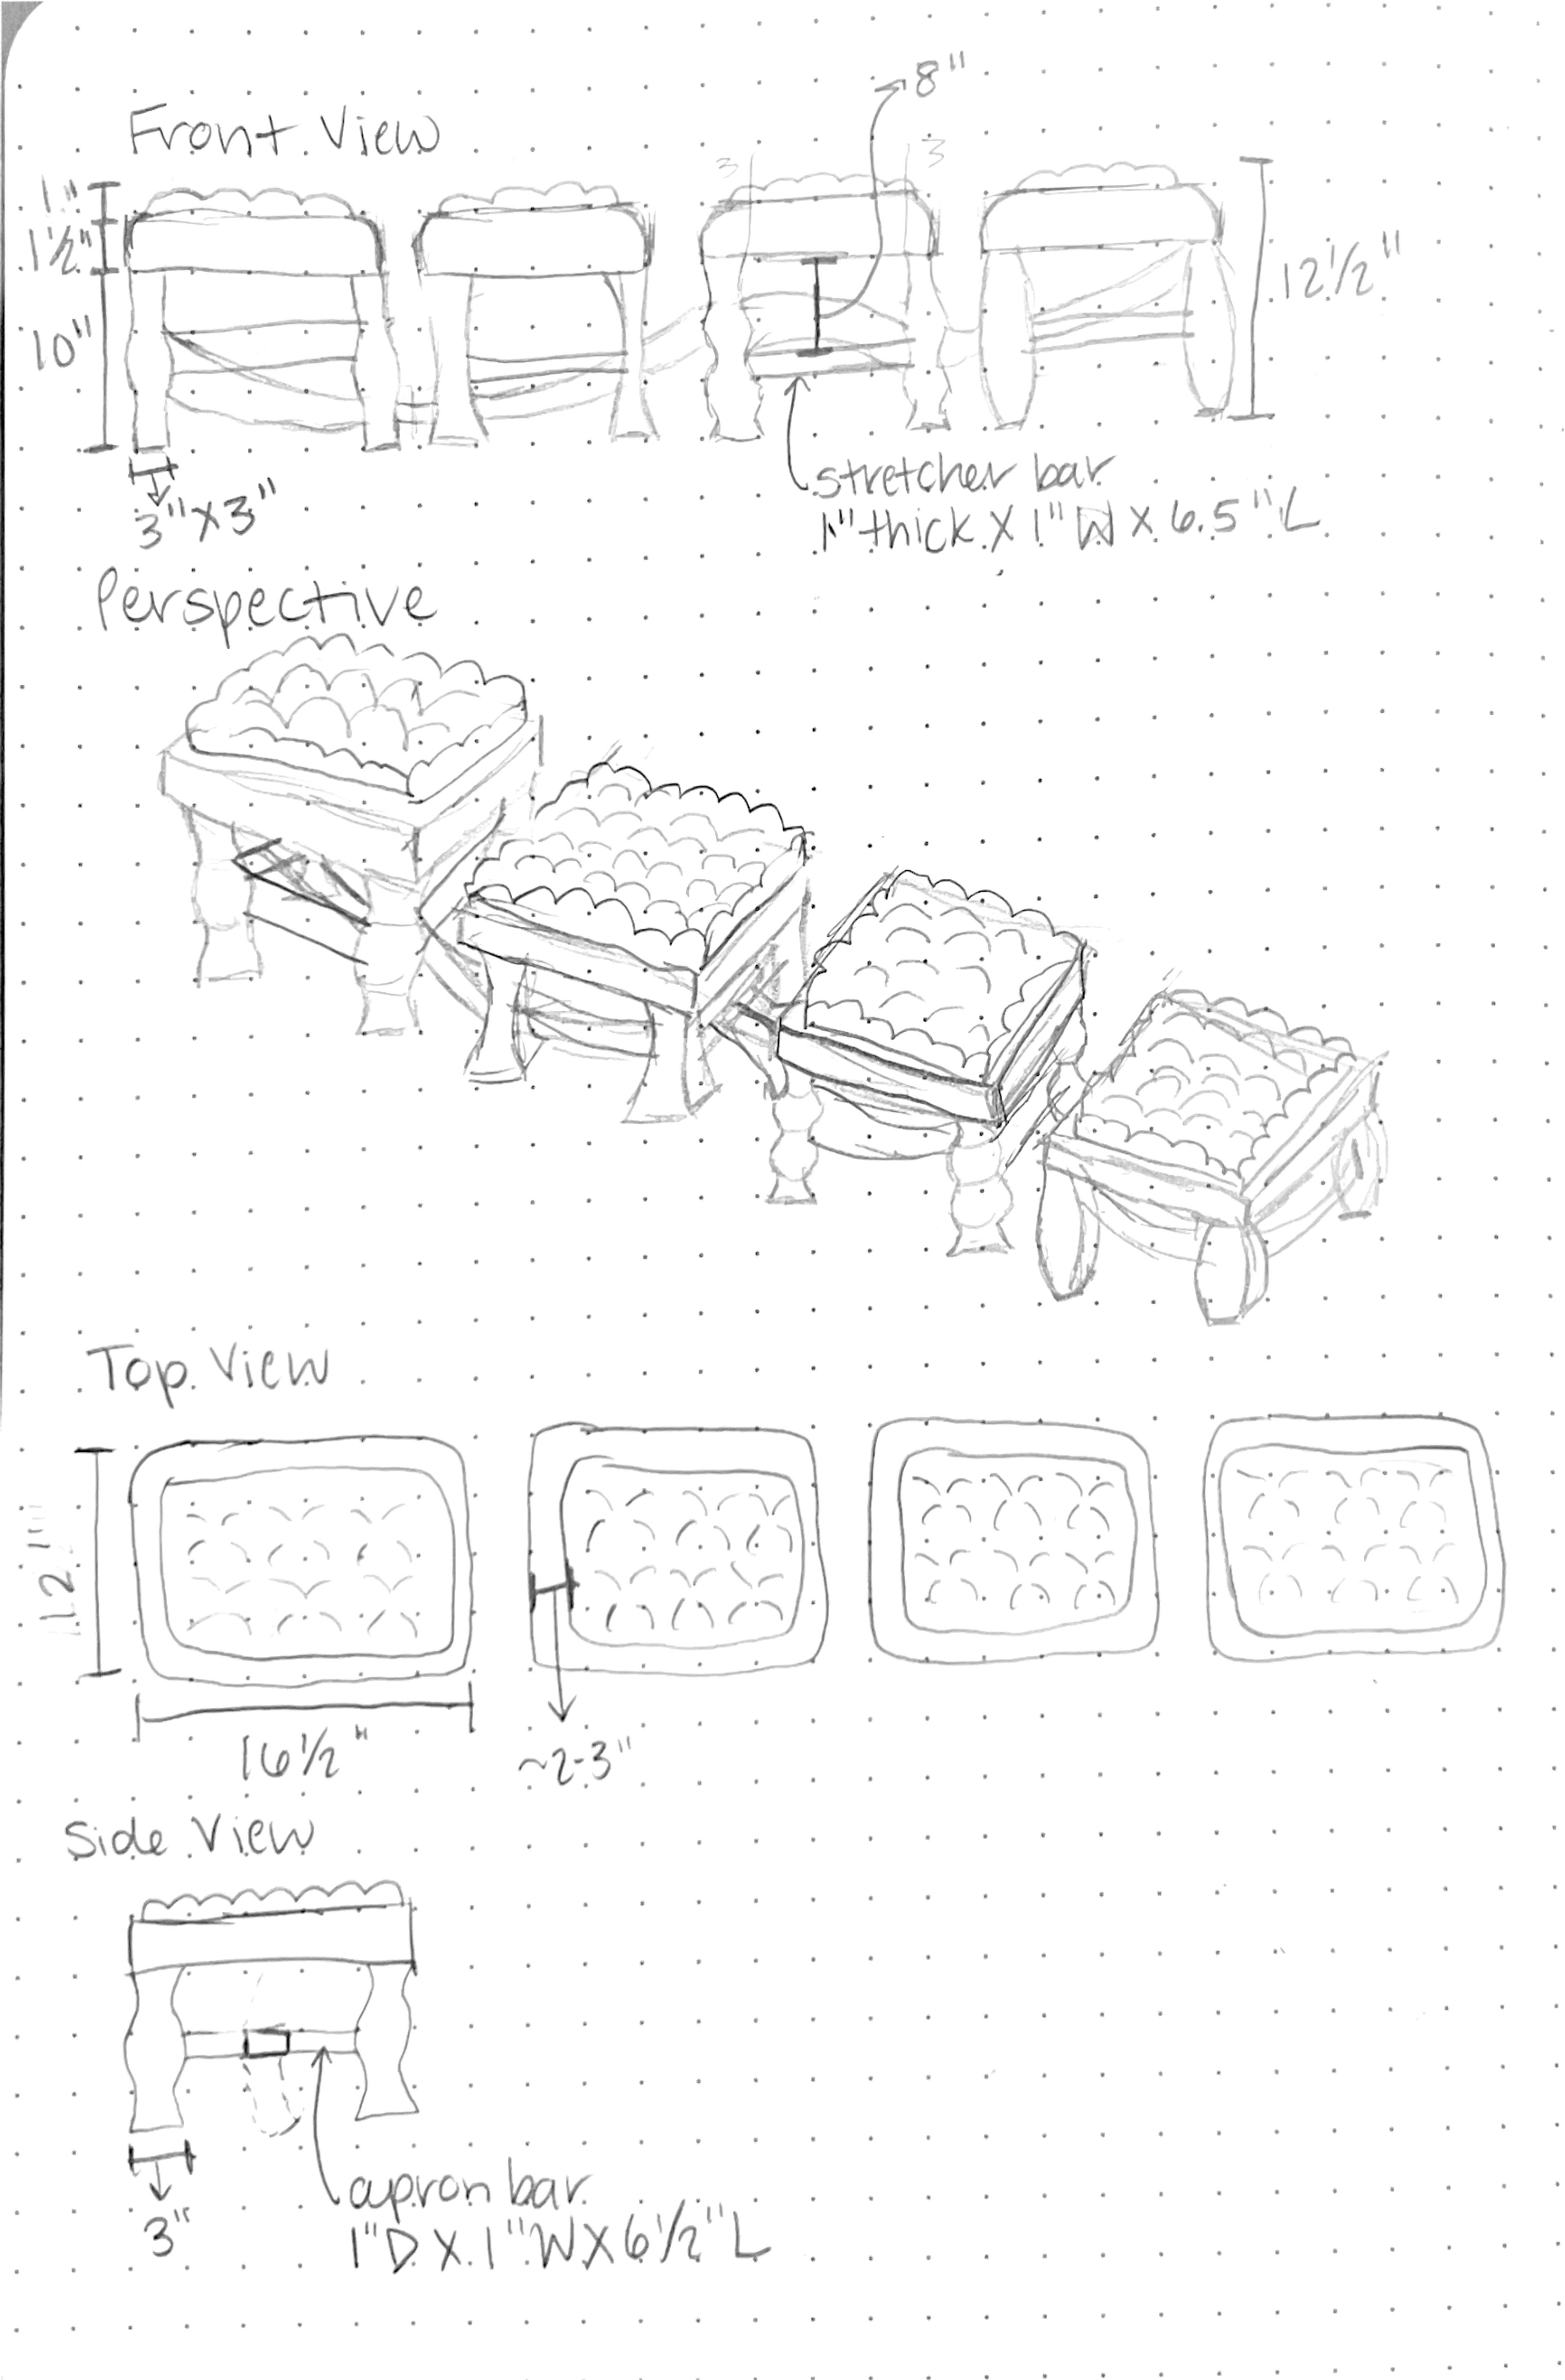
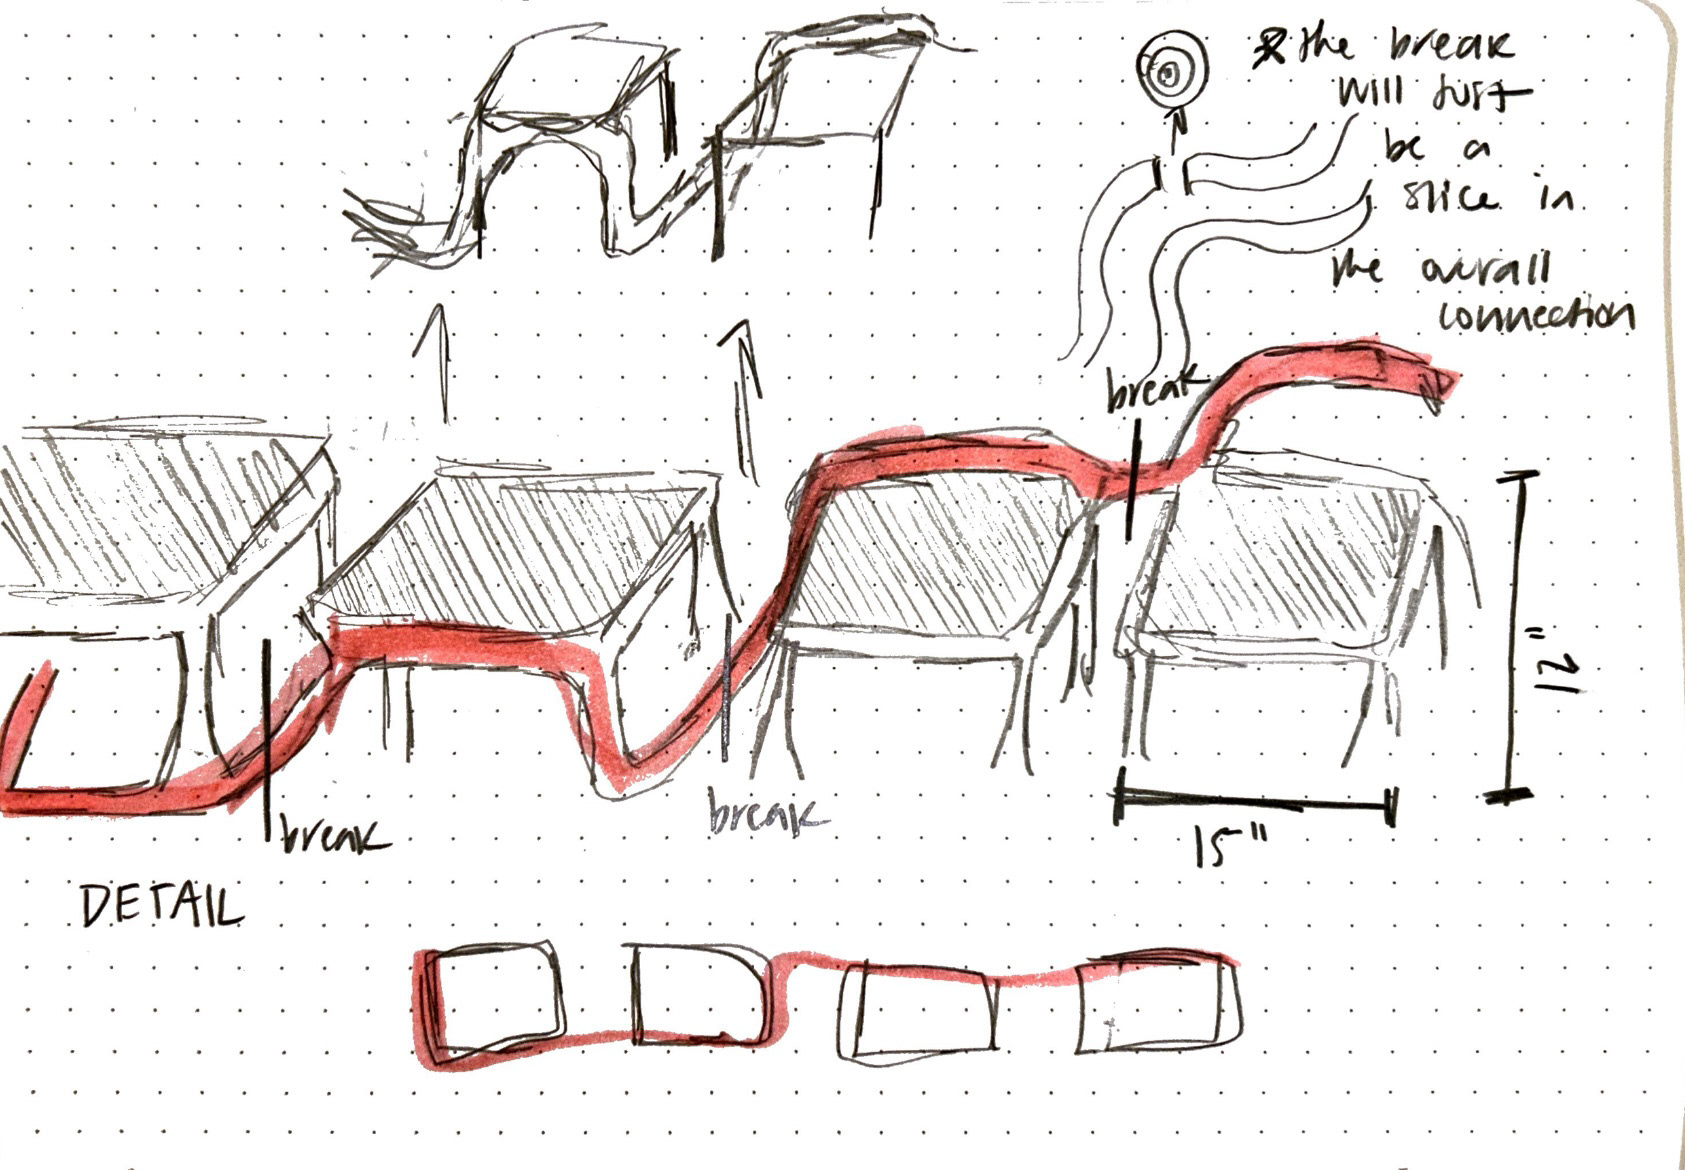
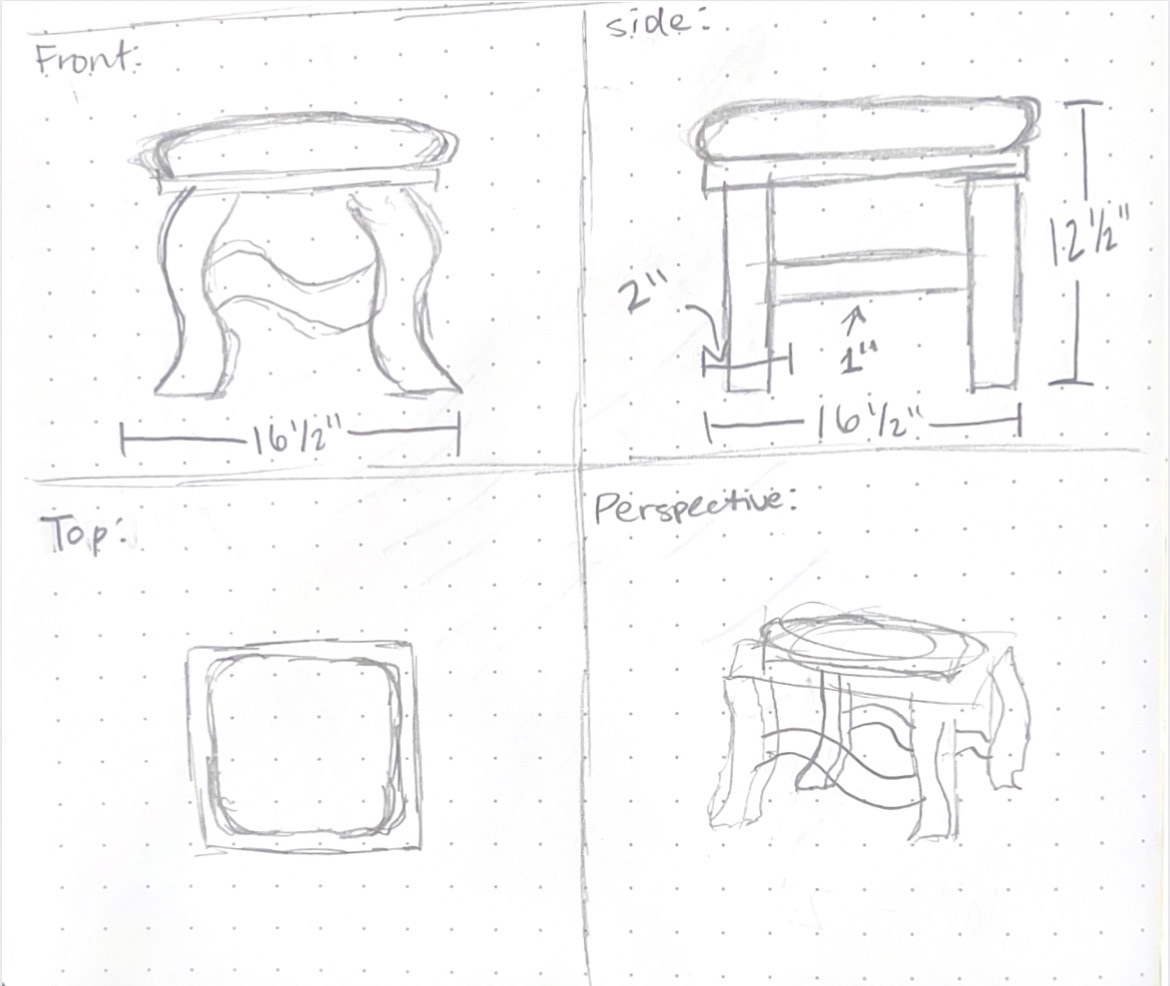
Each group member sketched various designs for the Curved Contrast footstool system. After discussing how each design correlates to the system's concept, we selected Sketch 6 and 7 to move forward with in the digital modeling phase of this design.
Sketch 1
Sketch 2
Sketch 3
Sketch 4
Sketch 5
Sketch 6

Sketch 7
Digital Model Iterations
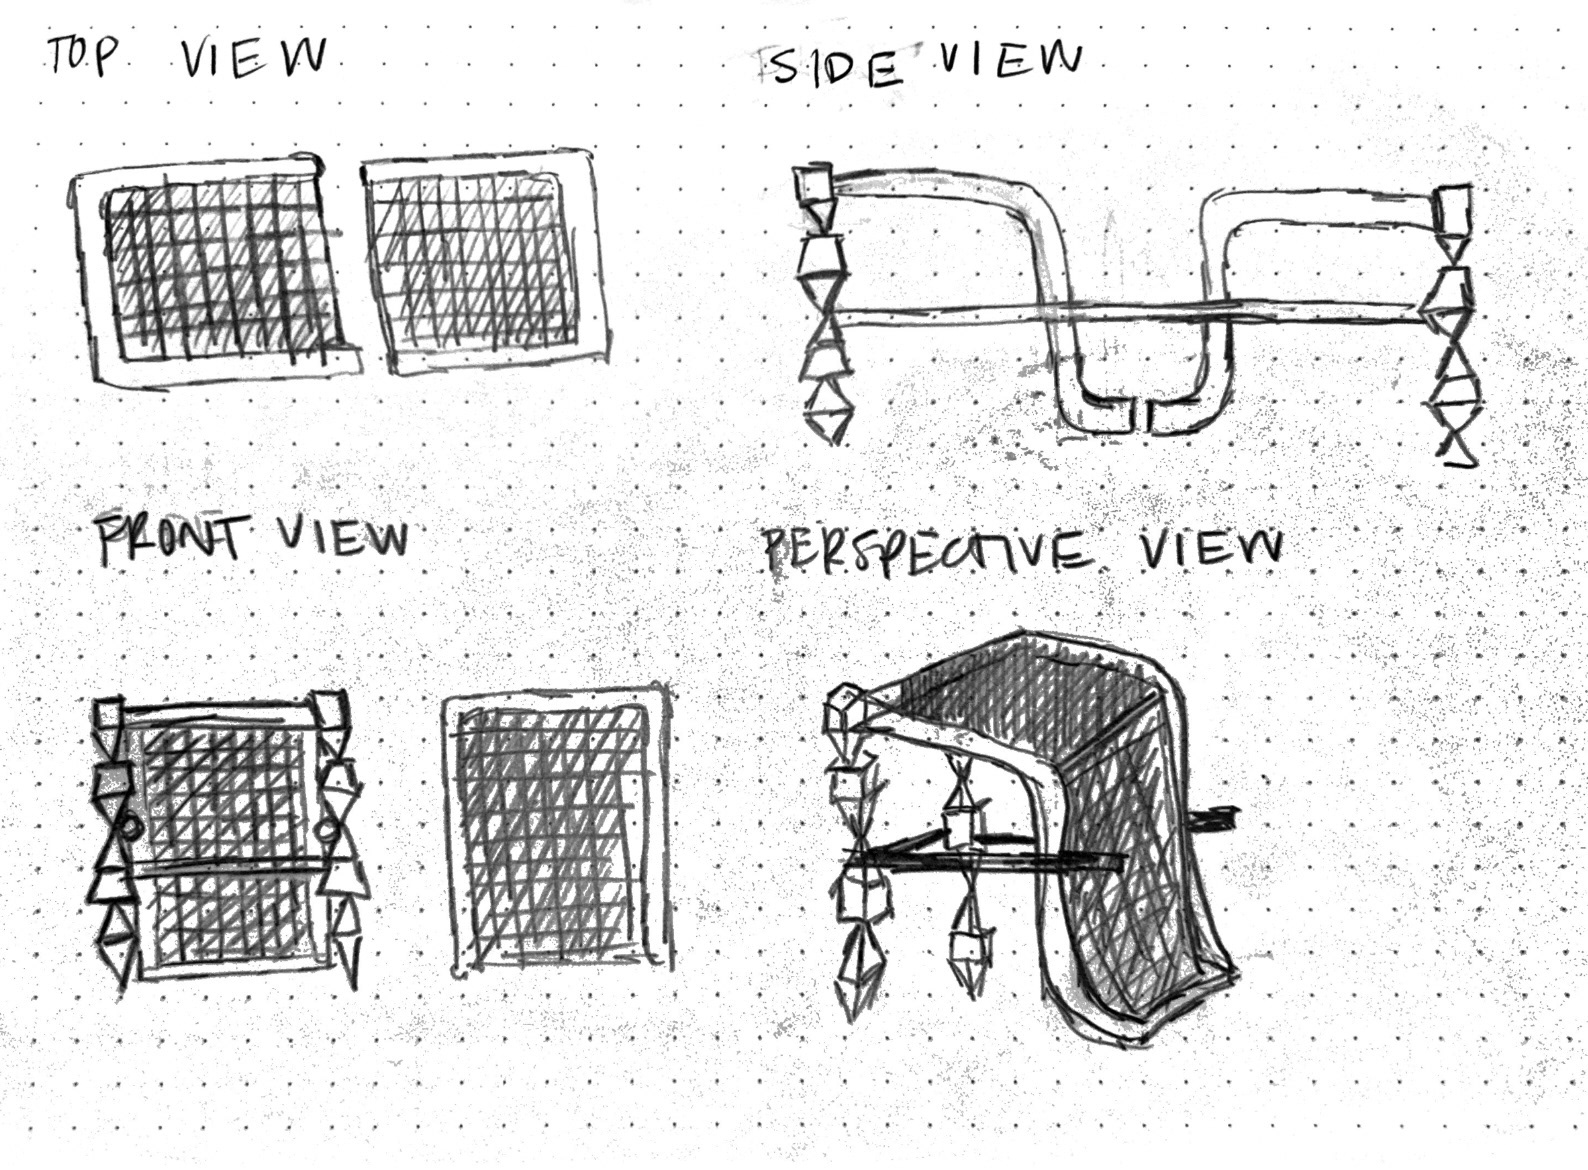
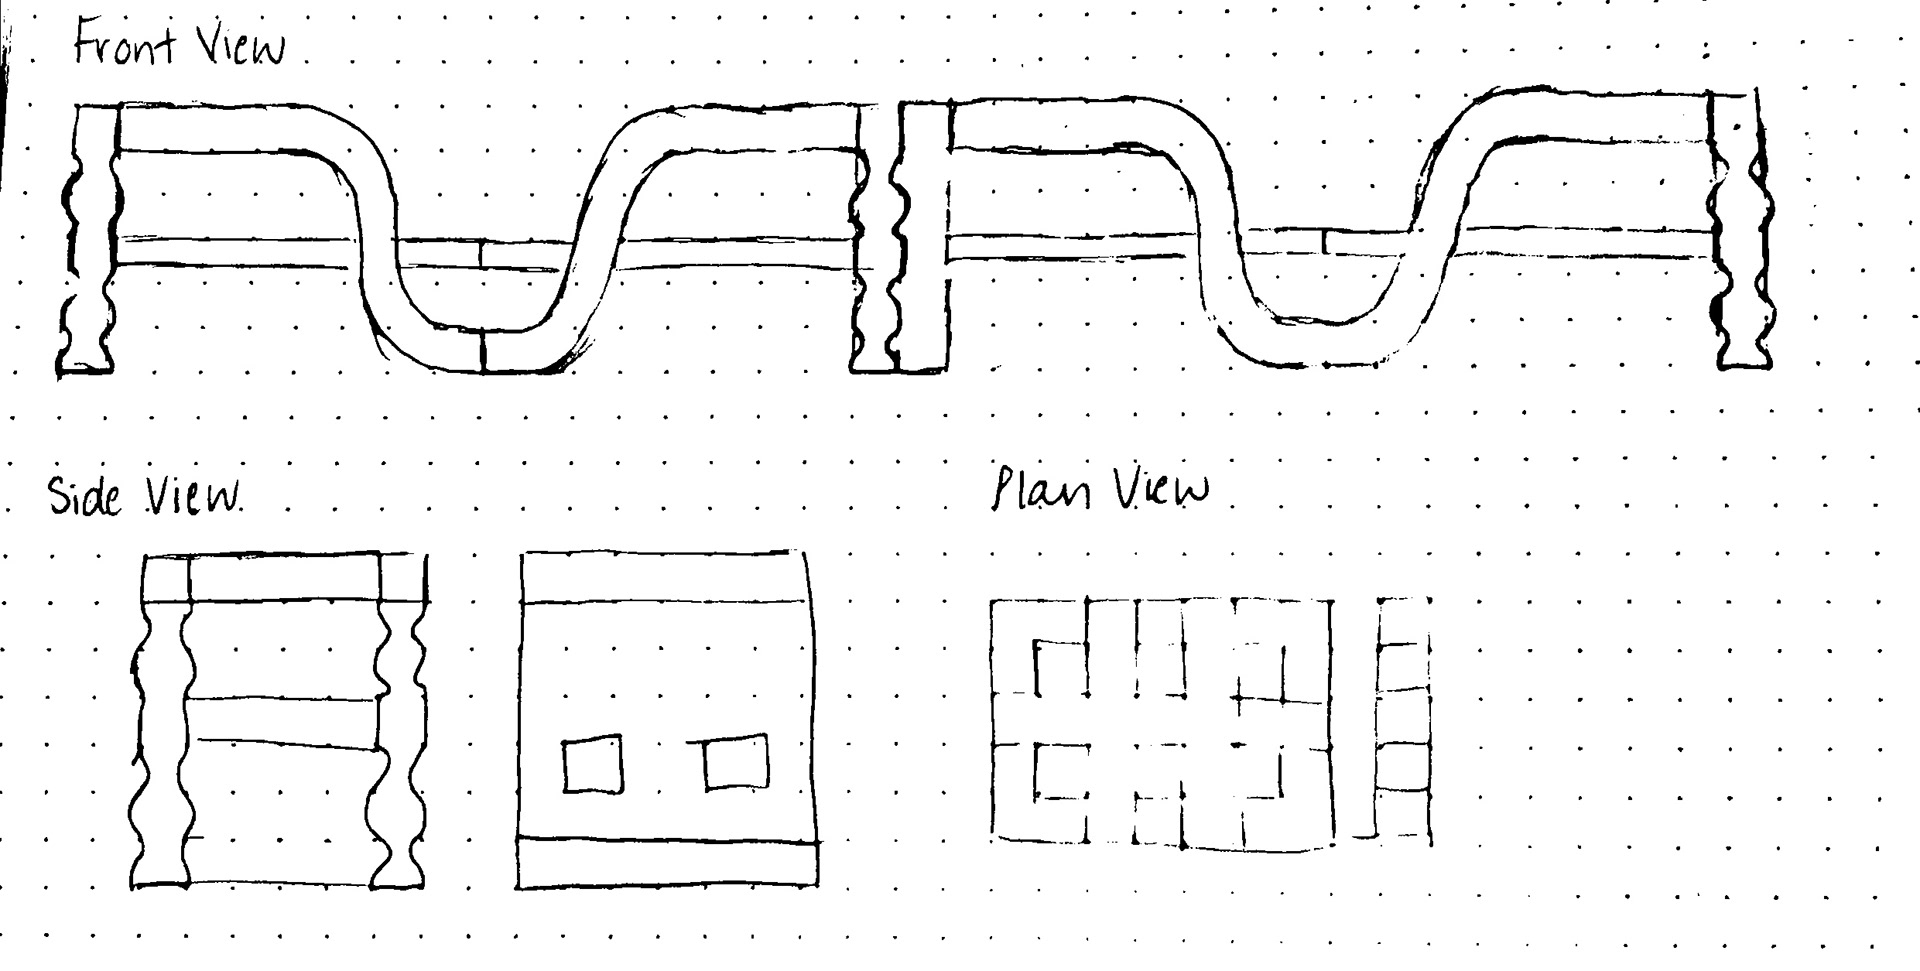
Several digital model iterations were created in Rhino 8, experimenting with the design of the columnar legs, the S-curve legs, and the upholstery methods. Each iteration shows the footstools both as a connected system and as disconnected, individual footstools.
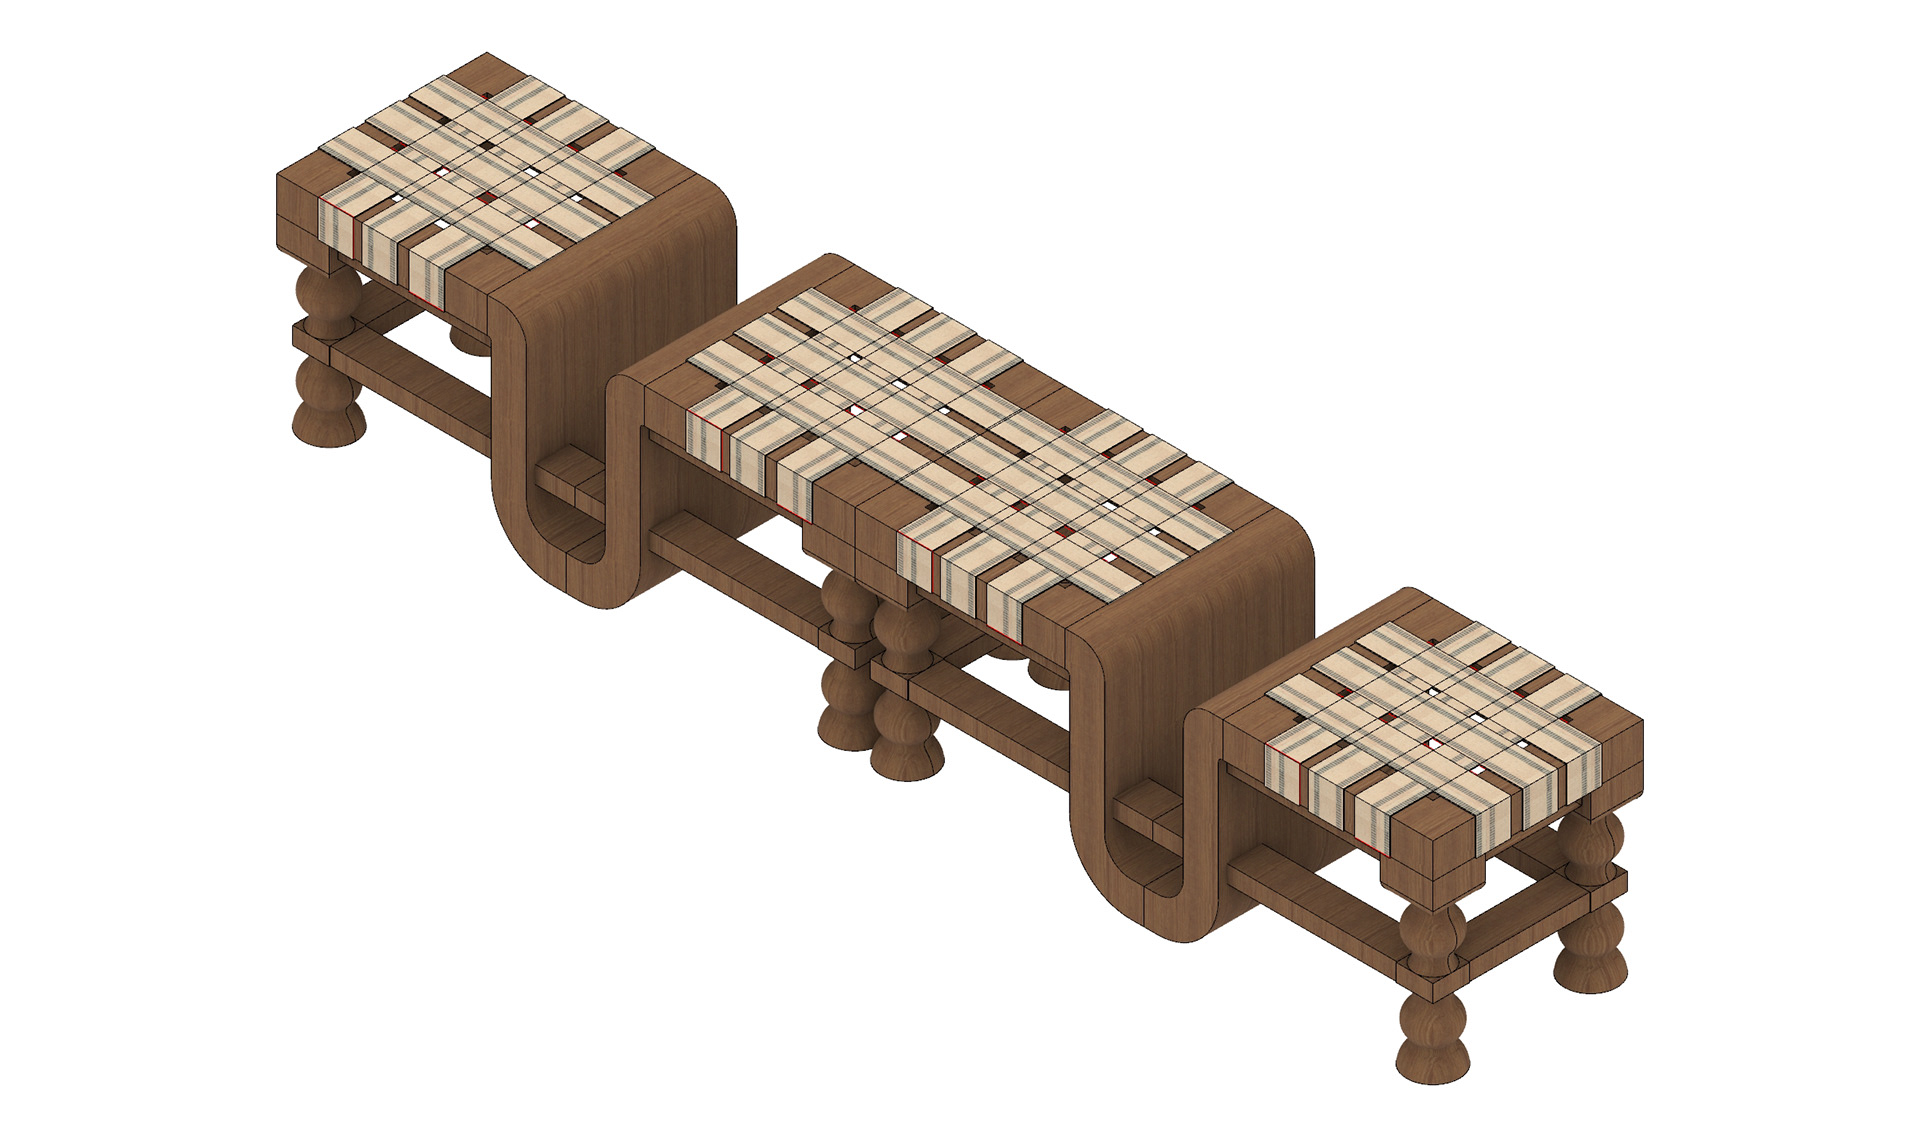
Digital Model Iteration 1 - Connected
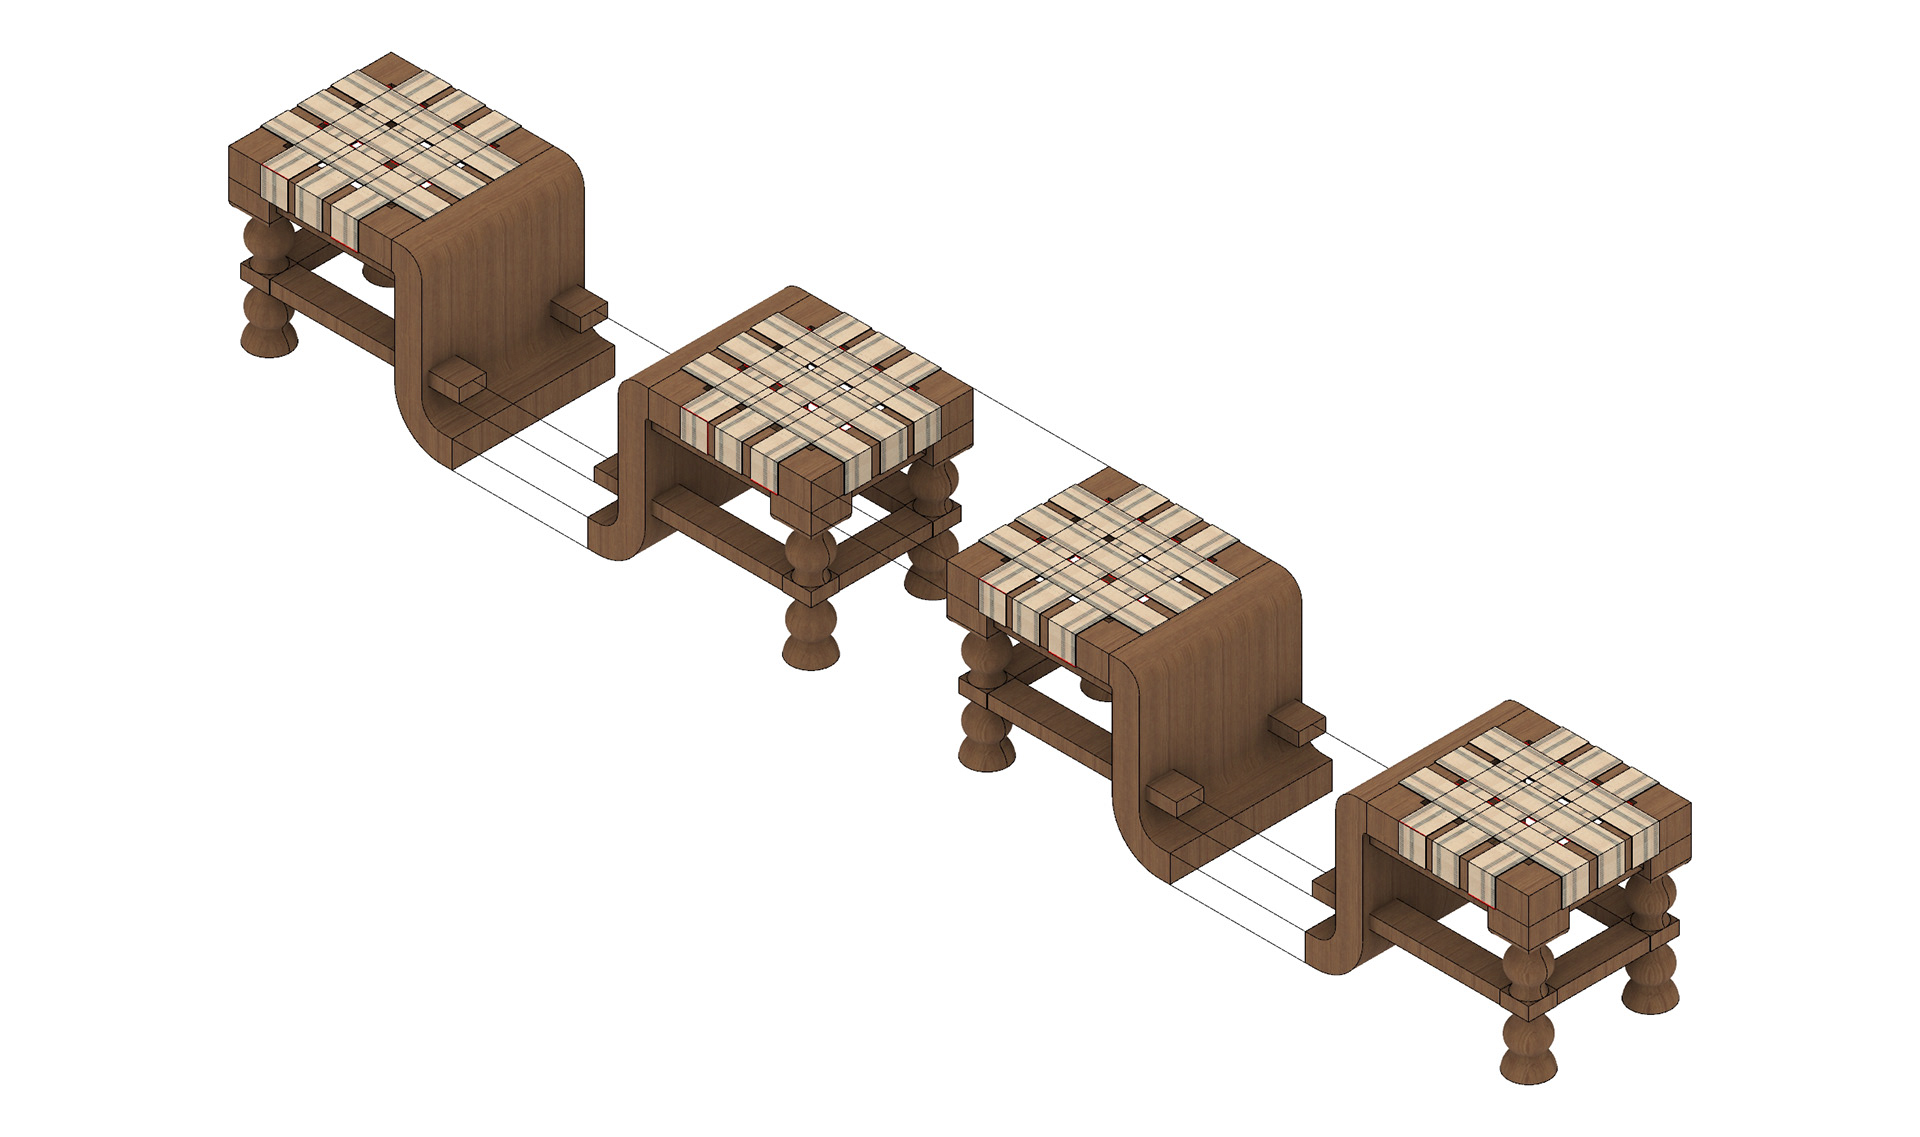
Digital Model Iteration 1 - Disconnected
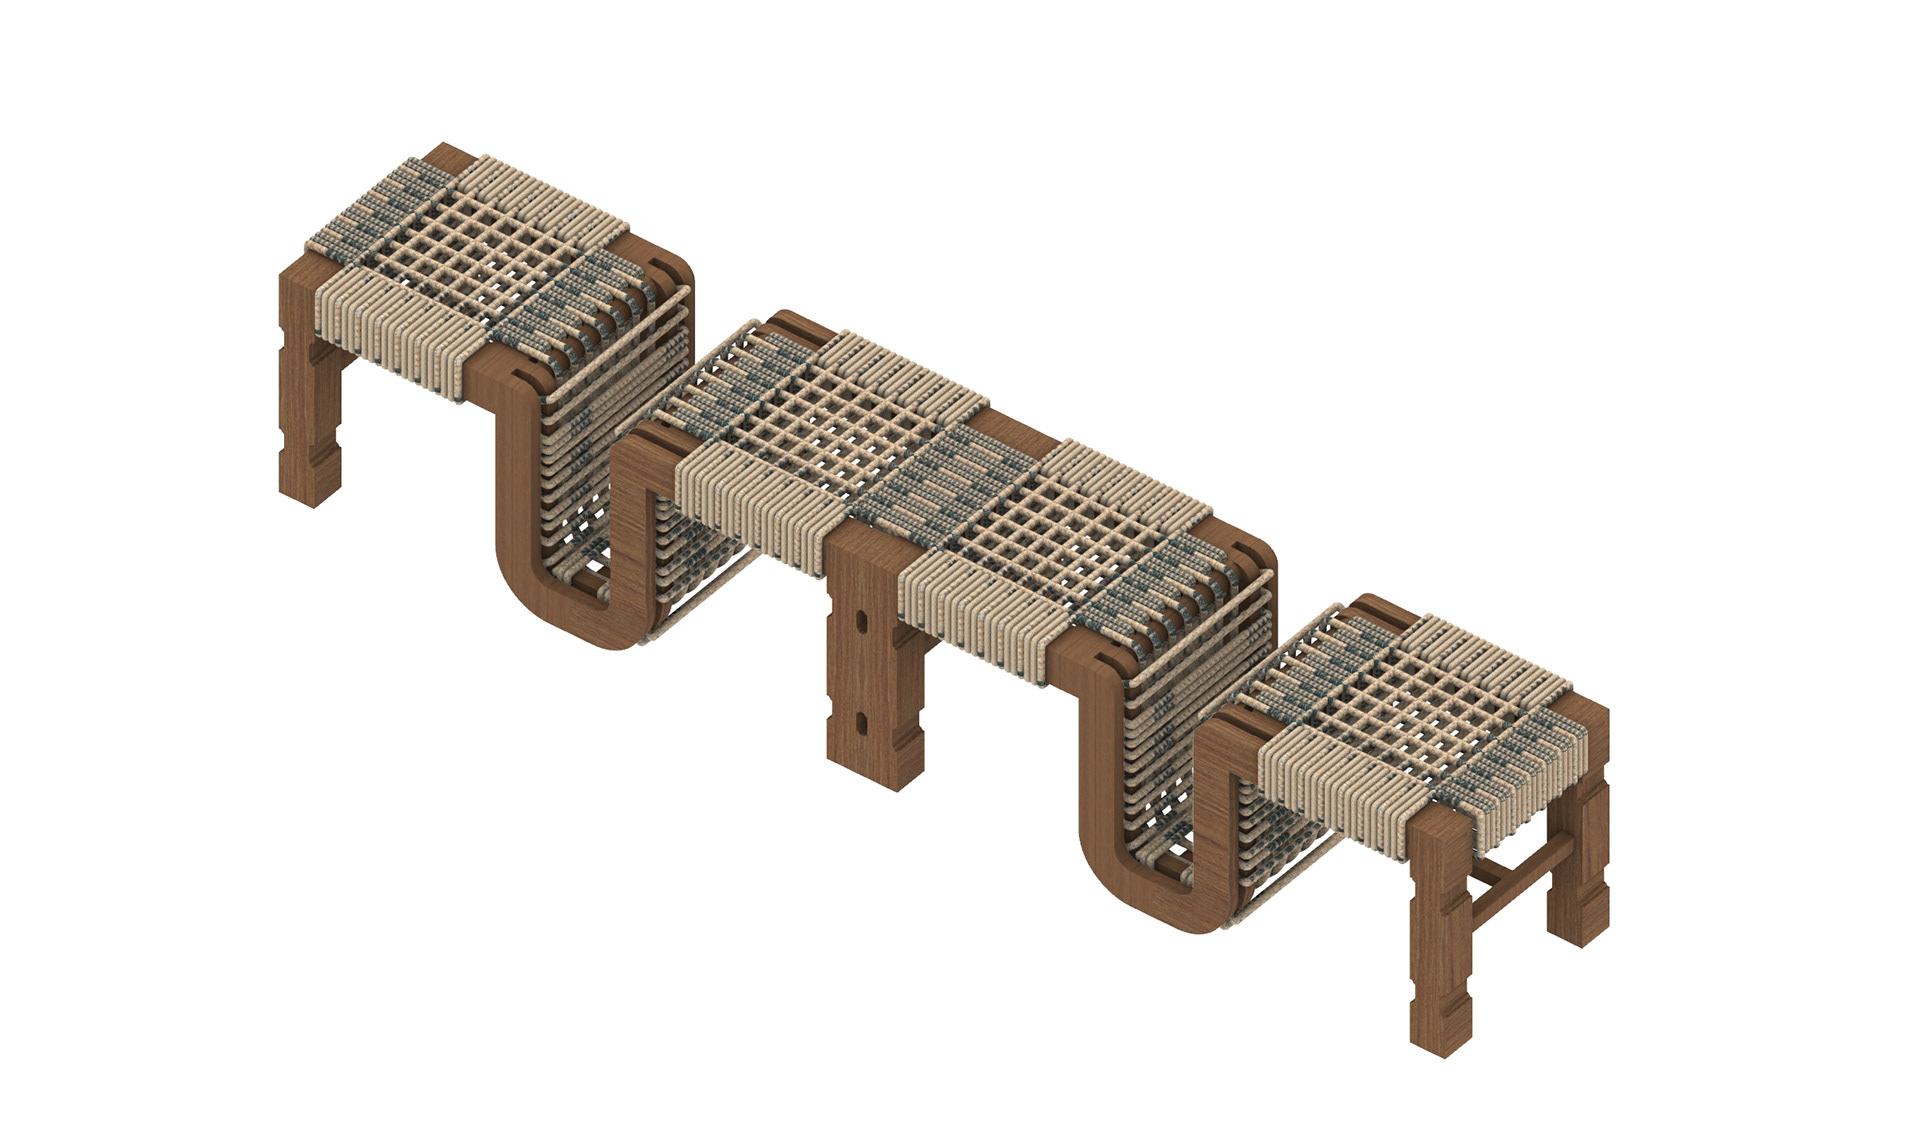
Digital Model Iteration 2 - Connected
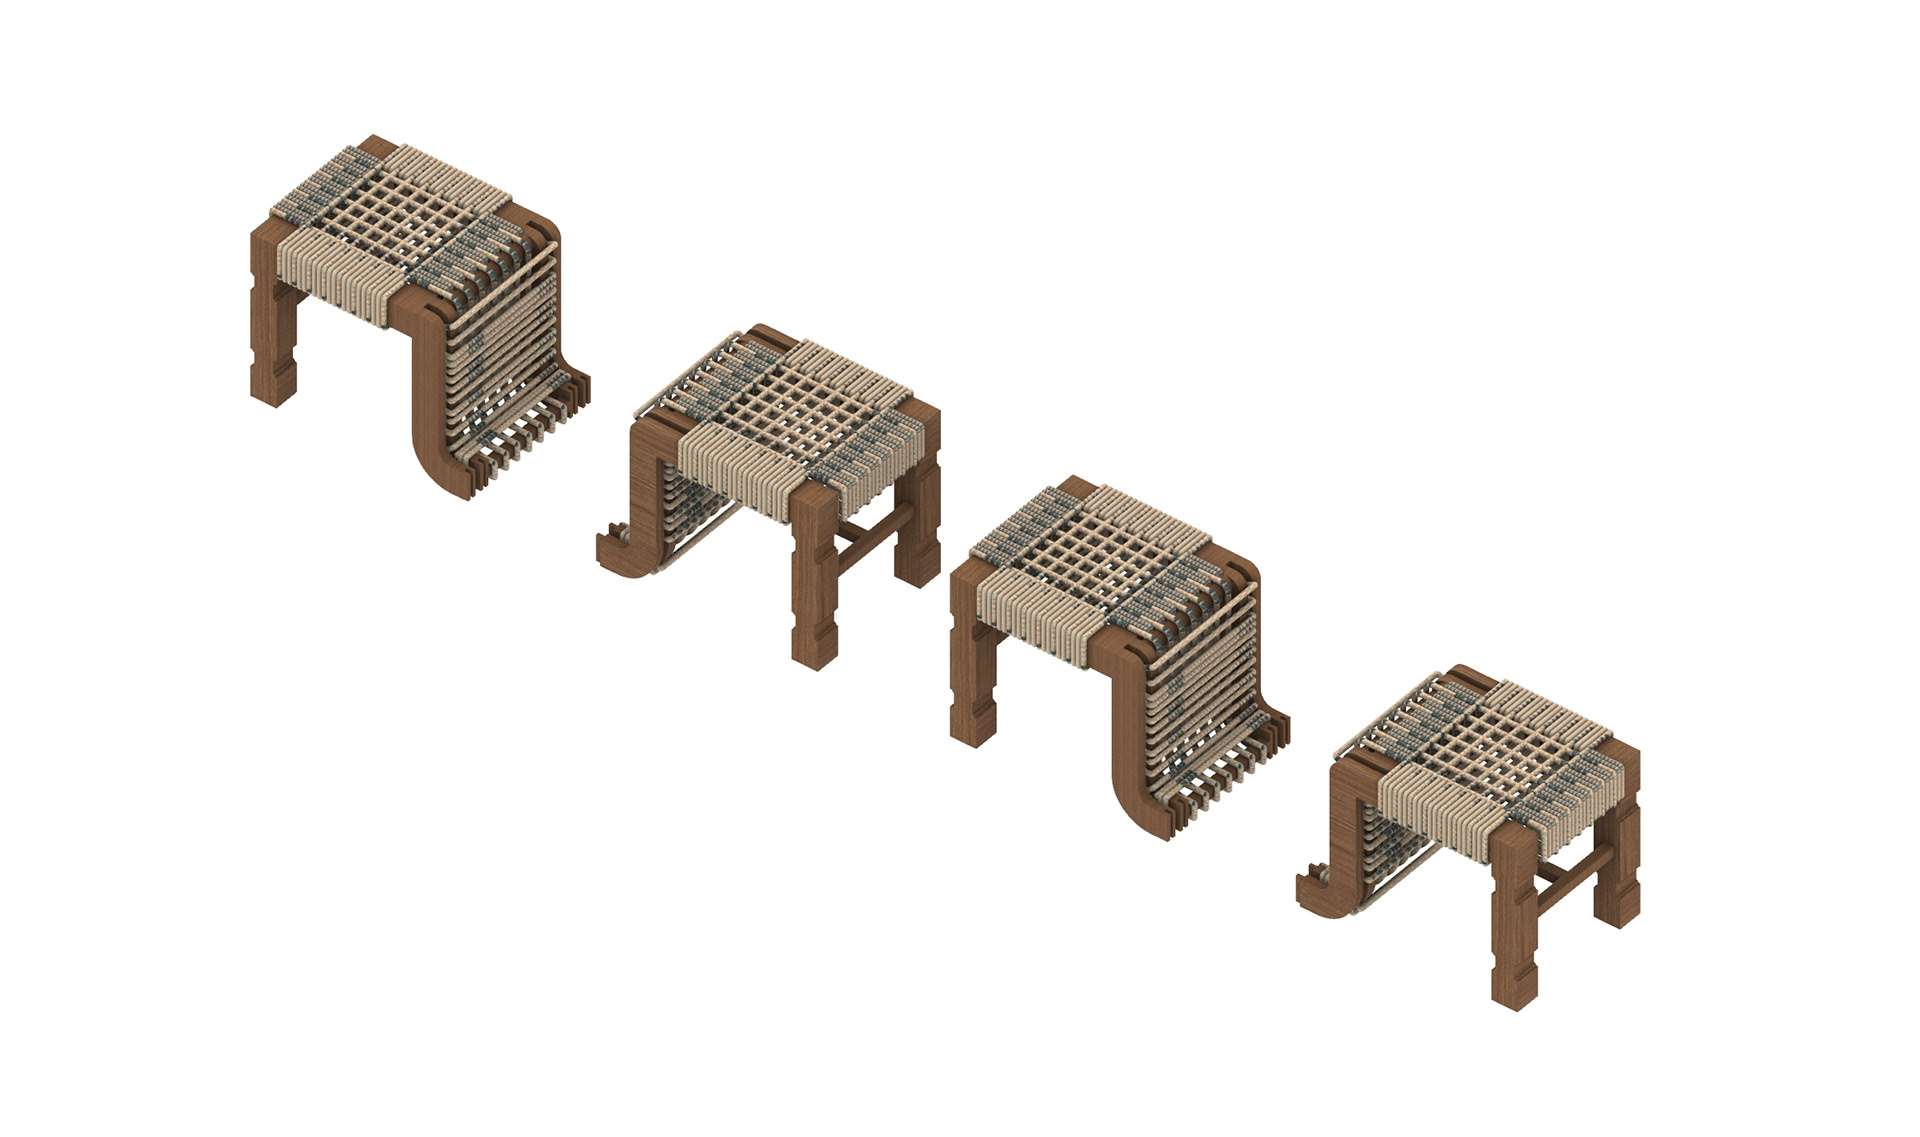
Digital Model Iteration 2 - Disconnected
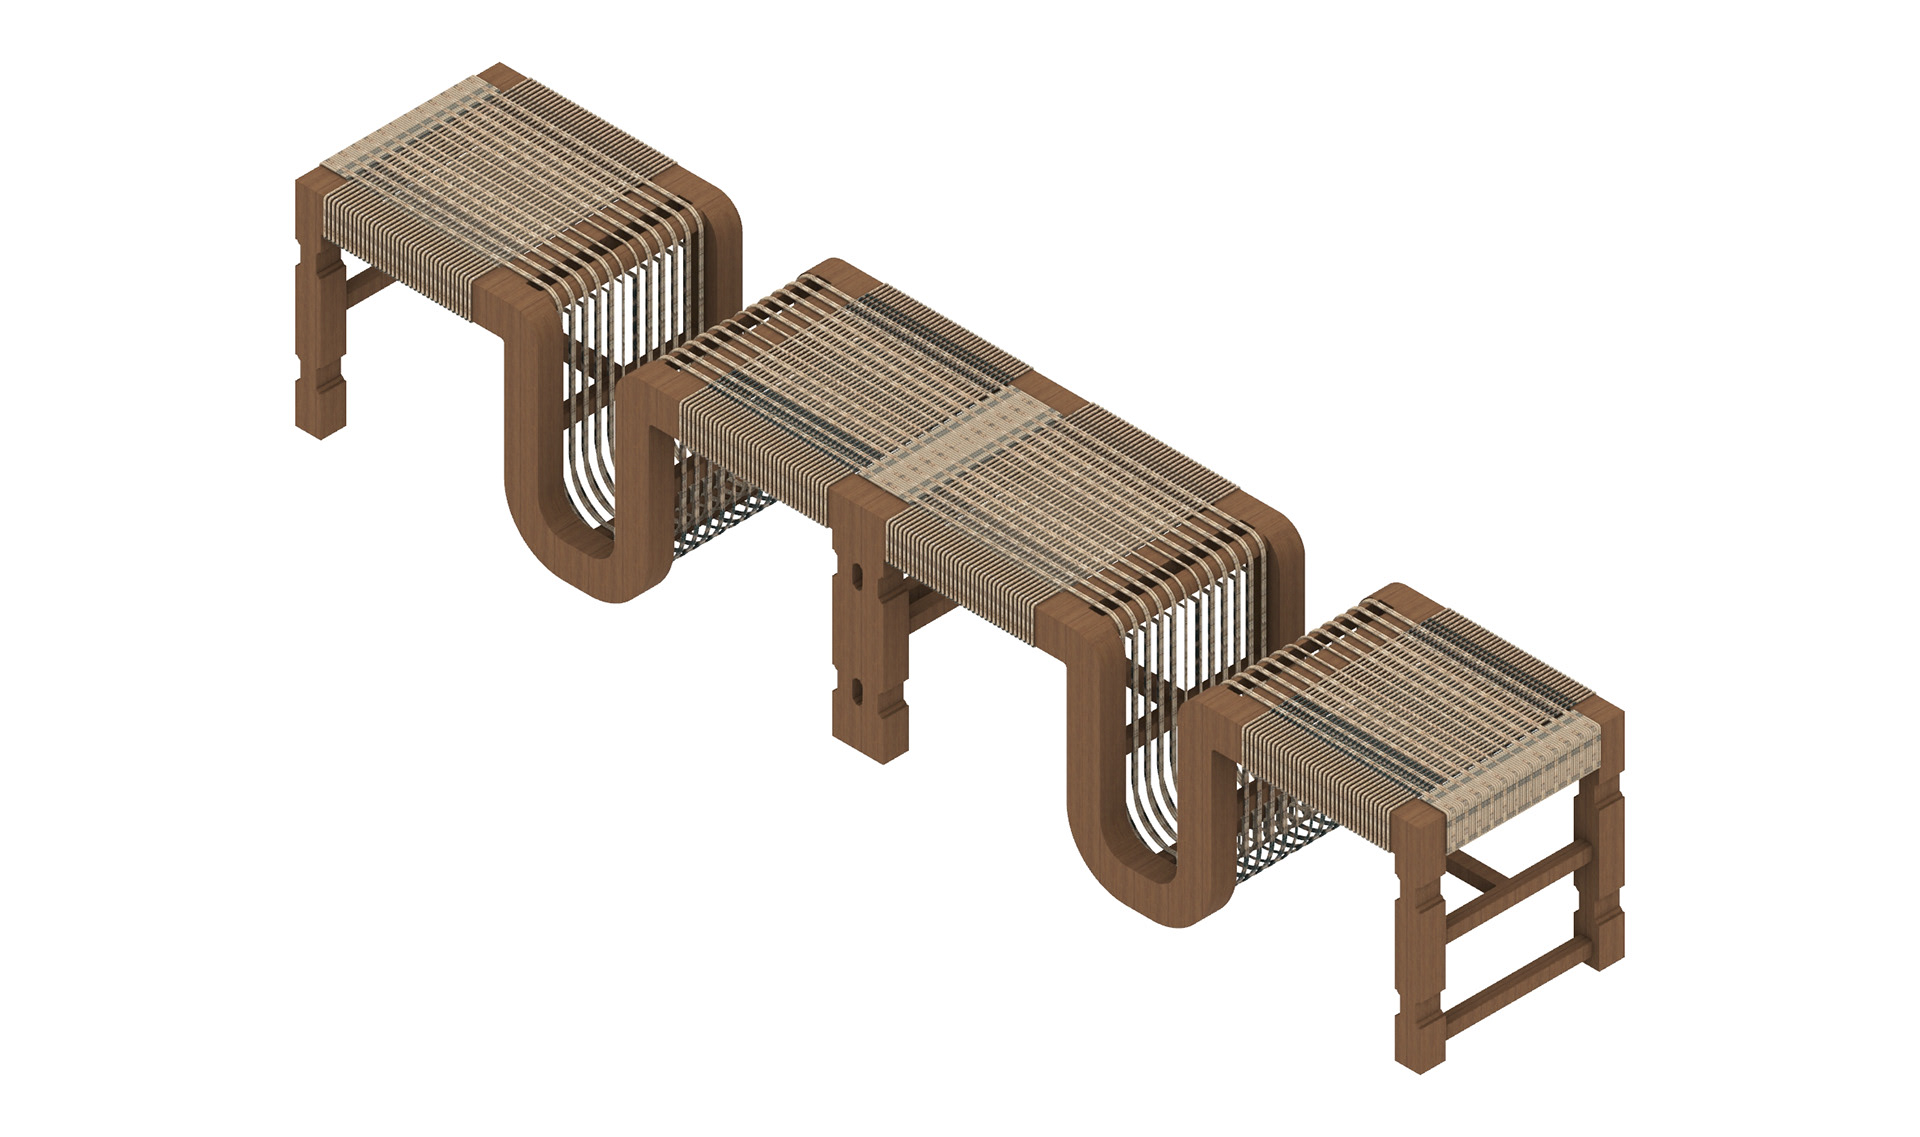
Digital Model Iteration 3 - Connected
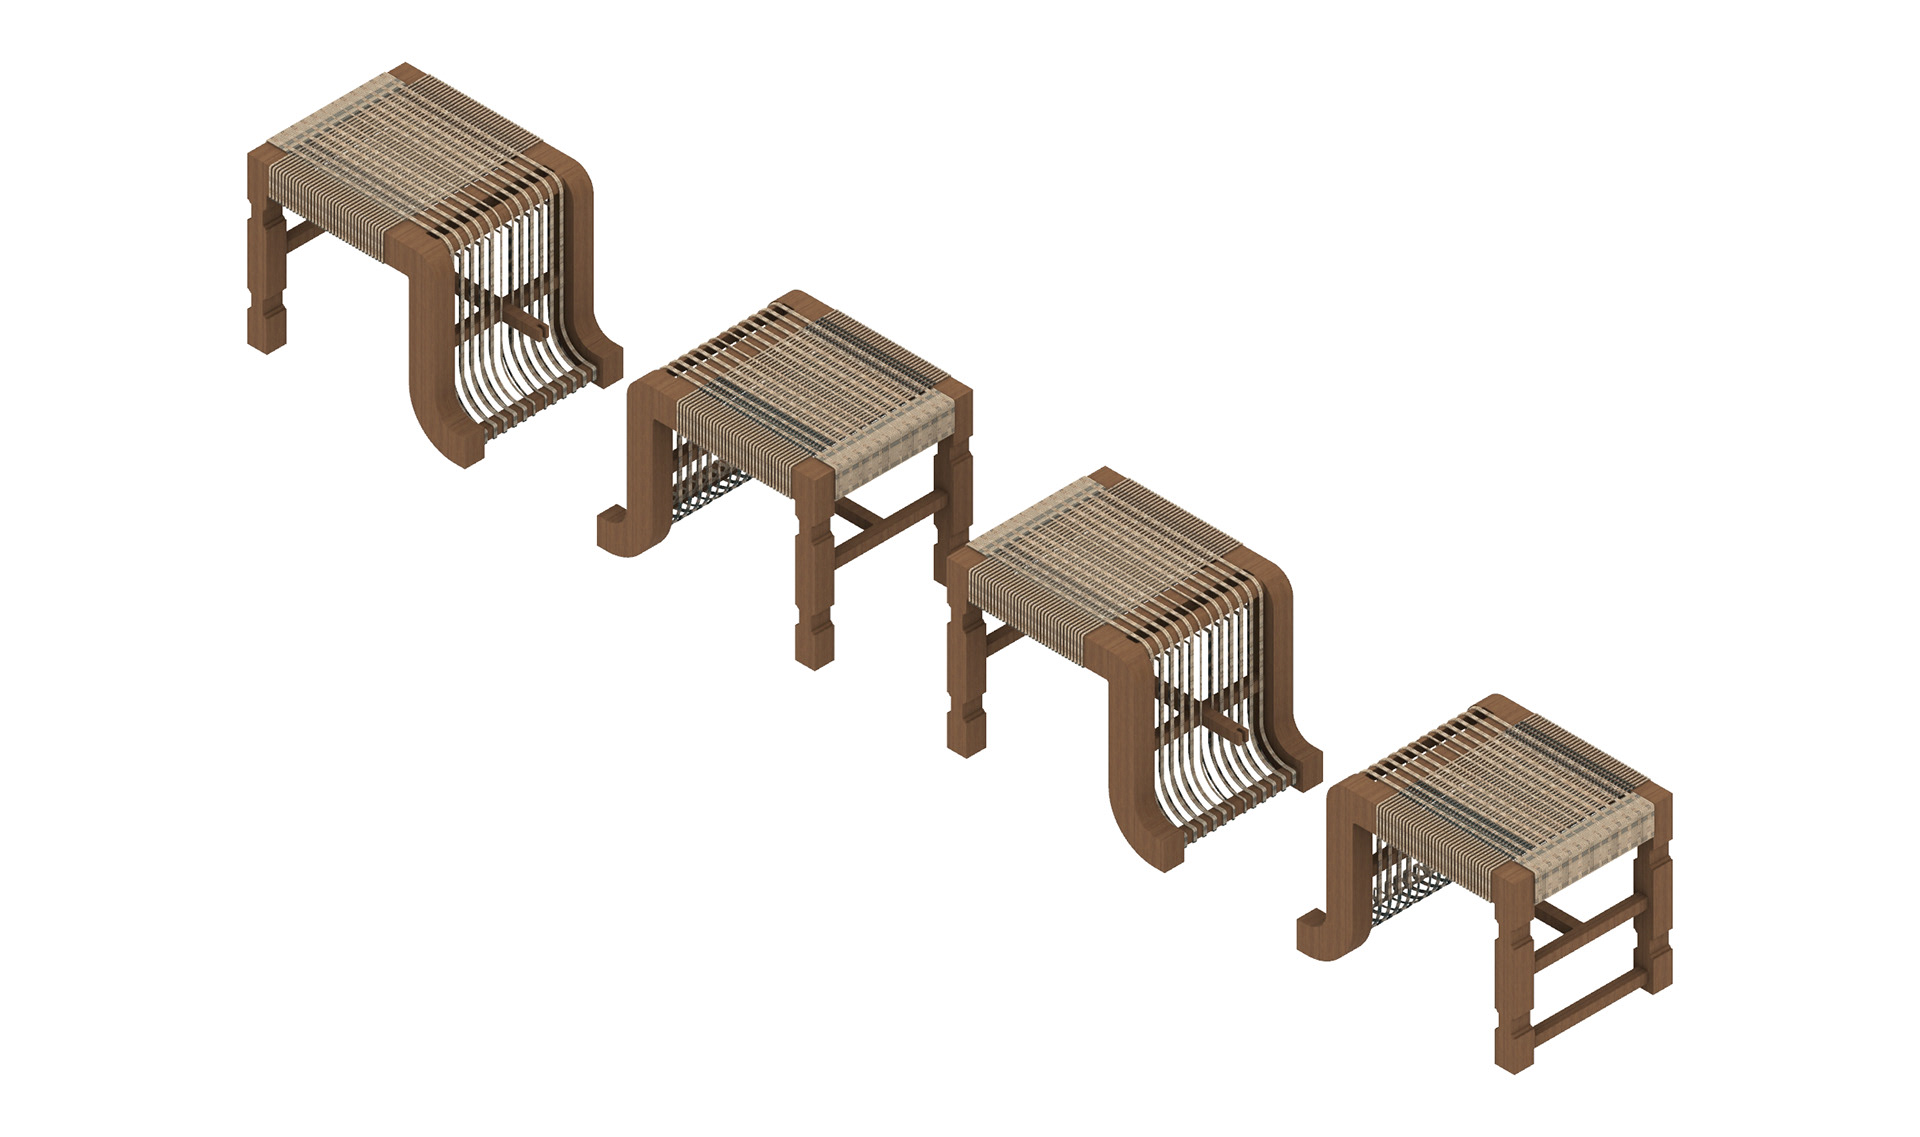
Digital Model Iteration 3 - Disconnected
Final Design of the Overall Footstool System
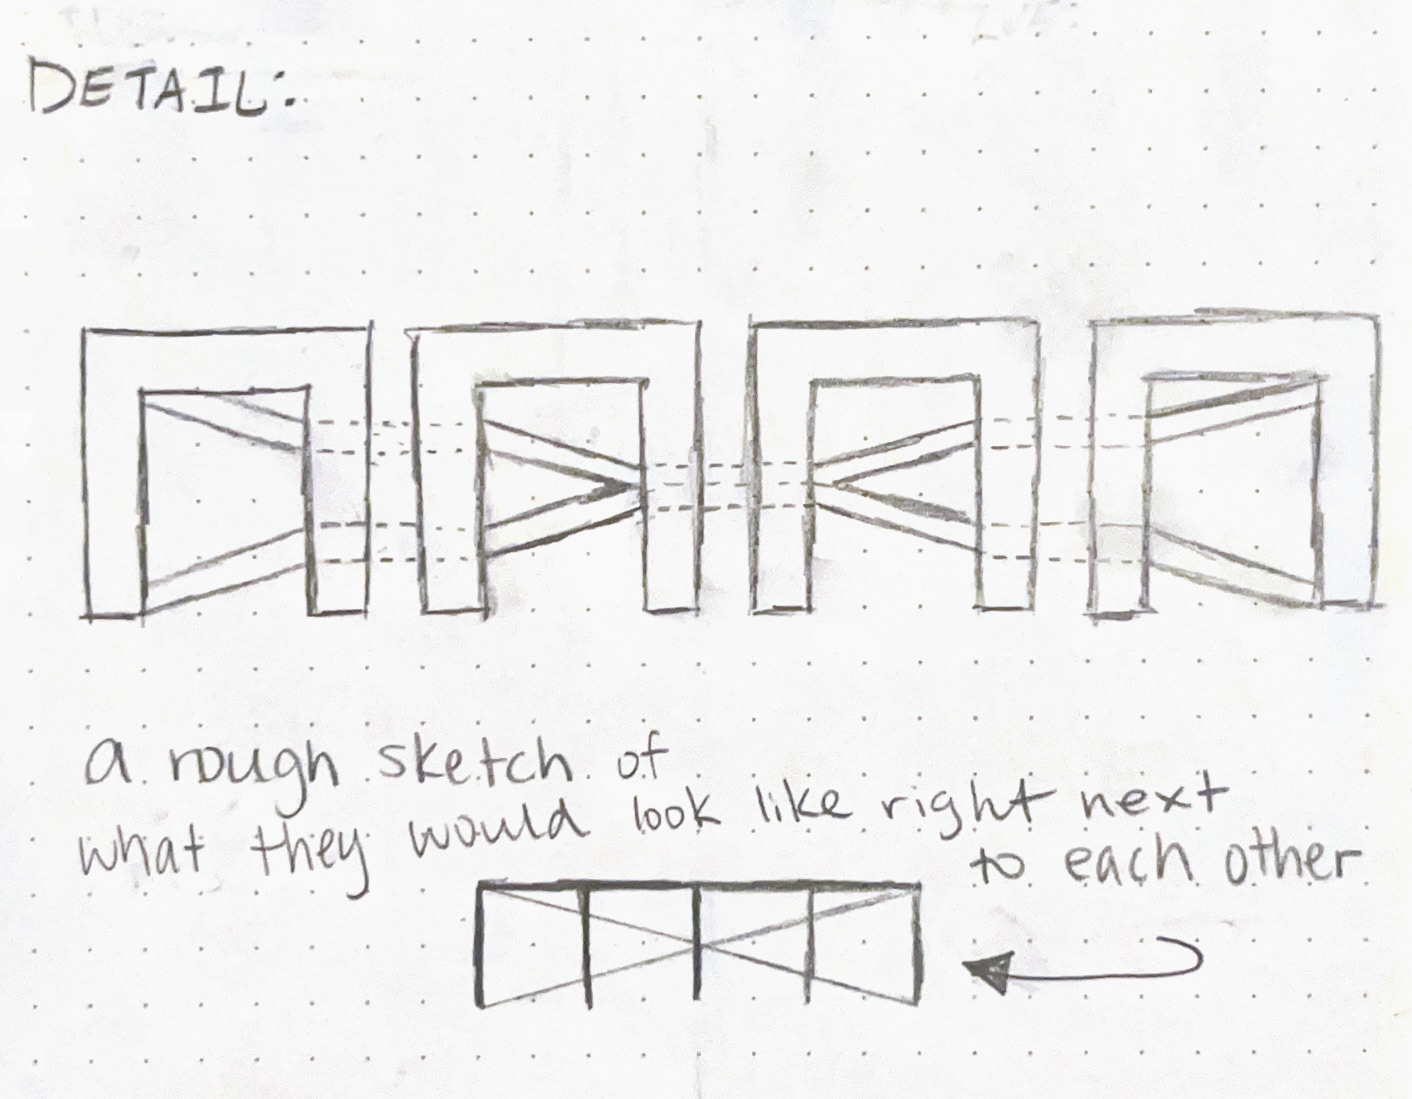
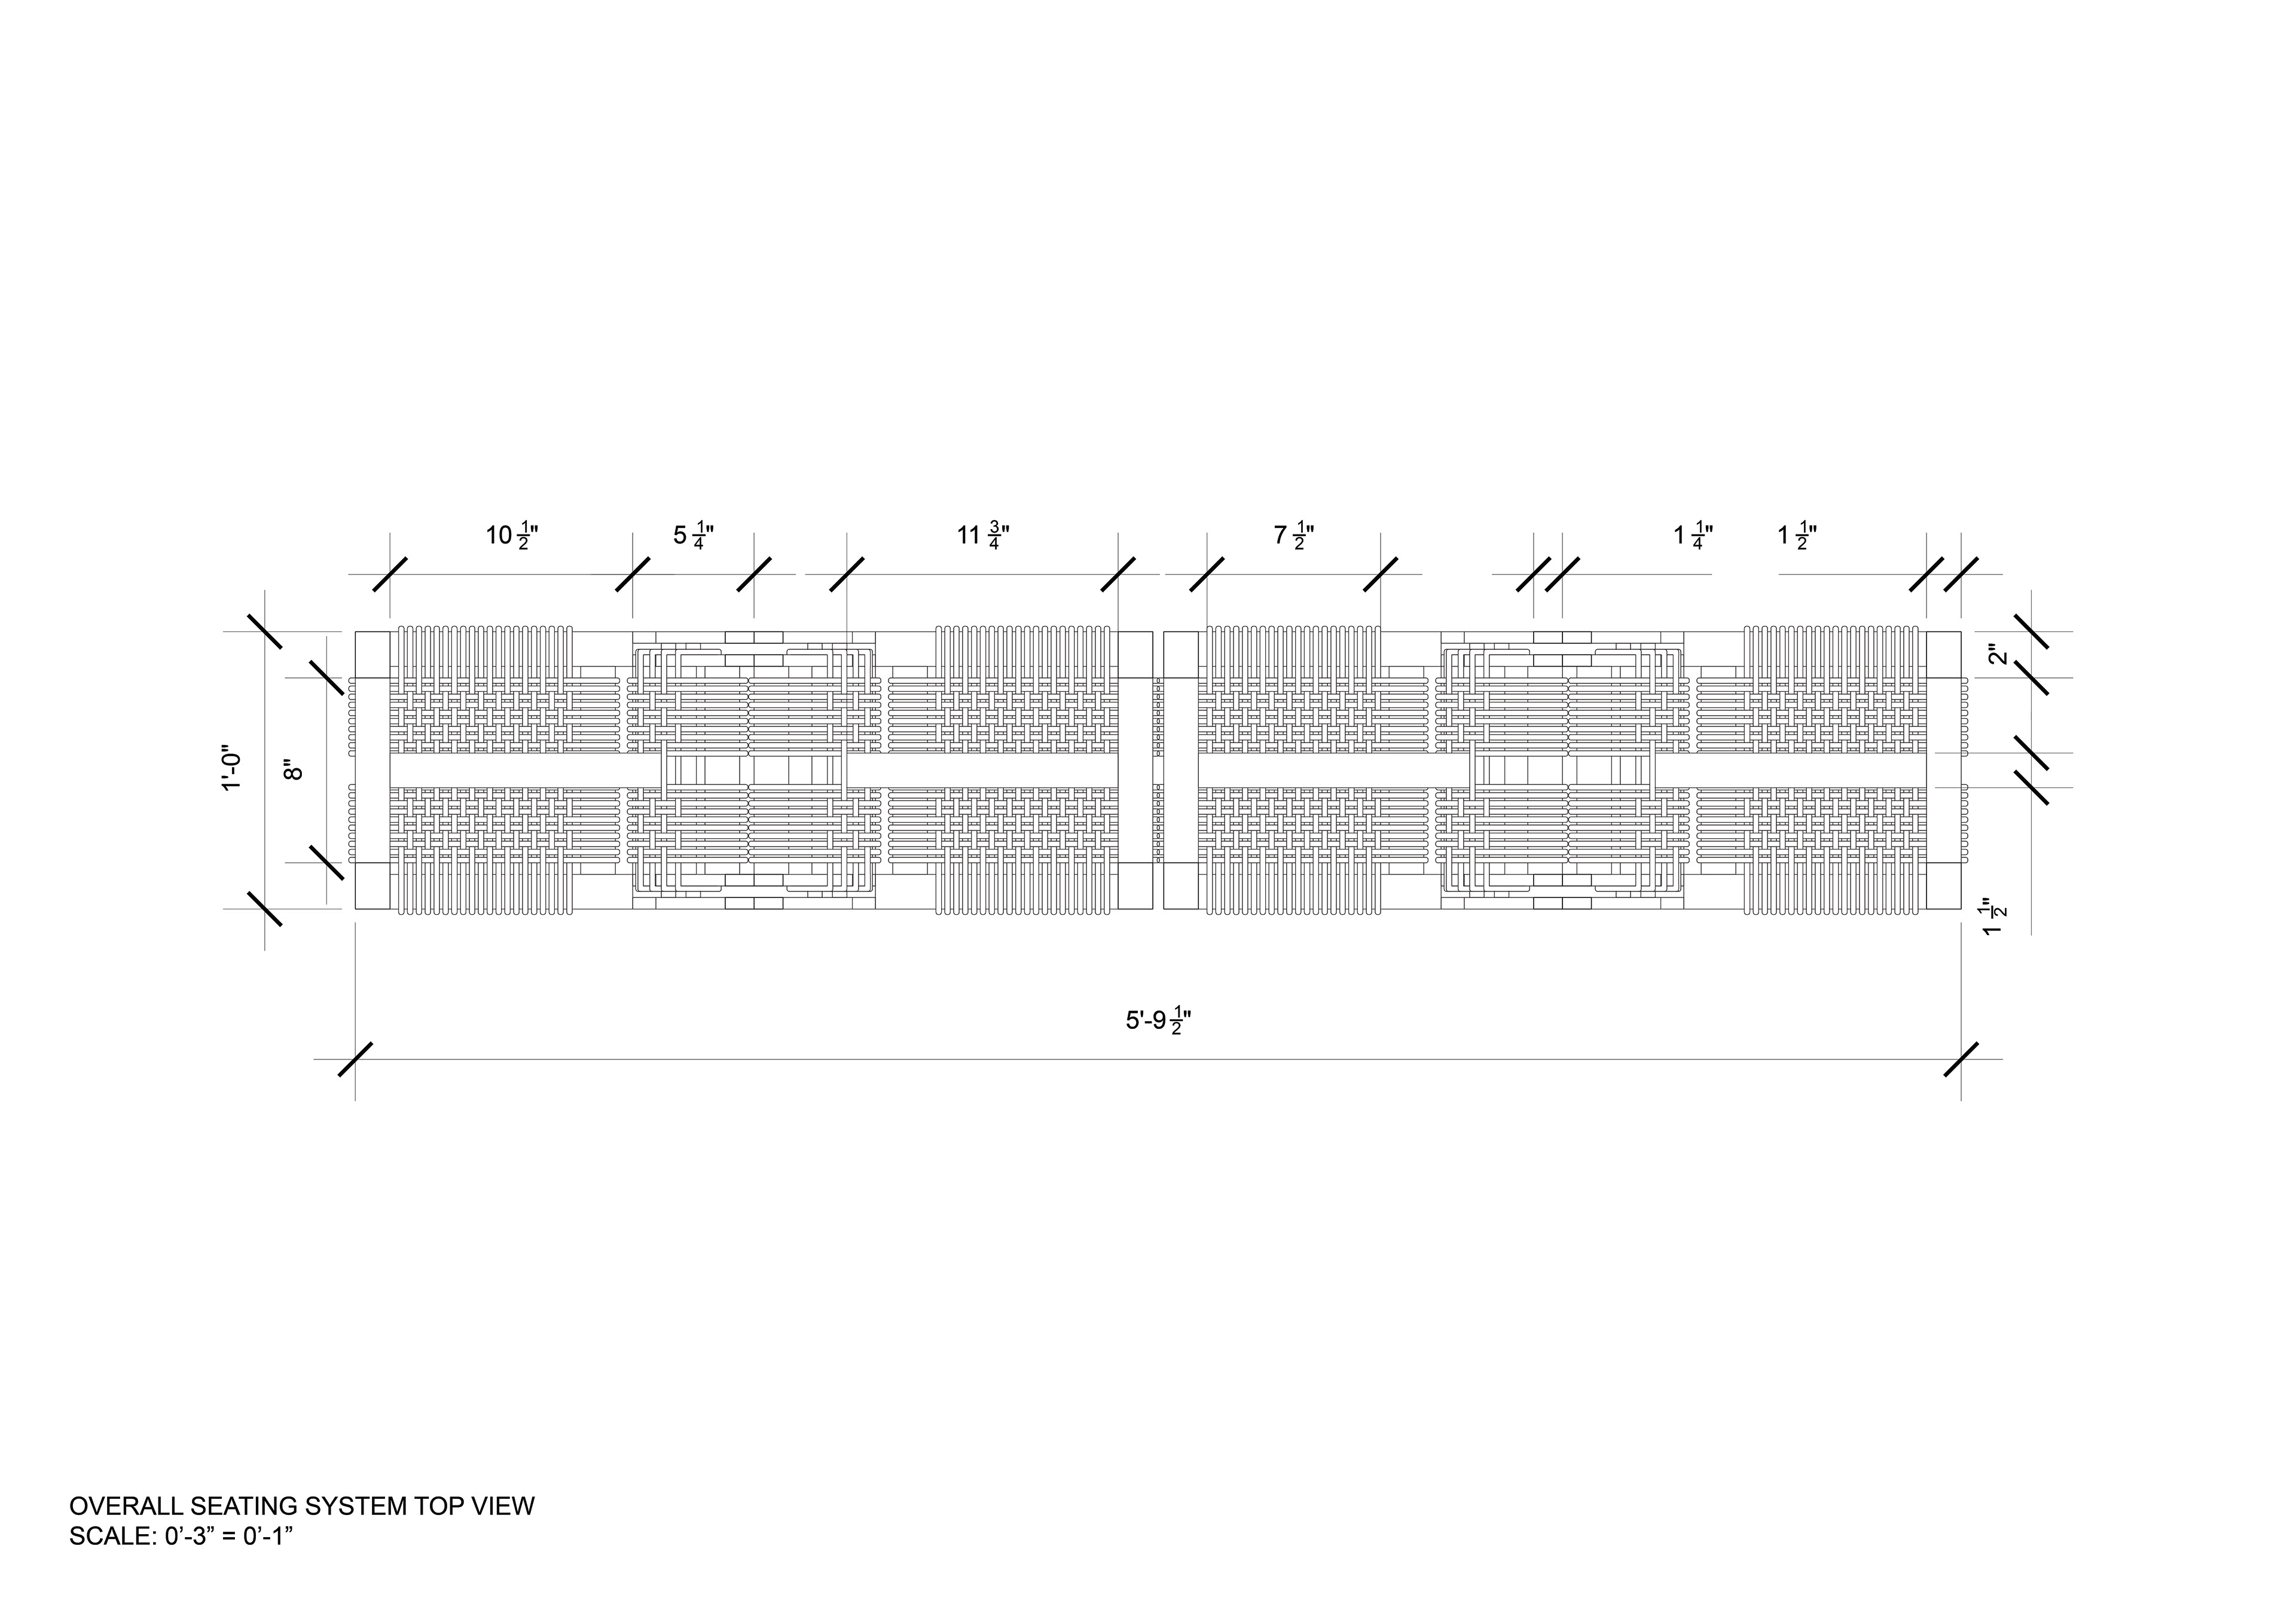
After designing multiple digital model iterations, we decided on the final design for the overall Curved Contrast footstool system shown below to proceed with fabrication. Each footstool is connected as part of a system through tongue-and-groove joints at the bottom of the footstool's S-curve legs, or by placing the columnar legs back-to-back with the mirrored footstool. Within each footstool's design, two pairs of S-curve legs are placed on the ends of the footstool, with the outside S-curve leg showing the exposed grain of the walnut wood and the interior S-curve leg holding the weft rope.
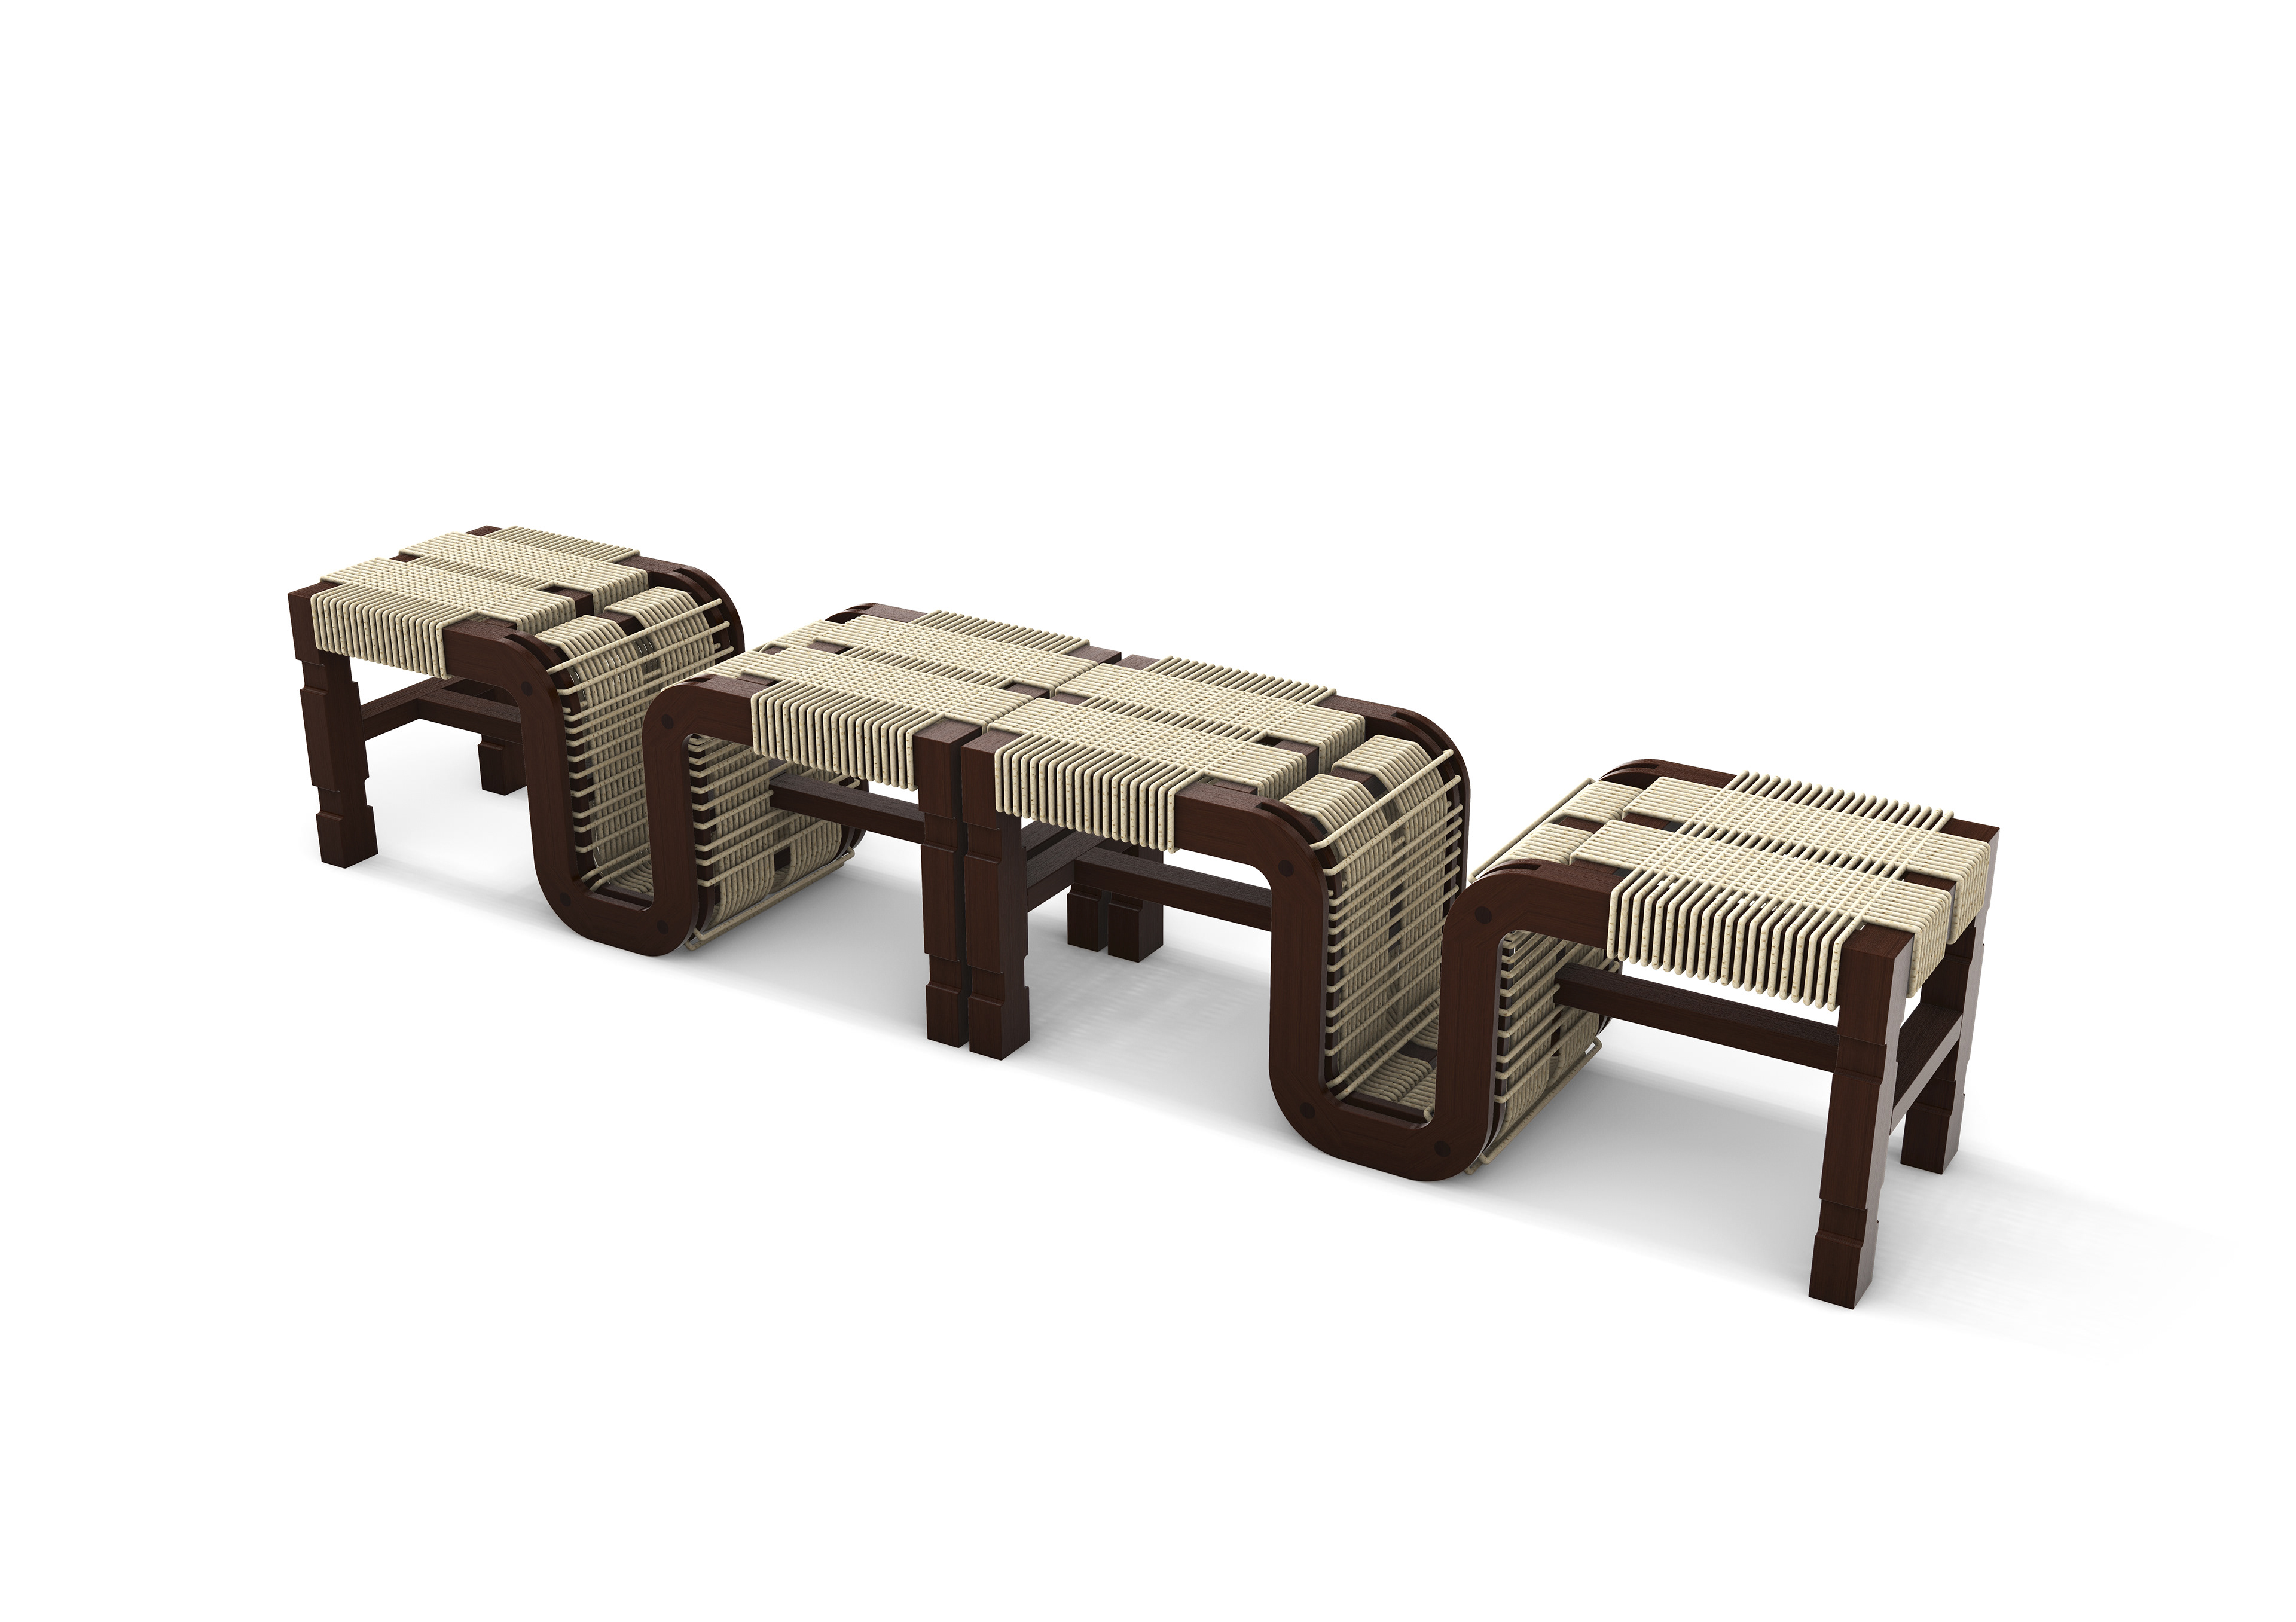
In relation to our concept, this footstool system explores material contrast through the combination of dark walnut wood and woven cream-colored rope to reinforce the relationship between structural rigidity and ergonomic comfort inspired by columnar and cabriole forms. The variation between the smooth hardwood structure and the braided rope creates a visual and tactile contrast that expresses permanence, flexibility, and comfort. Walnut was selected for its durability and timeless character, allowing the footstool to balance long-term functionality with an evolving, organic aesthetic. By selecting Danish oil as the finish for our footstools, it deepens the tone of the walnut wood and highlights its natural grain movement, emphasizing the flowing curves and craftsmanship within the overall design.
Orthographic Drawings
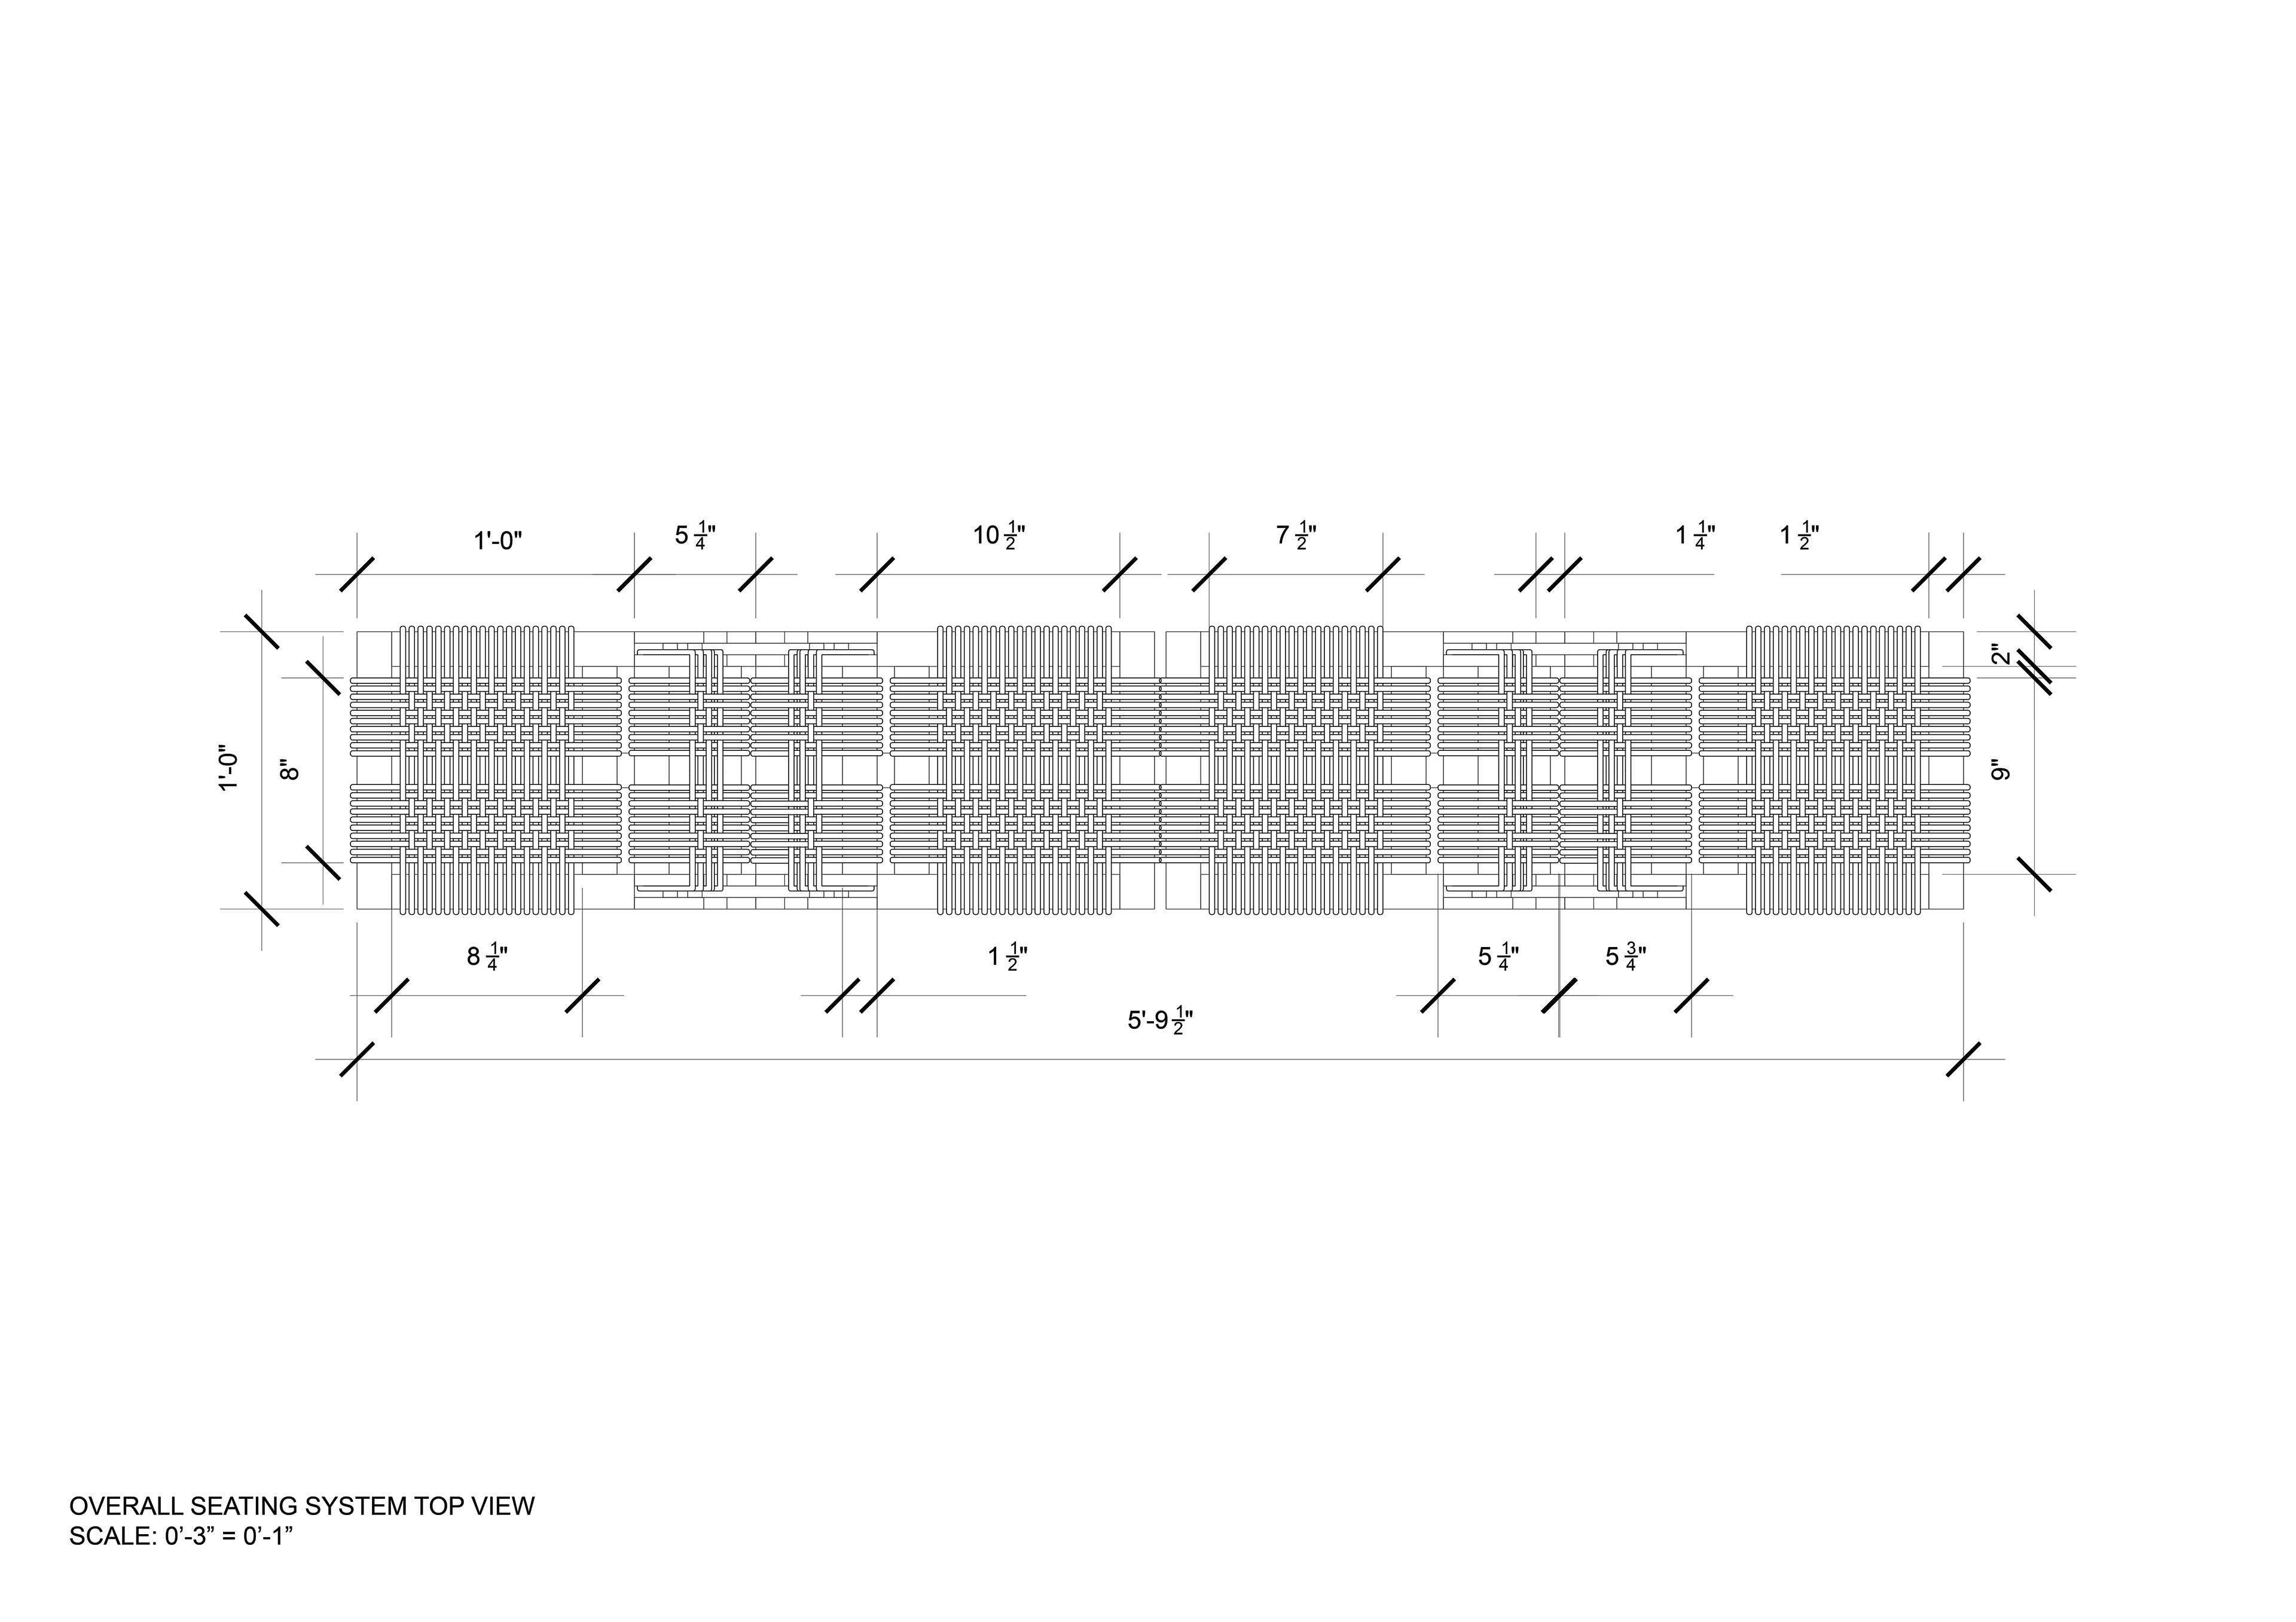
Overall Footstool System Top View
Overall Footstool System Bottom View
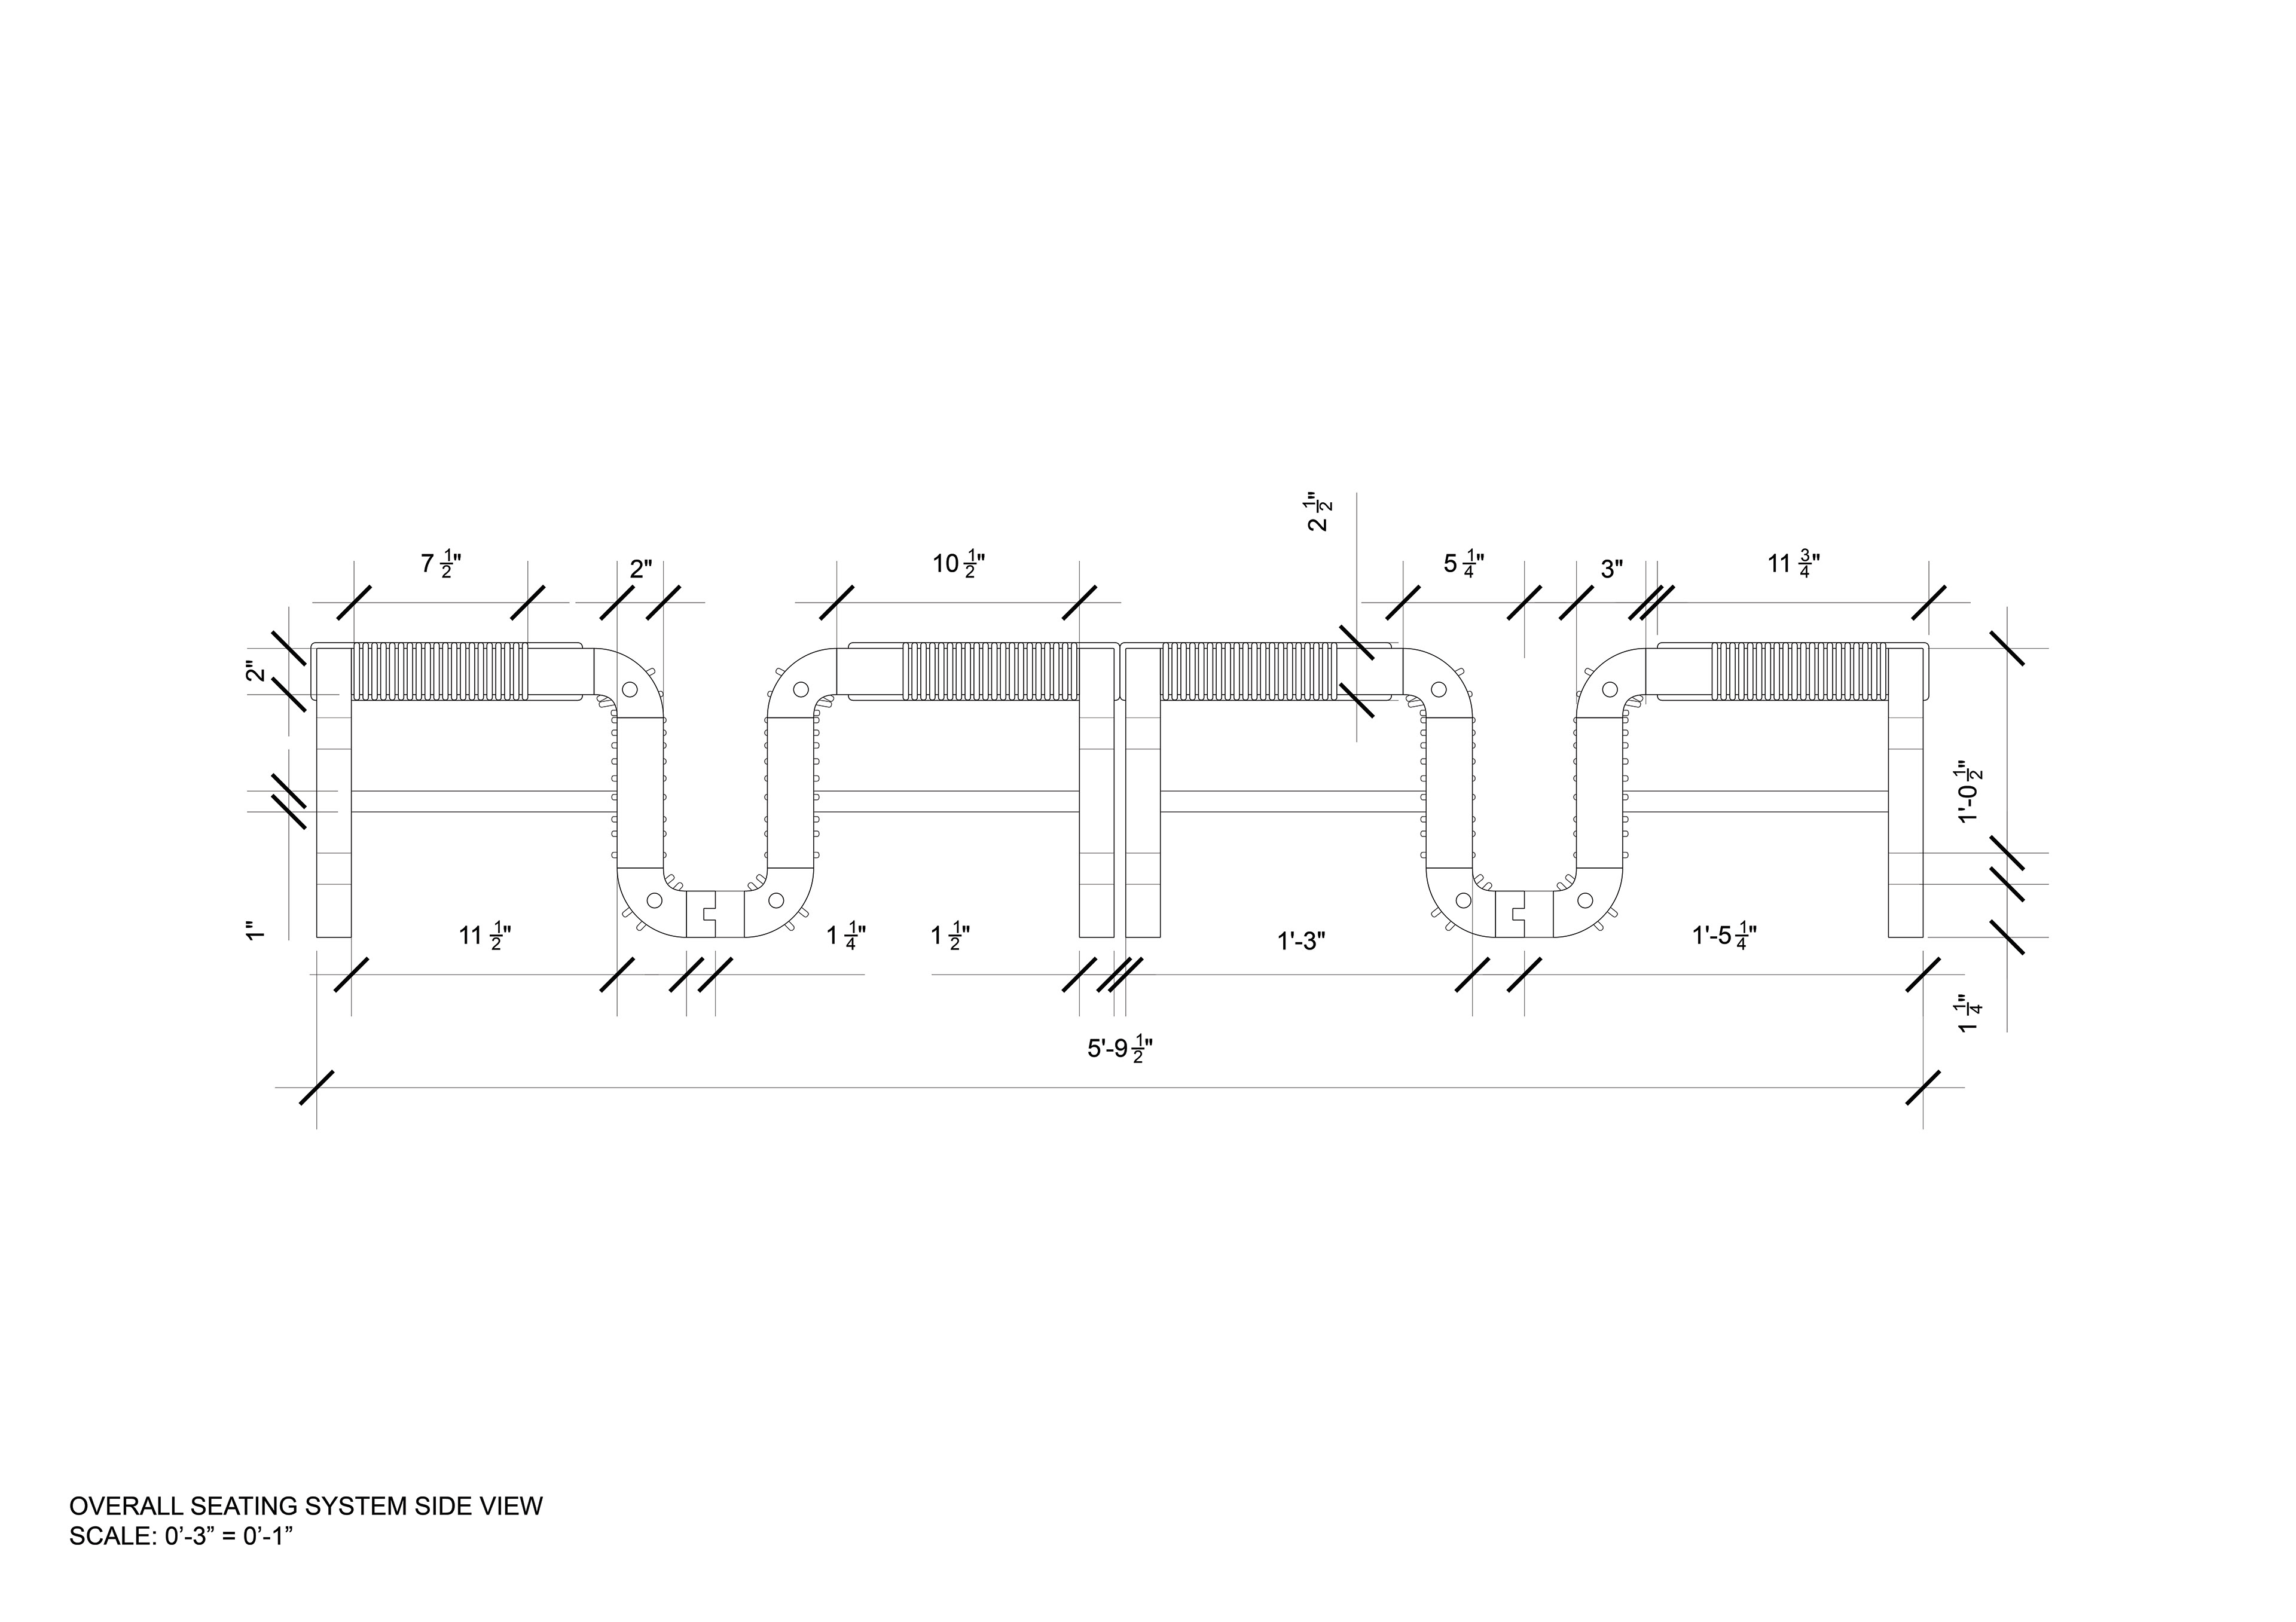
Overall Footstool System Side View
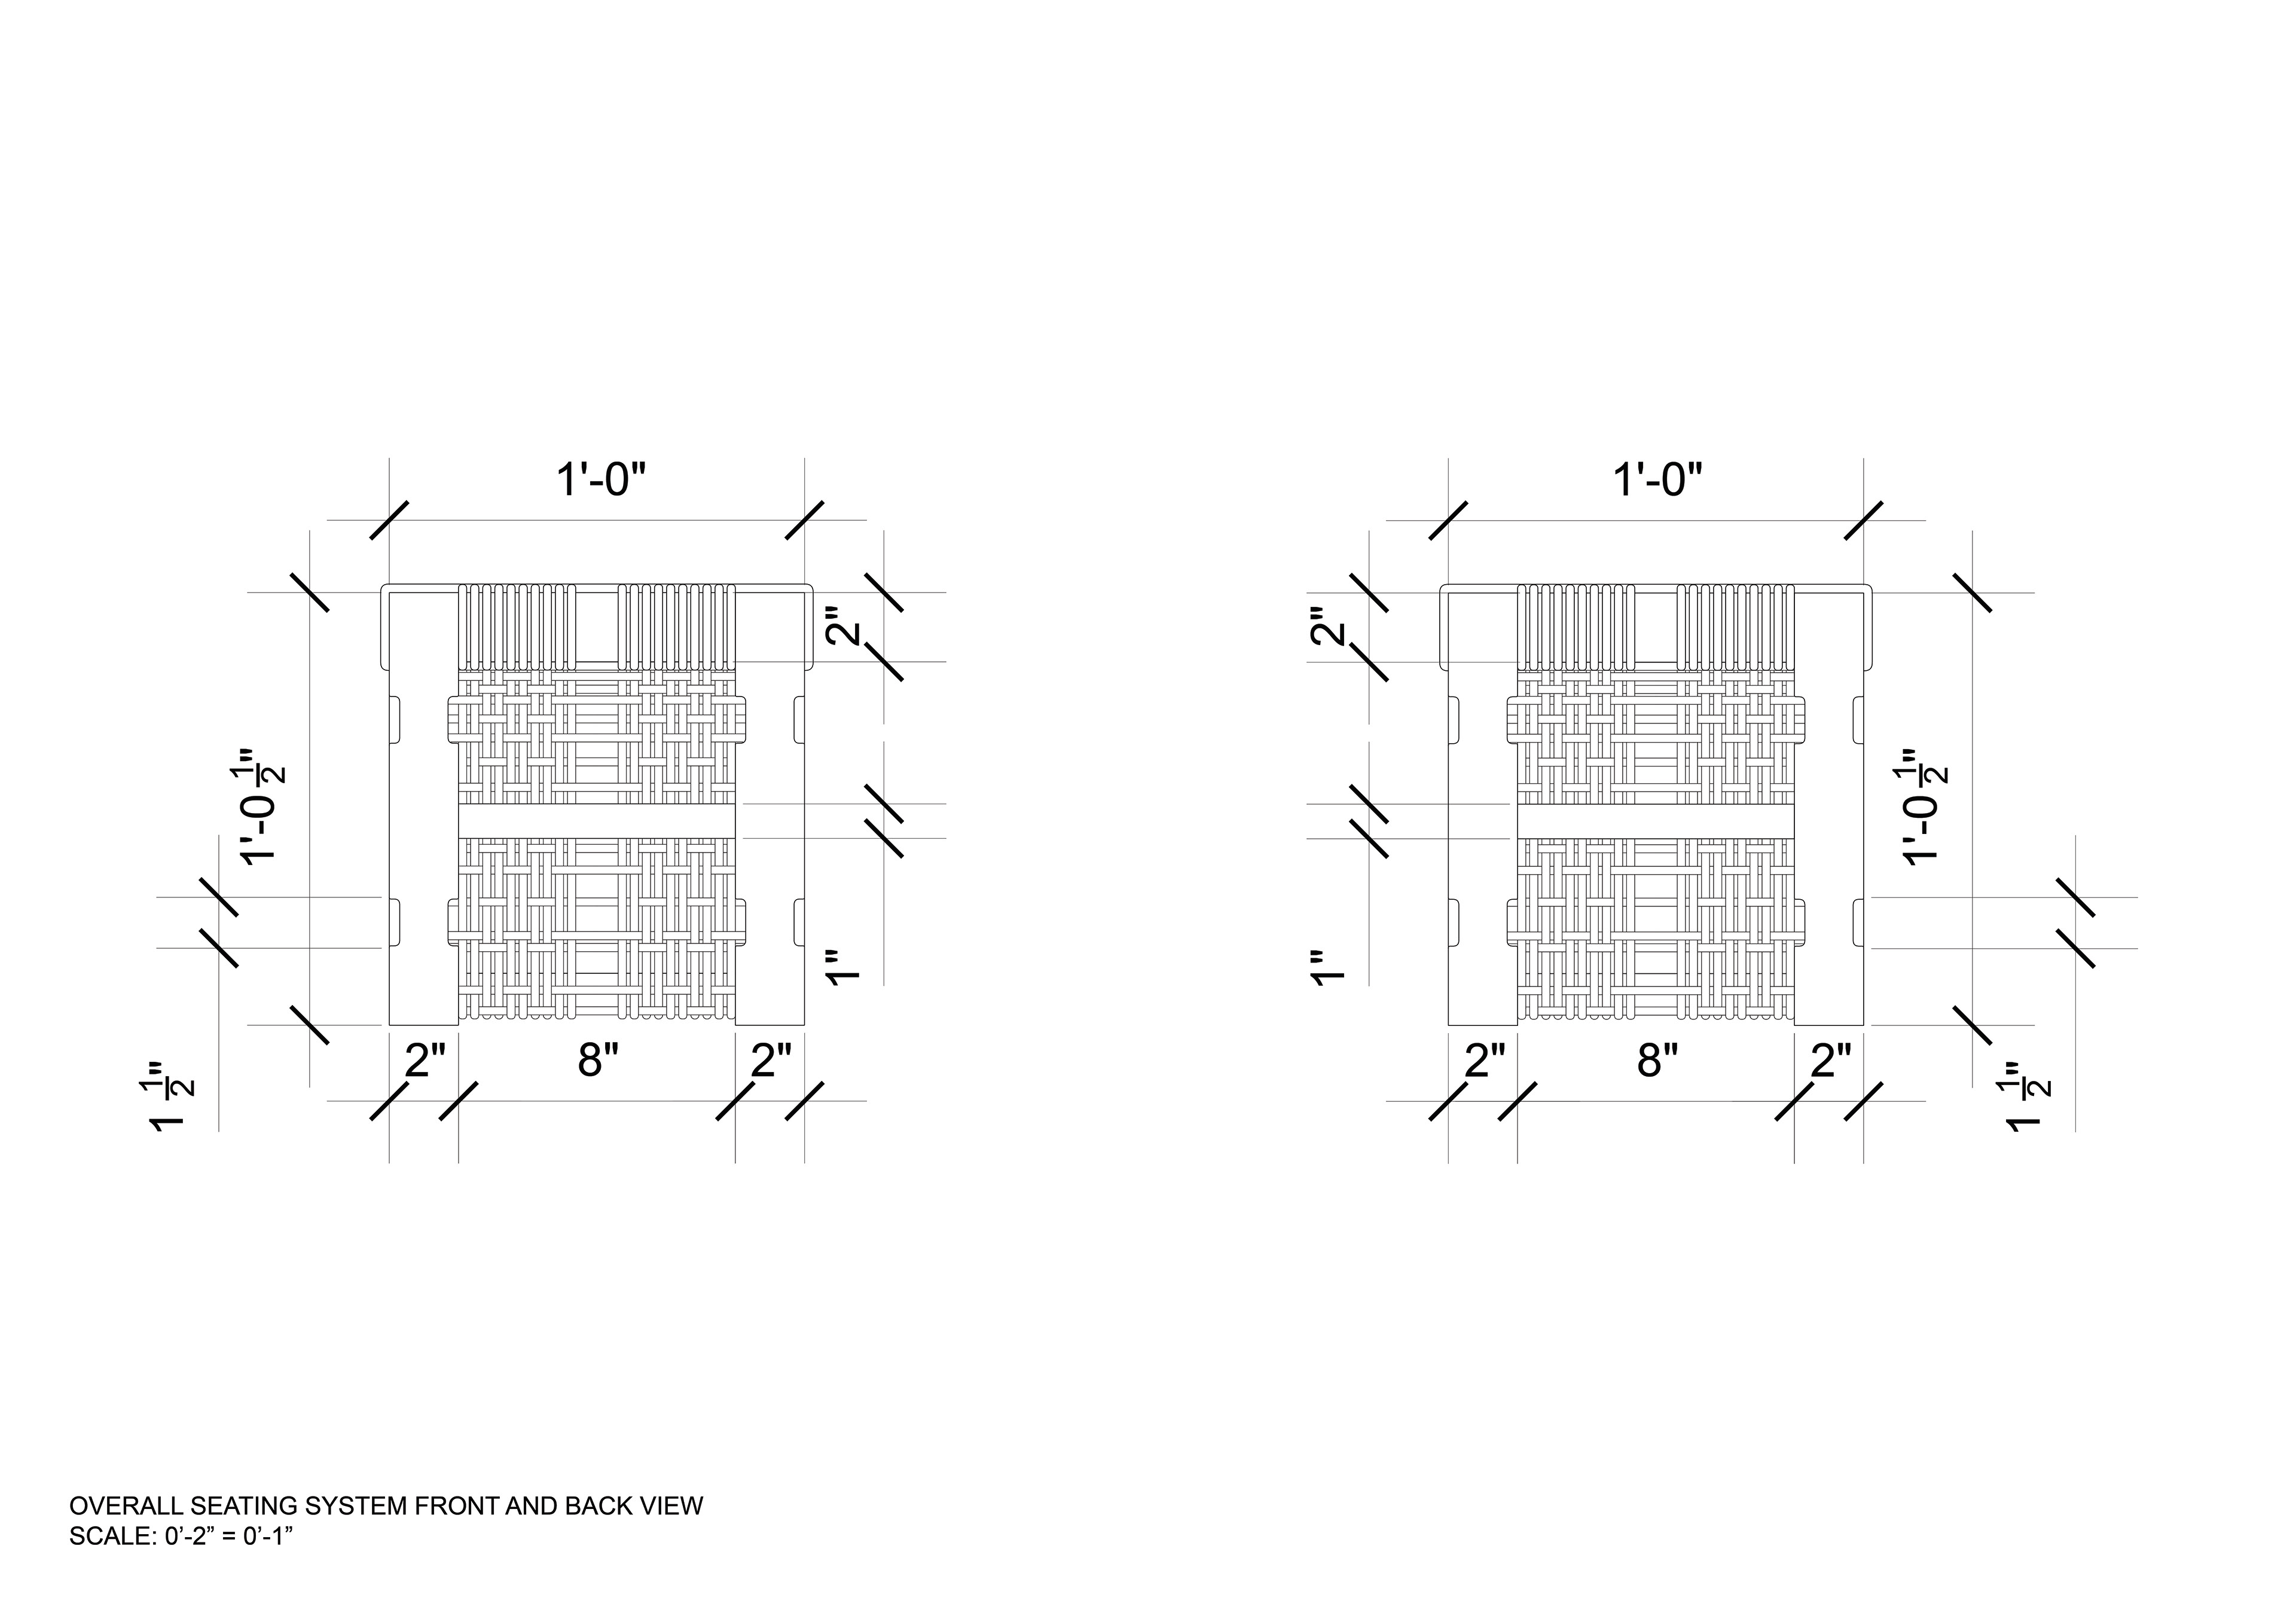
Overall Footstool System Front and Back View
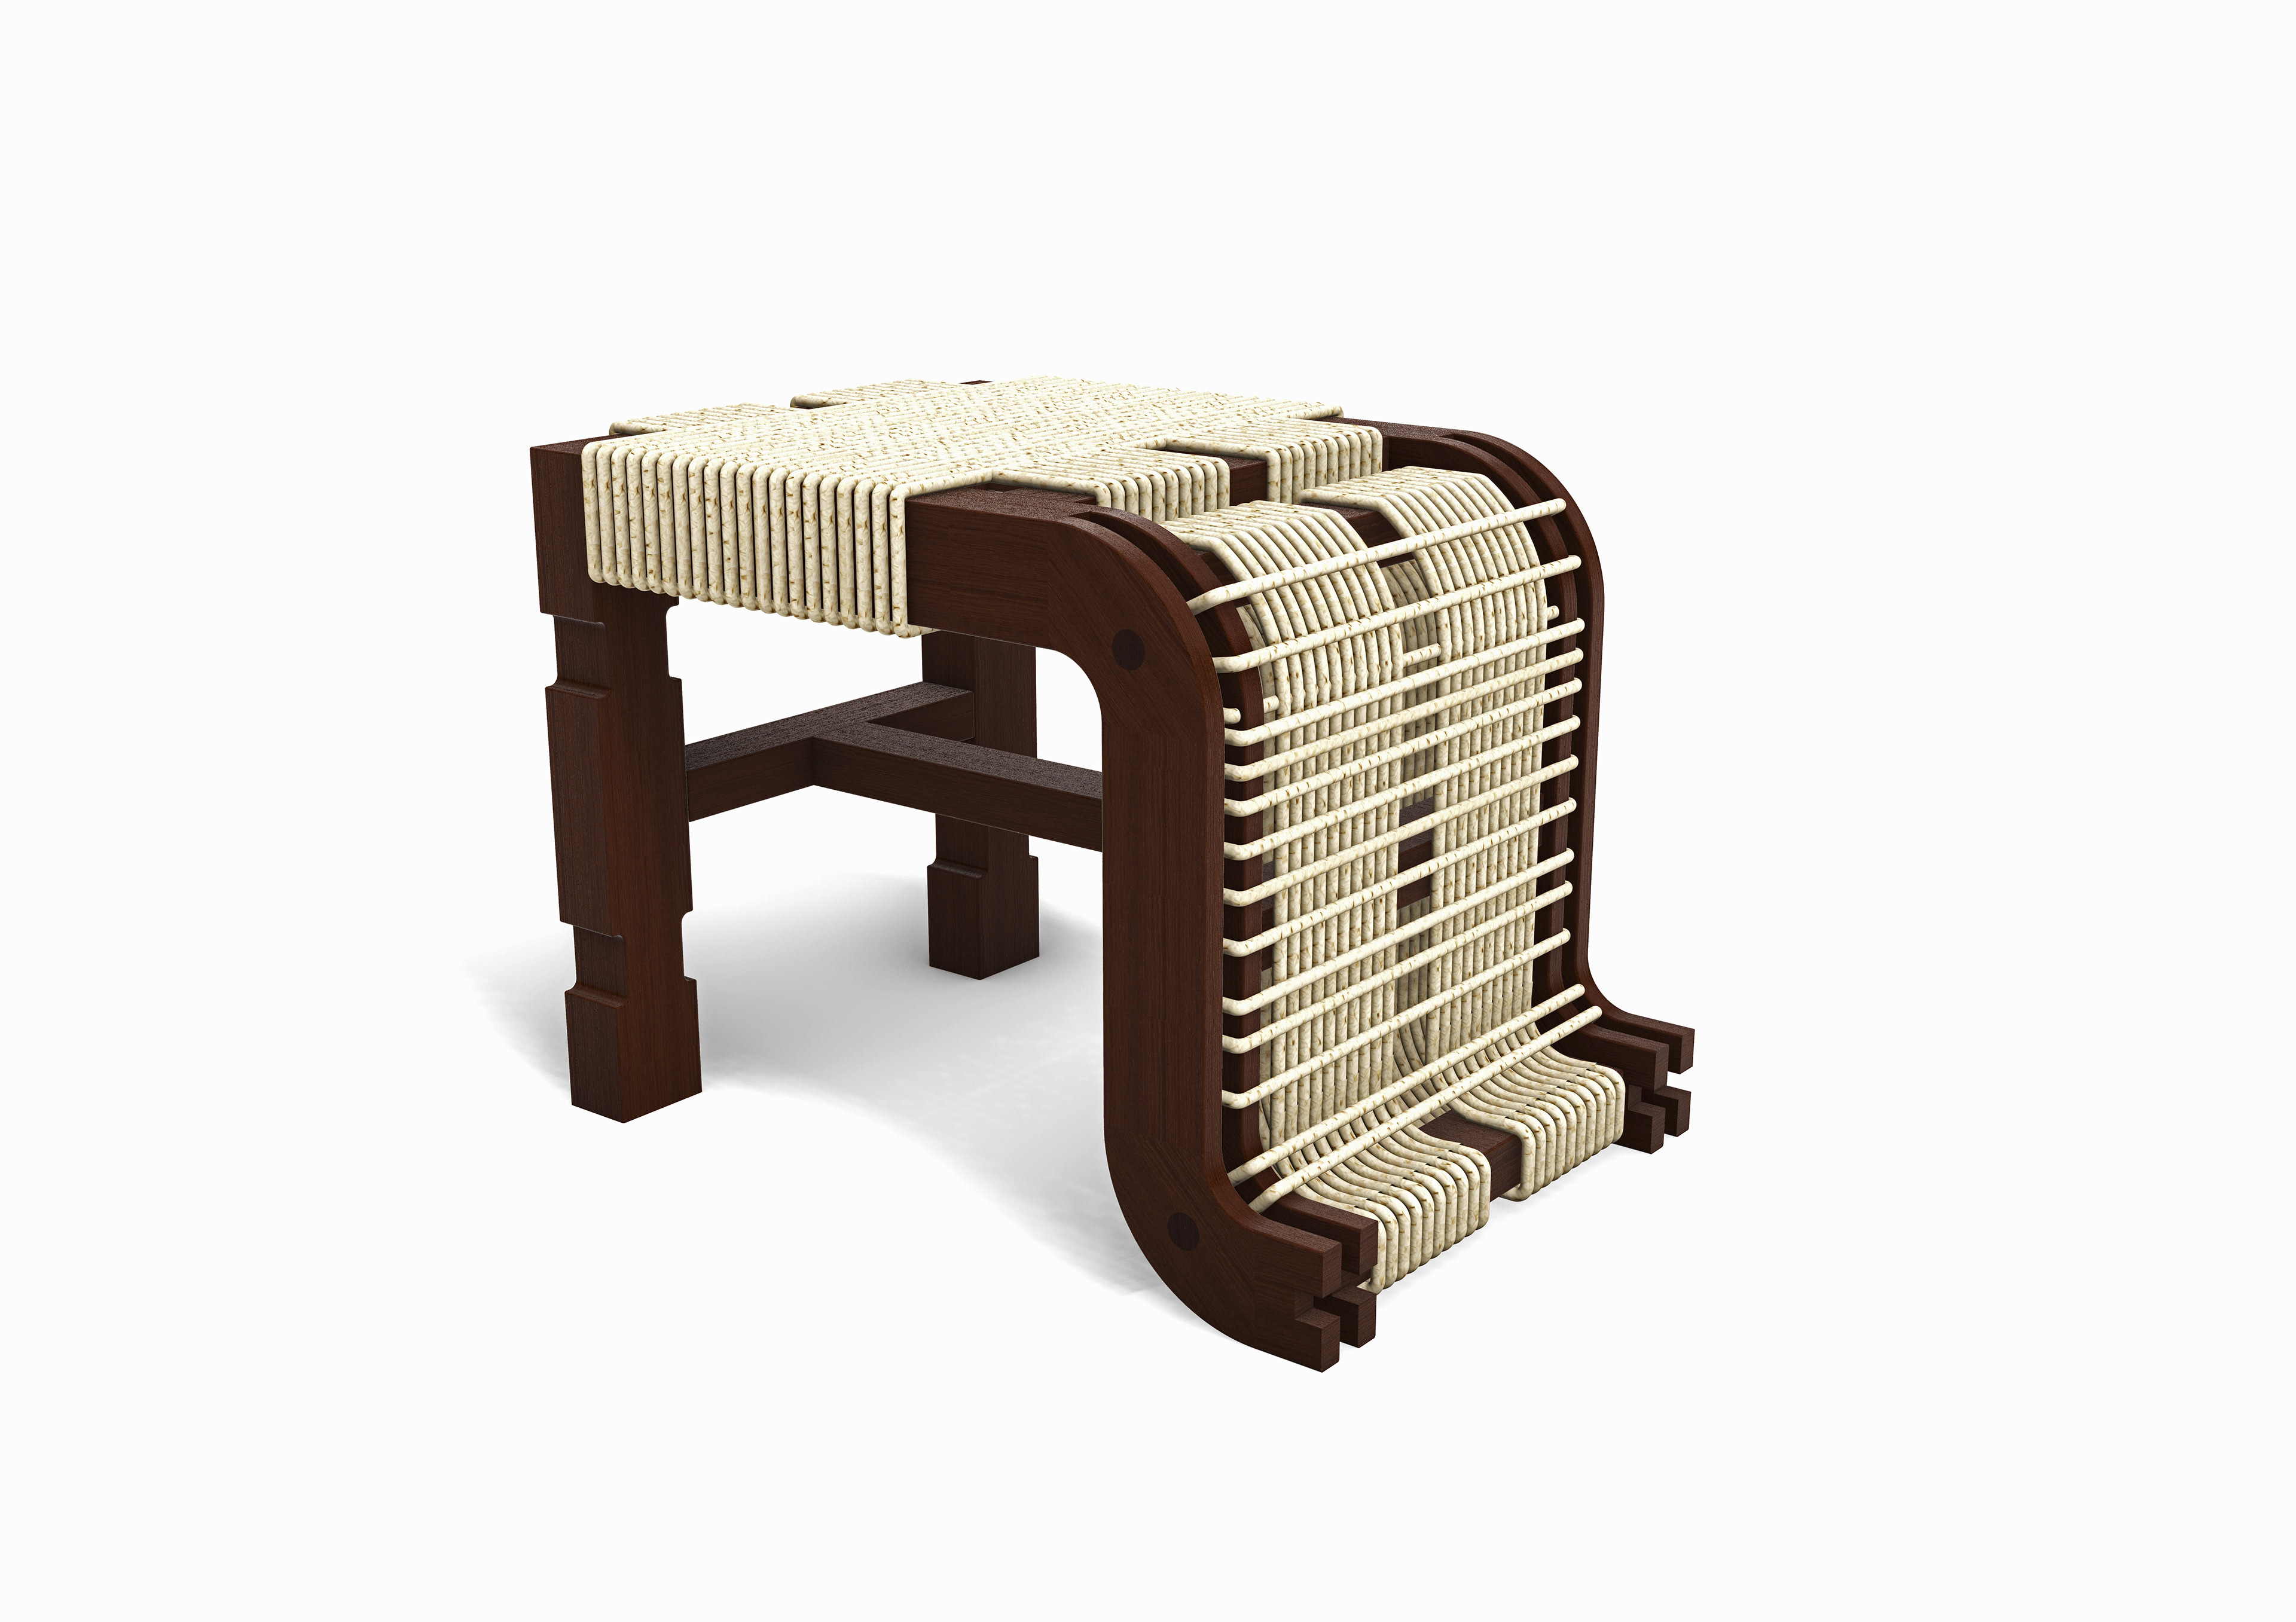
Final Footstool 1 Design
As part of this group project, each group member moved forward in fabricating one of the four footstools in our system. The following images are the render and detailed orthographic drawings I created for my individual footstool.
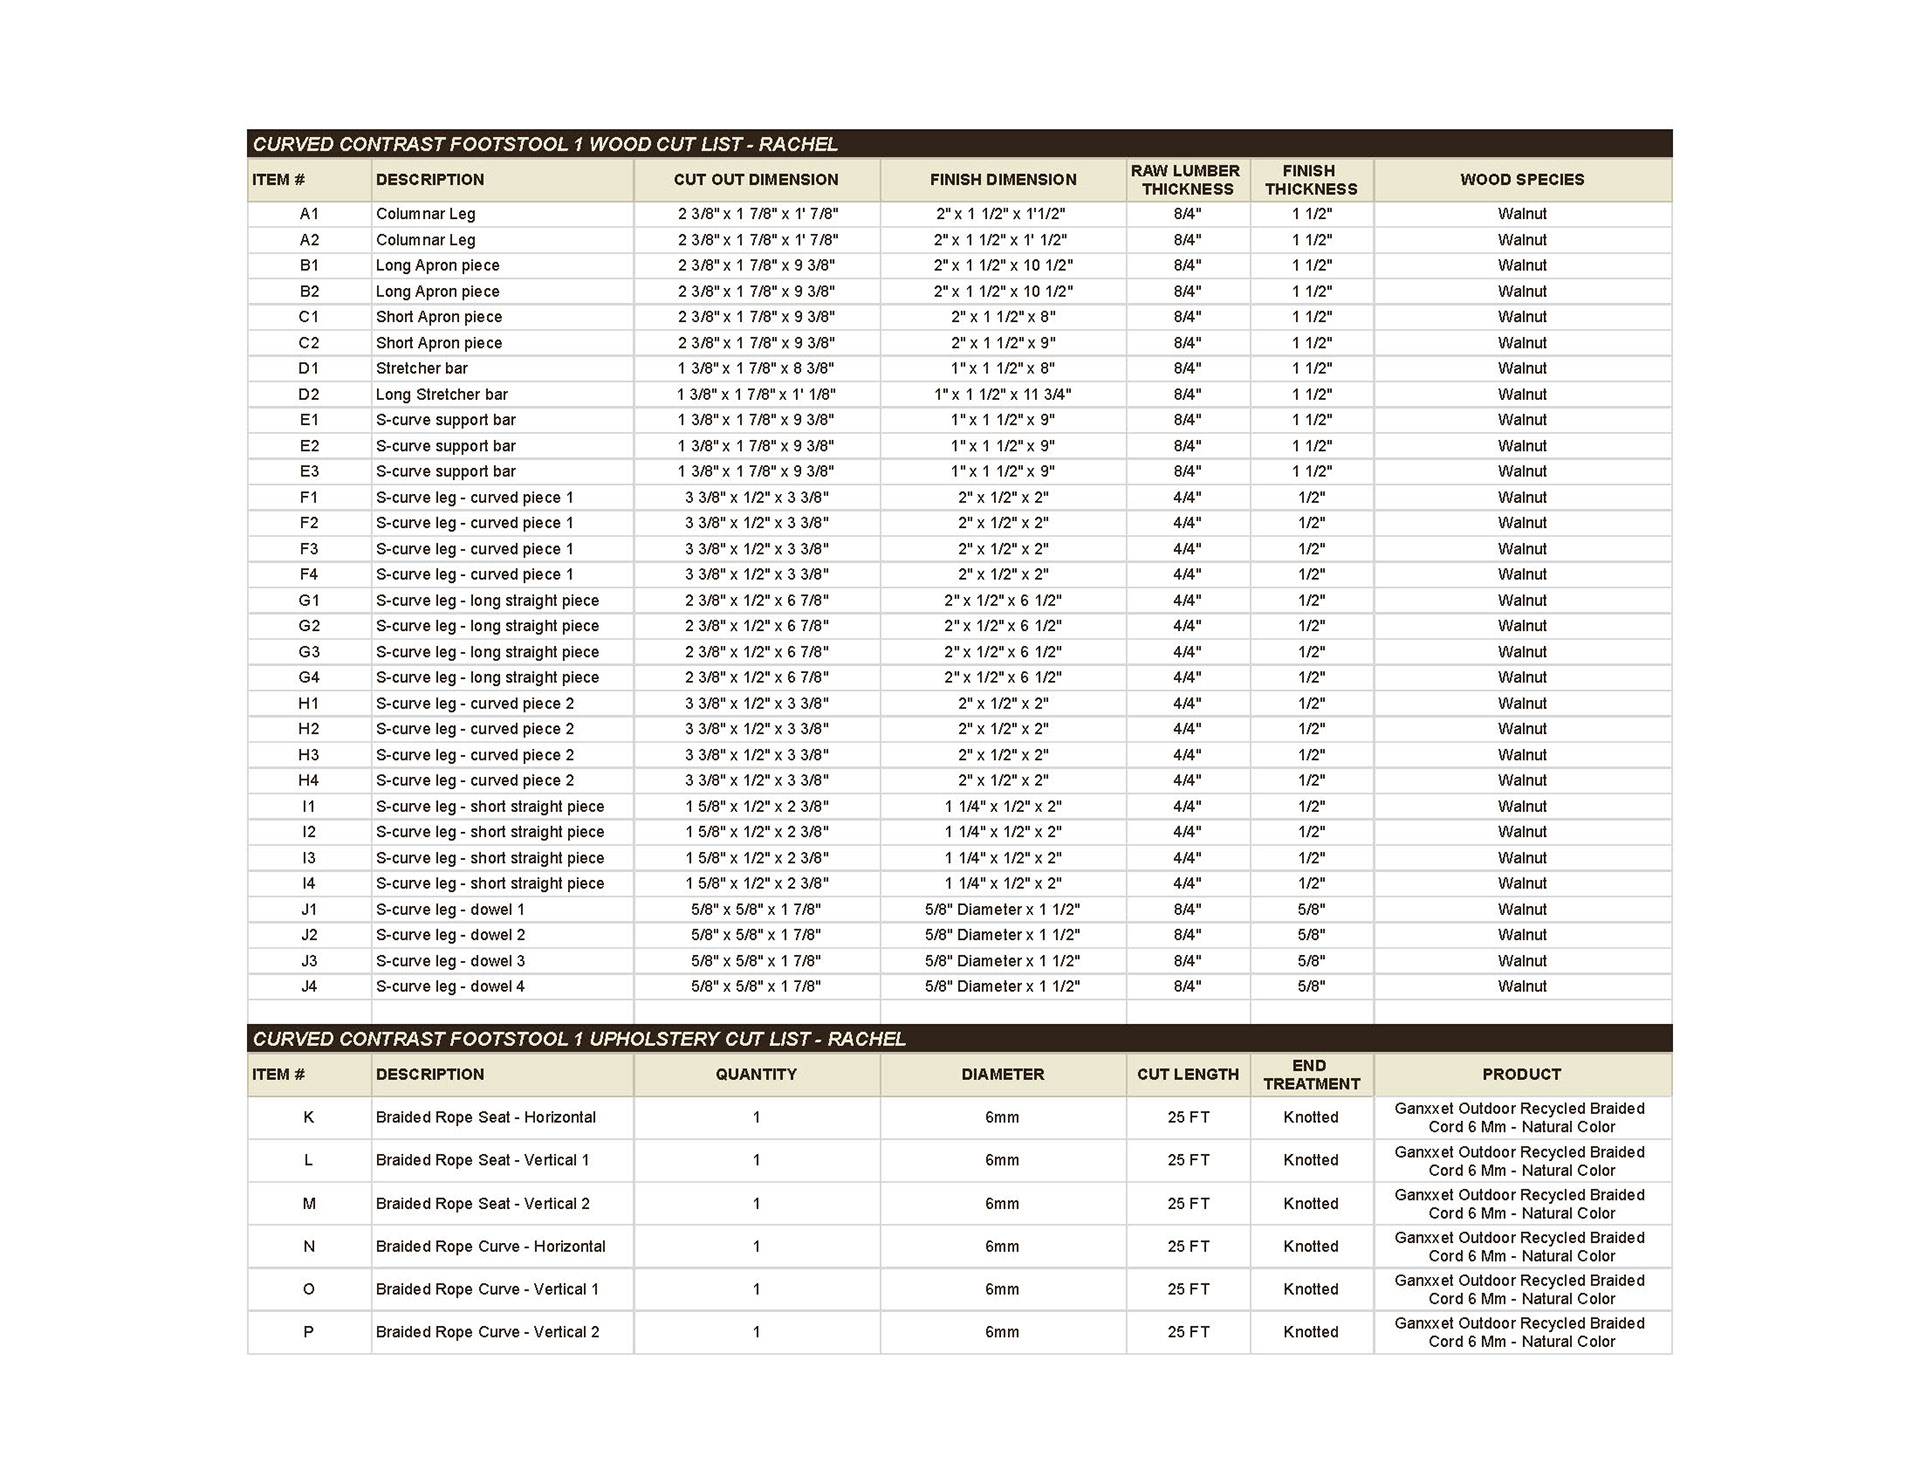
Final Material Cut List
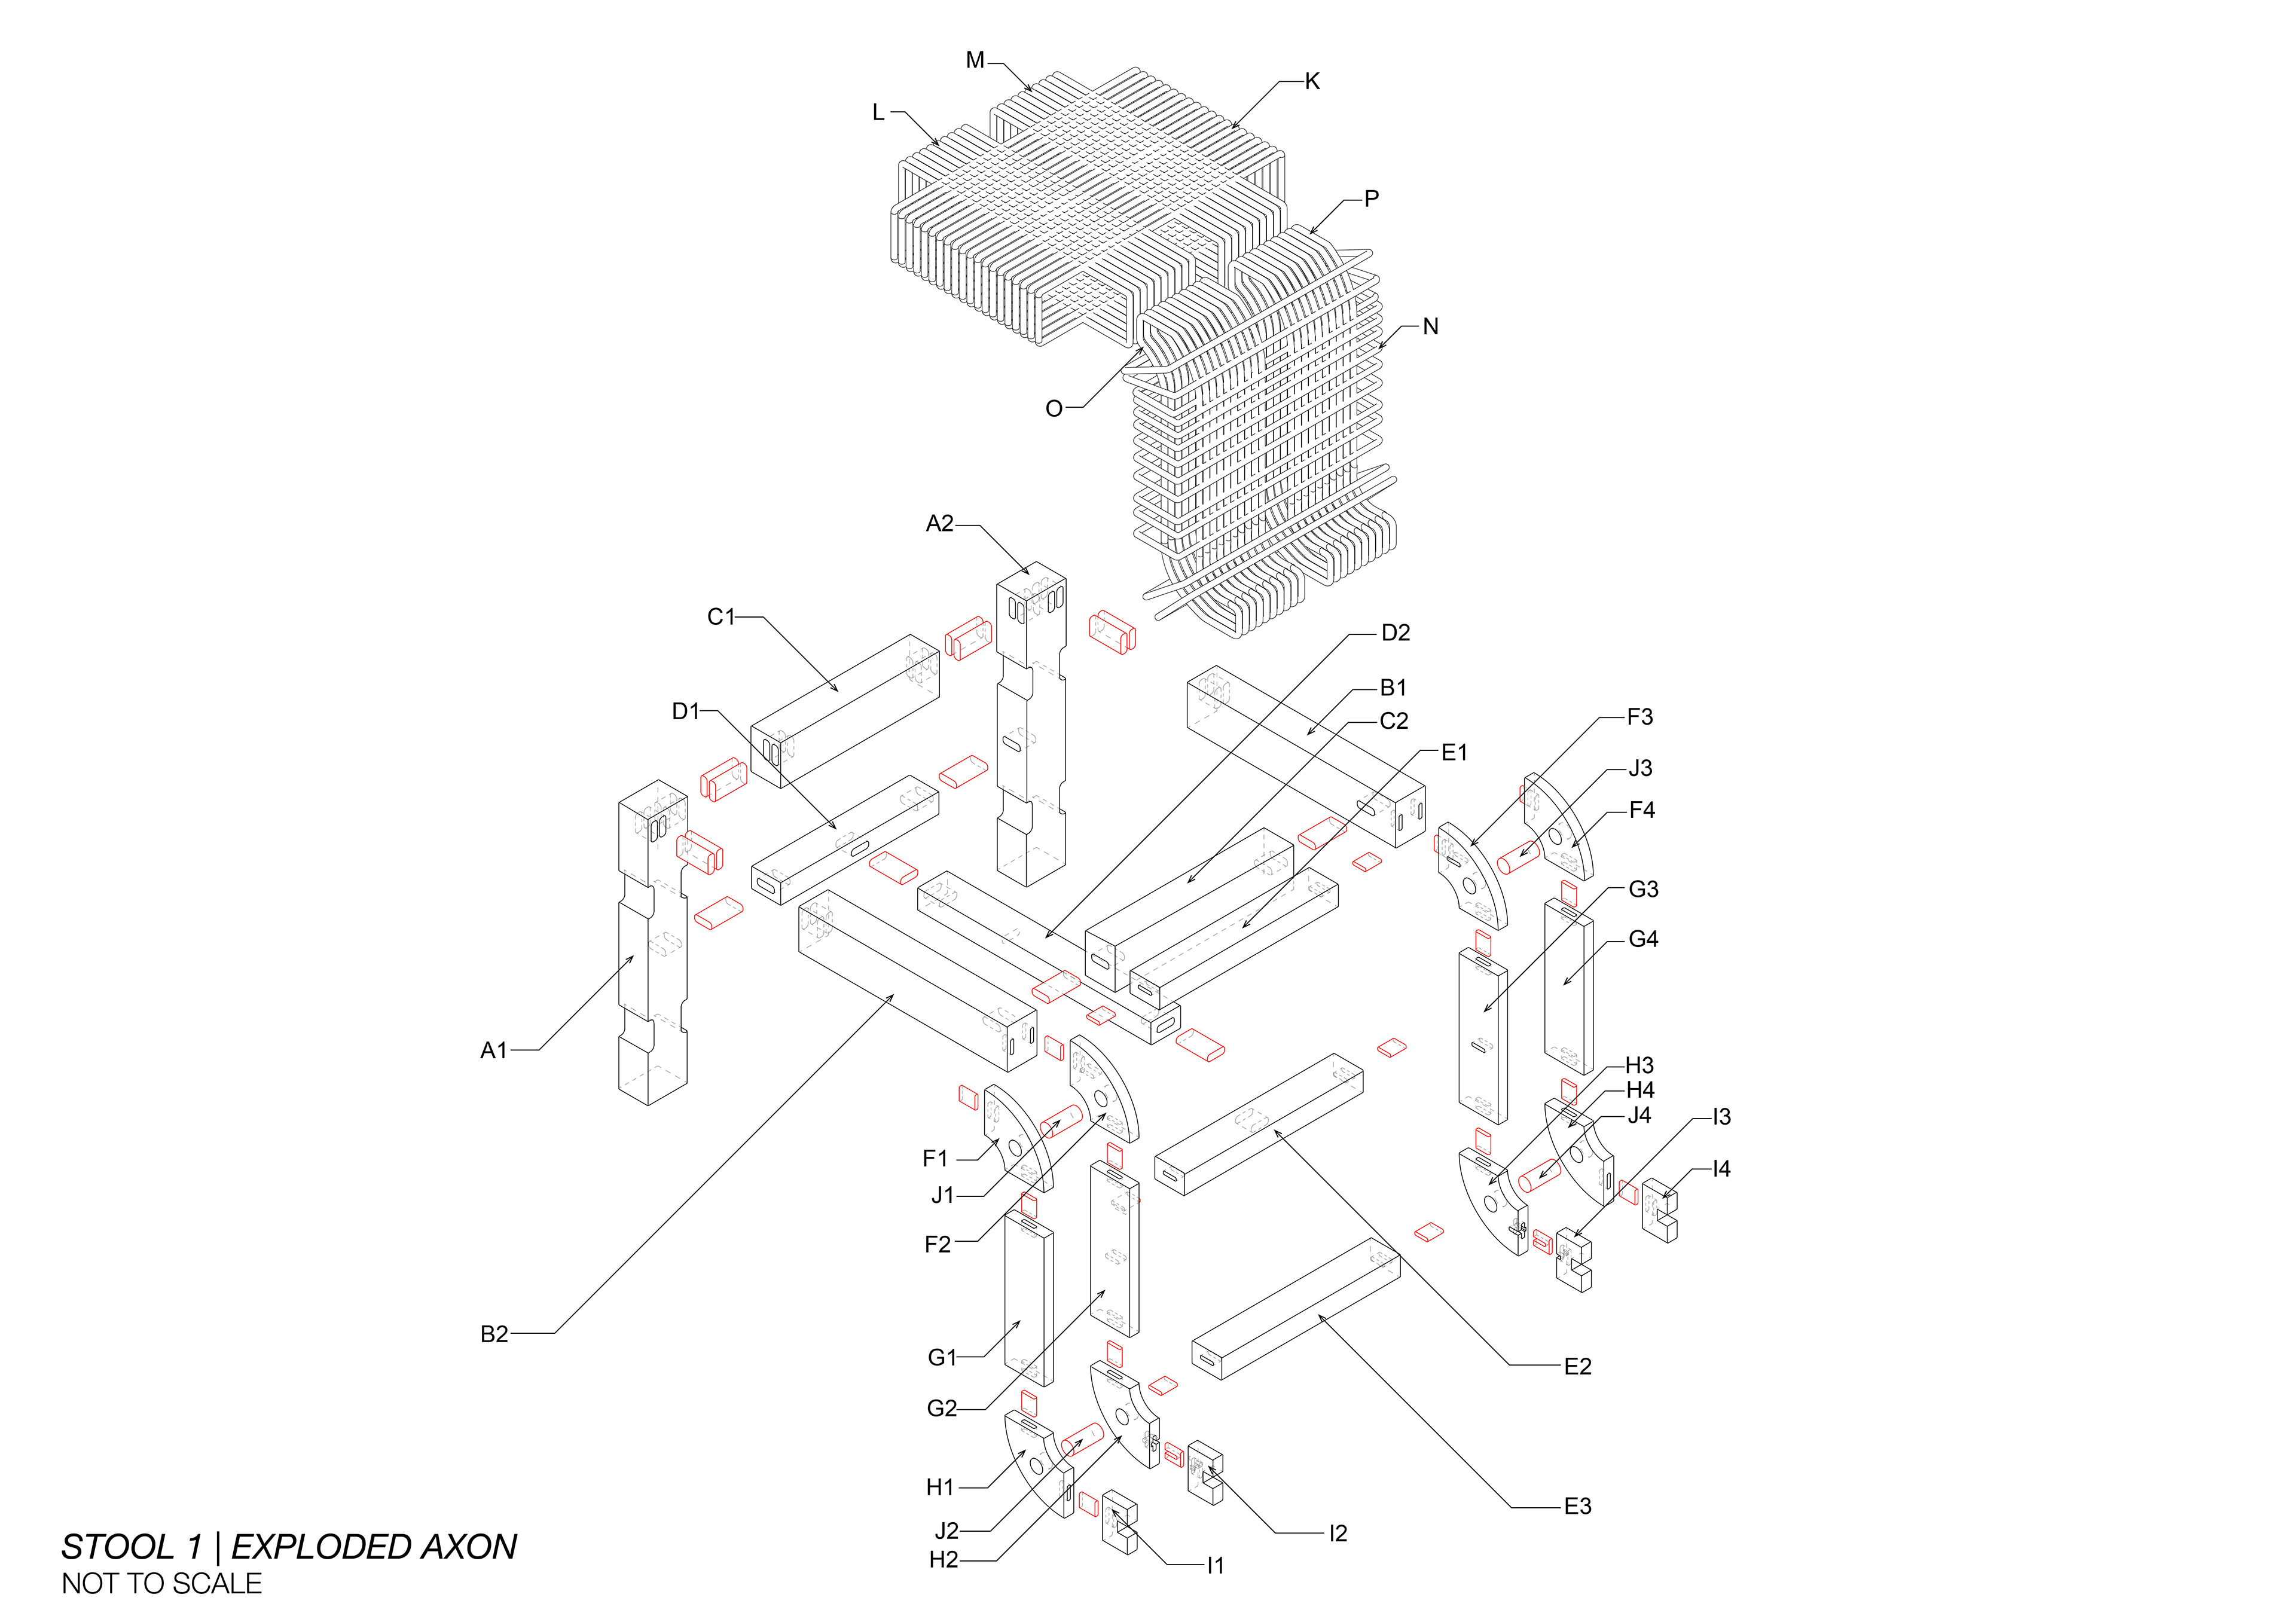
This exploded axon drawing dissects the individual pieces of the footstool's frame, joinery, and upholstery. Each piece is labeled according to the cut list next to the drawing that indicates the specific cut-out dimensions, finish dimensions, raw lumber thickness, finish thickness, and wood species for the footstool, as well as the specifications for the rope upholstery. Creating these cut lists helped in the fabrication process of my footstool.
Orthographic Drawings
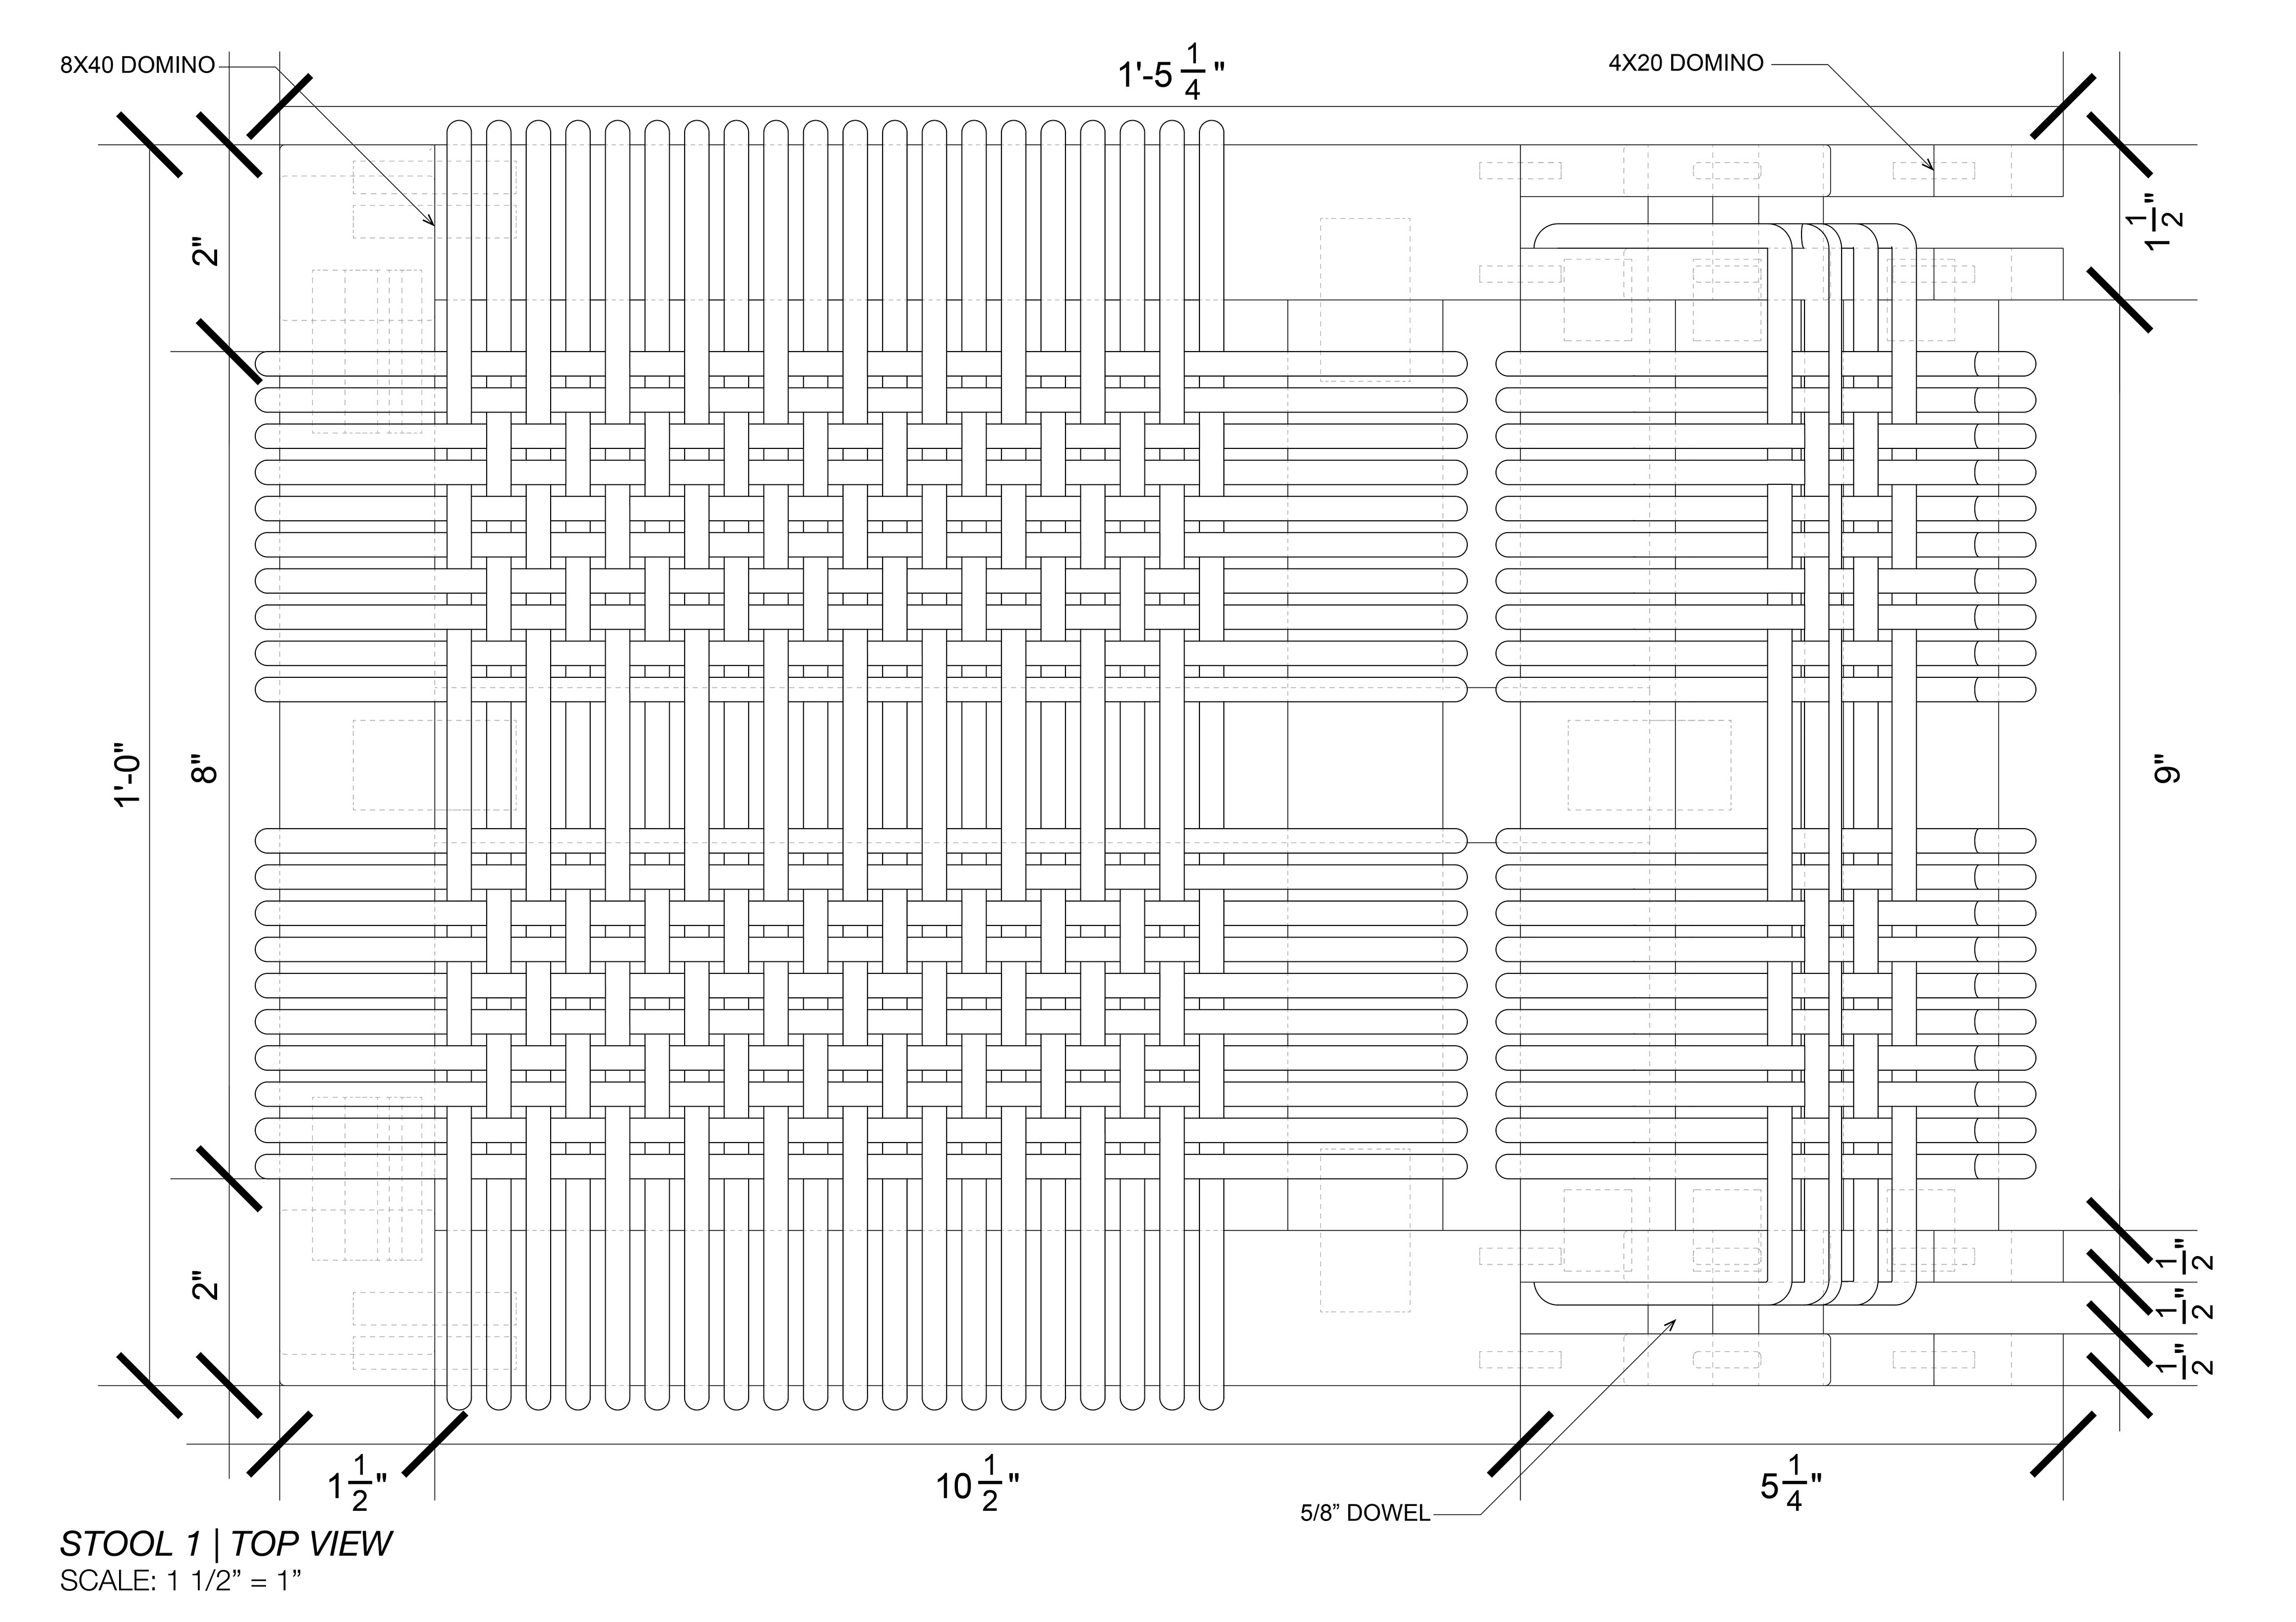
Top View
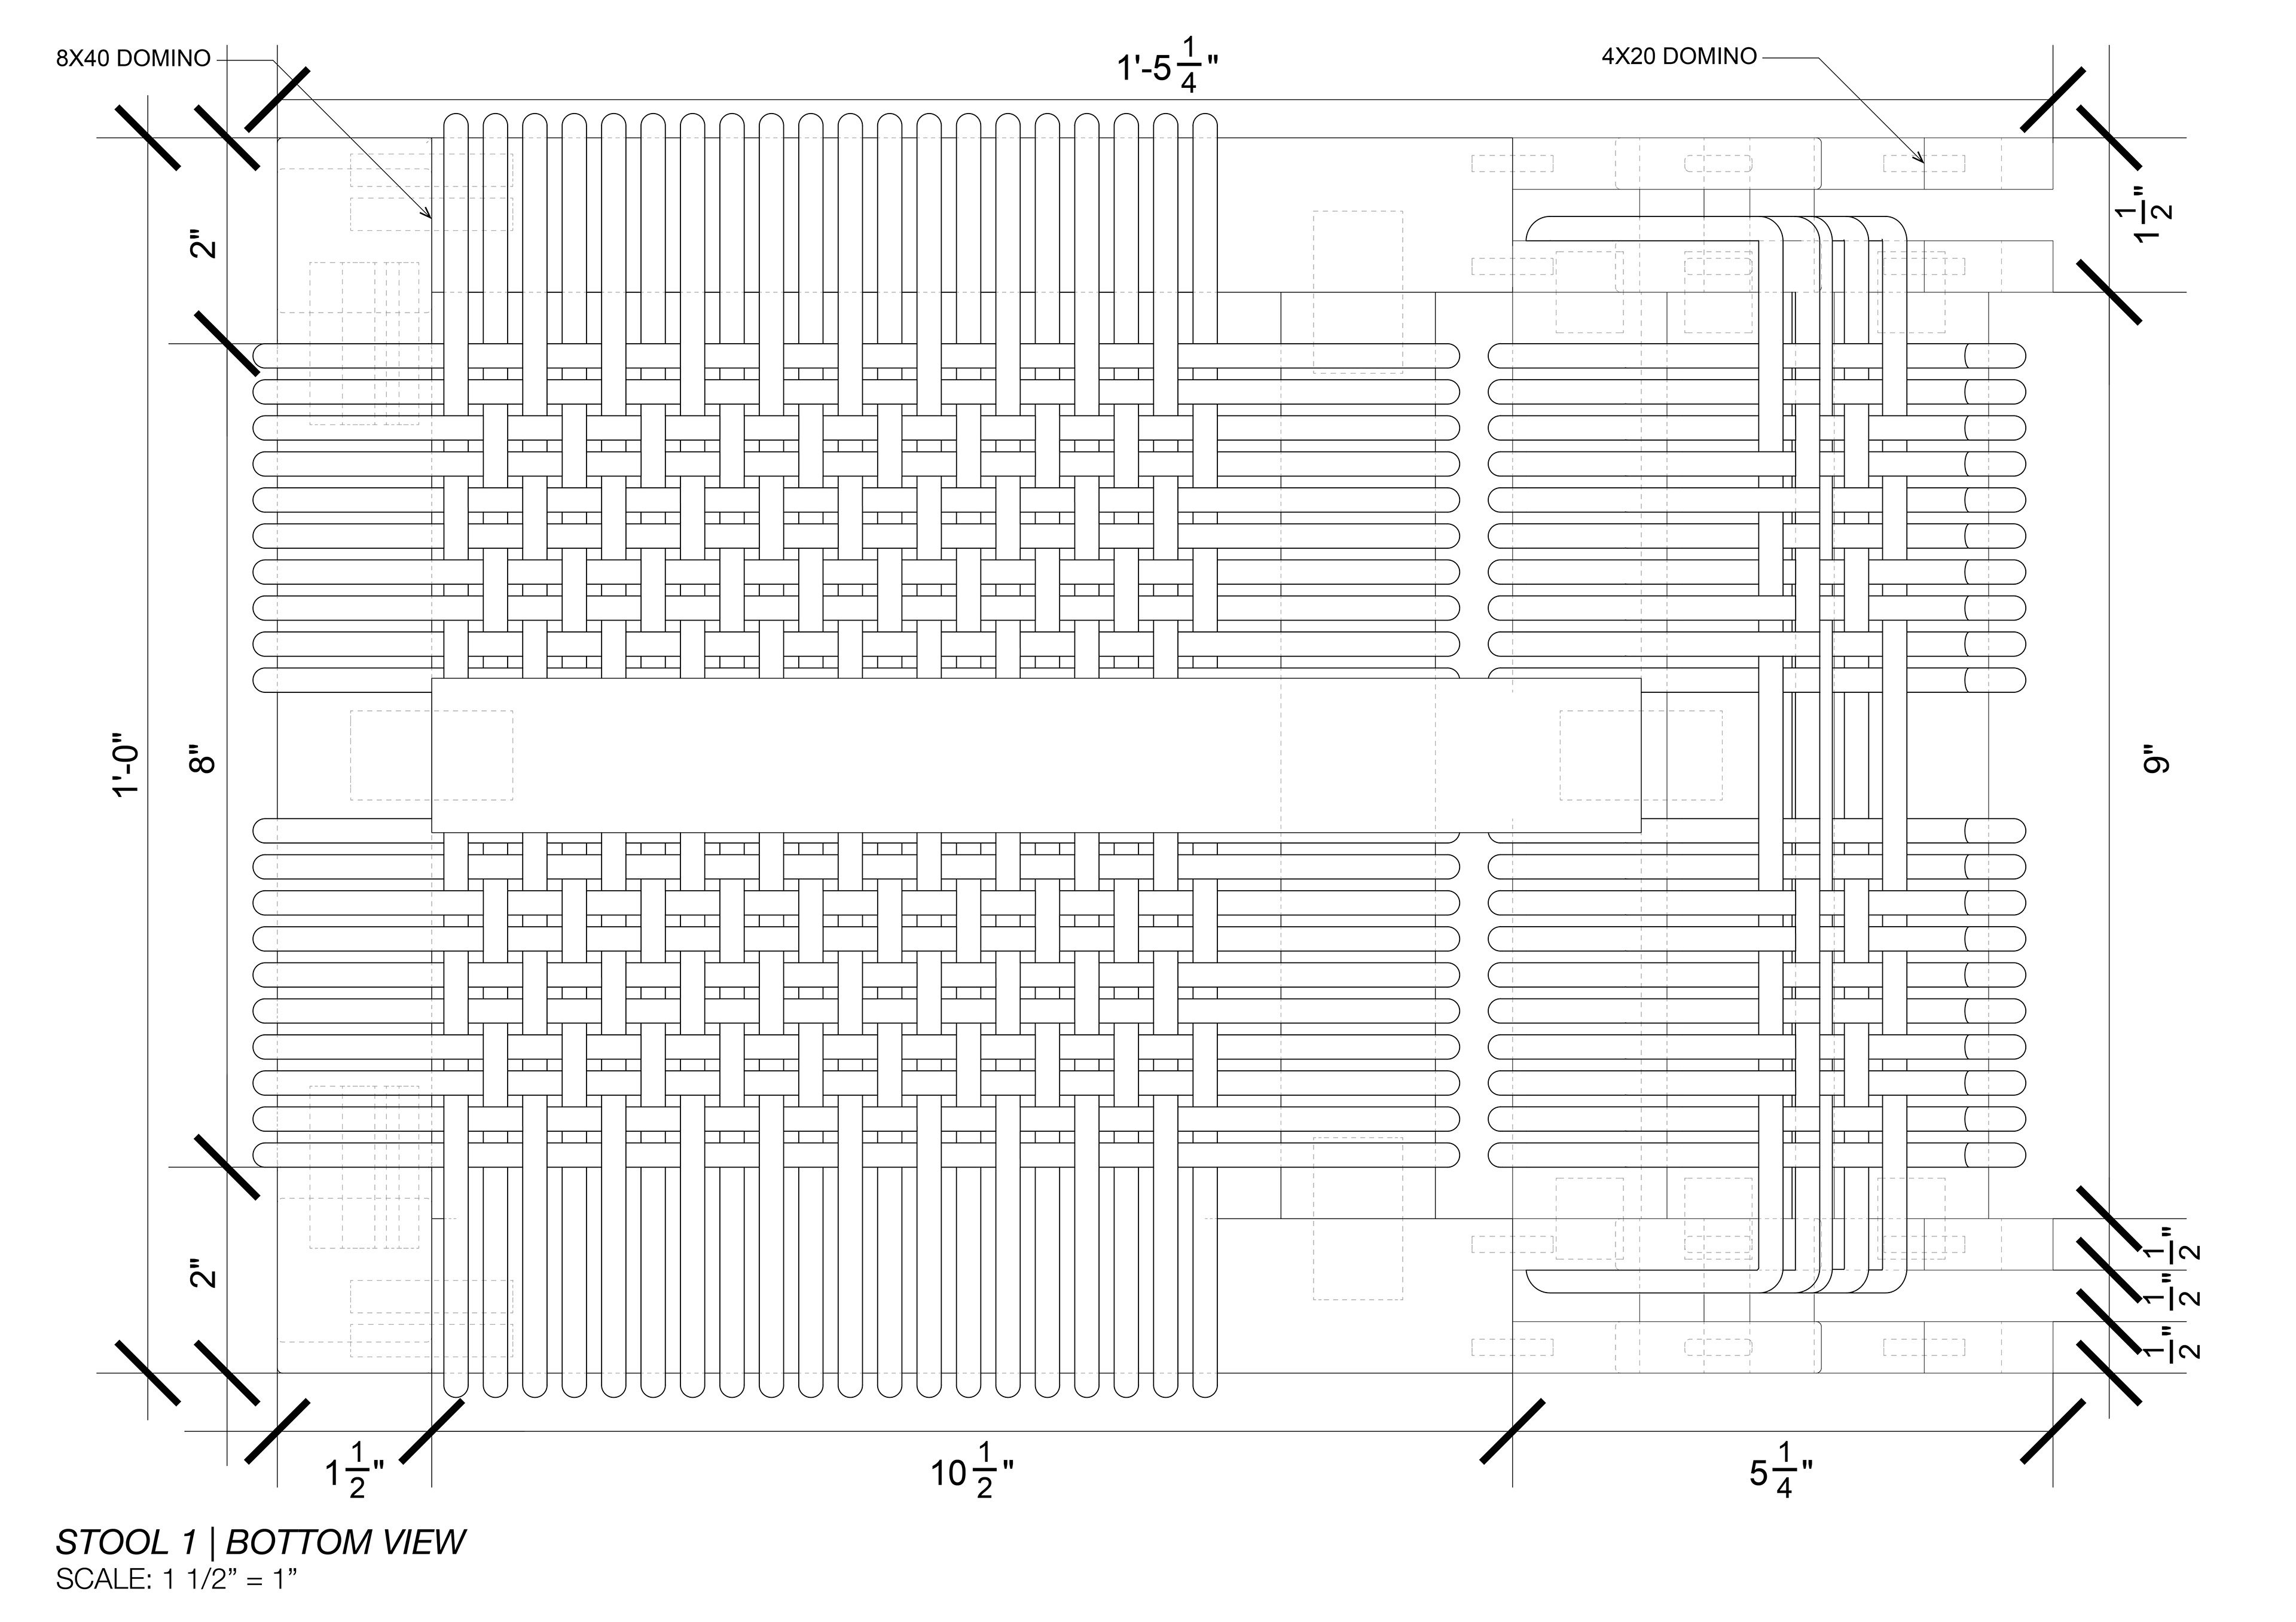
Bottom View
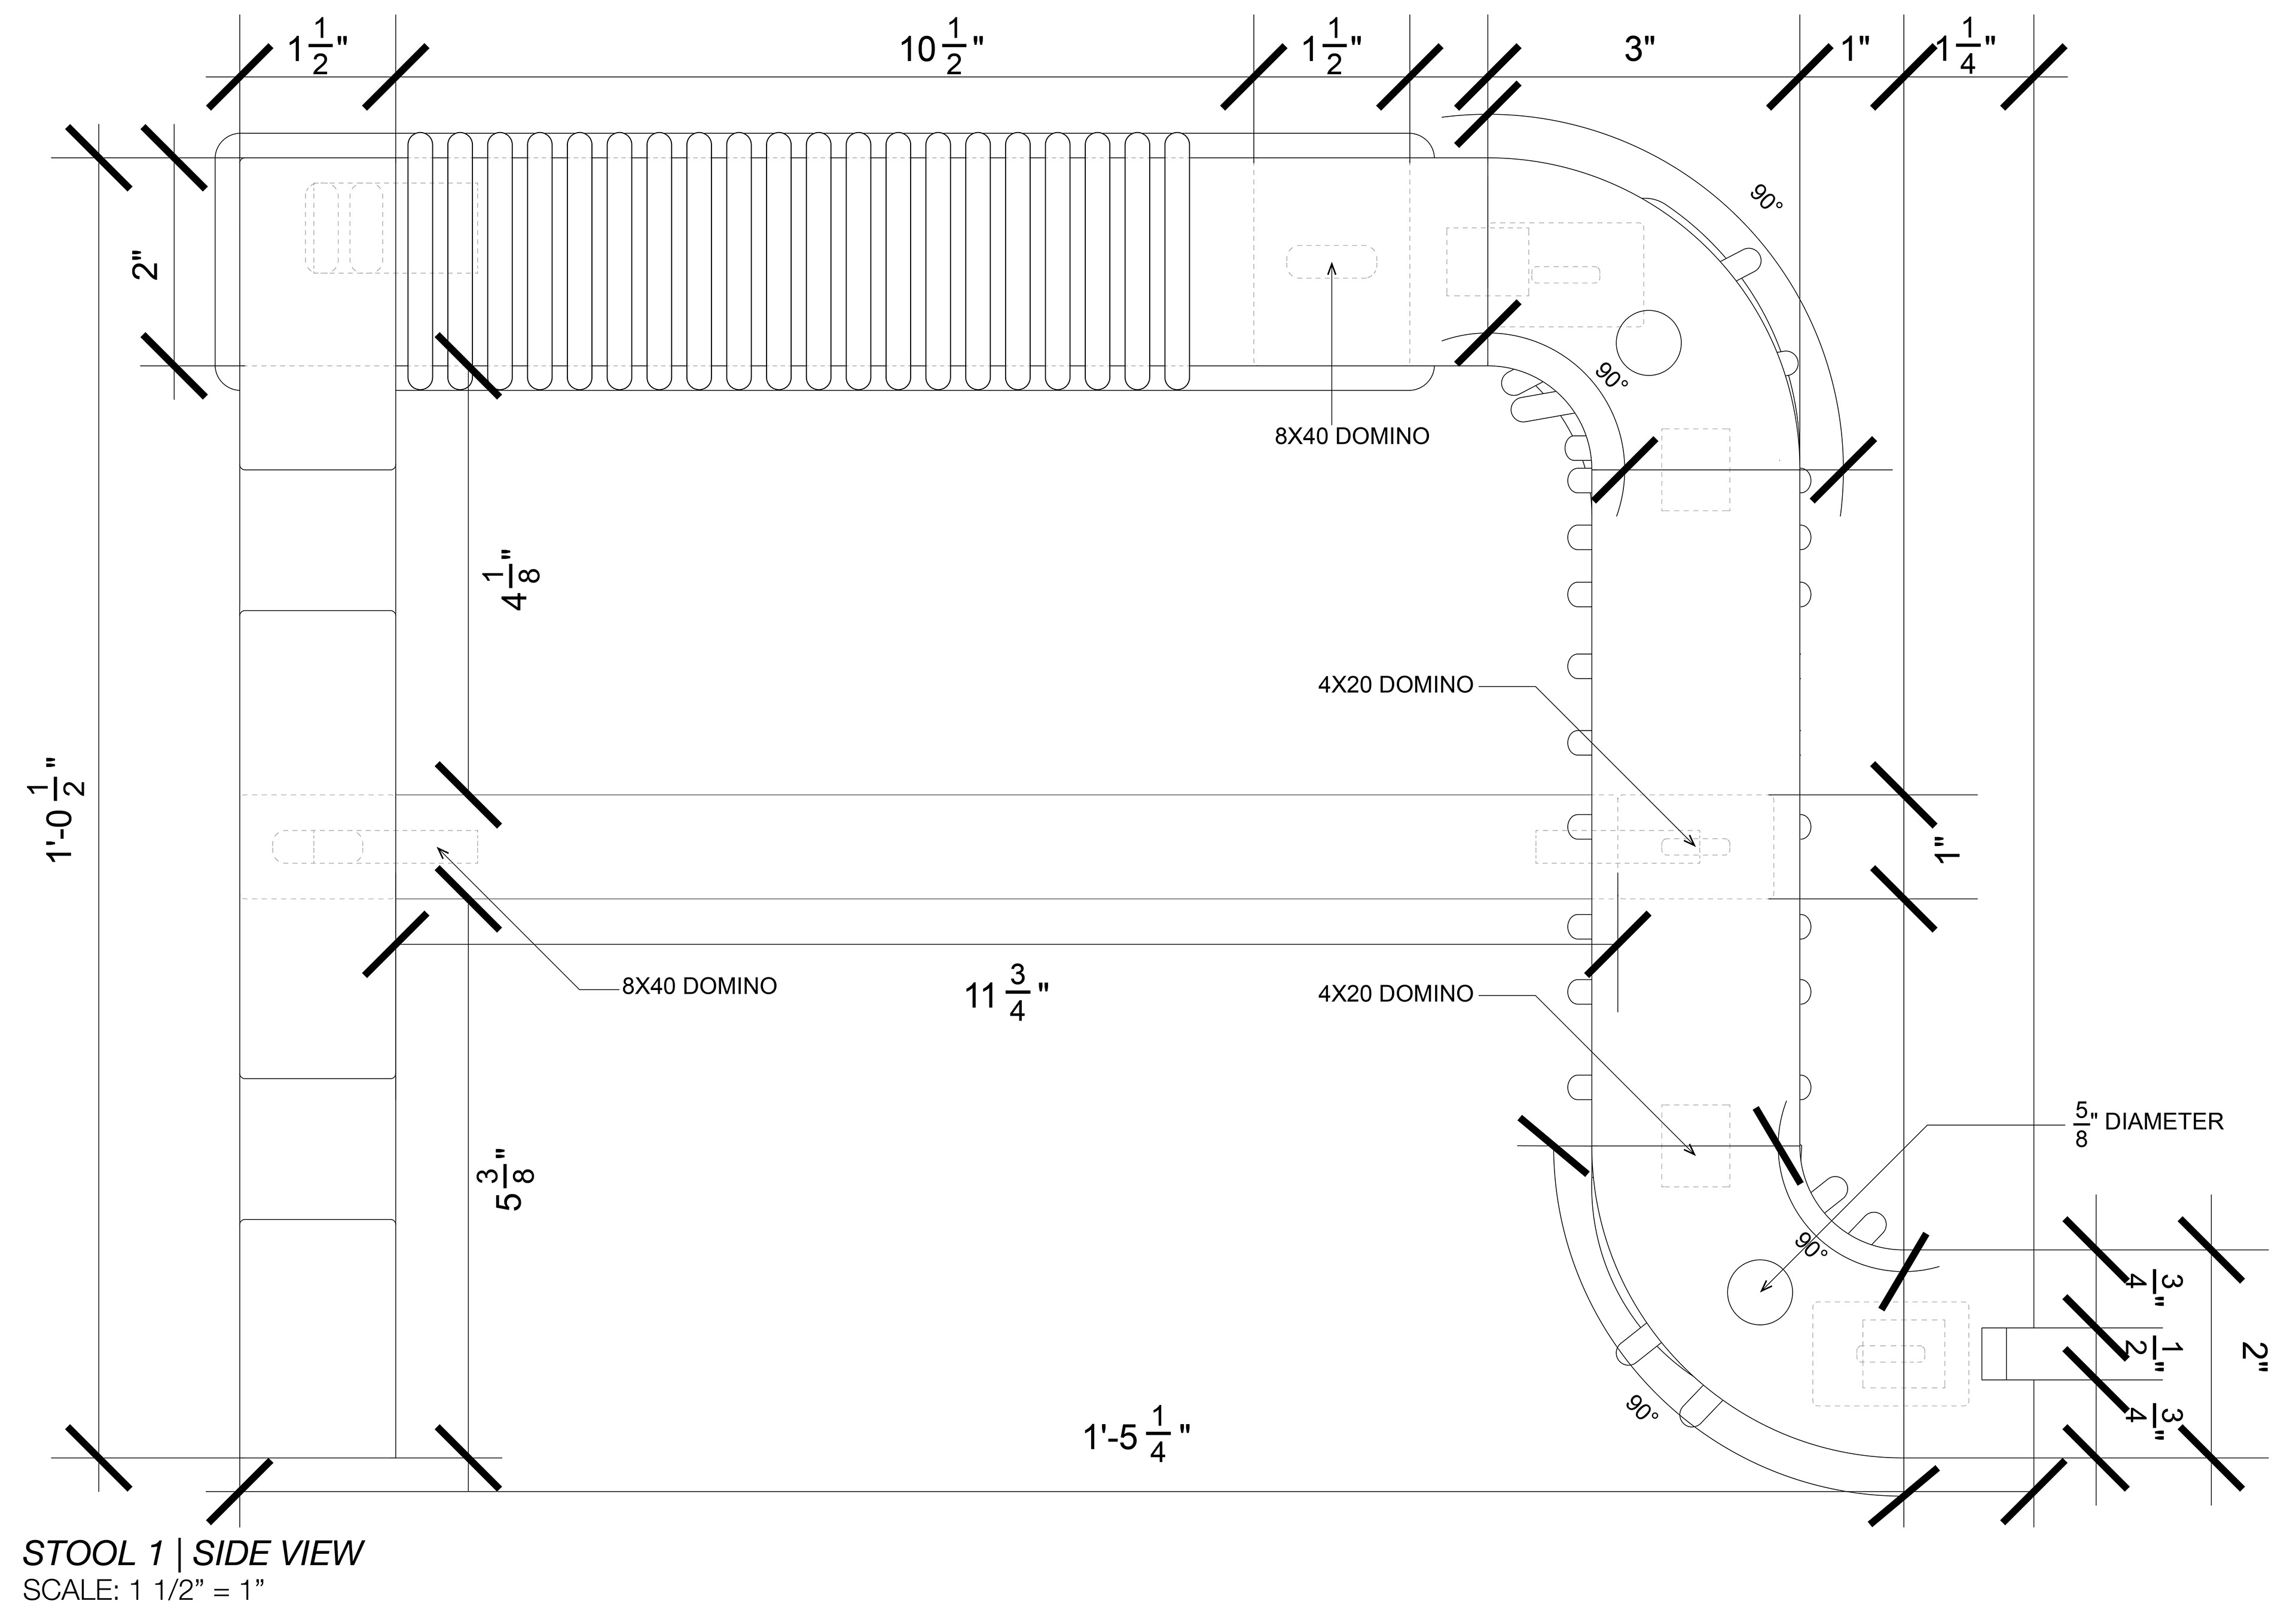
Side View
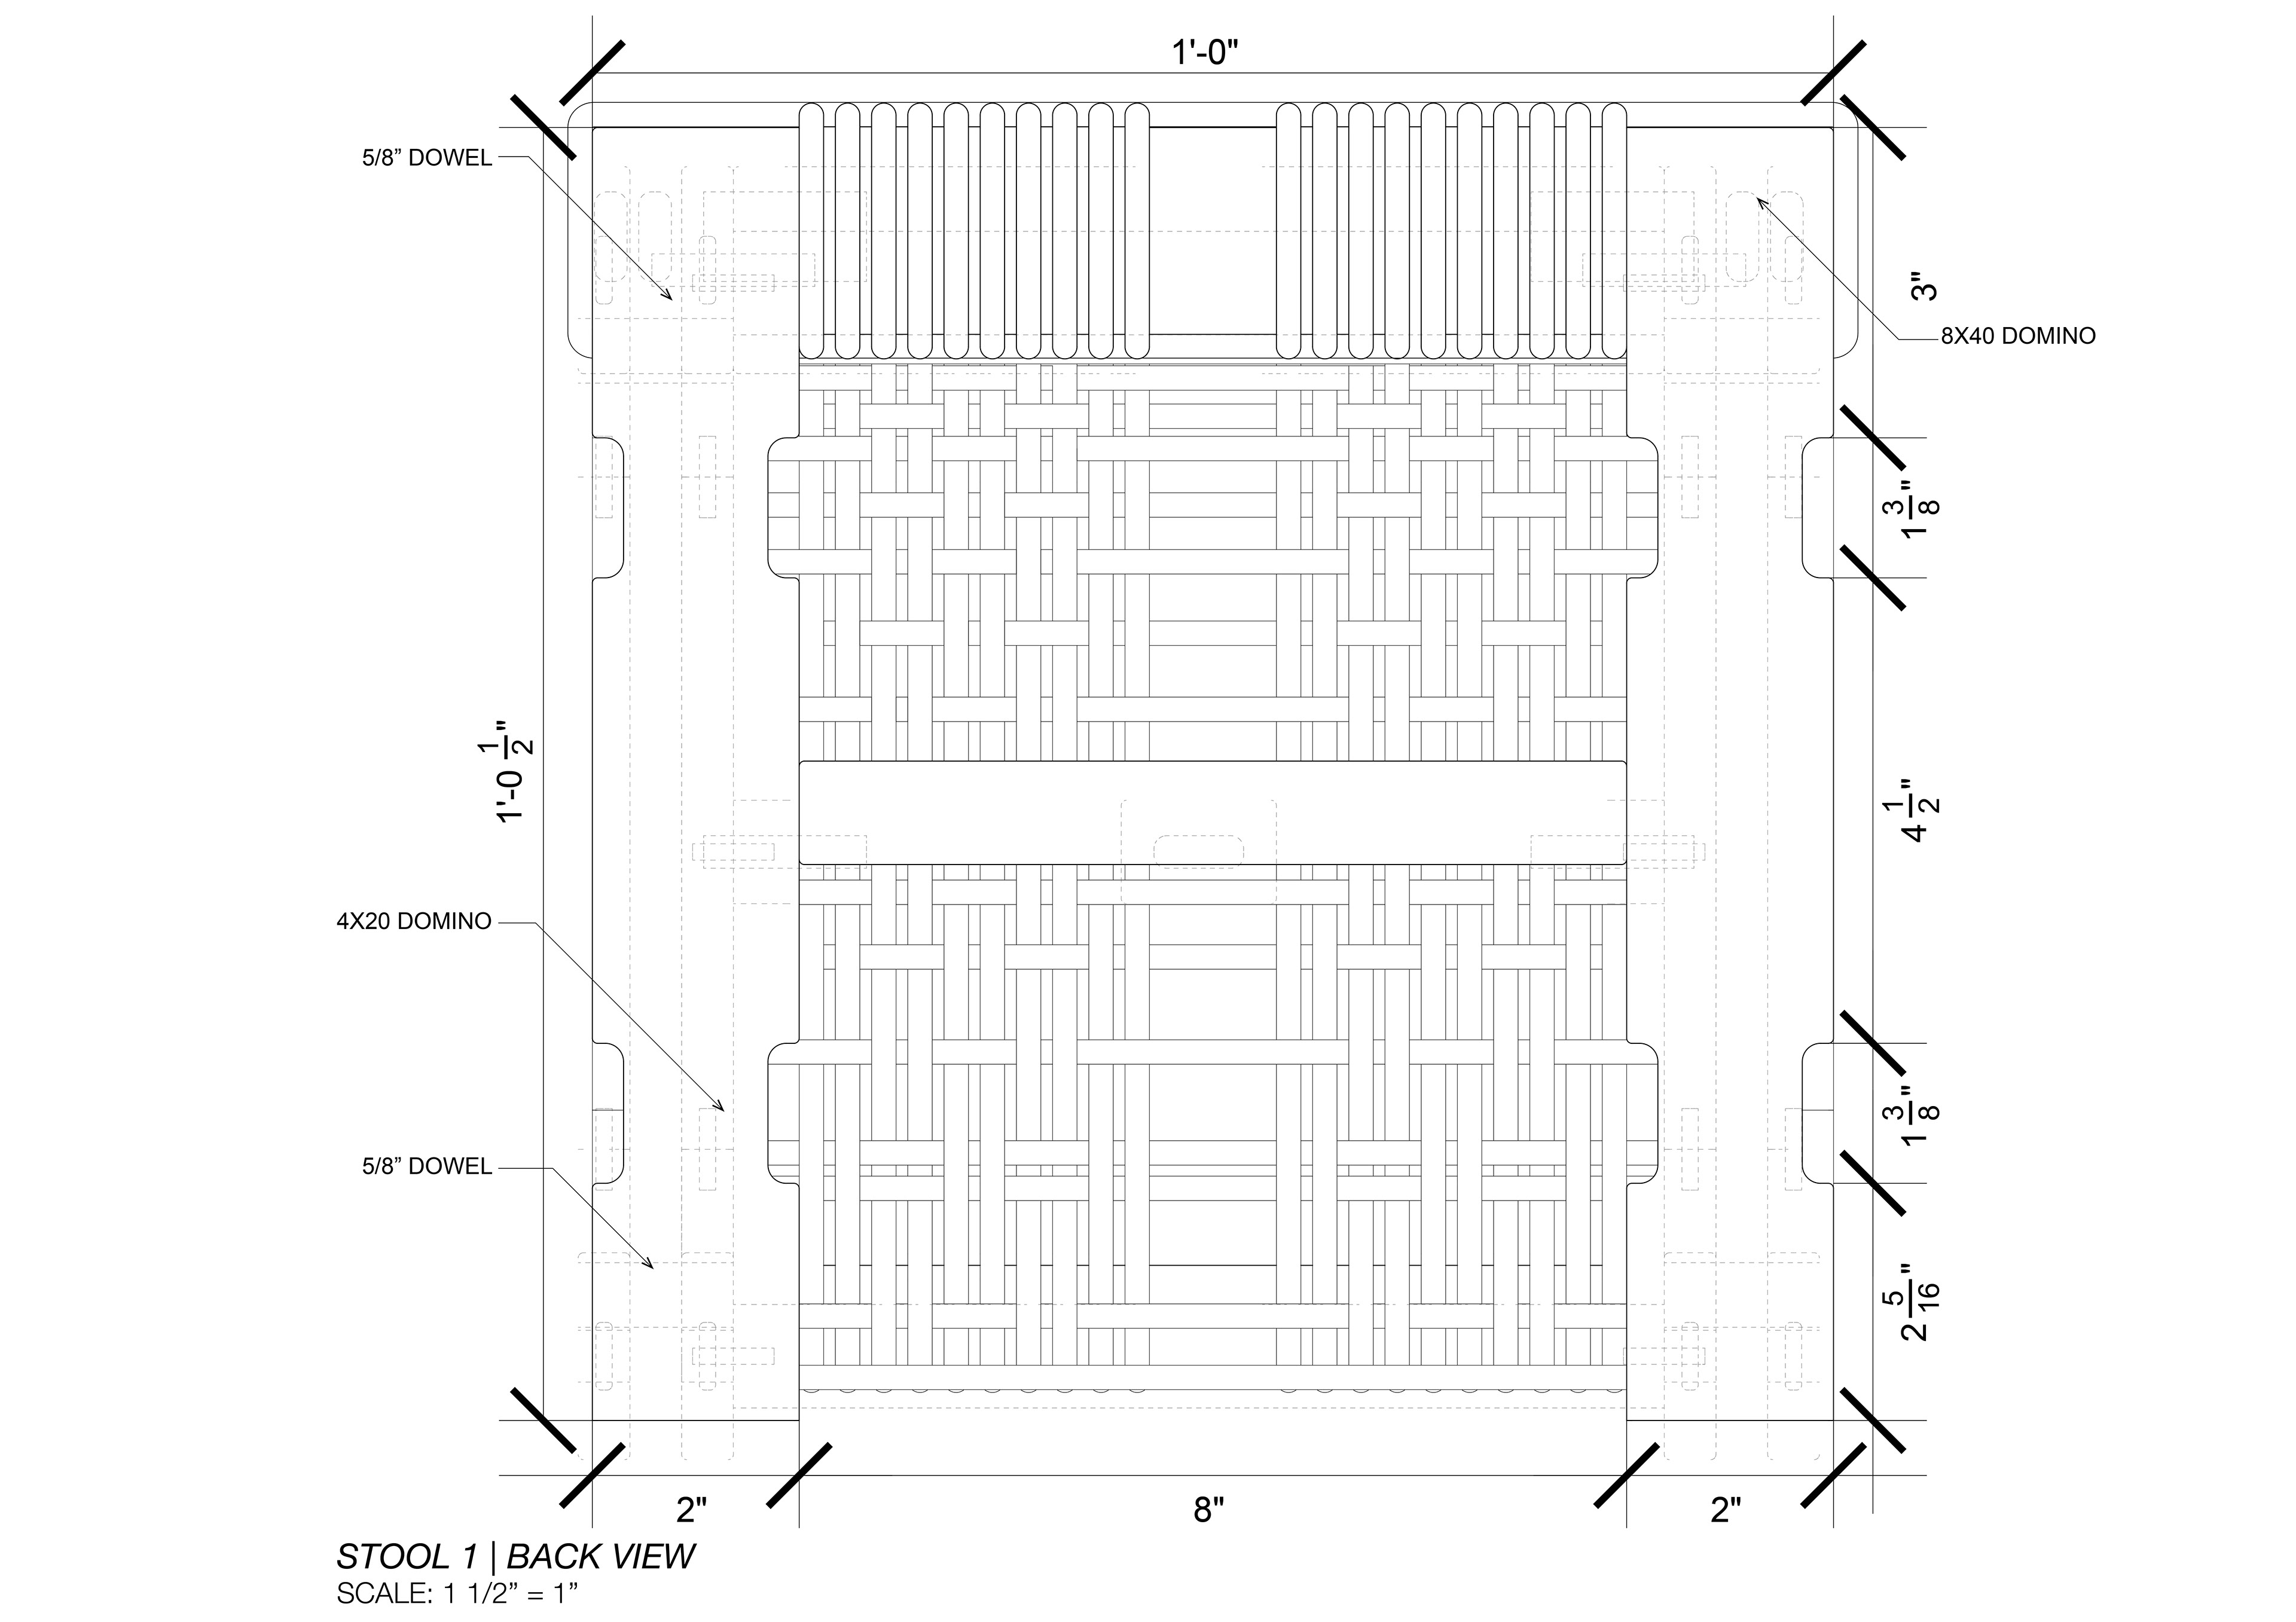
Back View
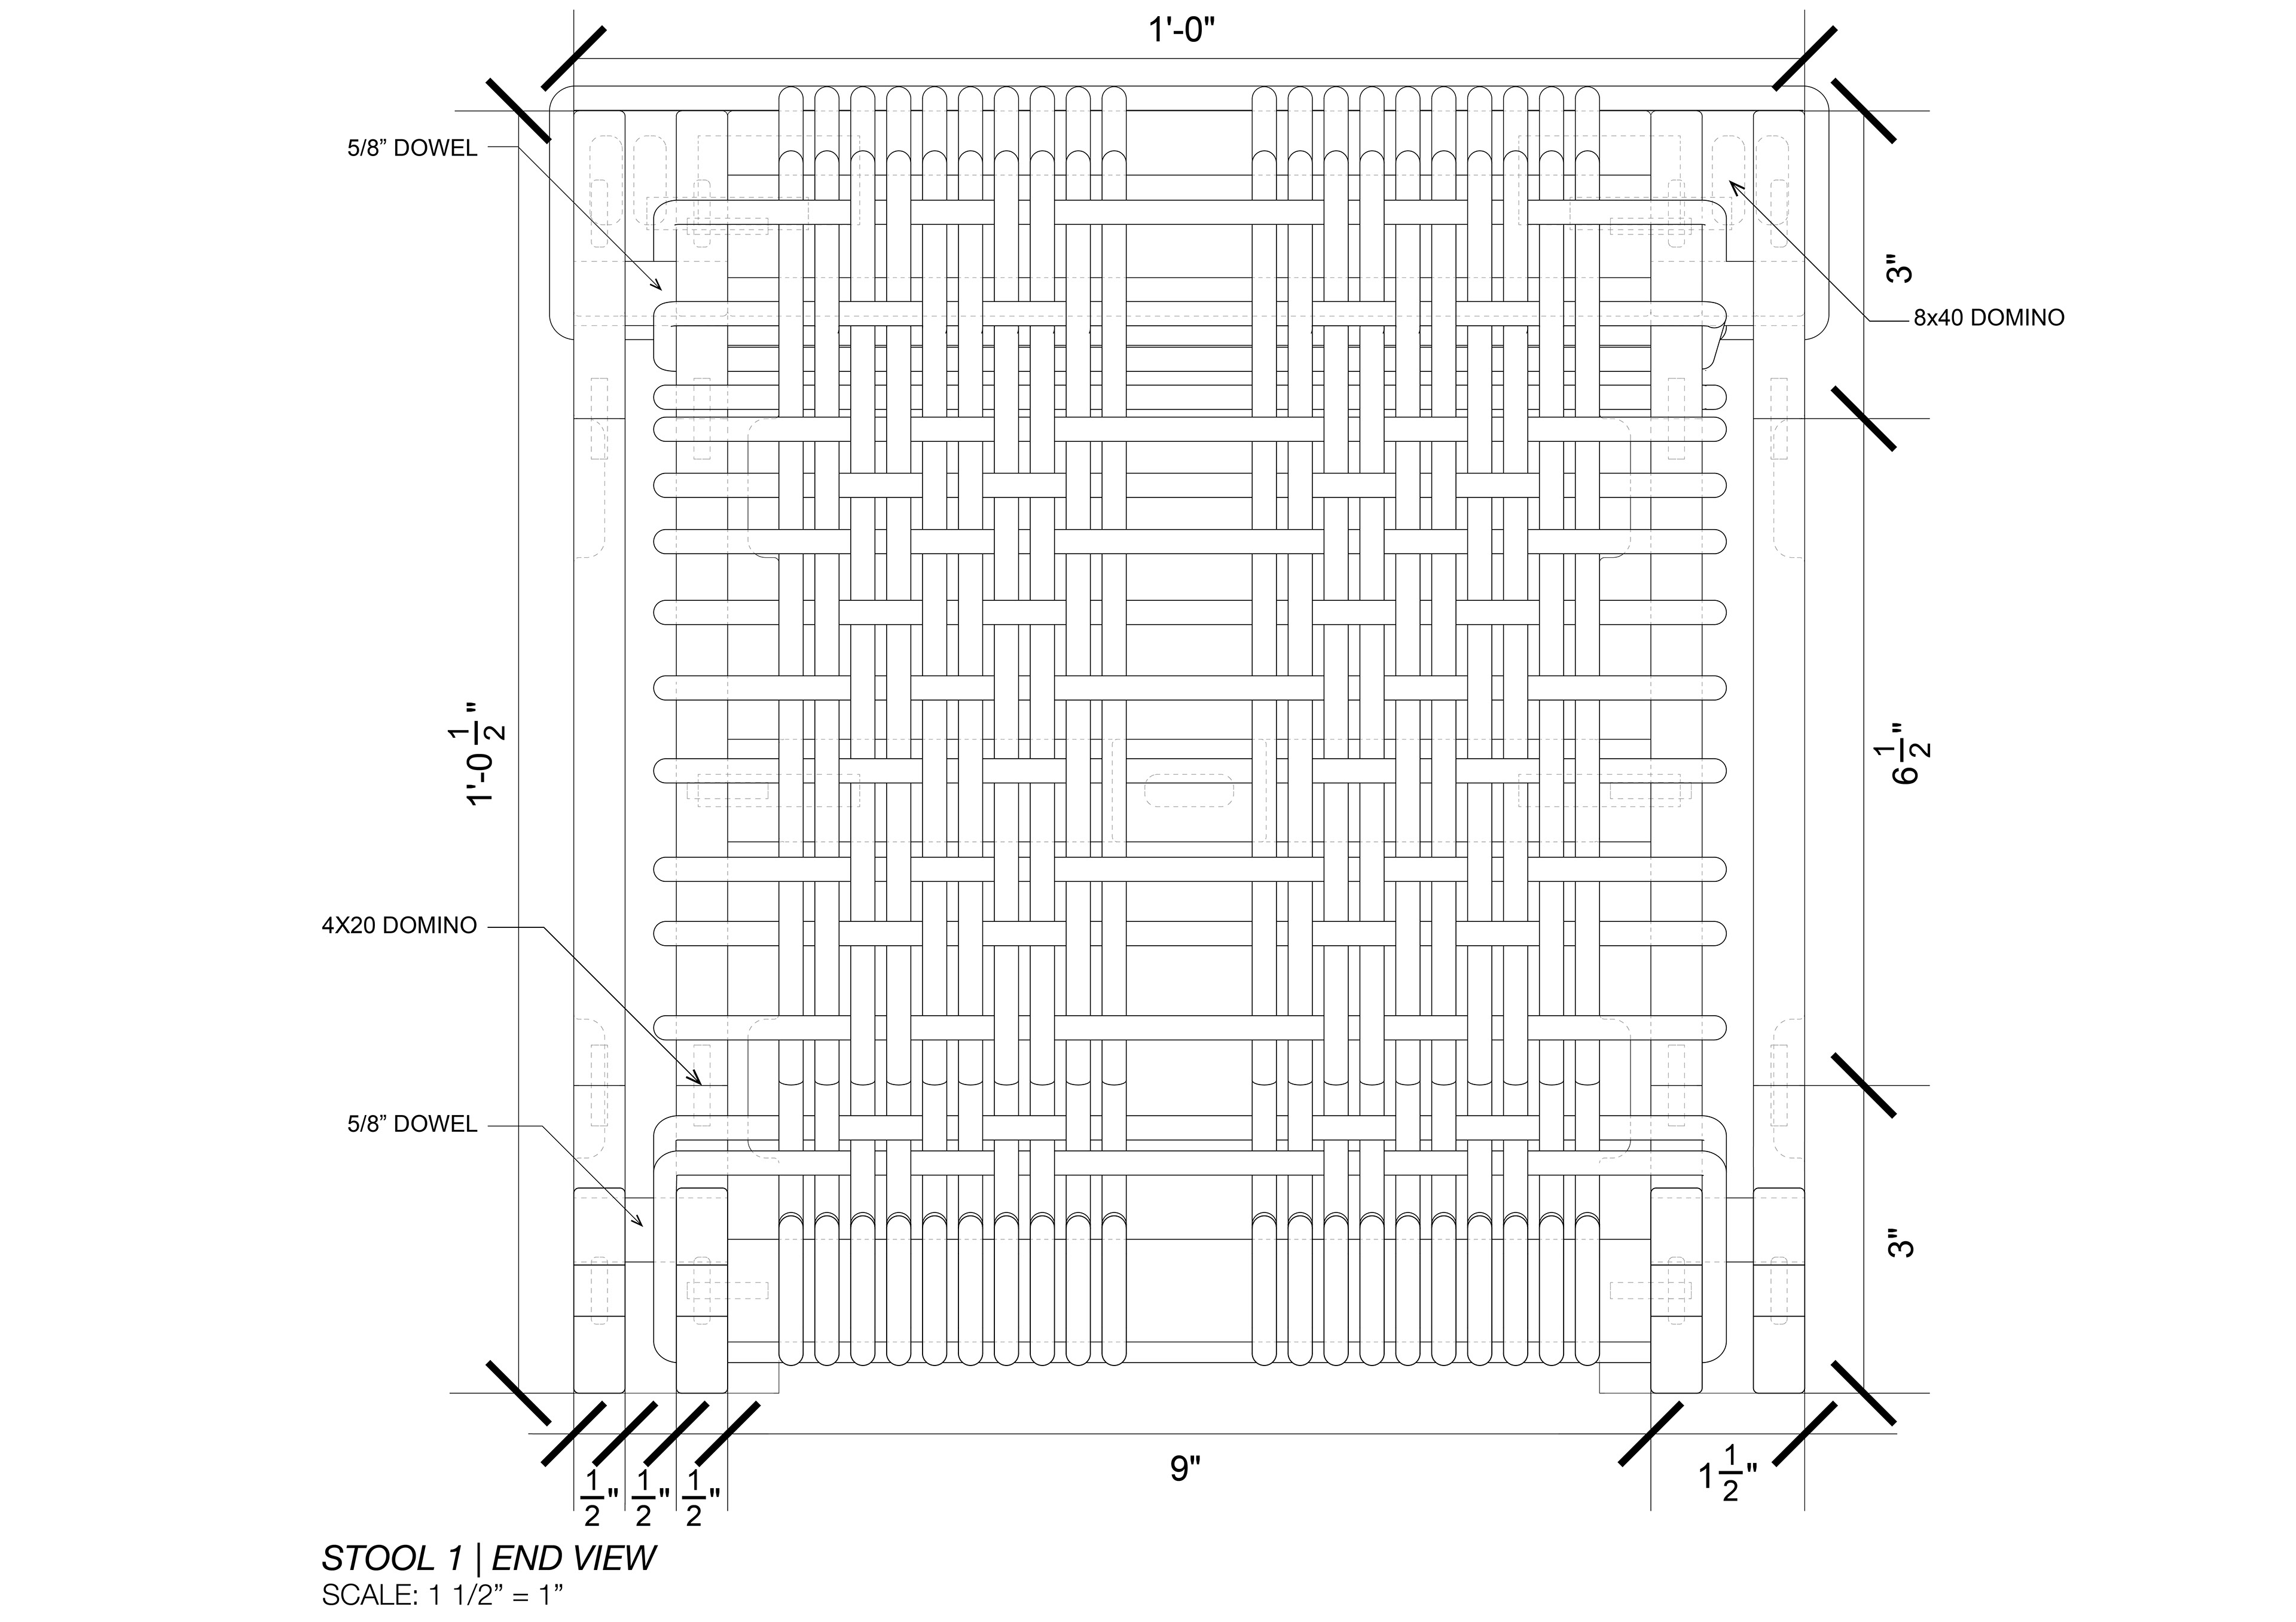
End View
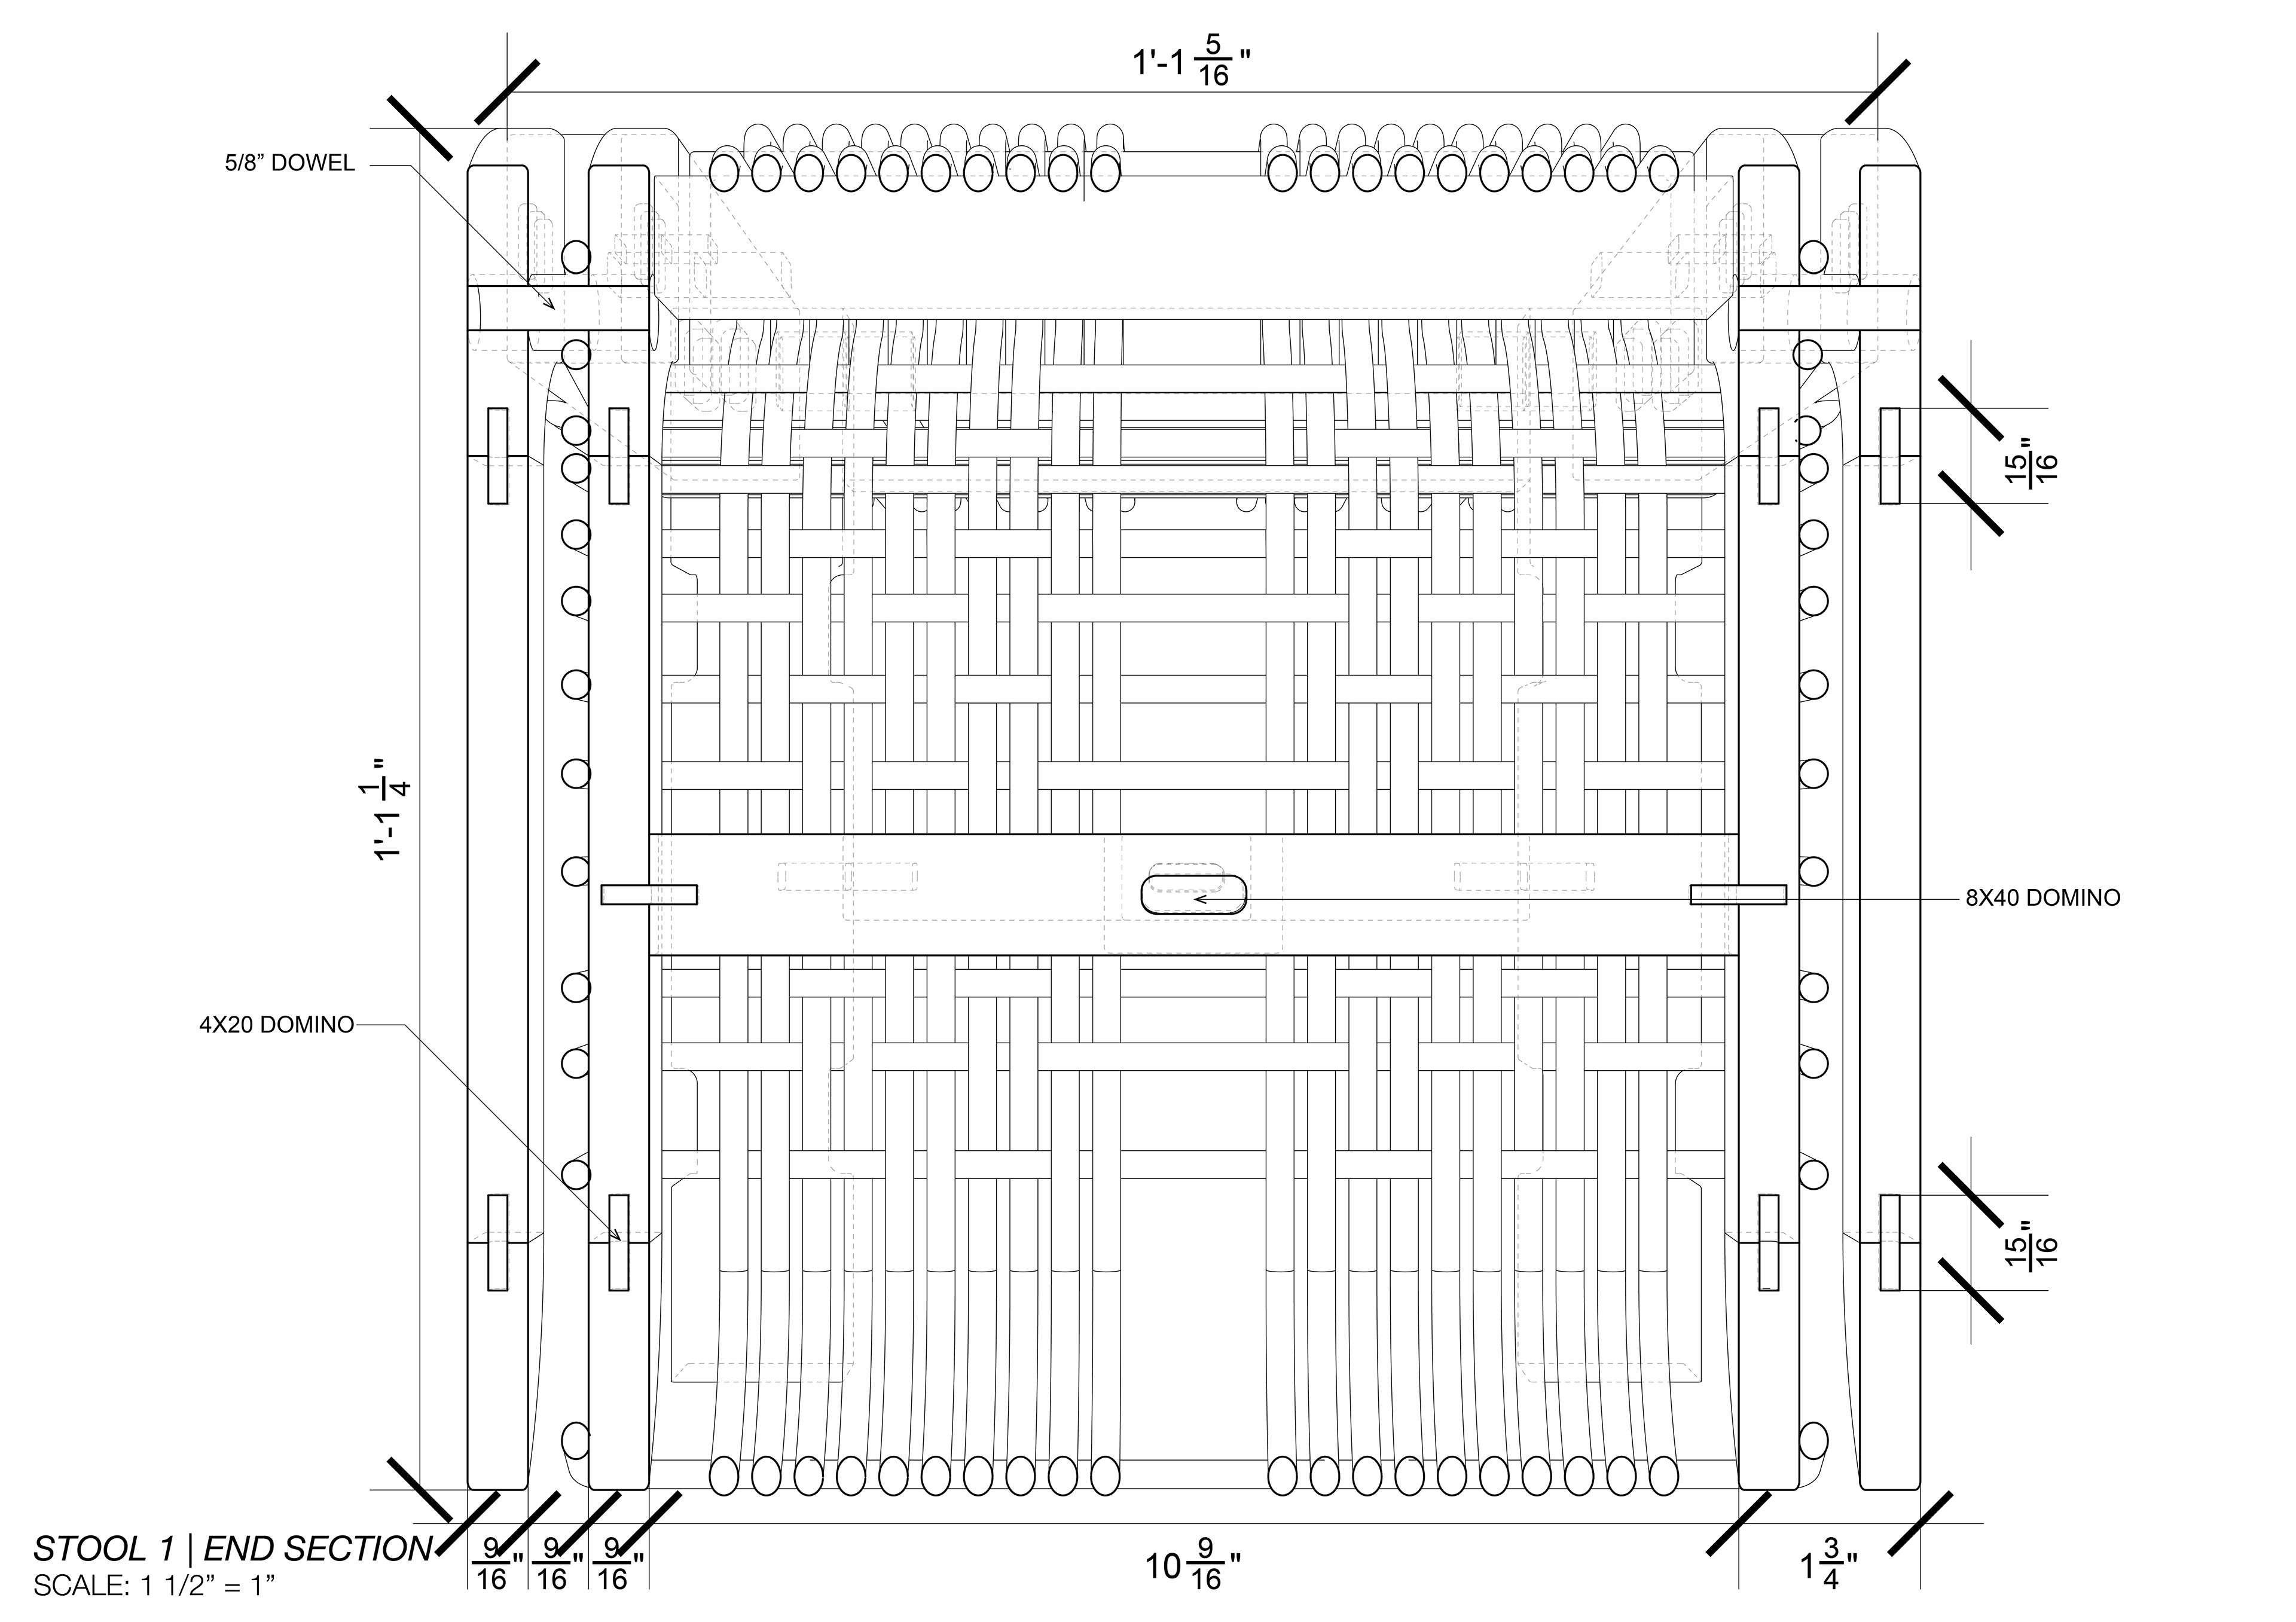
End Section Perspective View
Fabrication Process
Material Selection
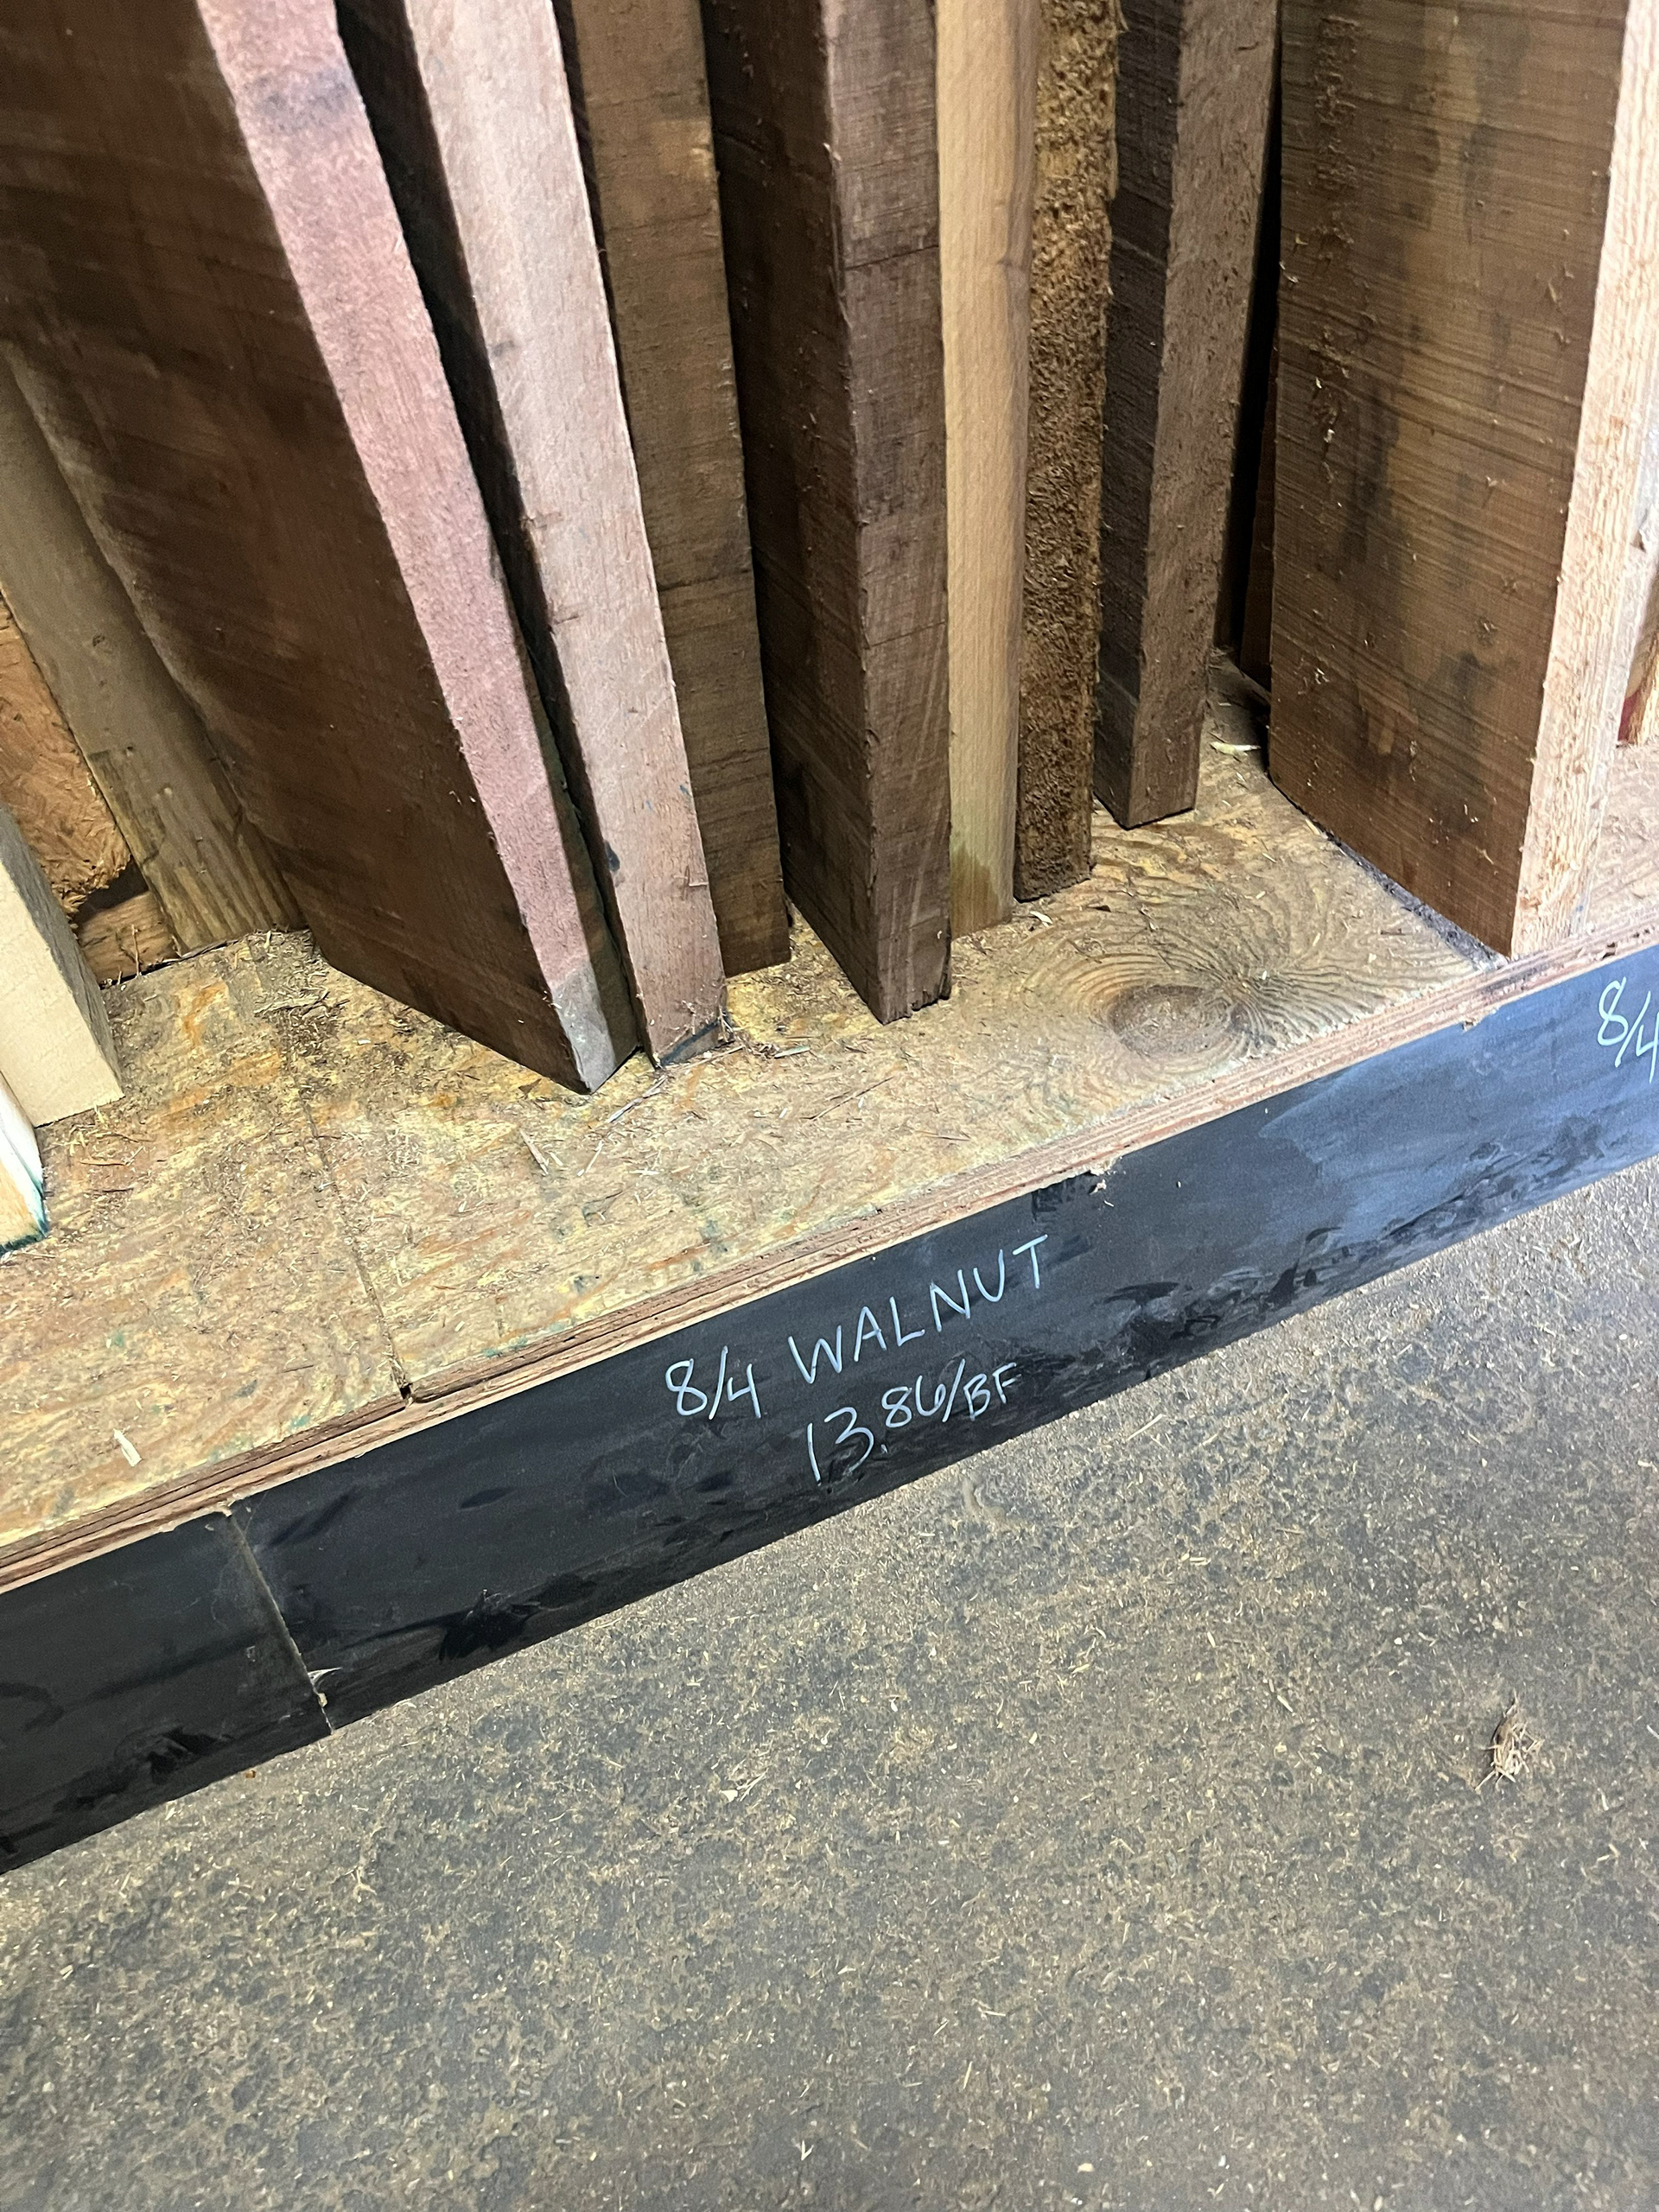
Image 1 | Selecting Walnut 8/4 Boards for the Main Structure of the Stools
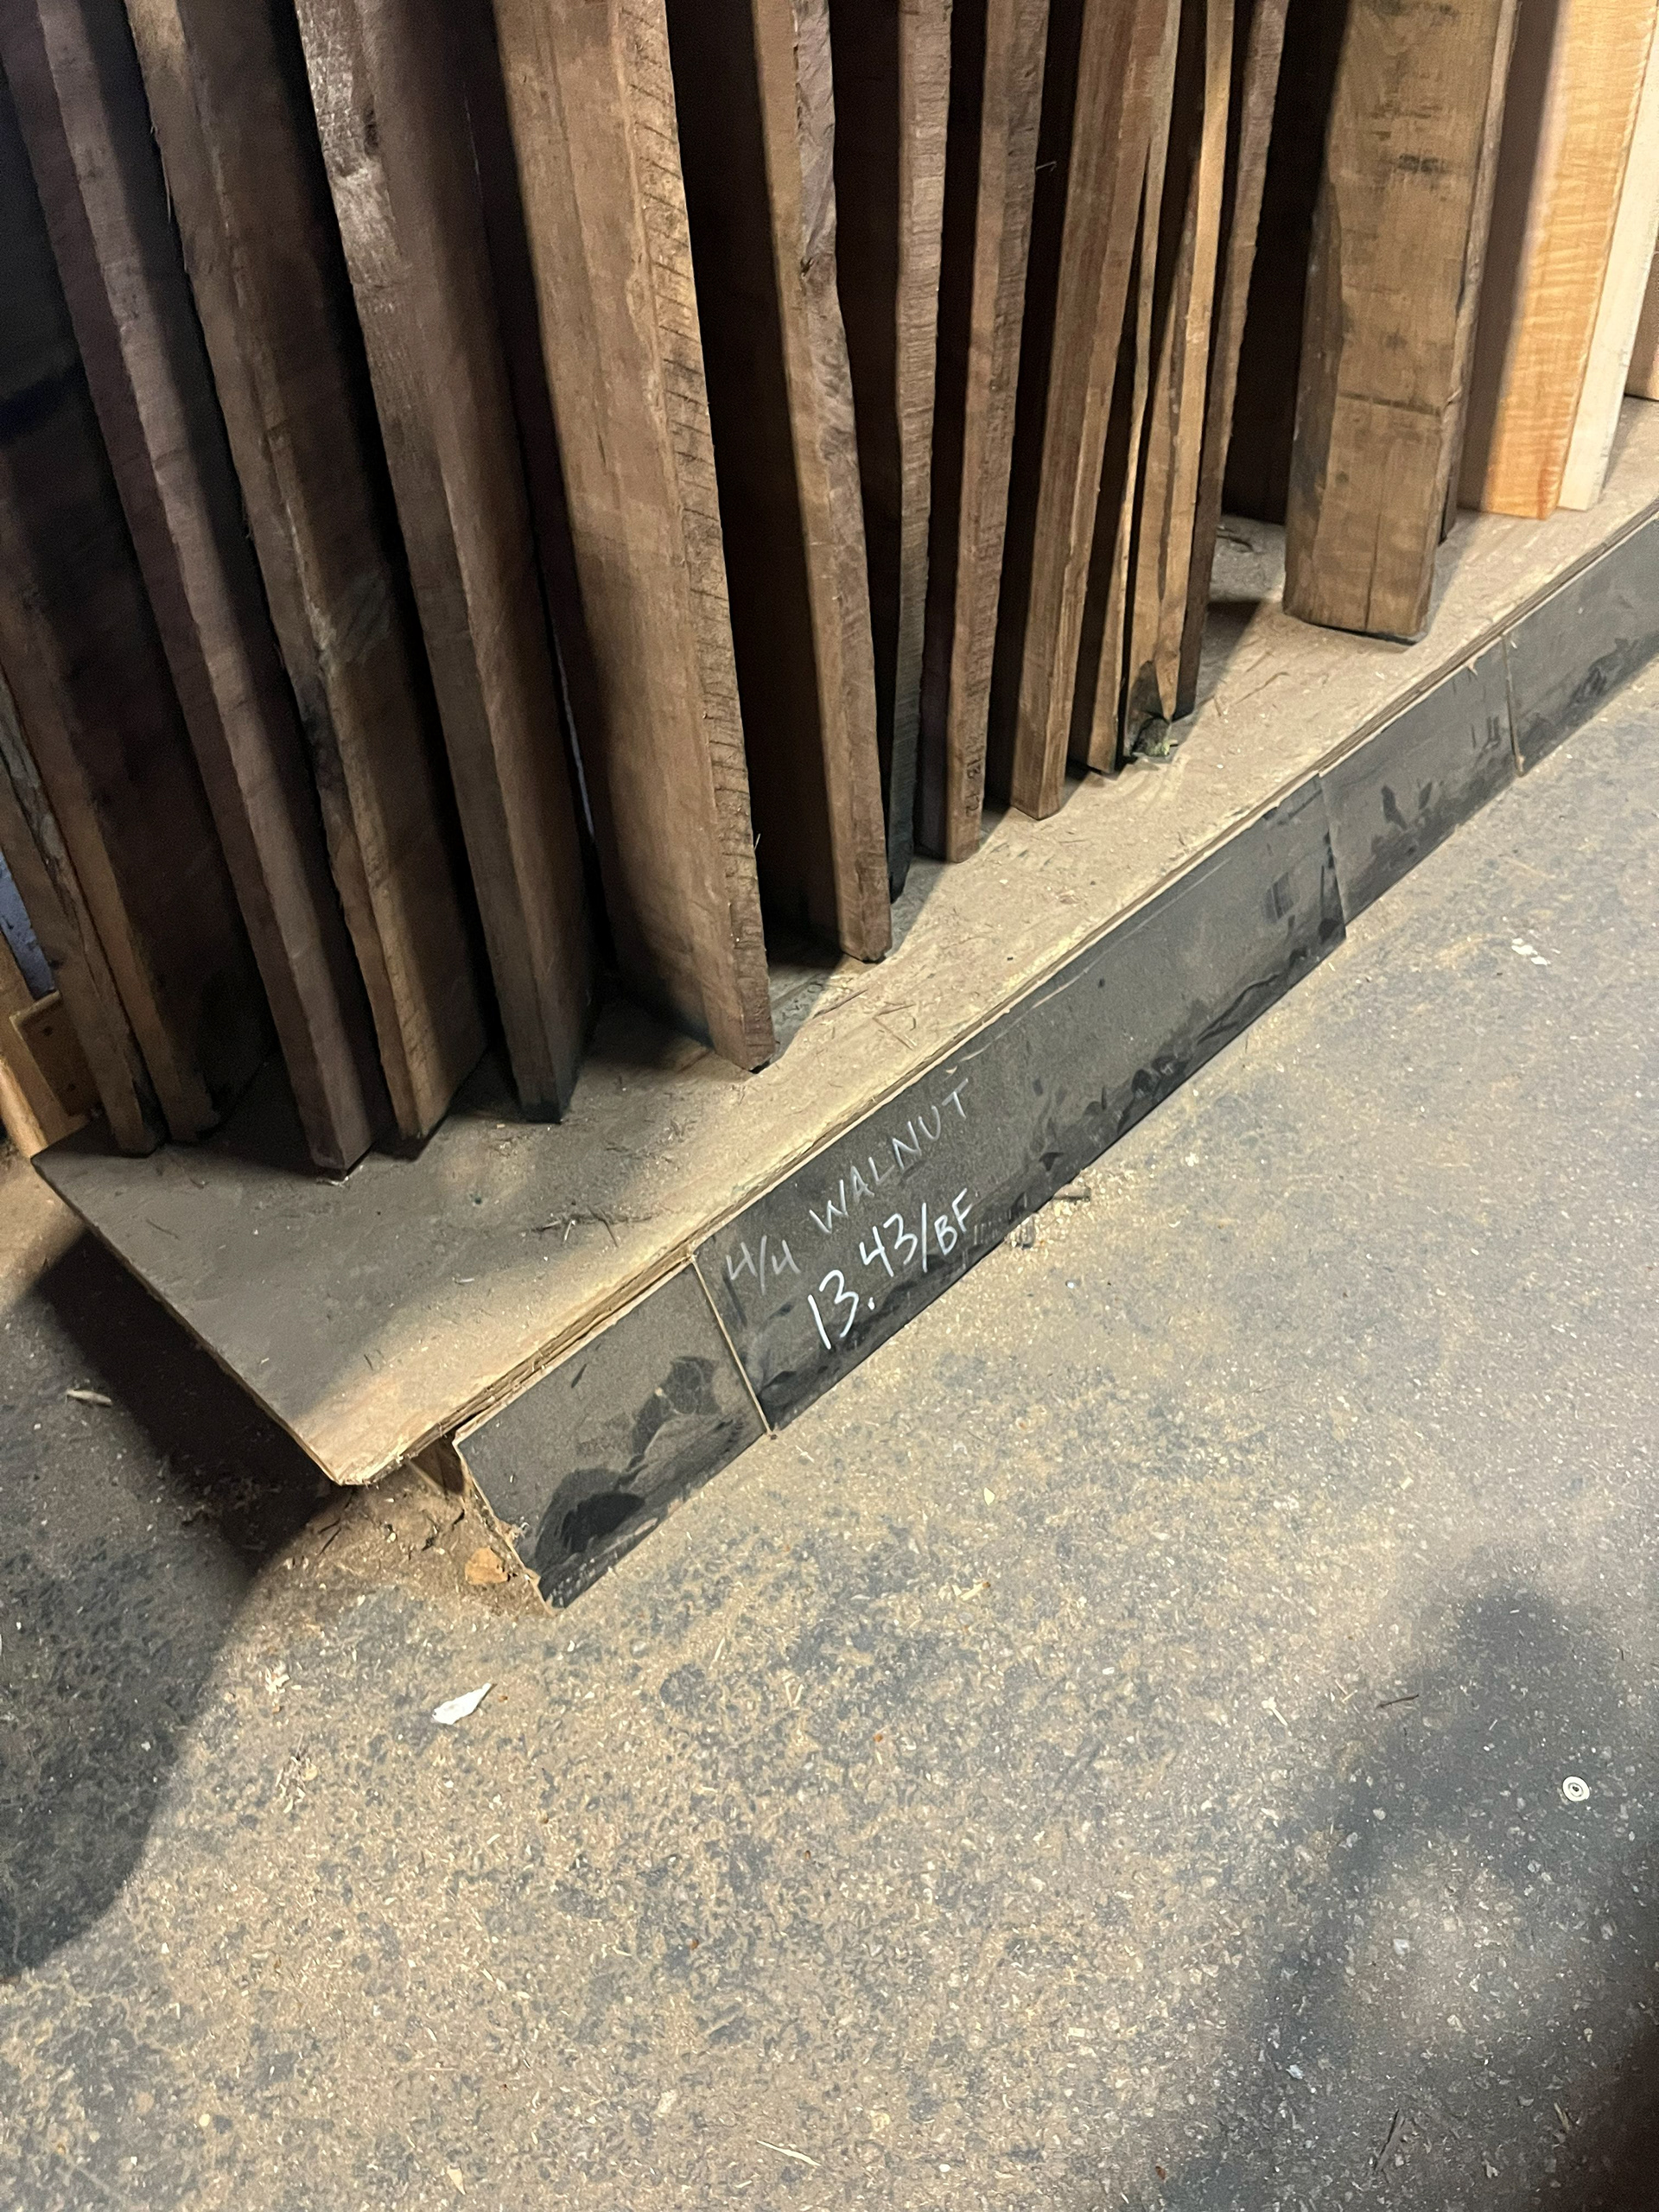
Image 2 | Selecting Walnut 4/4 Boards for the S-curve Leg Pieces of the Stools

Image 3 | Transporting 8/4 & 4/4 Walnut Boards to the FabLab
Preparing Wood Materials
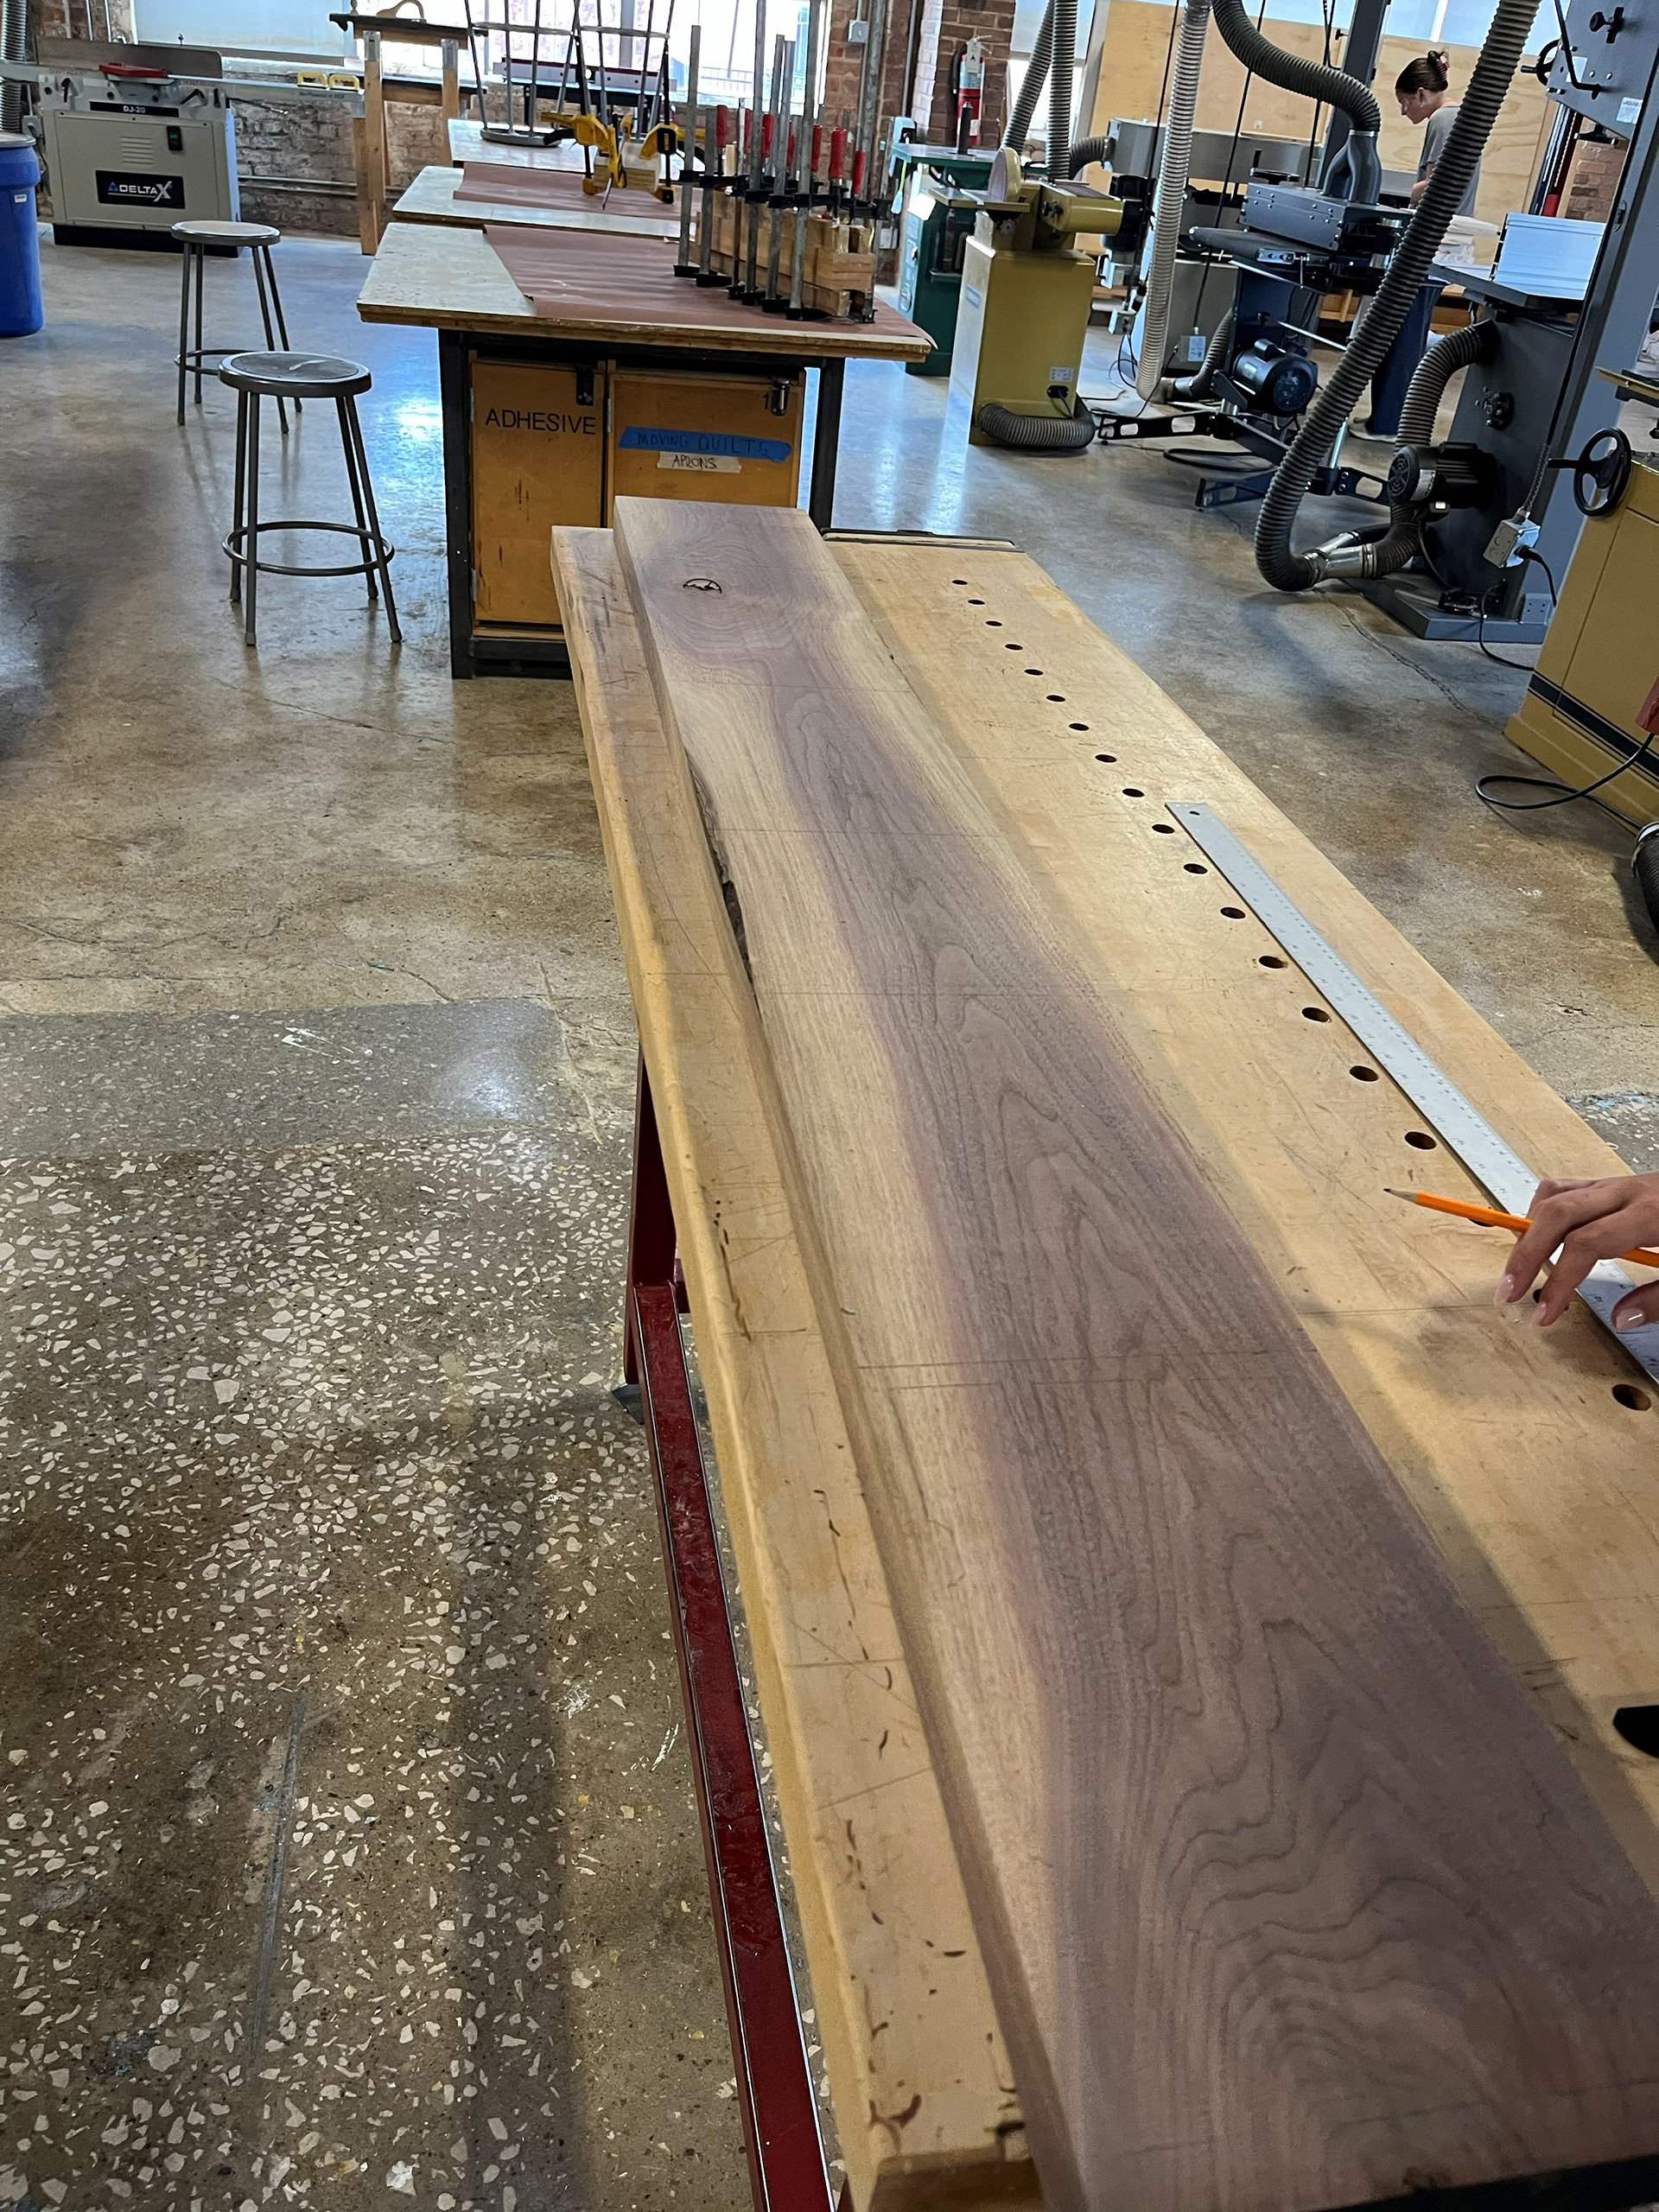
Image 4 | Measuring Sections of the 8/4 Boards to Cut on the Chop Saw after Jointing and Planing All Faces and Edges
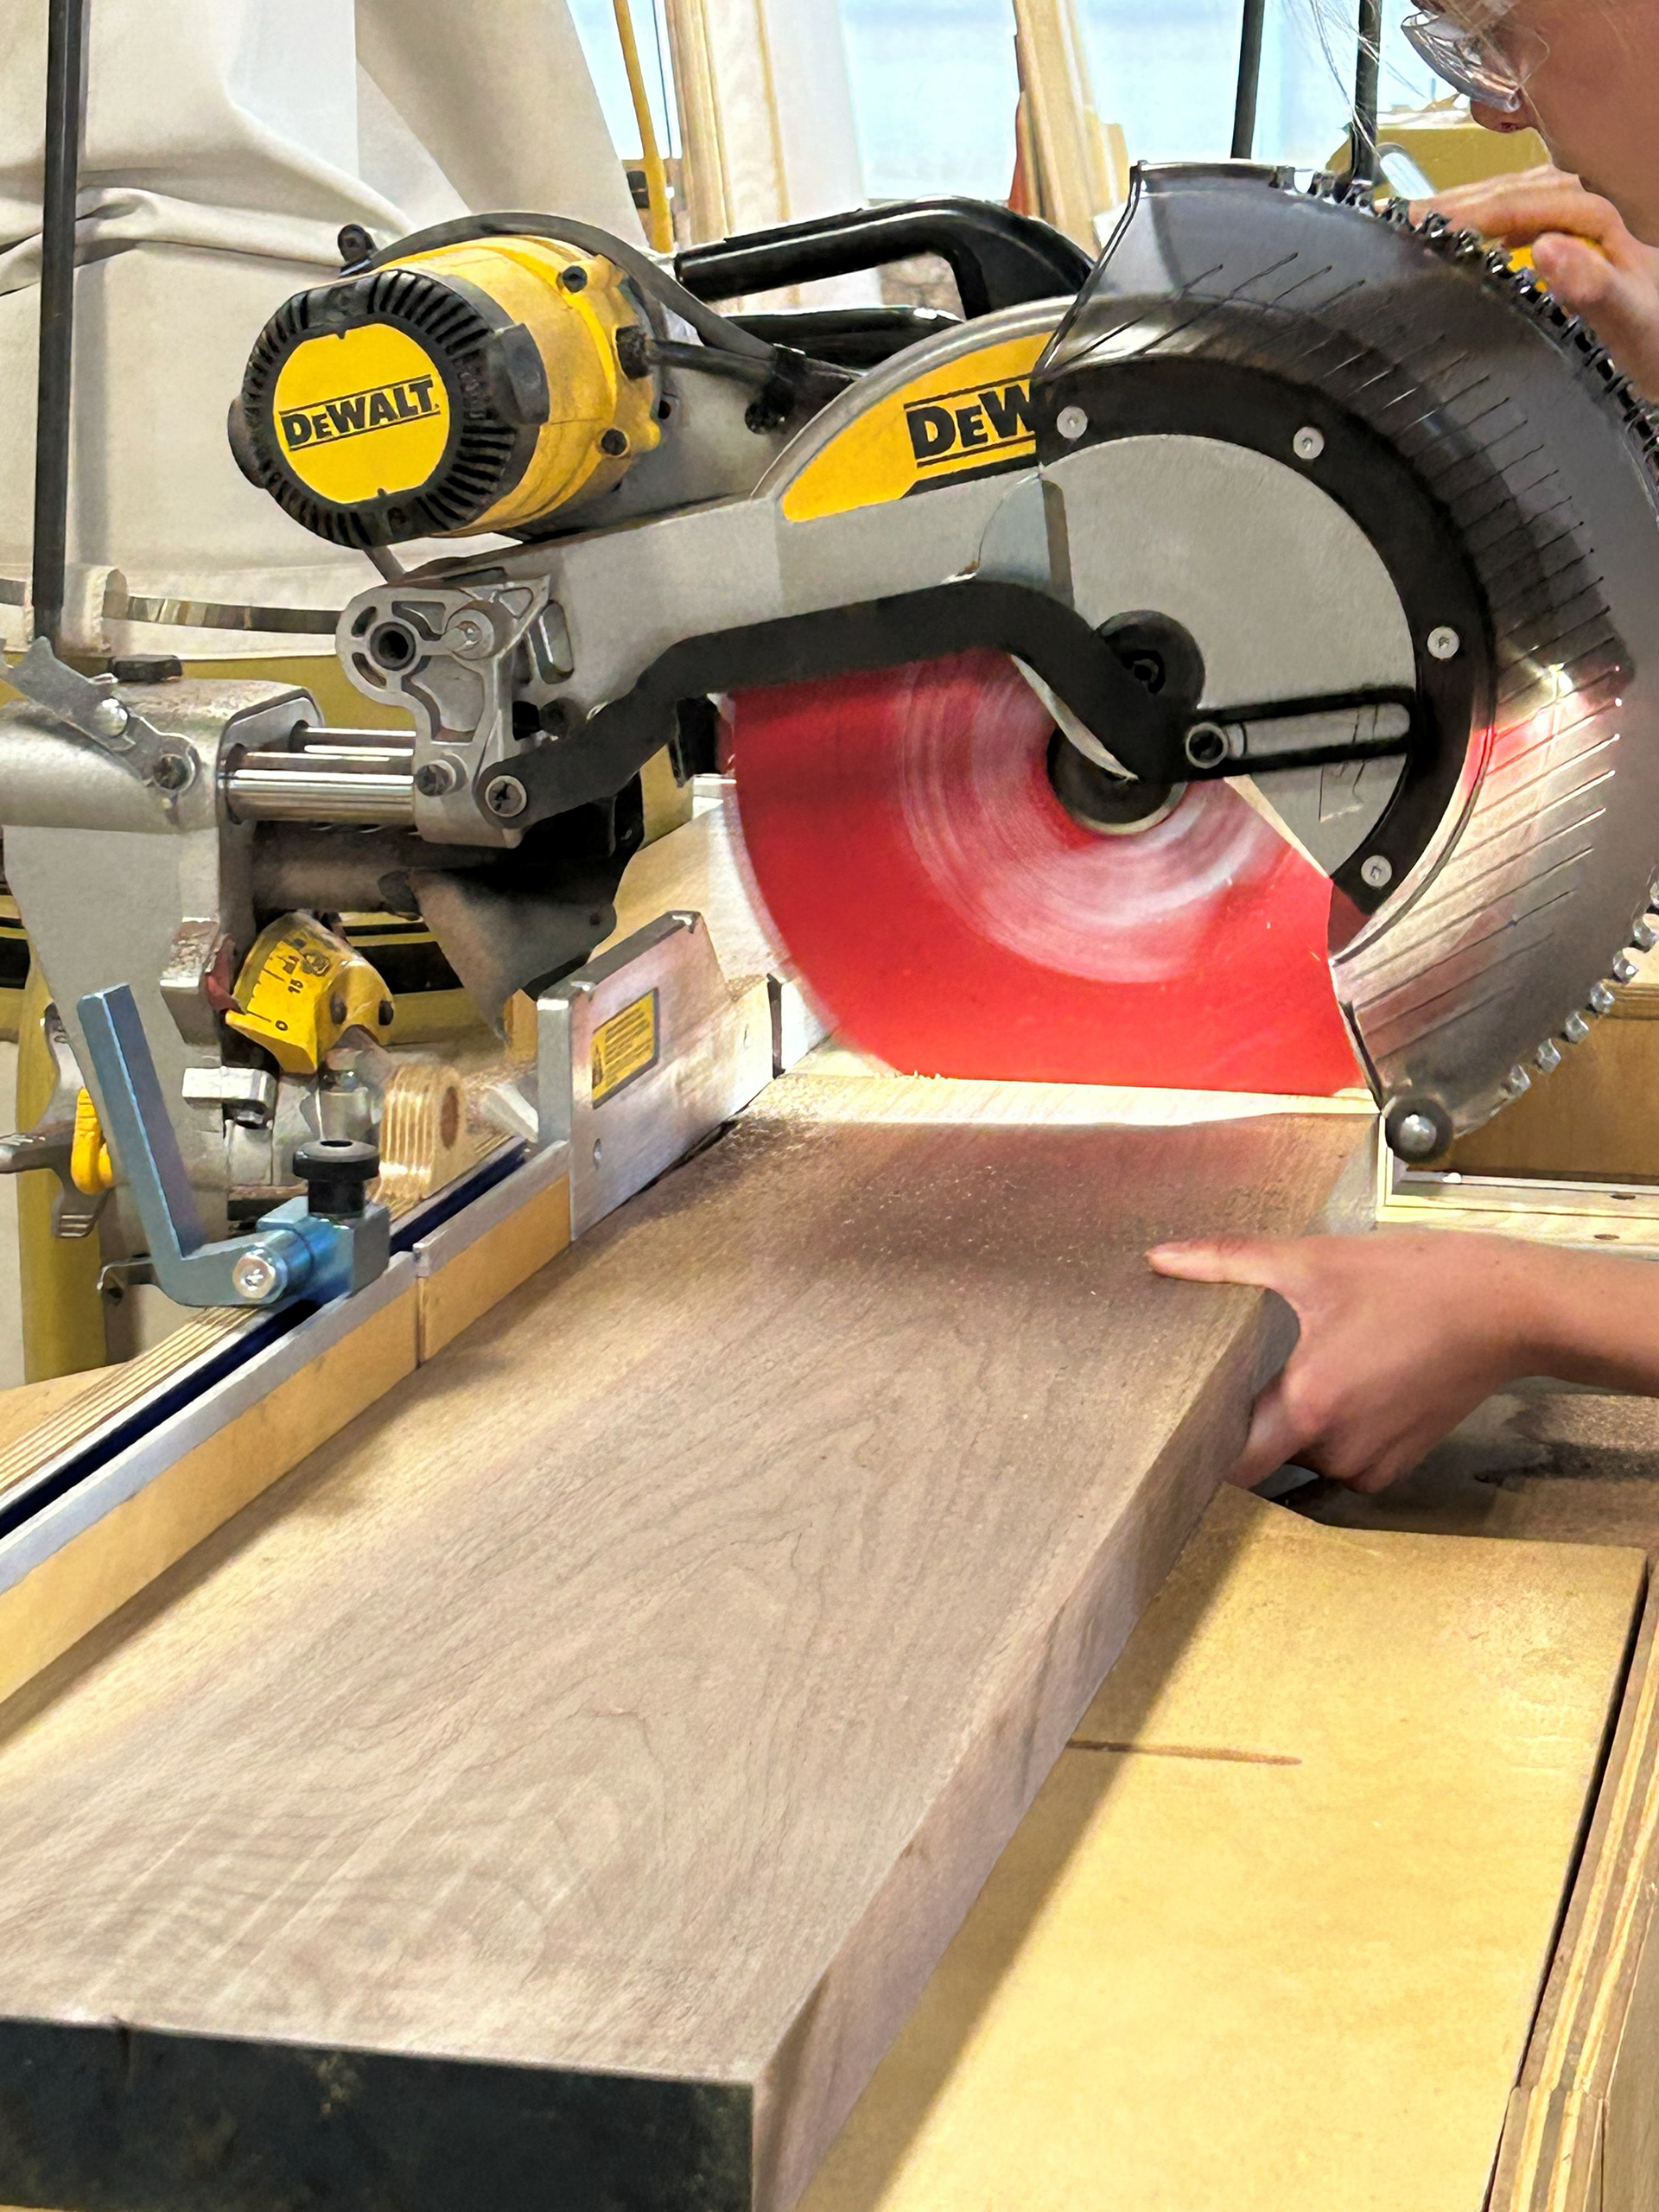
Image 5 | Cutting Sections of the 8/4 Boards on the Chop Saw
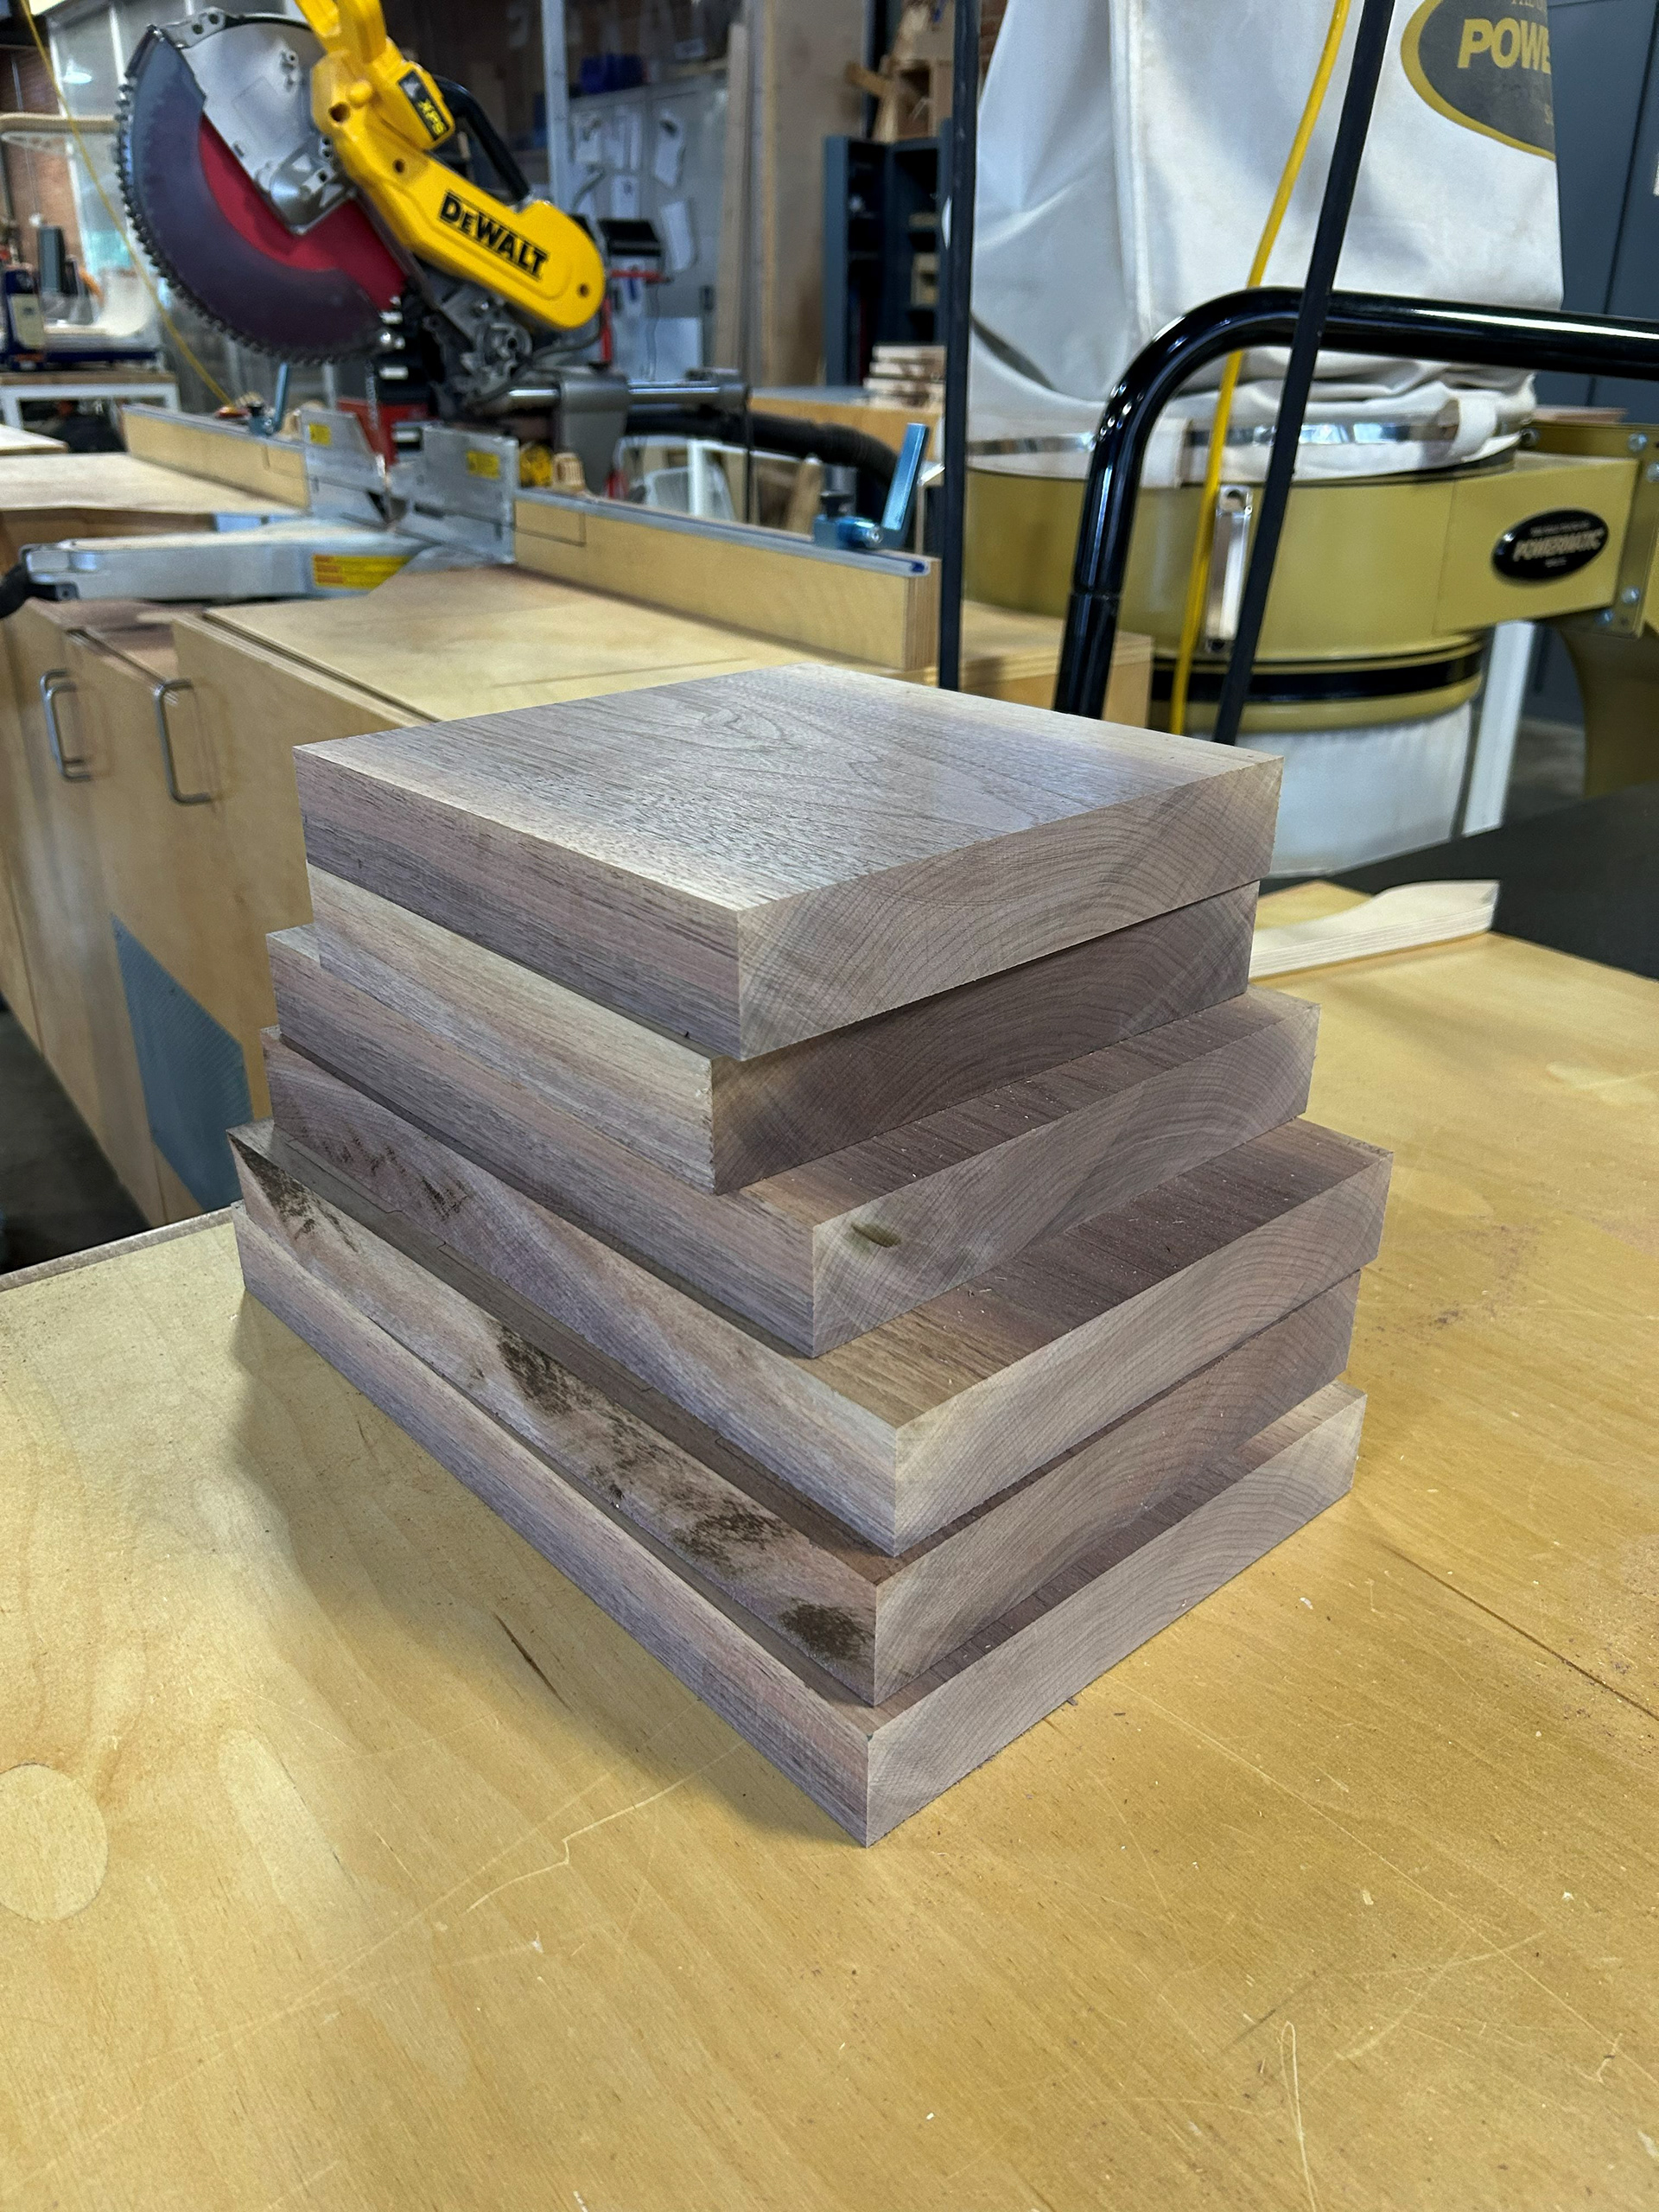
Image 6 | All 8/4 Boards Cut to the Dimensions Needed to Begin Rip Cutting Each Individual Piece of the Footstools
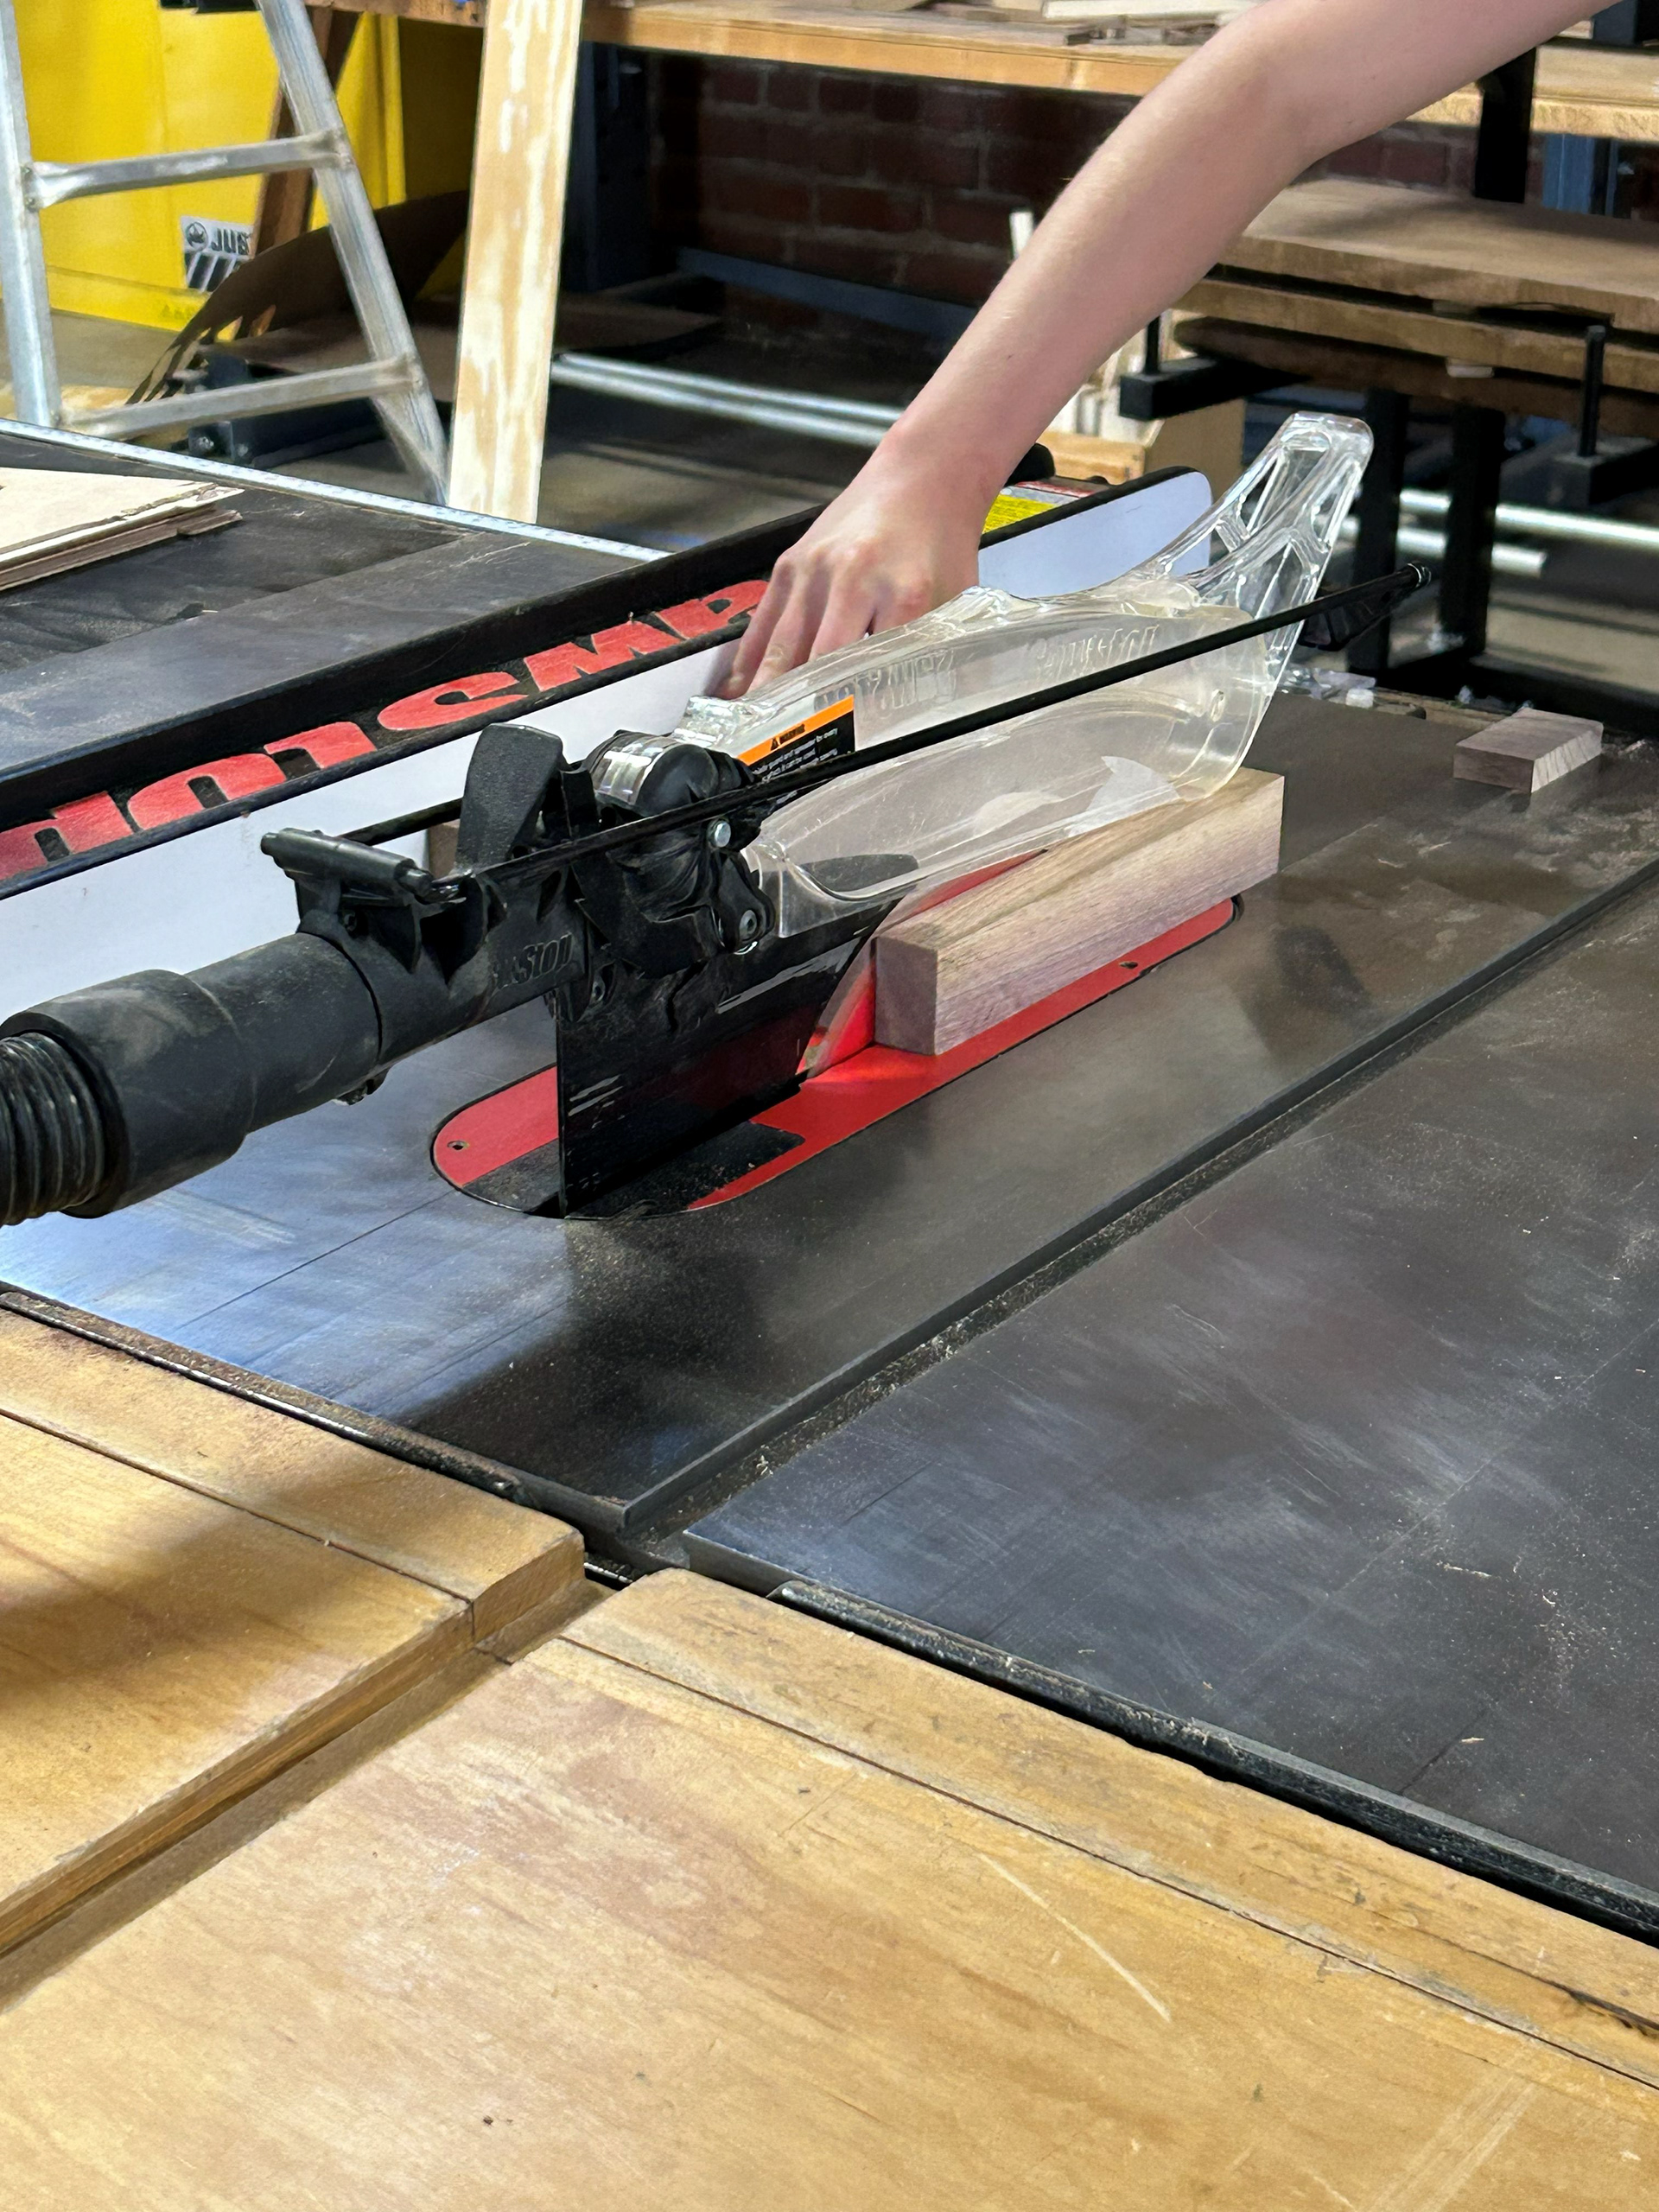
Image 7 | Rip Cutting the 8/4 Boards on the Table Saw, Using the to Measure the Needed Dimension of Each Footstool Piece
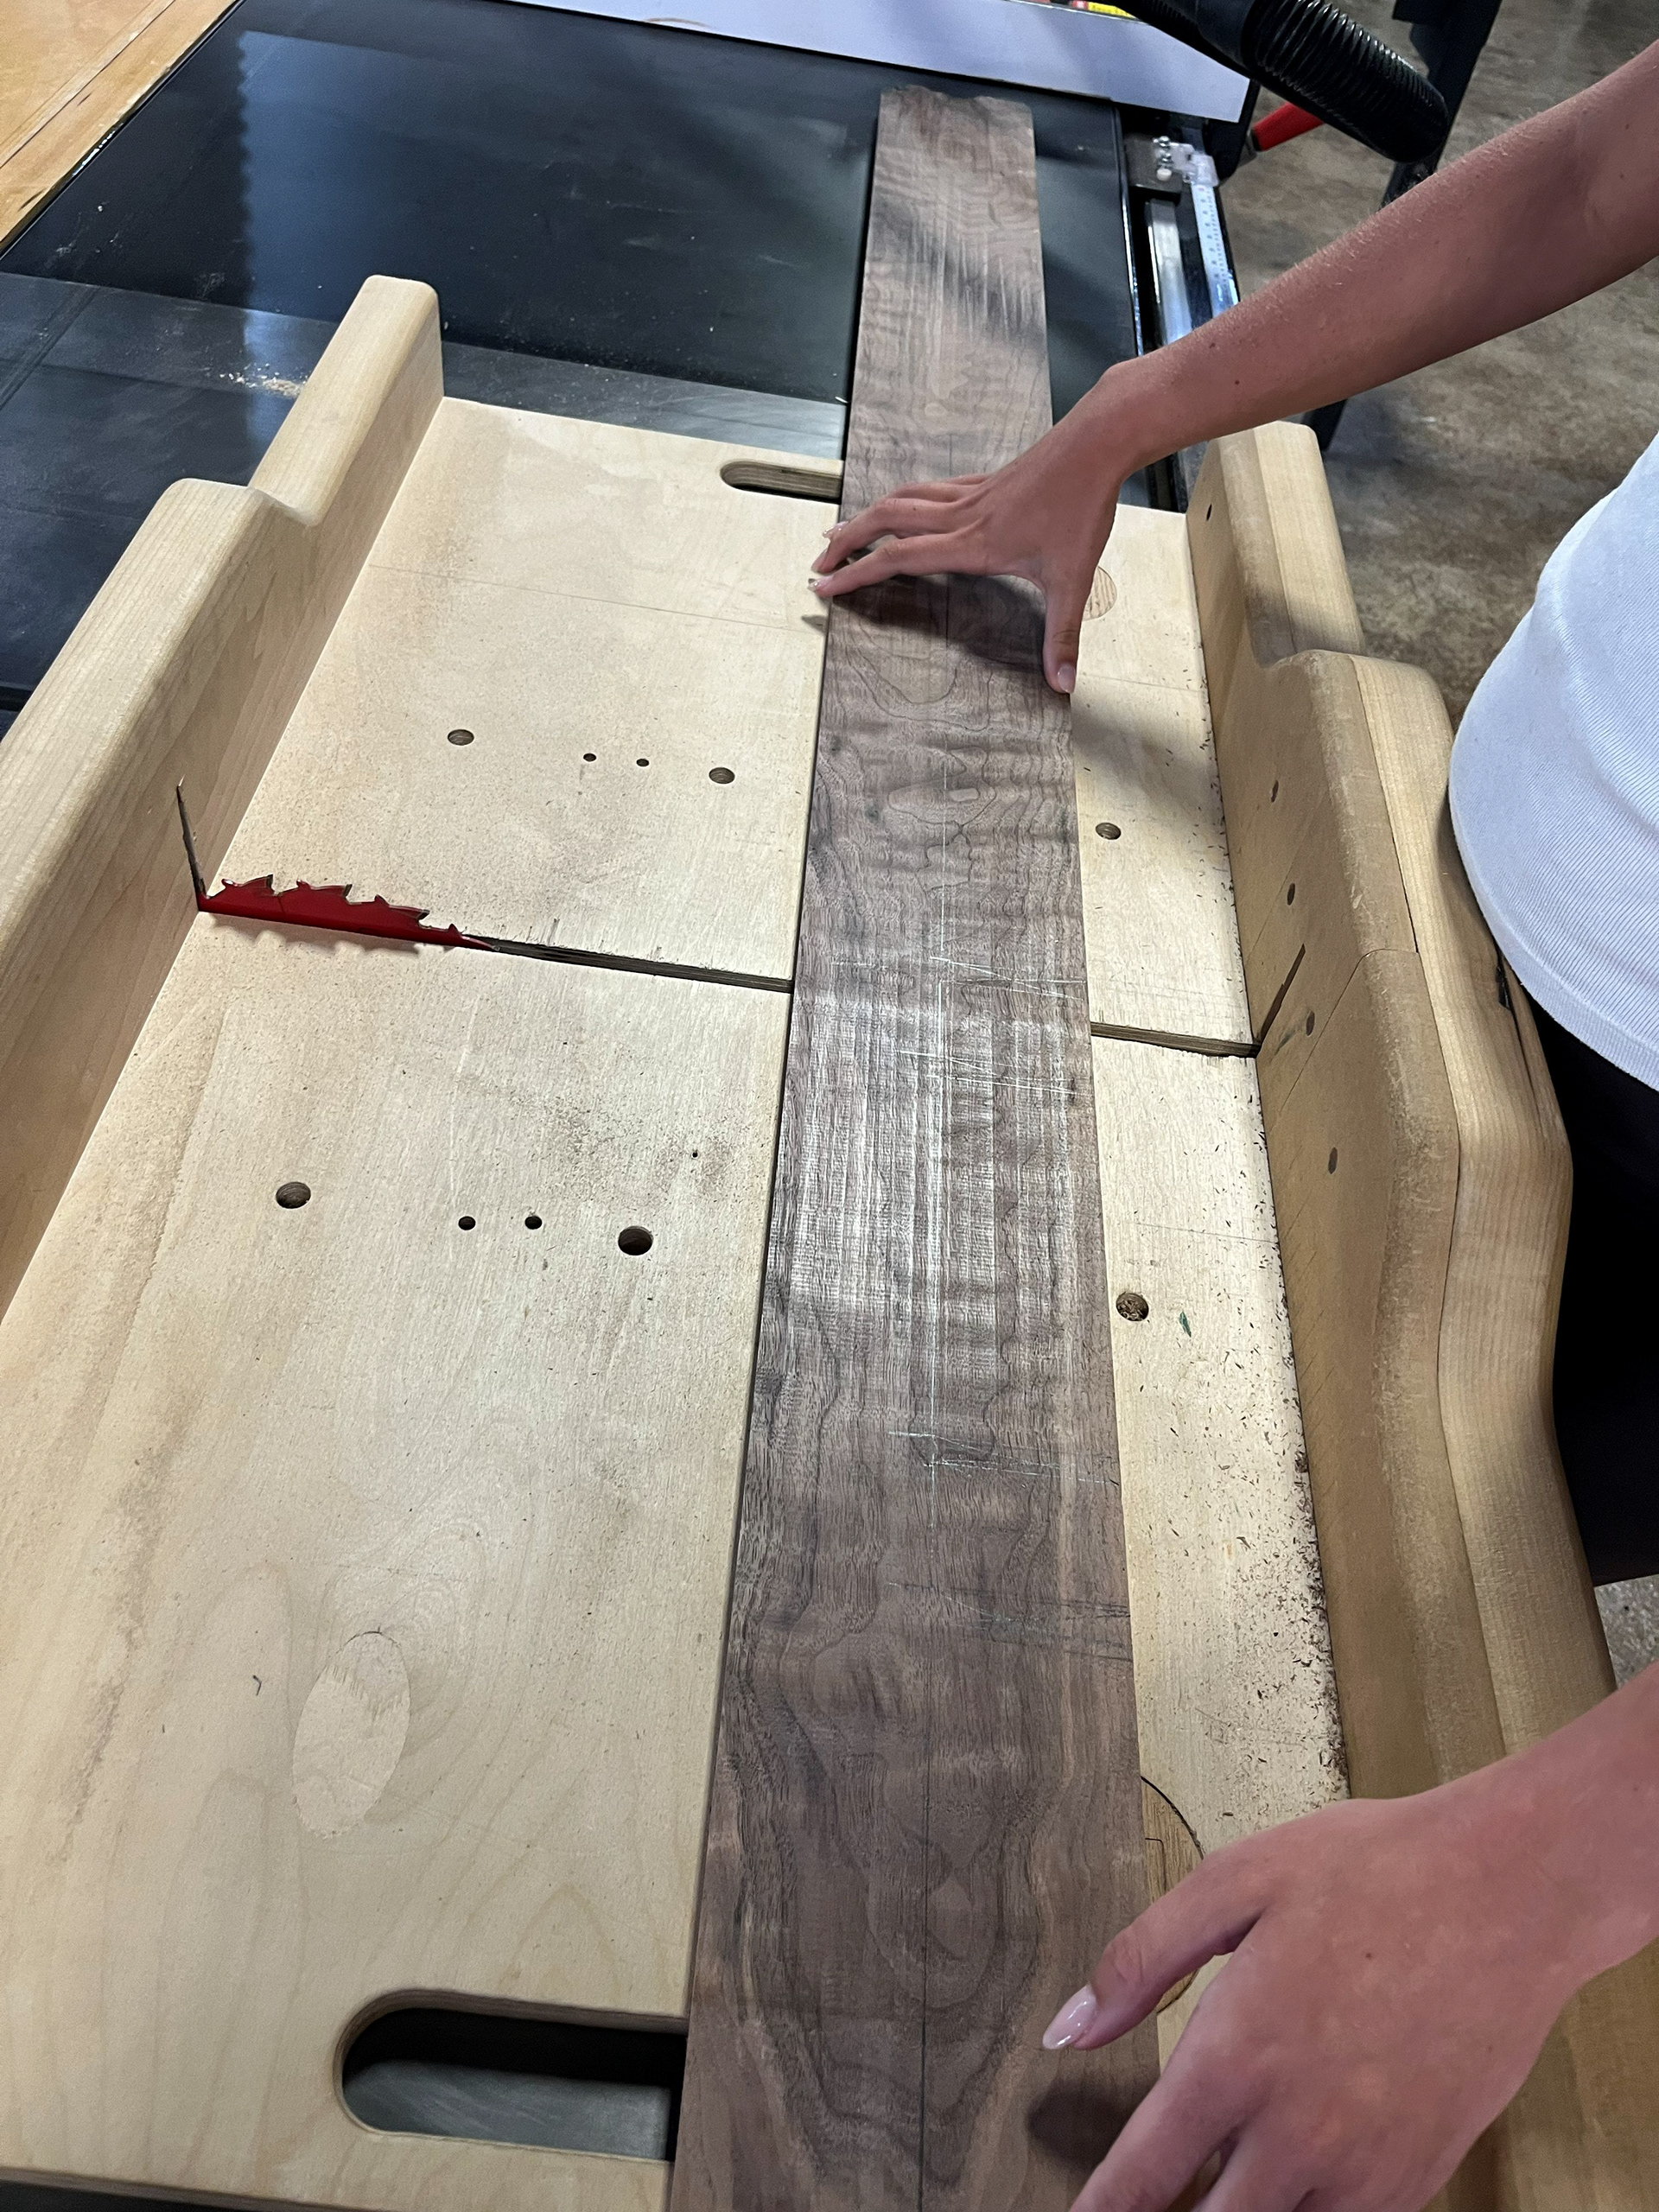
Image 8 | Cross-cutting the 4/4 Boards for the S-curve Leg Pieces for Each Group Member on the Table Saw with the Sled
Creating the S-curve Legs
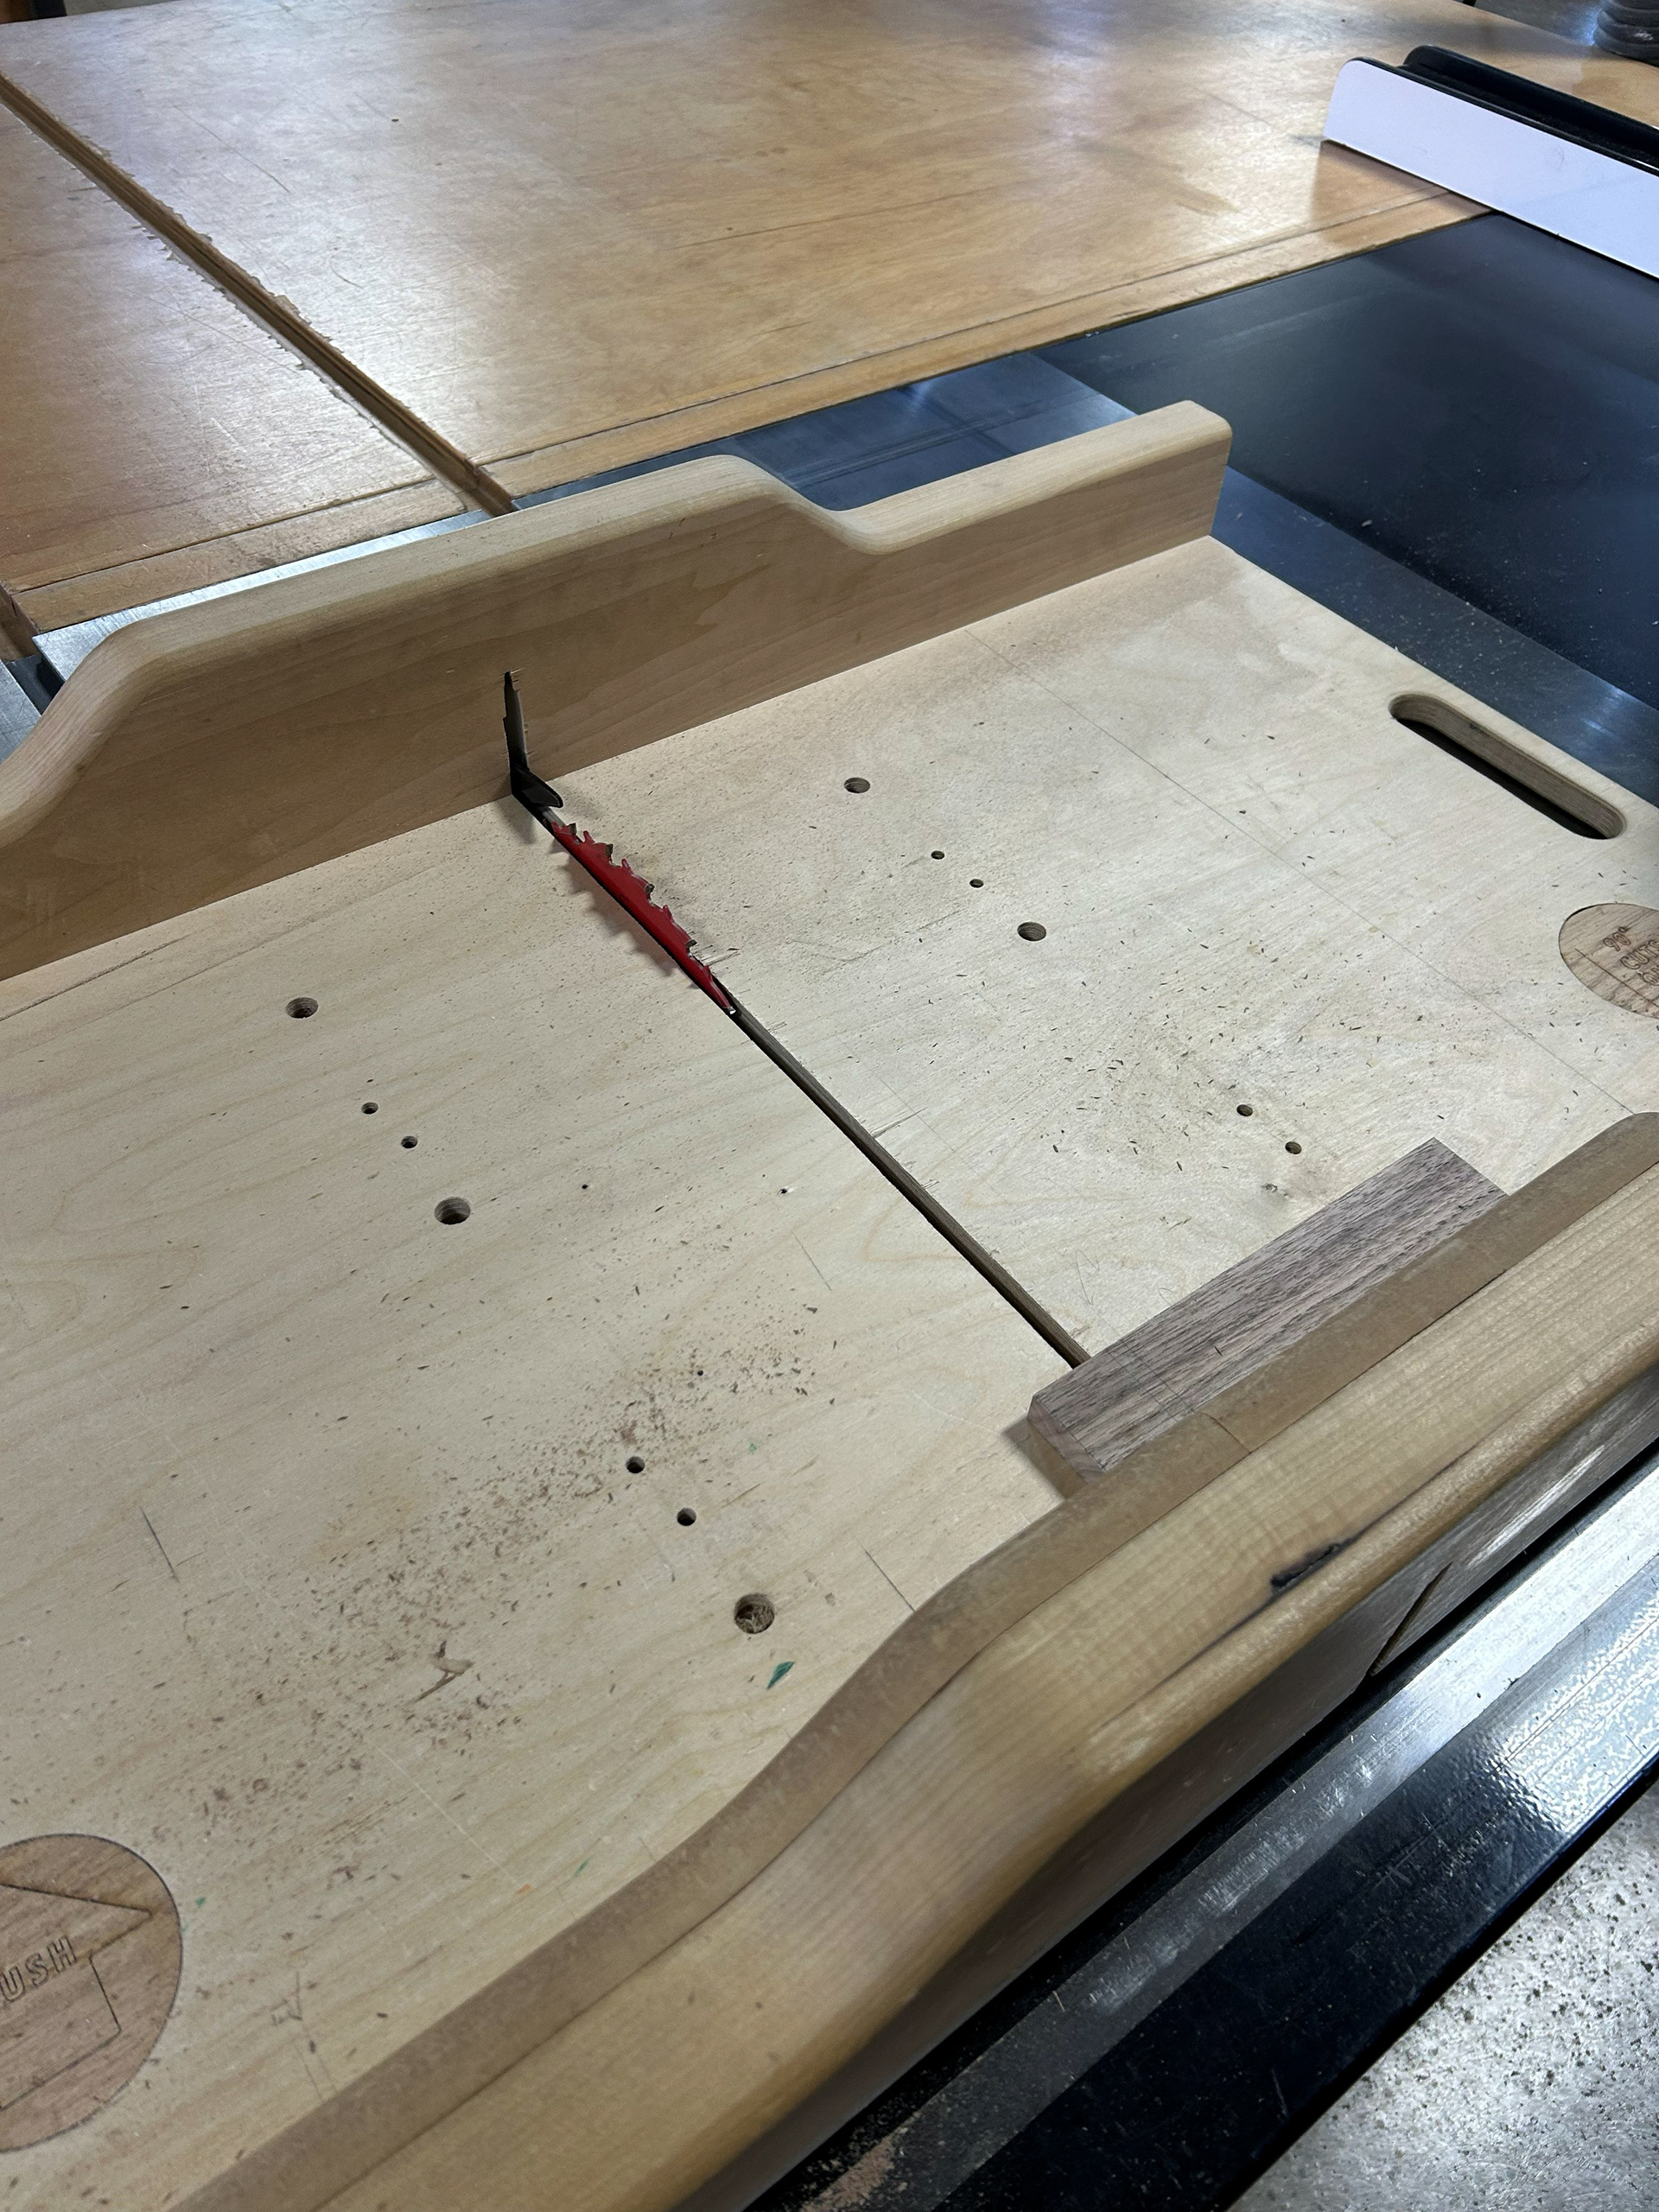
Image 9 | Rip Cutting Individual Straight Pieces of the S-curve Legs on the Table Saw
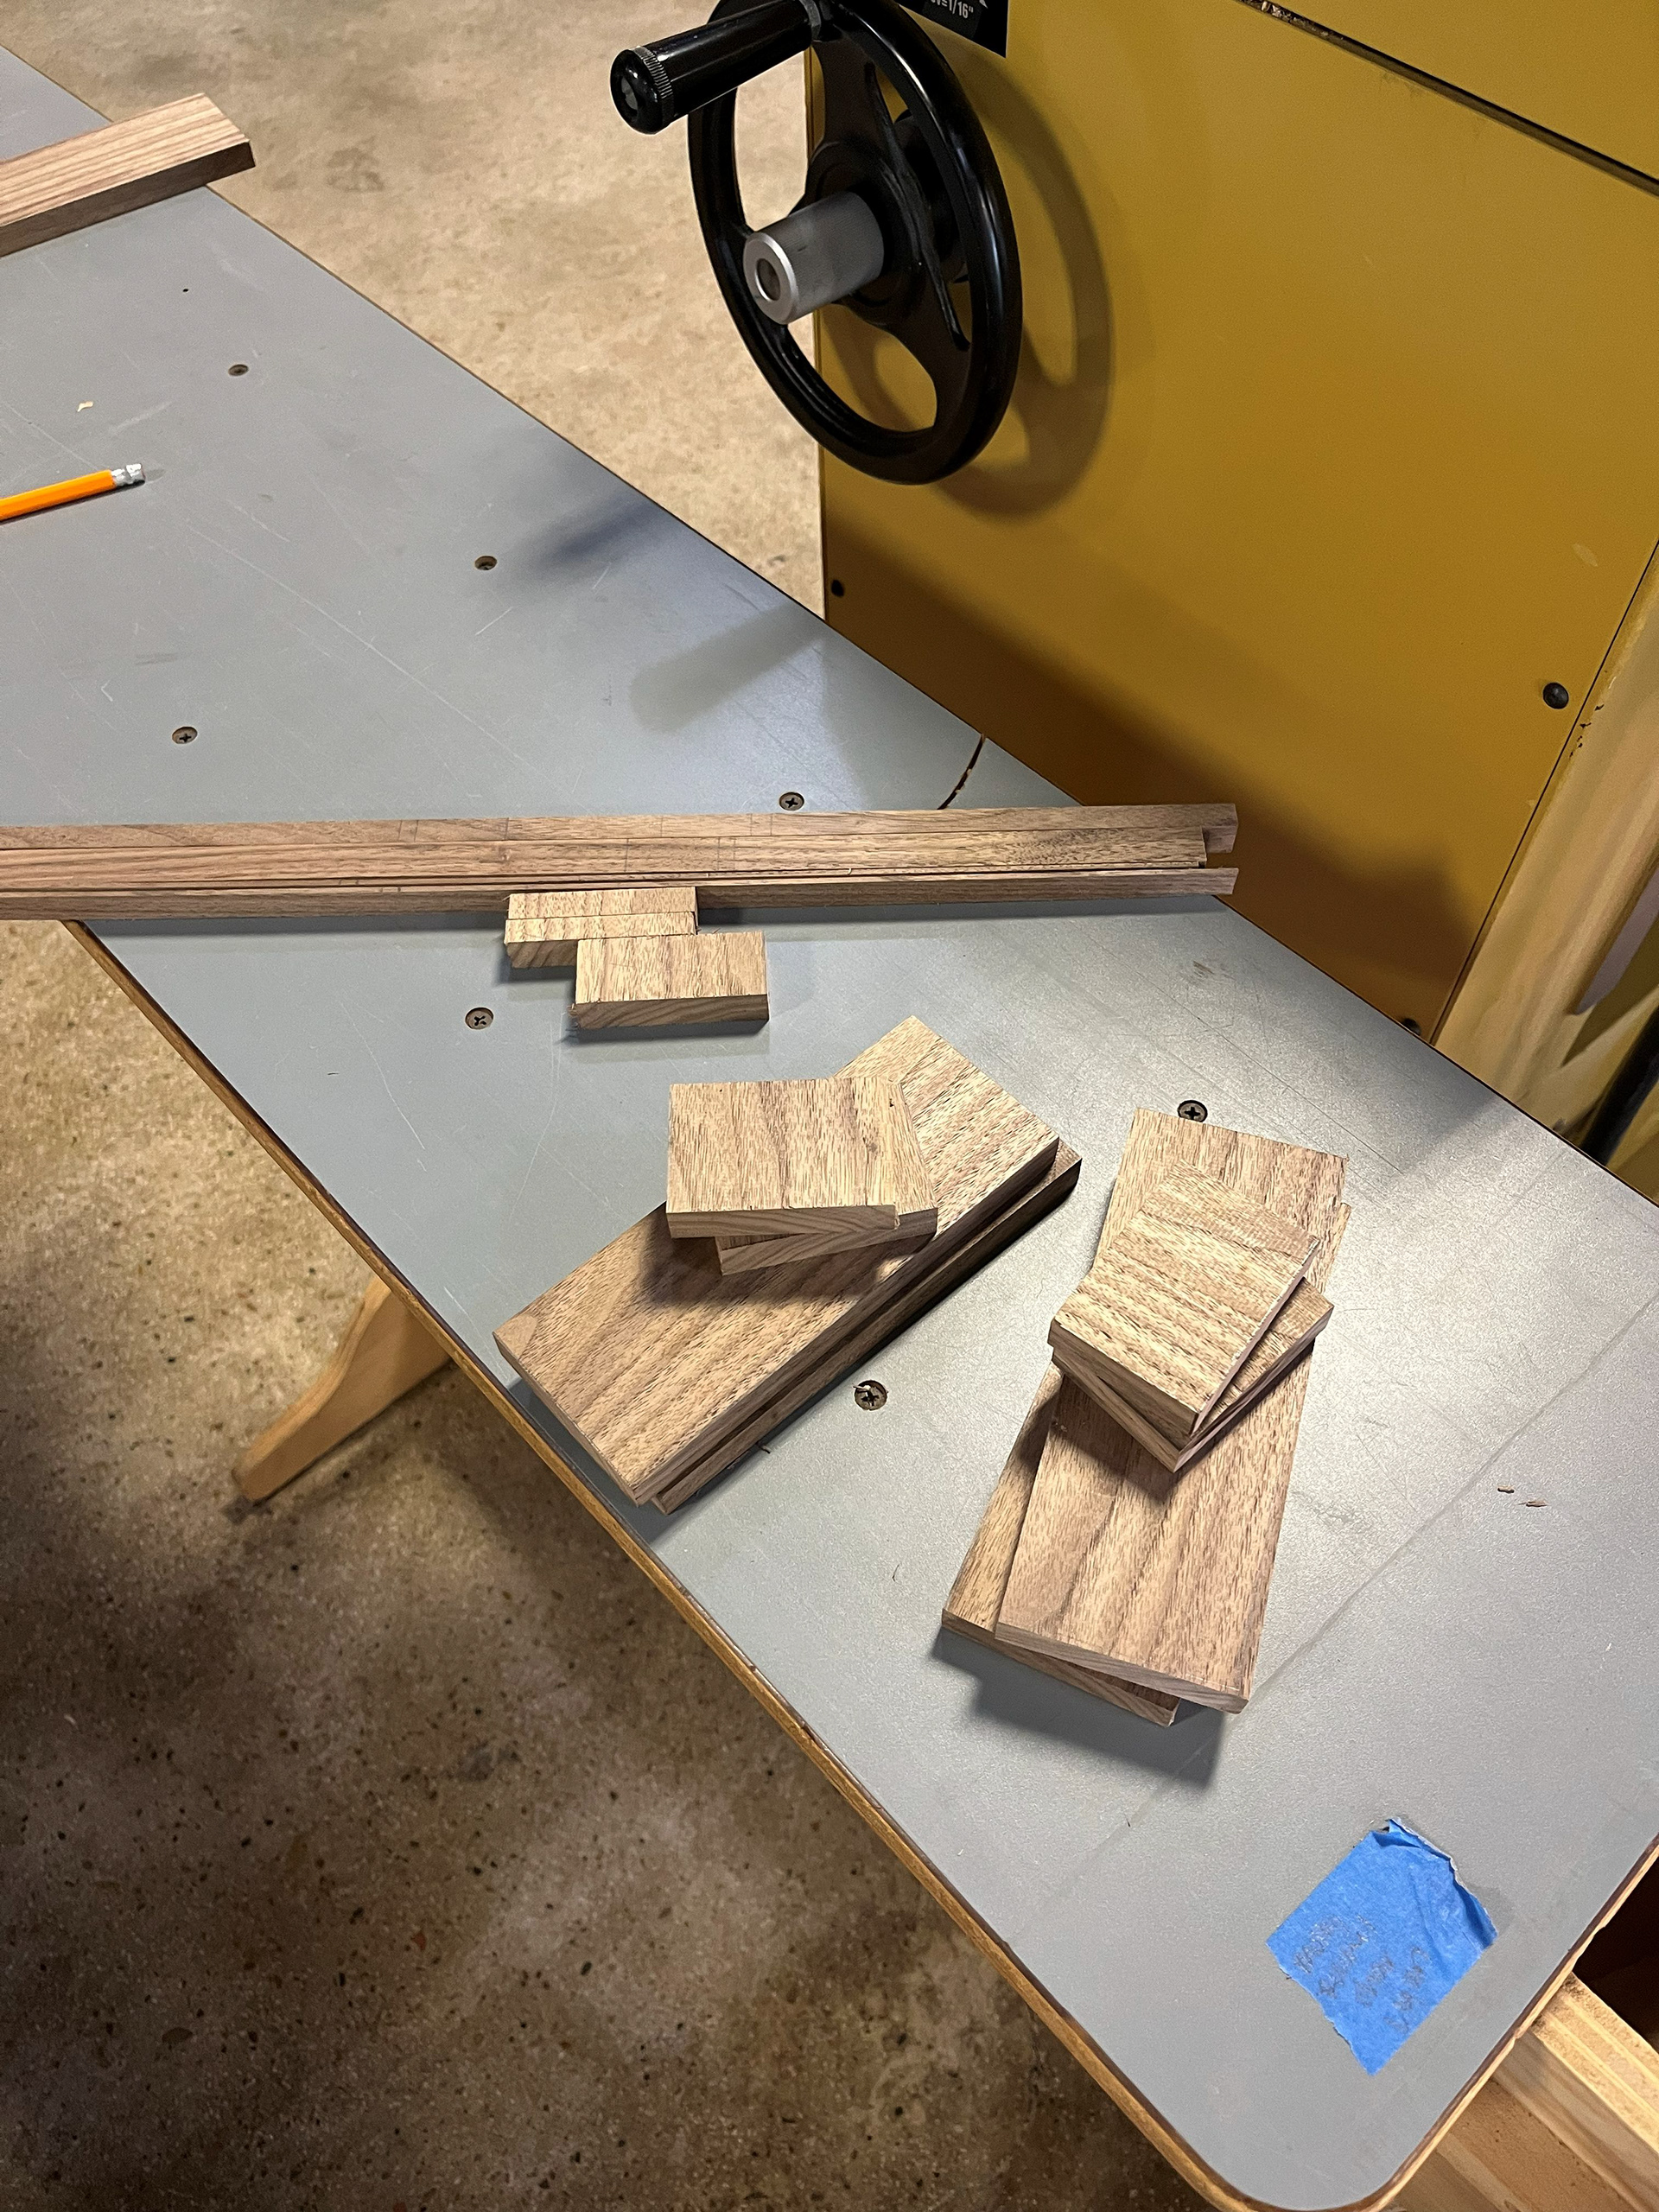
Image 10 | Individual Straight Pieces for the S-curve Legs
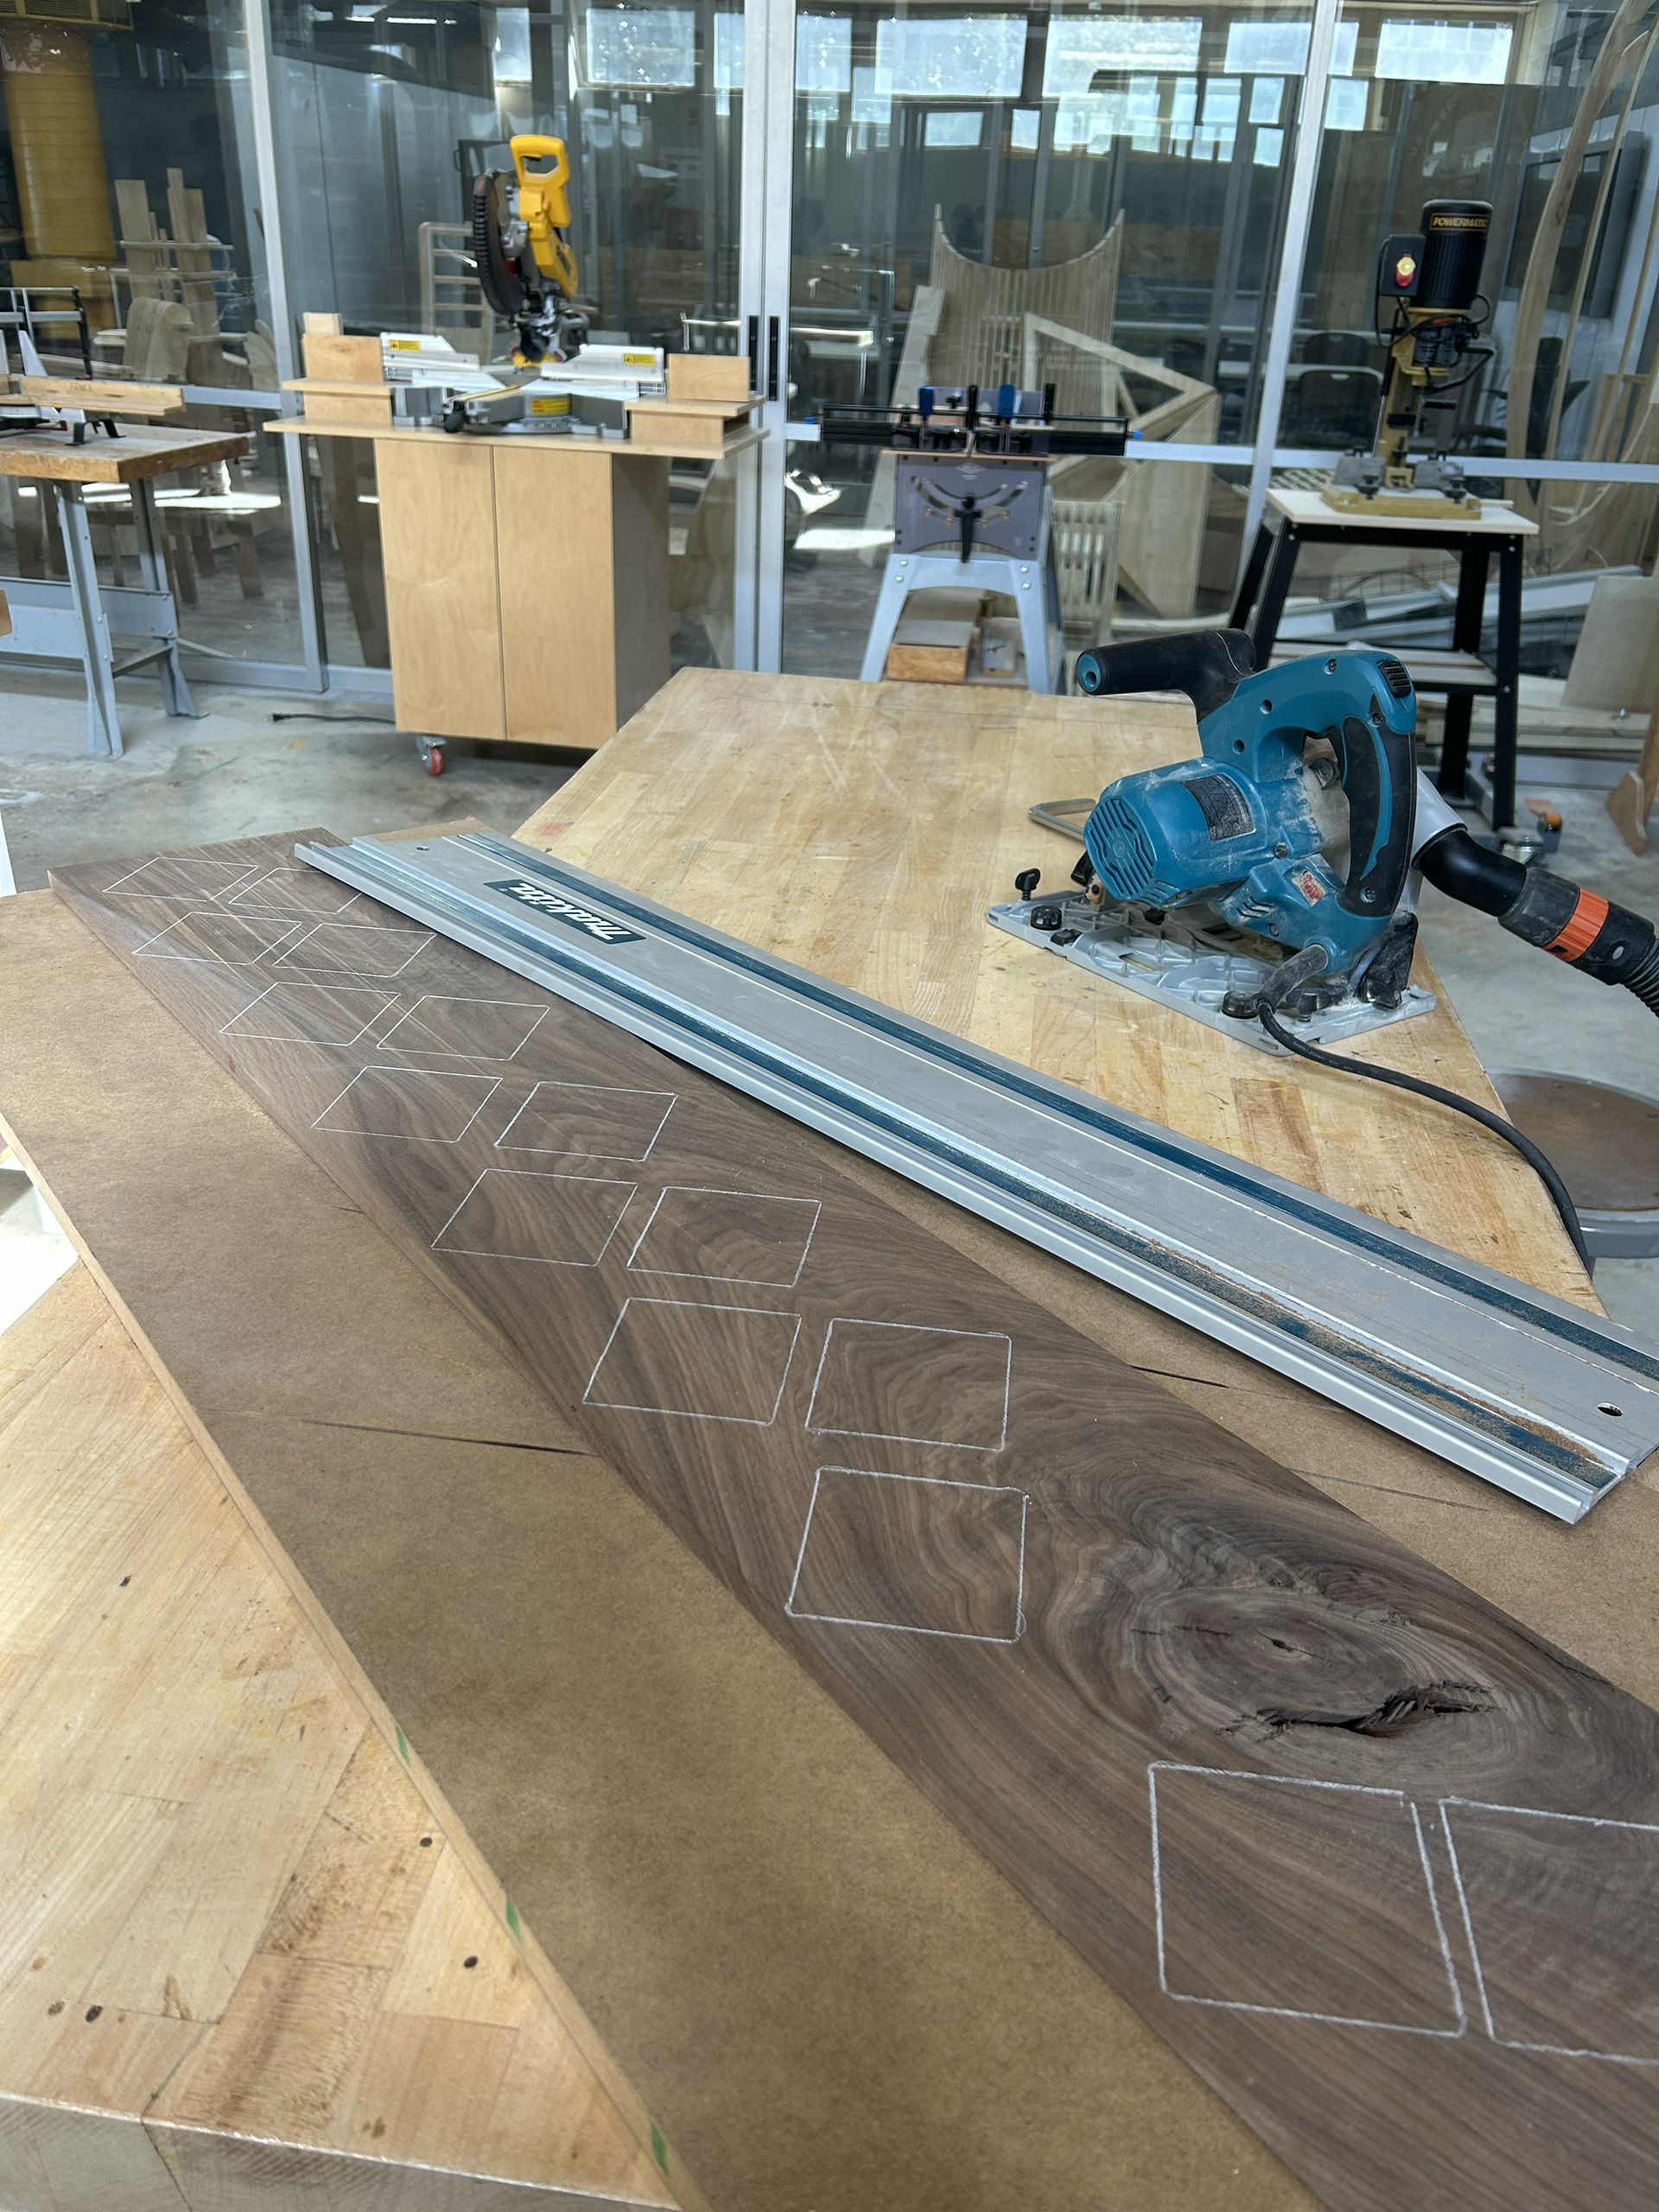
Image 11 | Drawing 3”x3” Squares for the Curved Sections of the S-curve Legs with the Grain Flowing Diagonally Along the Square
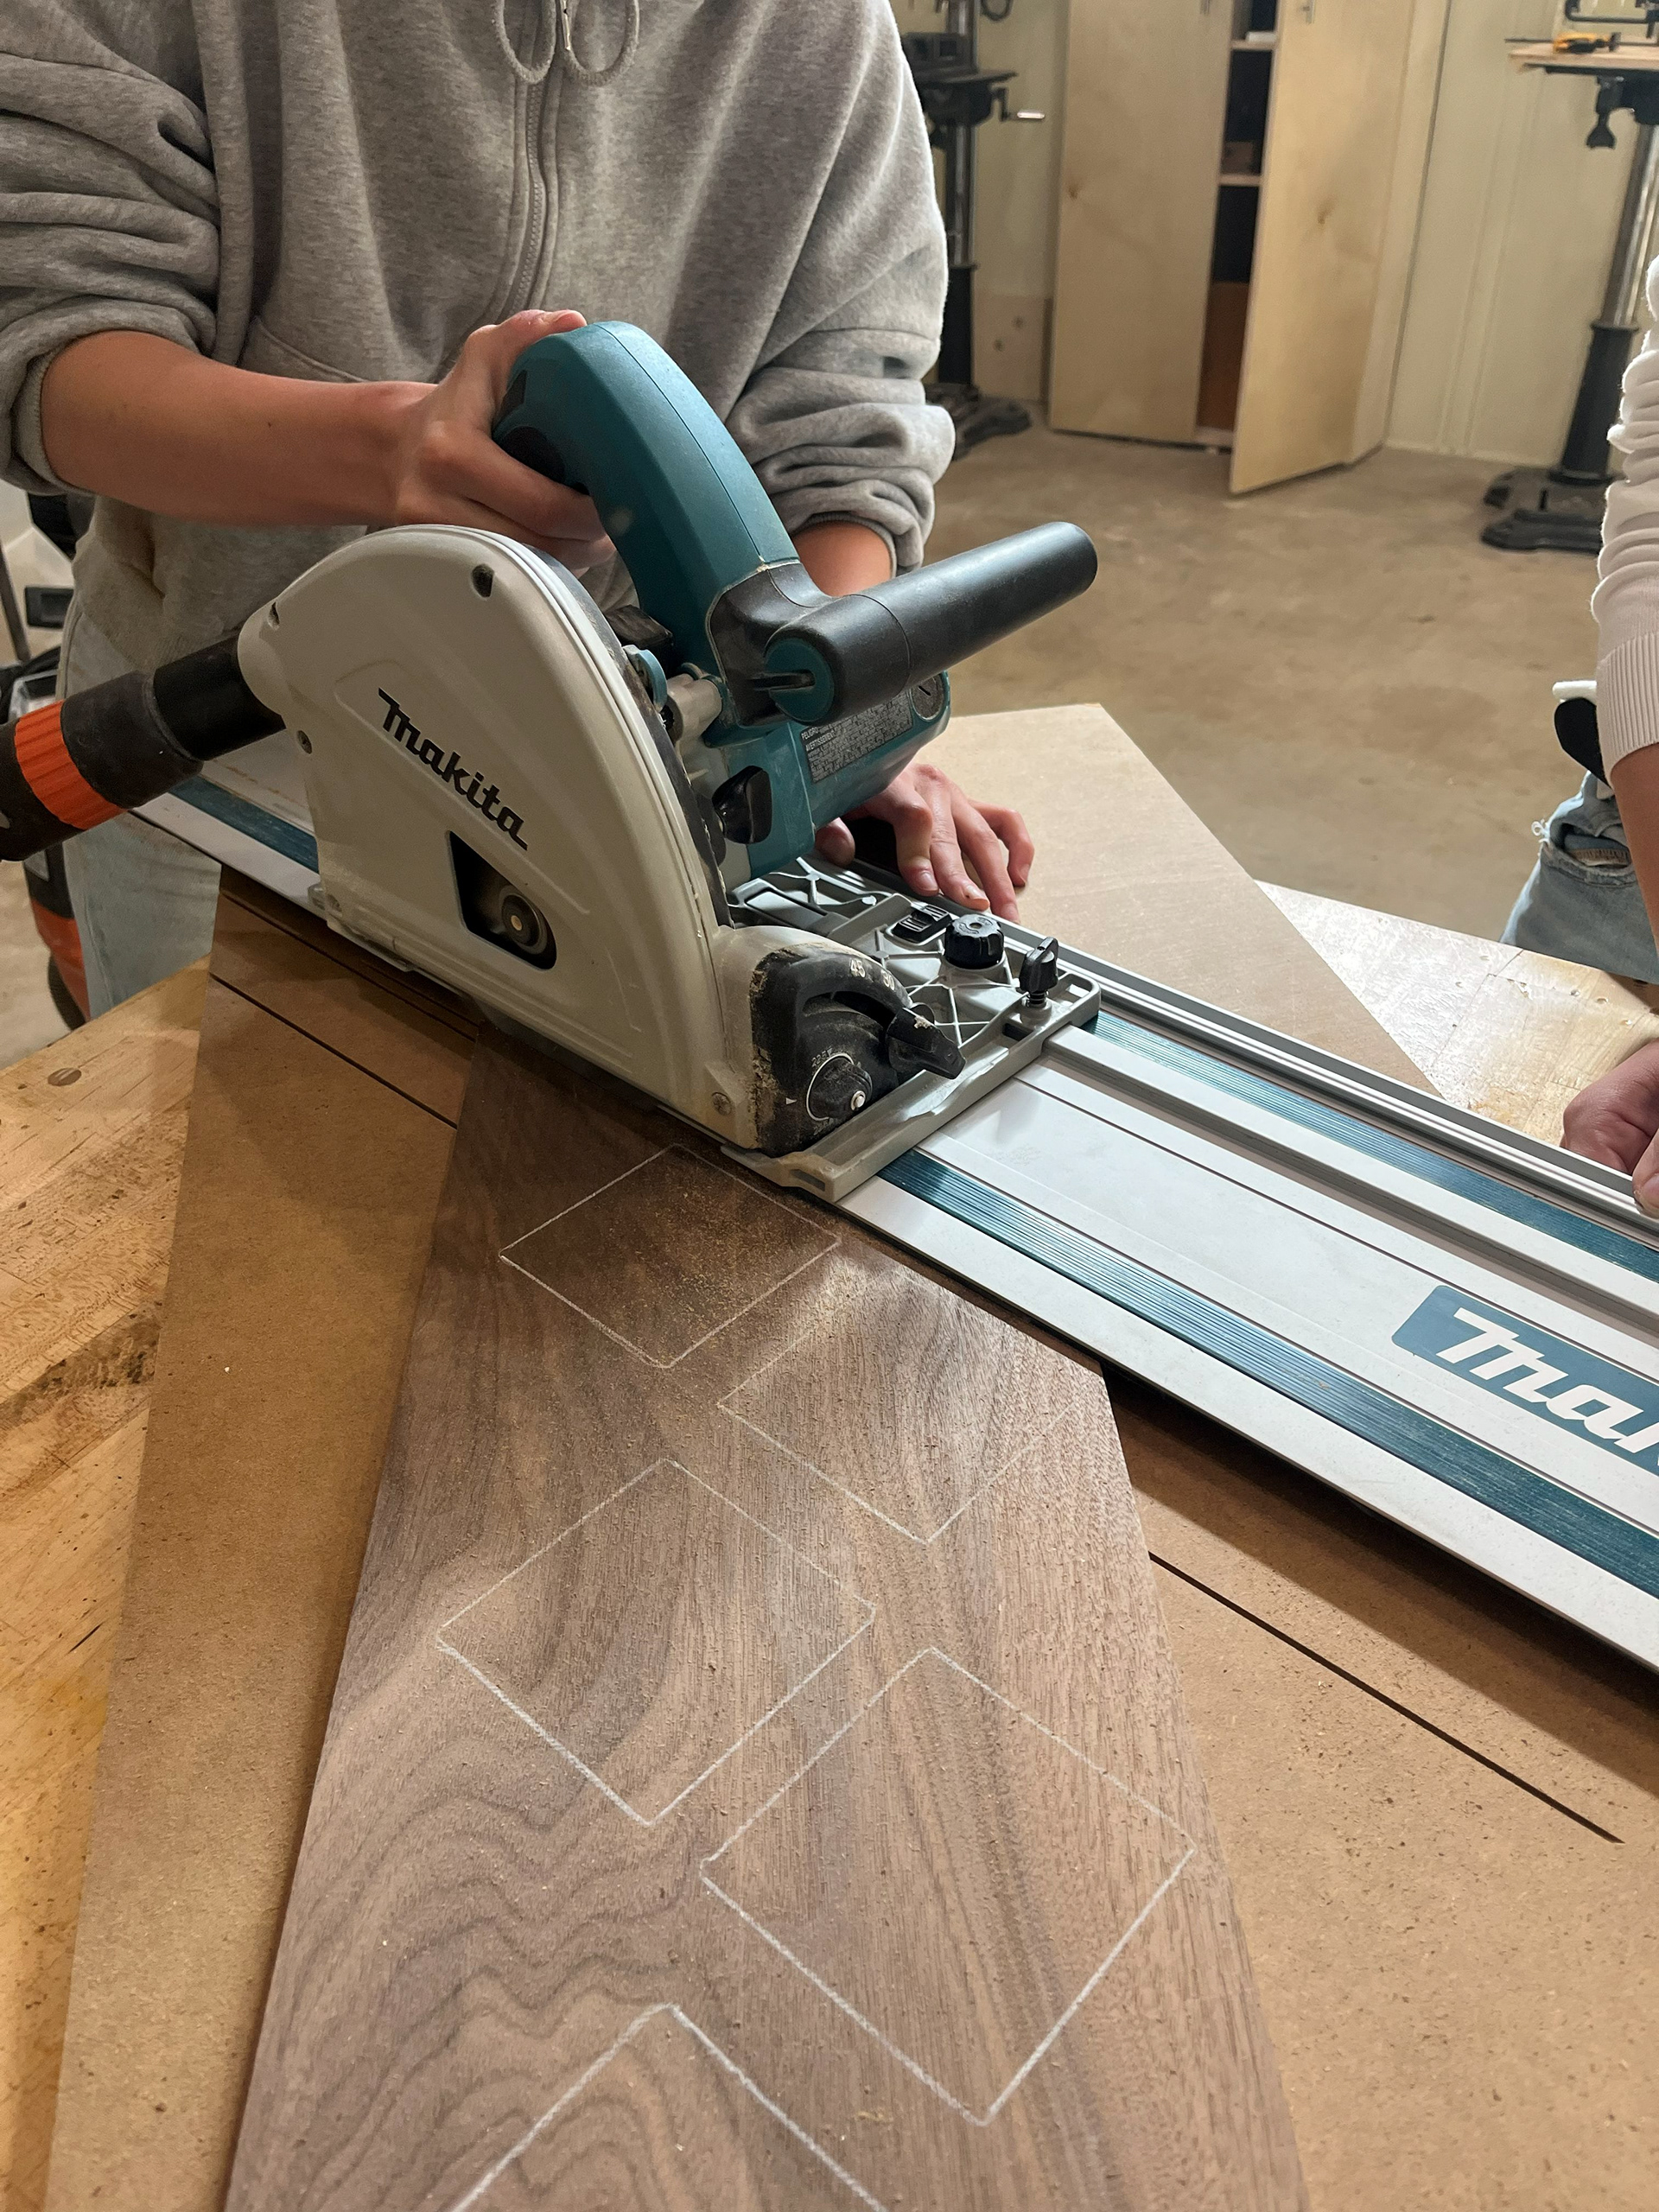
Image 12 | Cutting the S-curve Squares Diagonally with the Track Saw
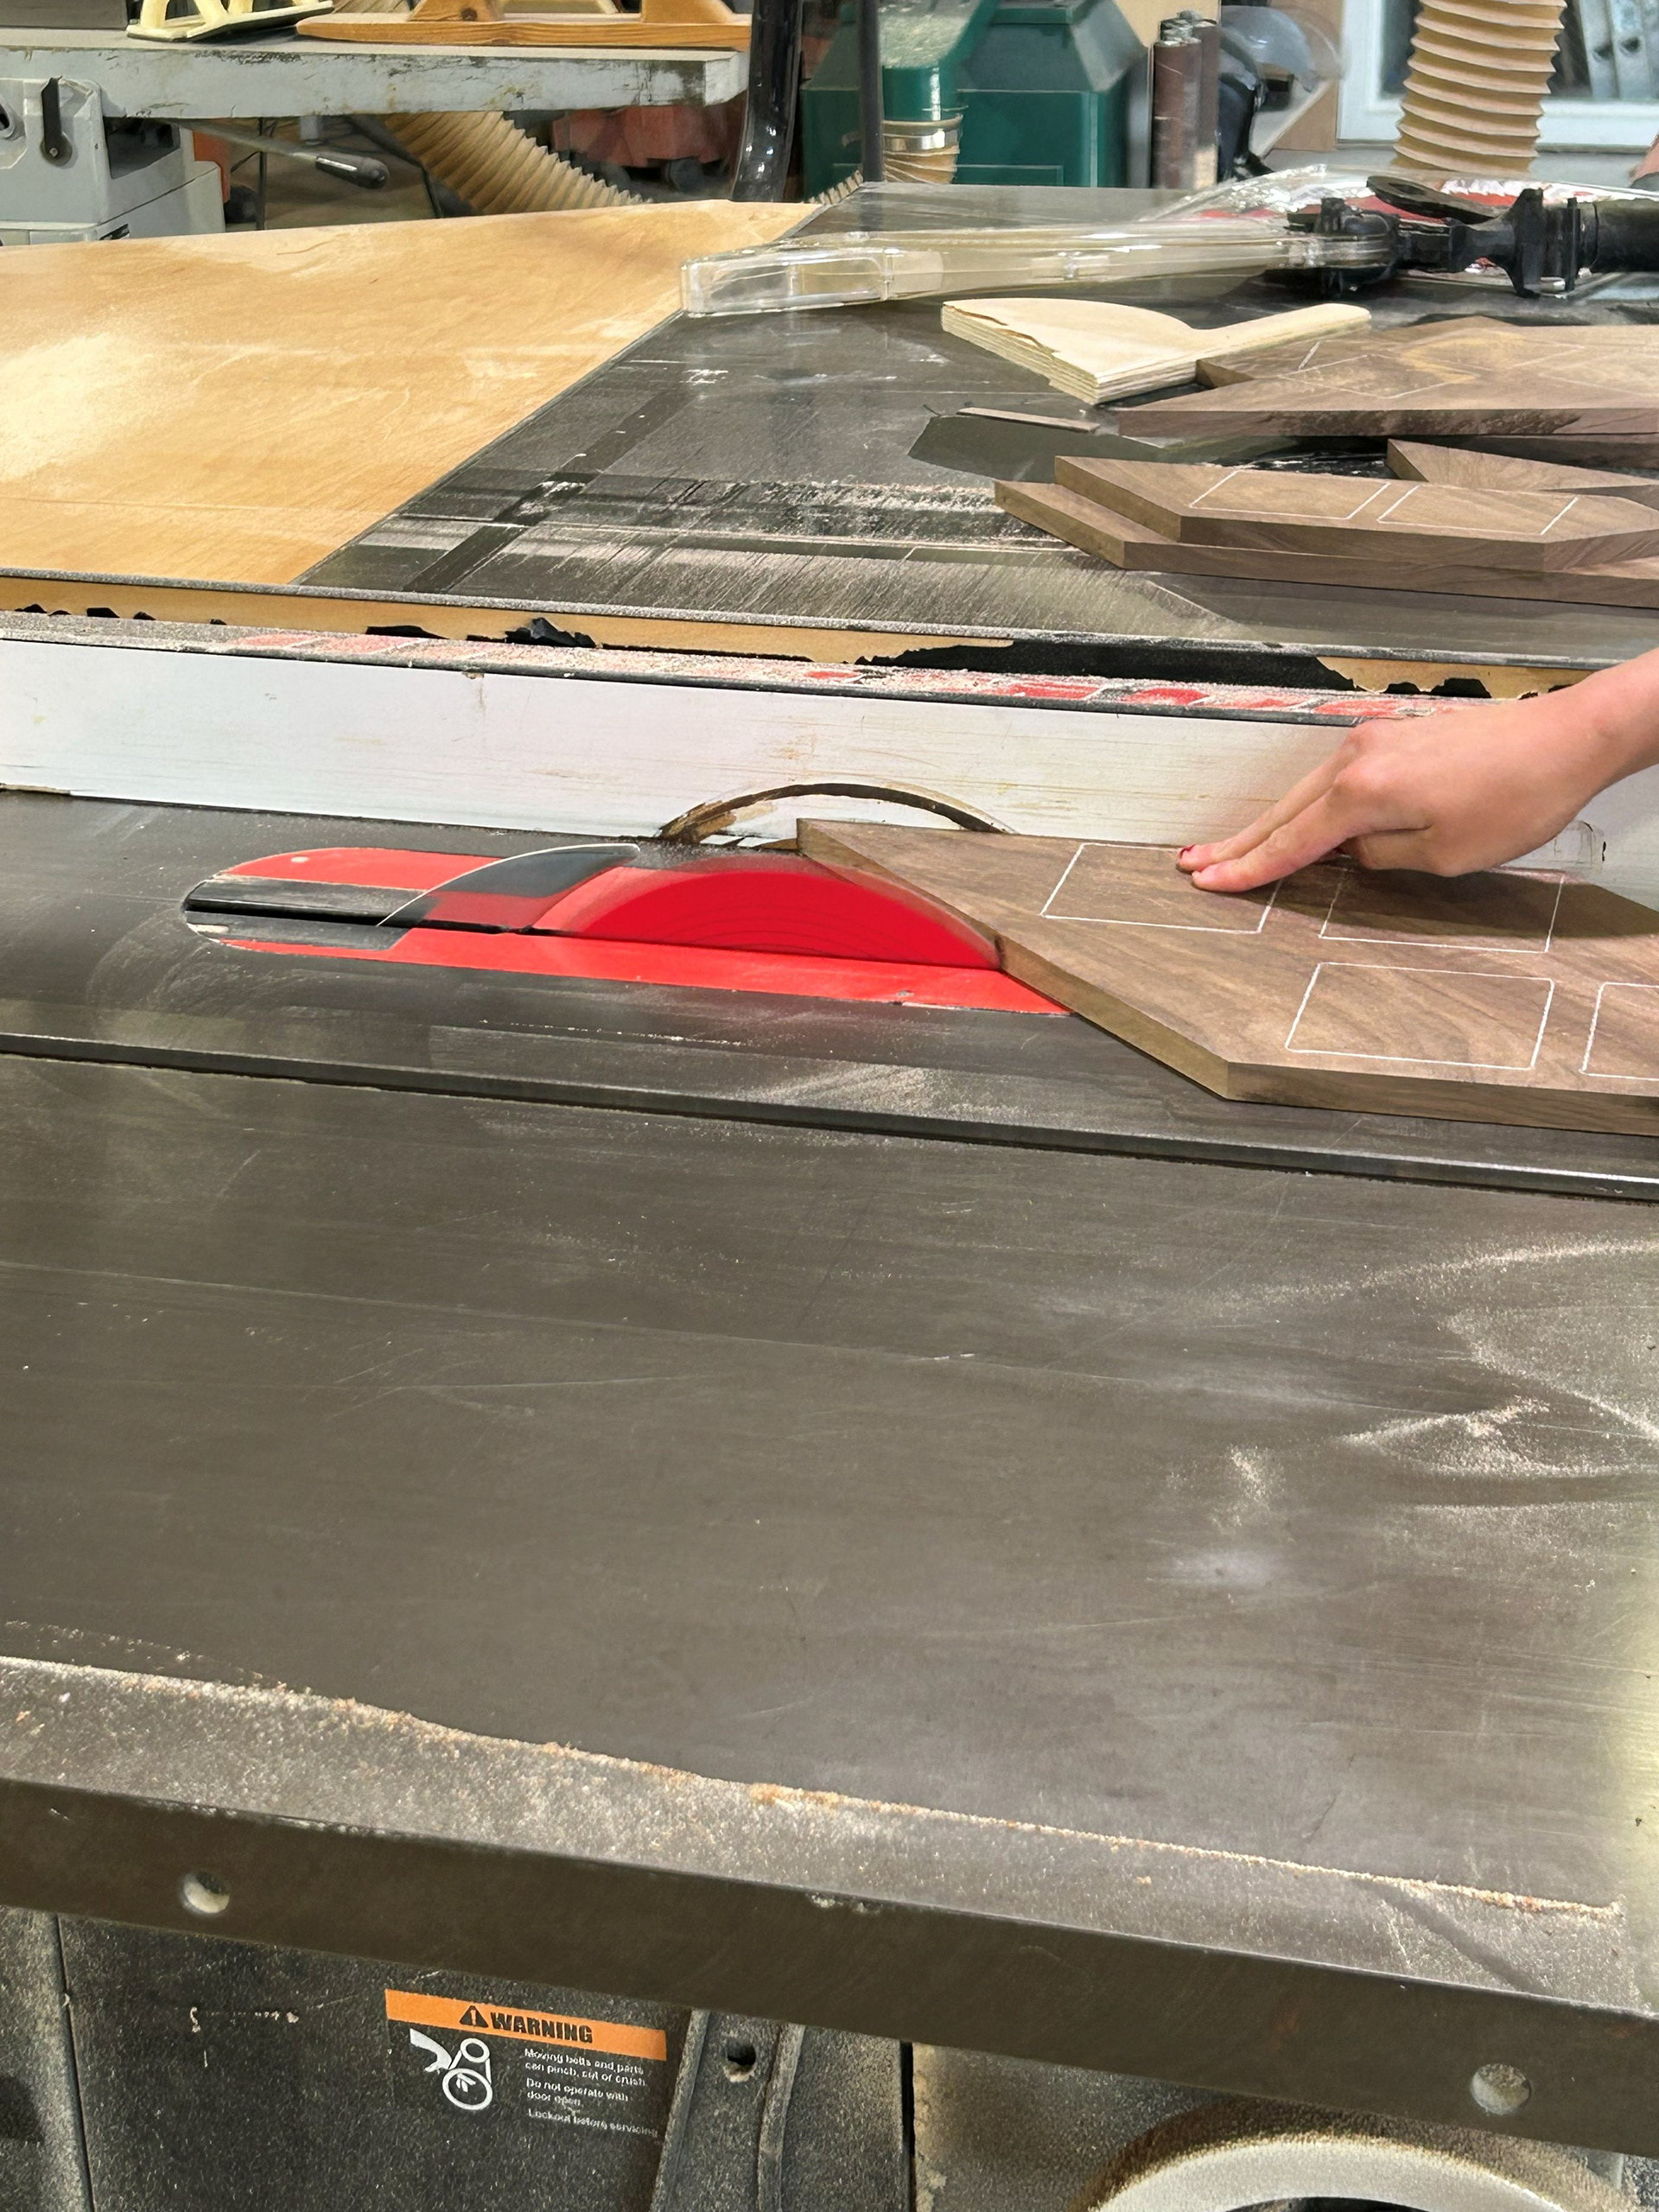
Image 13 | Rip Cutting S-curve Pieces to Make Separate, Smaller Boards
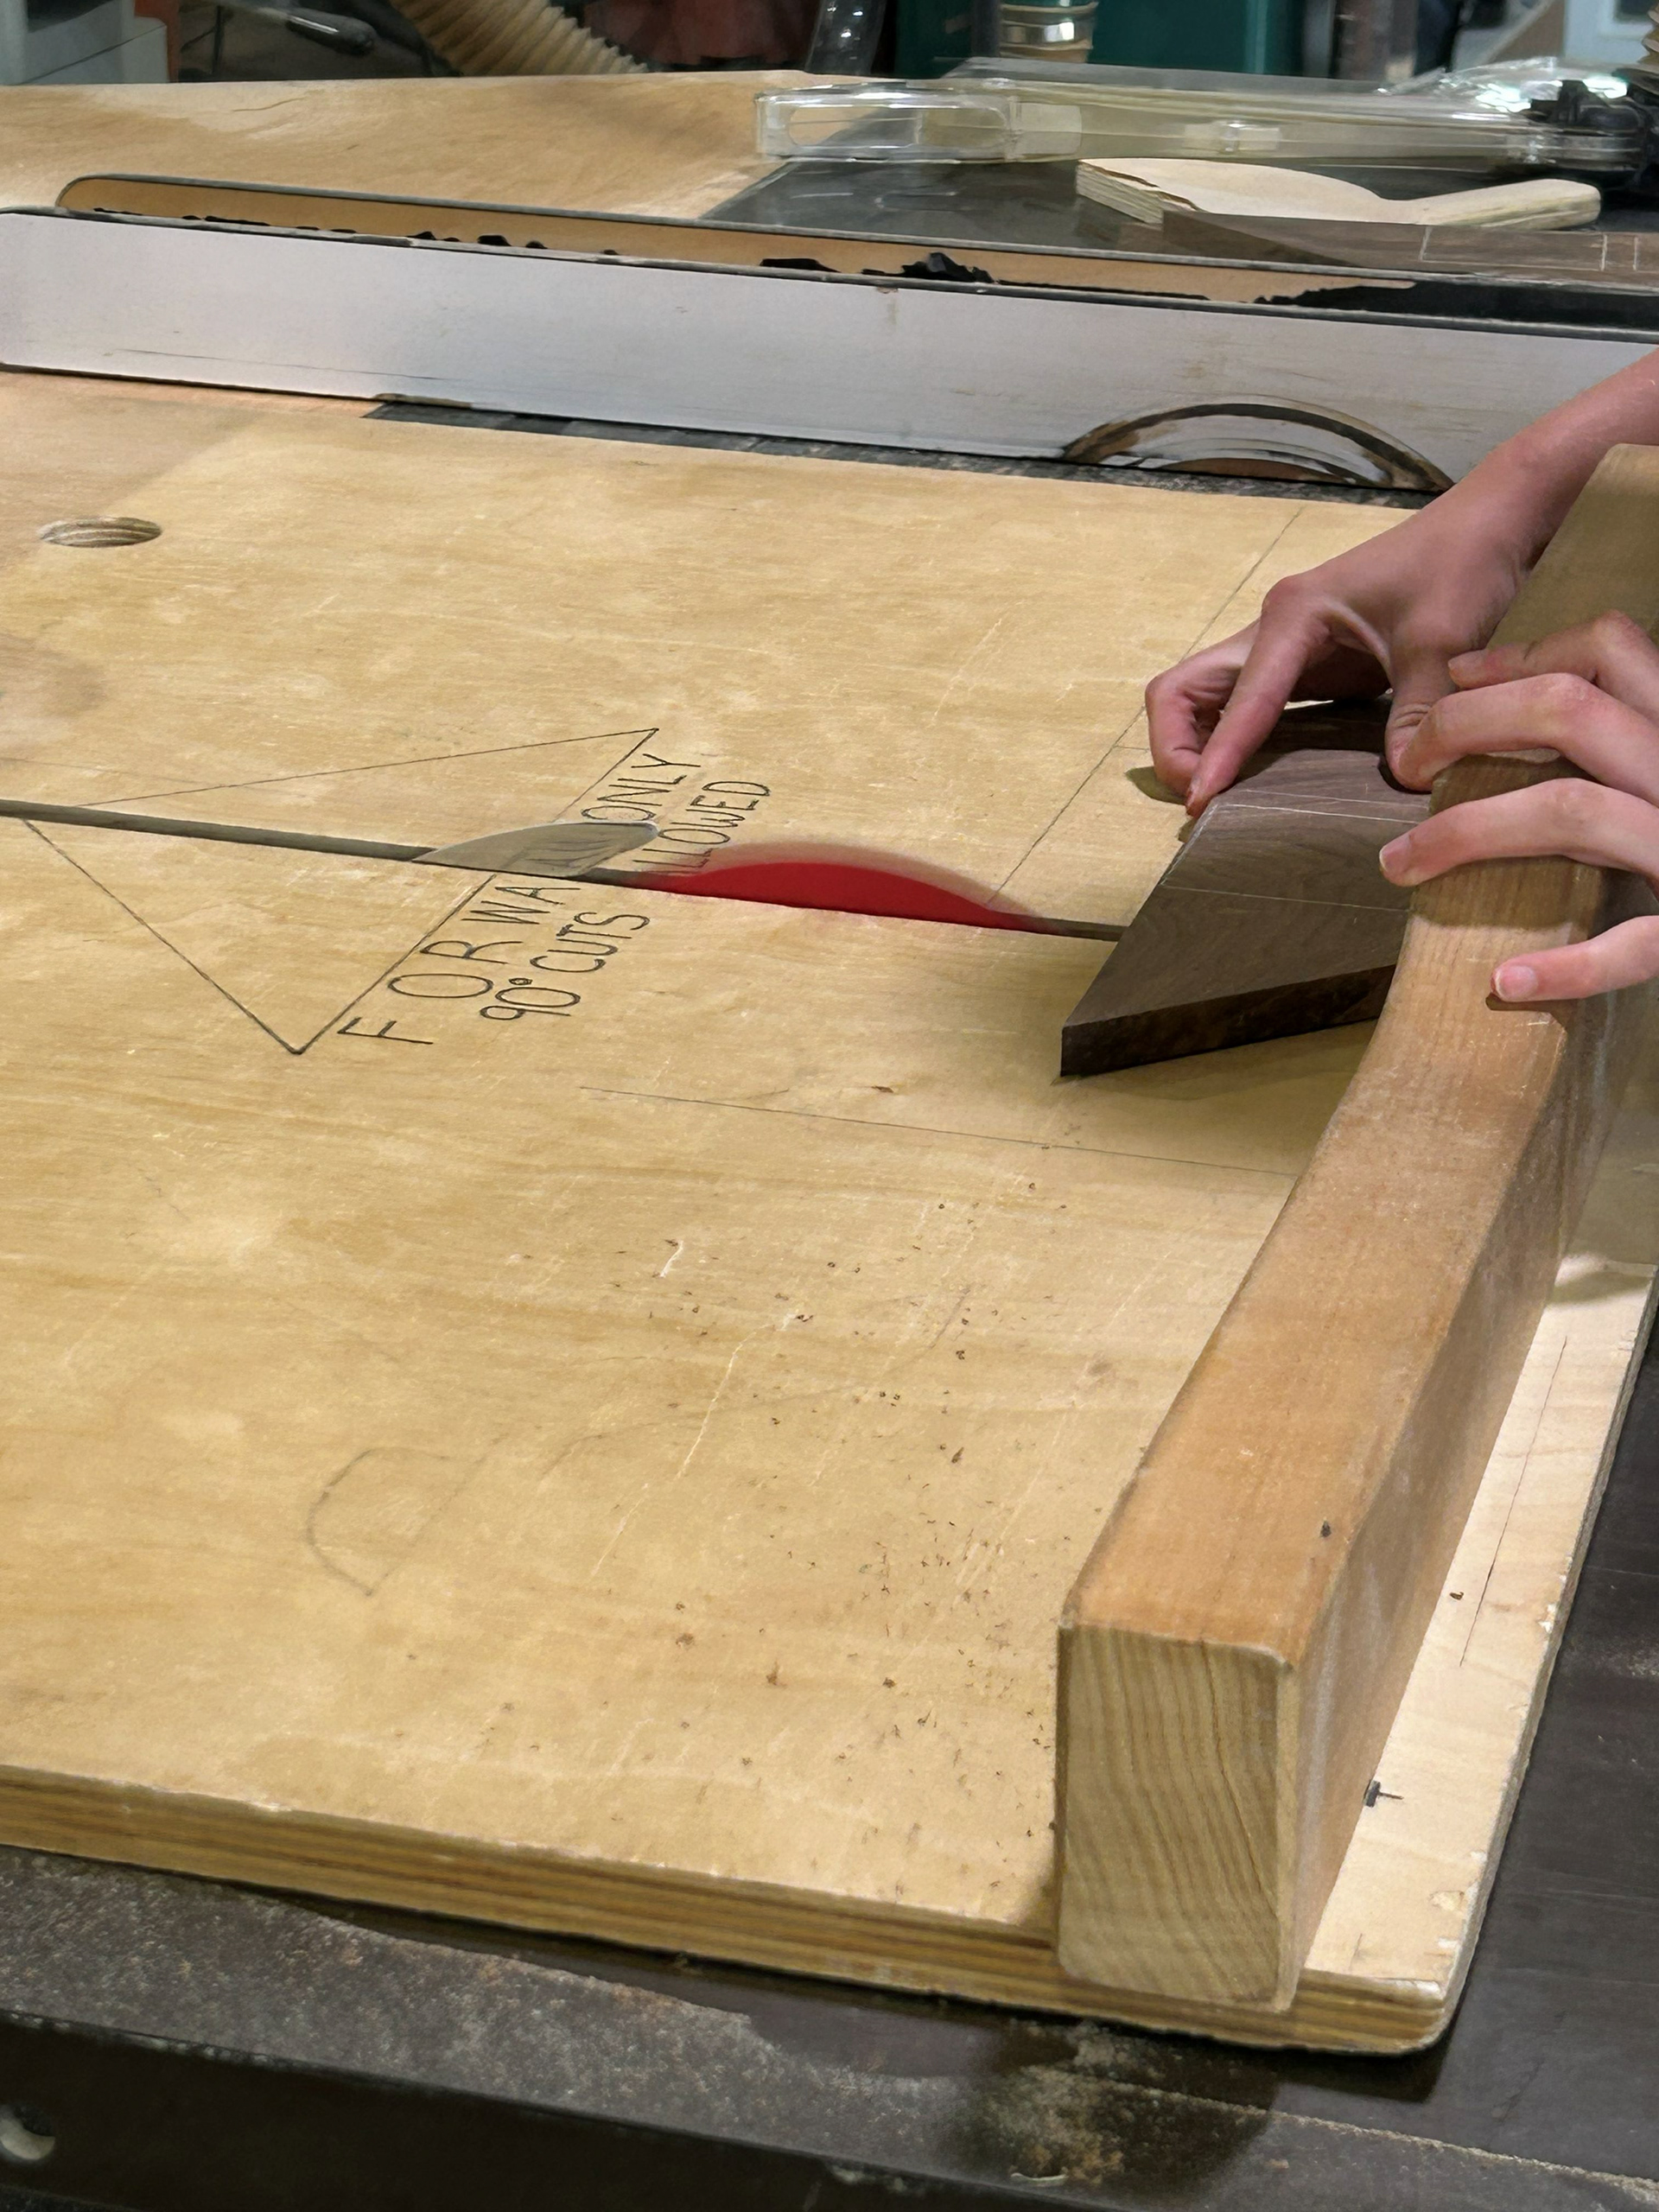
Image 14 | Rip Cutting the S-curve Pieces Into Individual Squares
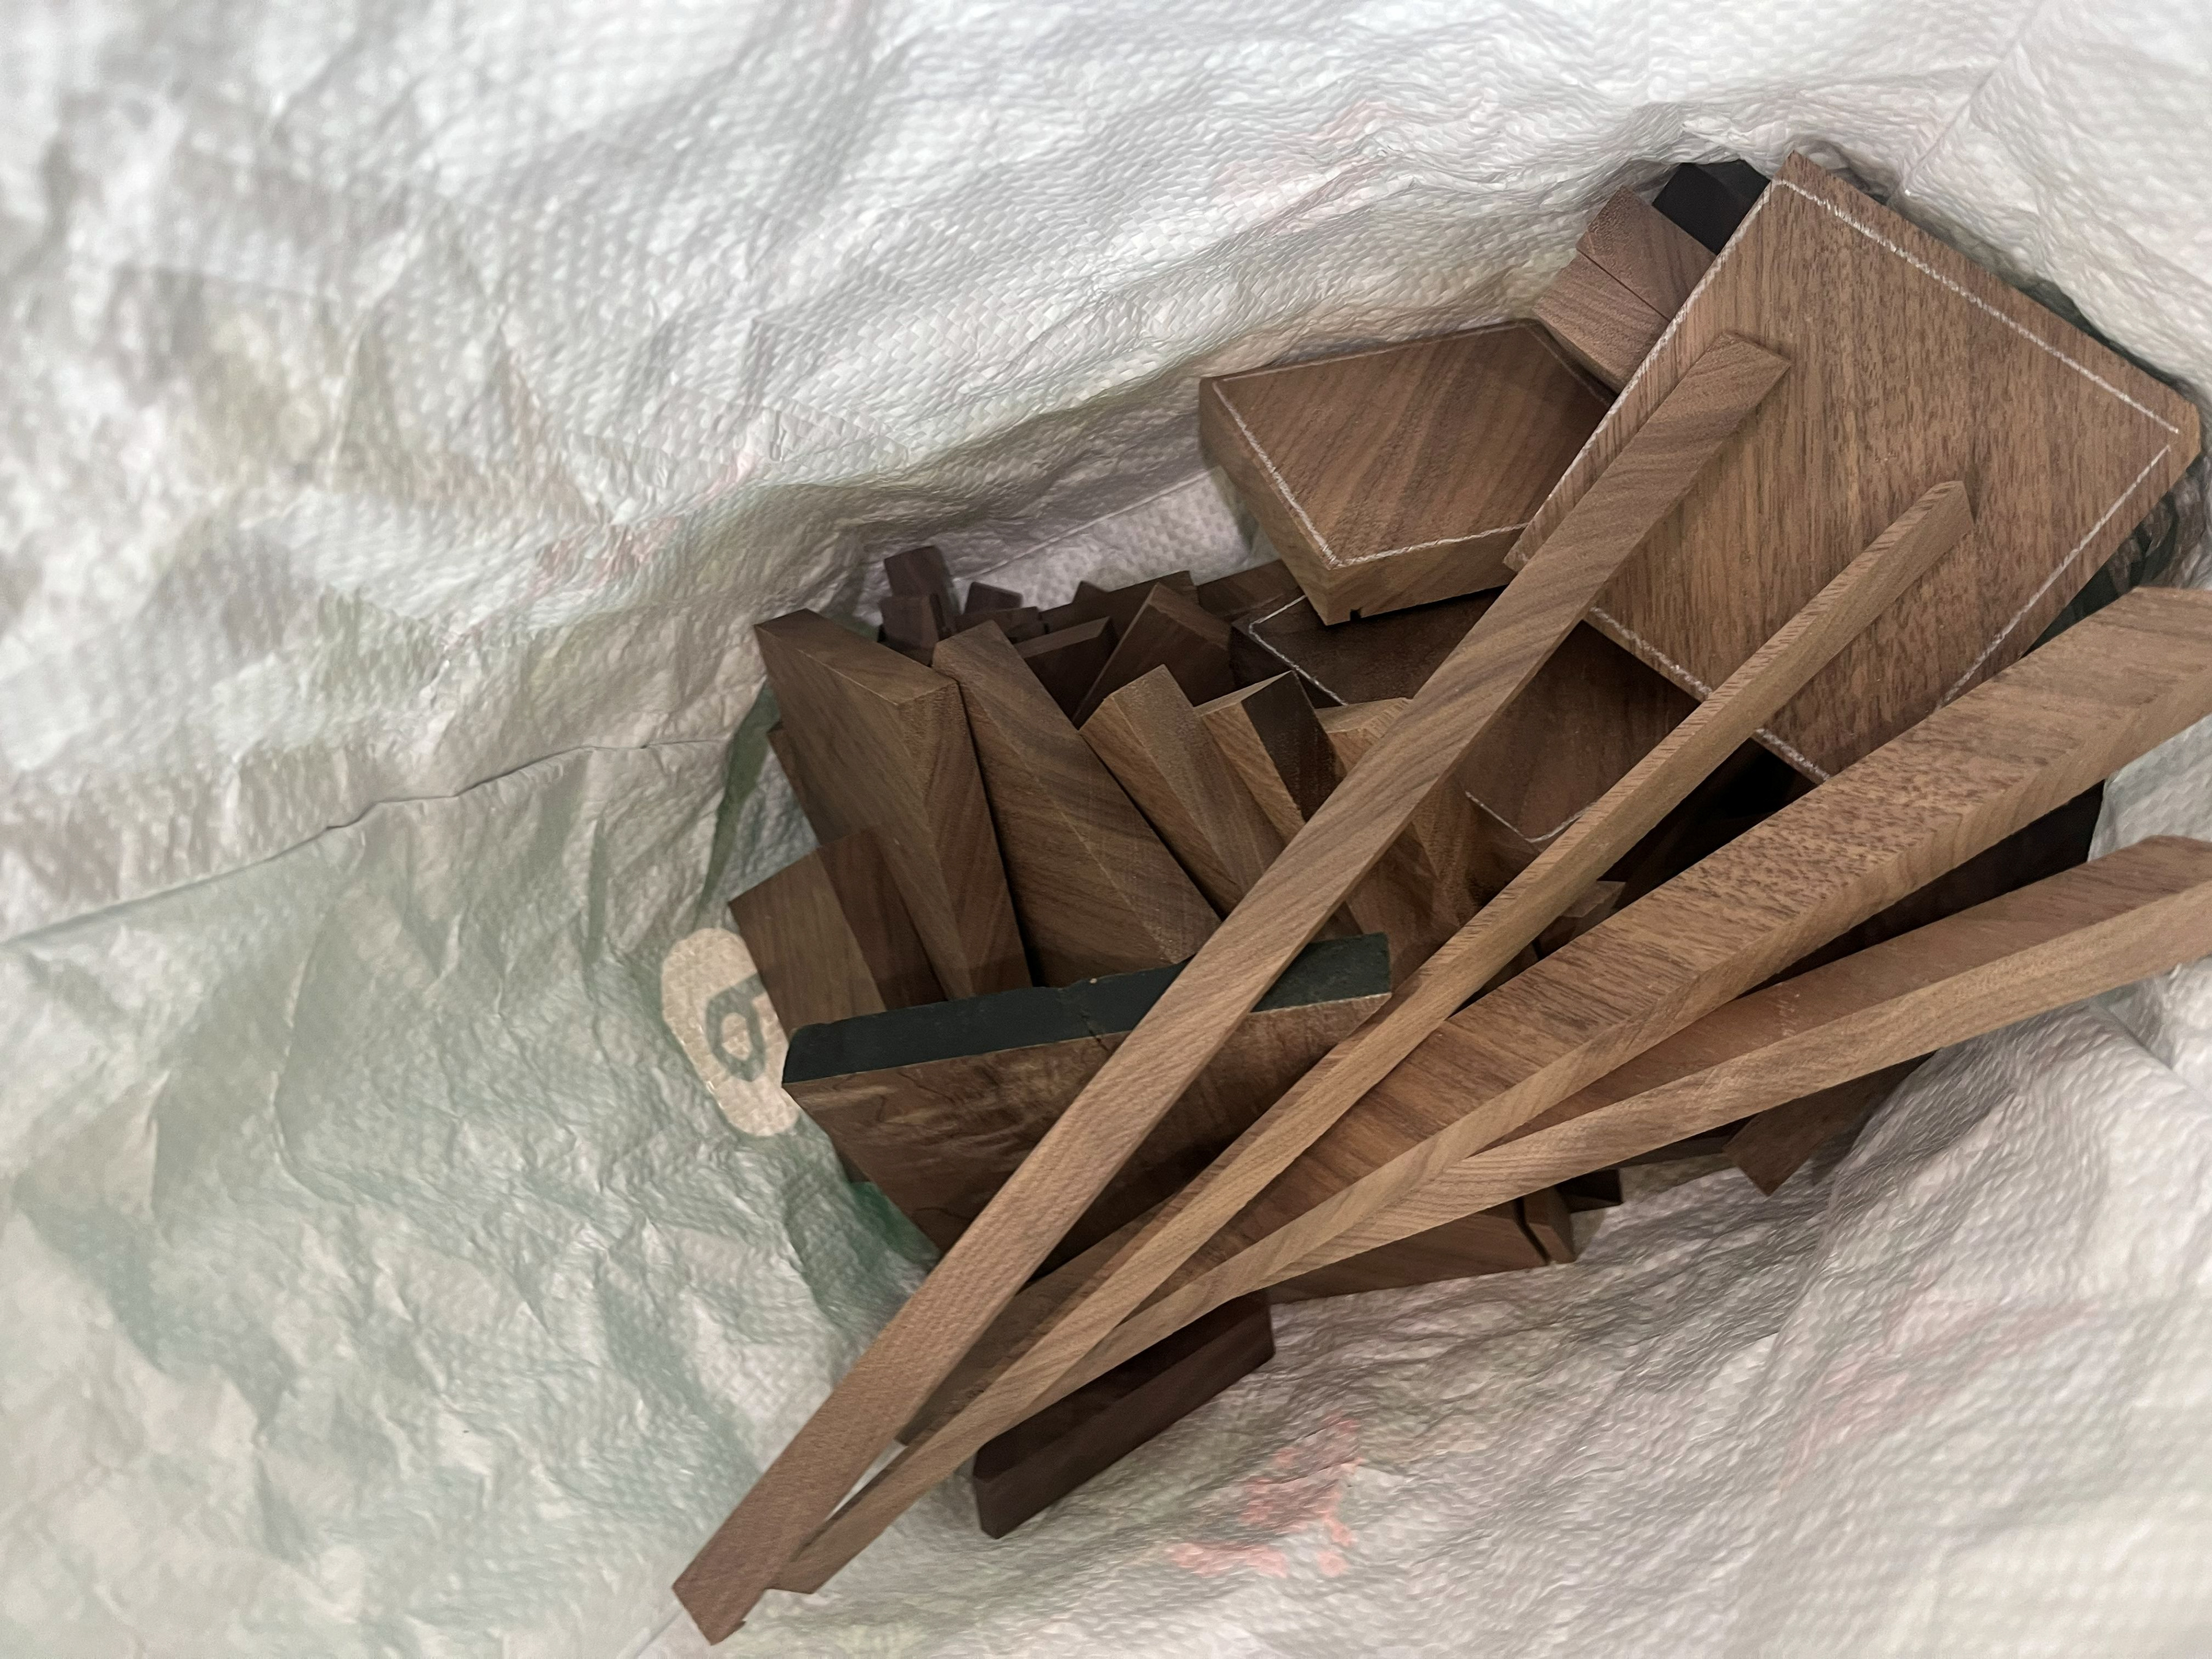
Image 15 | Final S-Curve Square Pieces to Make the S-curve Shape
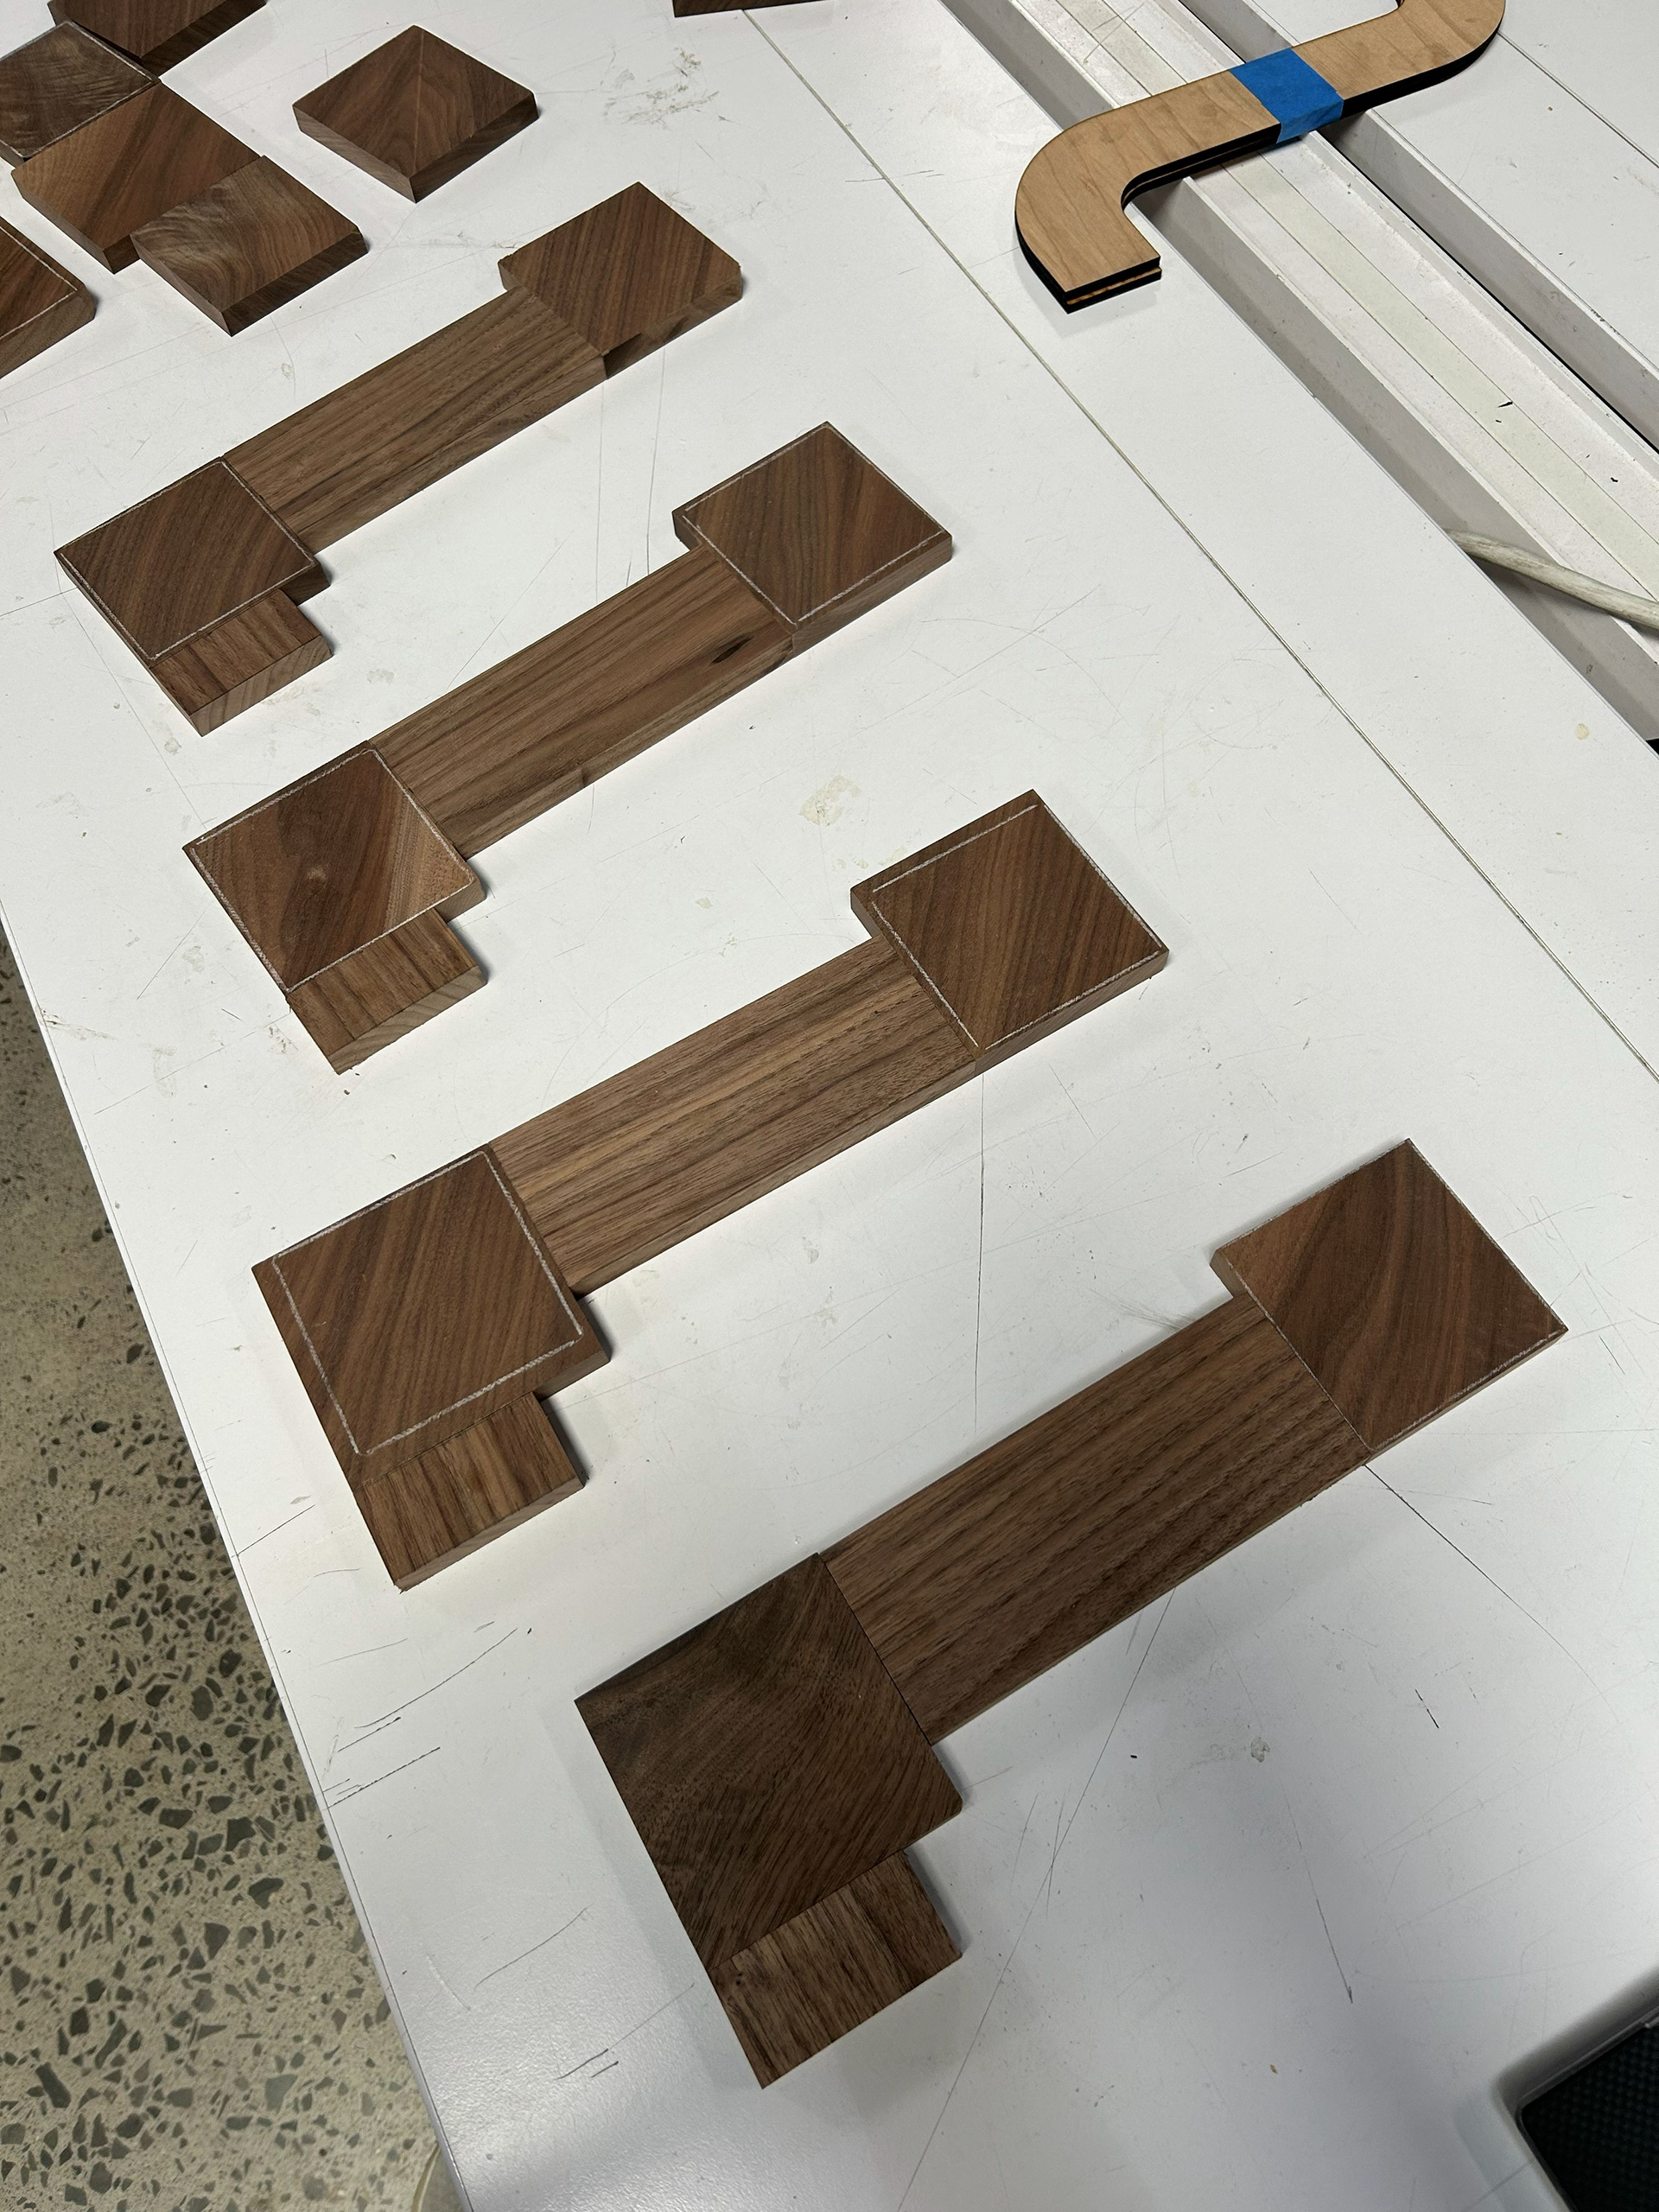
Image 16 | Matching the Shade, Color, and Grain Pattern of the S-curve Square Pieces with the Straight S-curve Pieces to Create Initial S-curve Shape
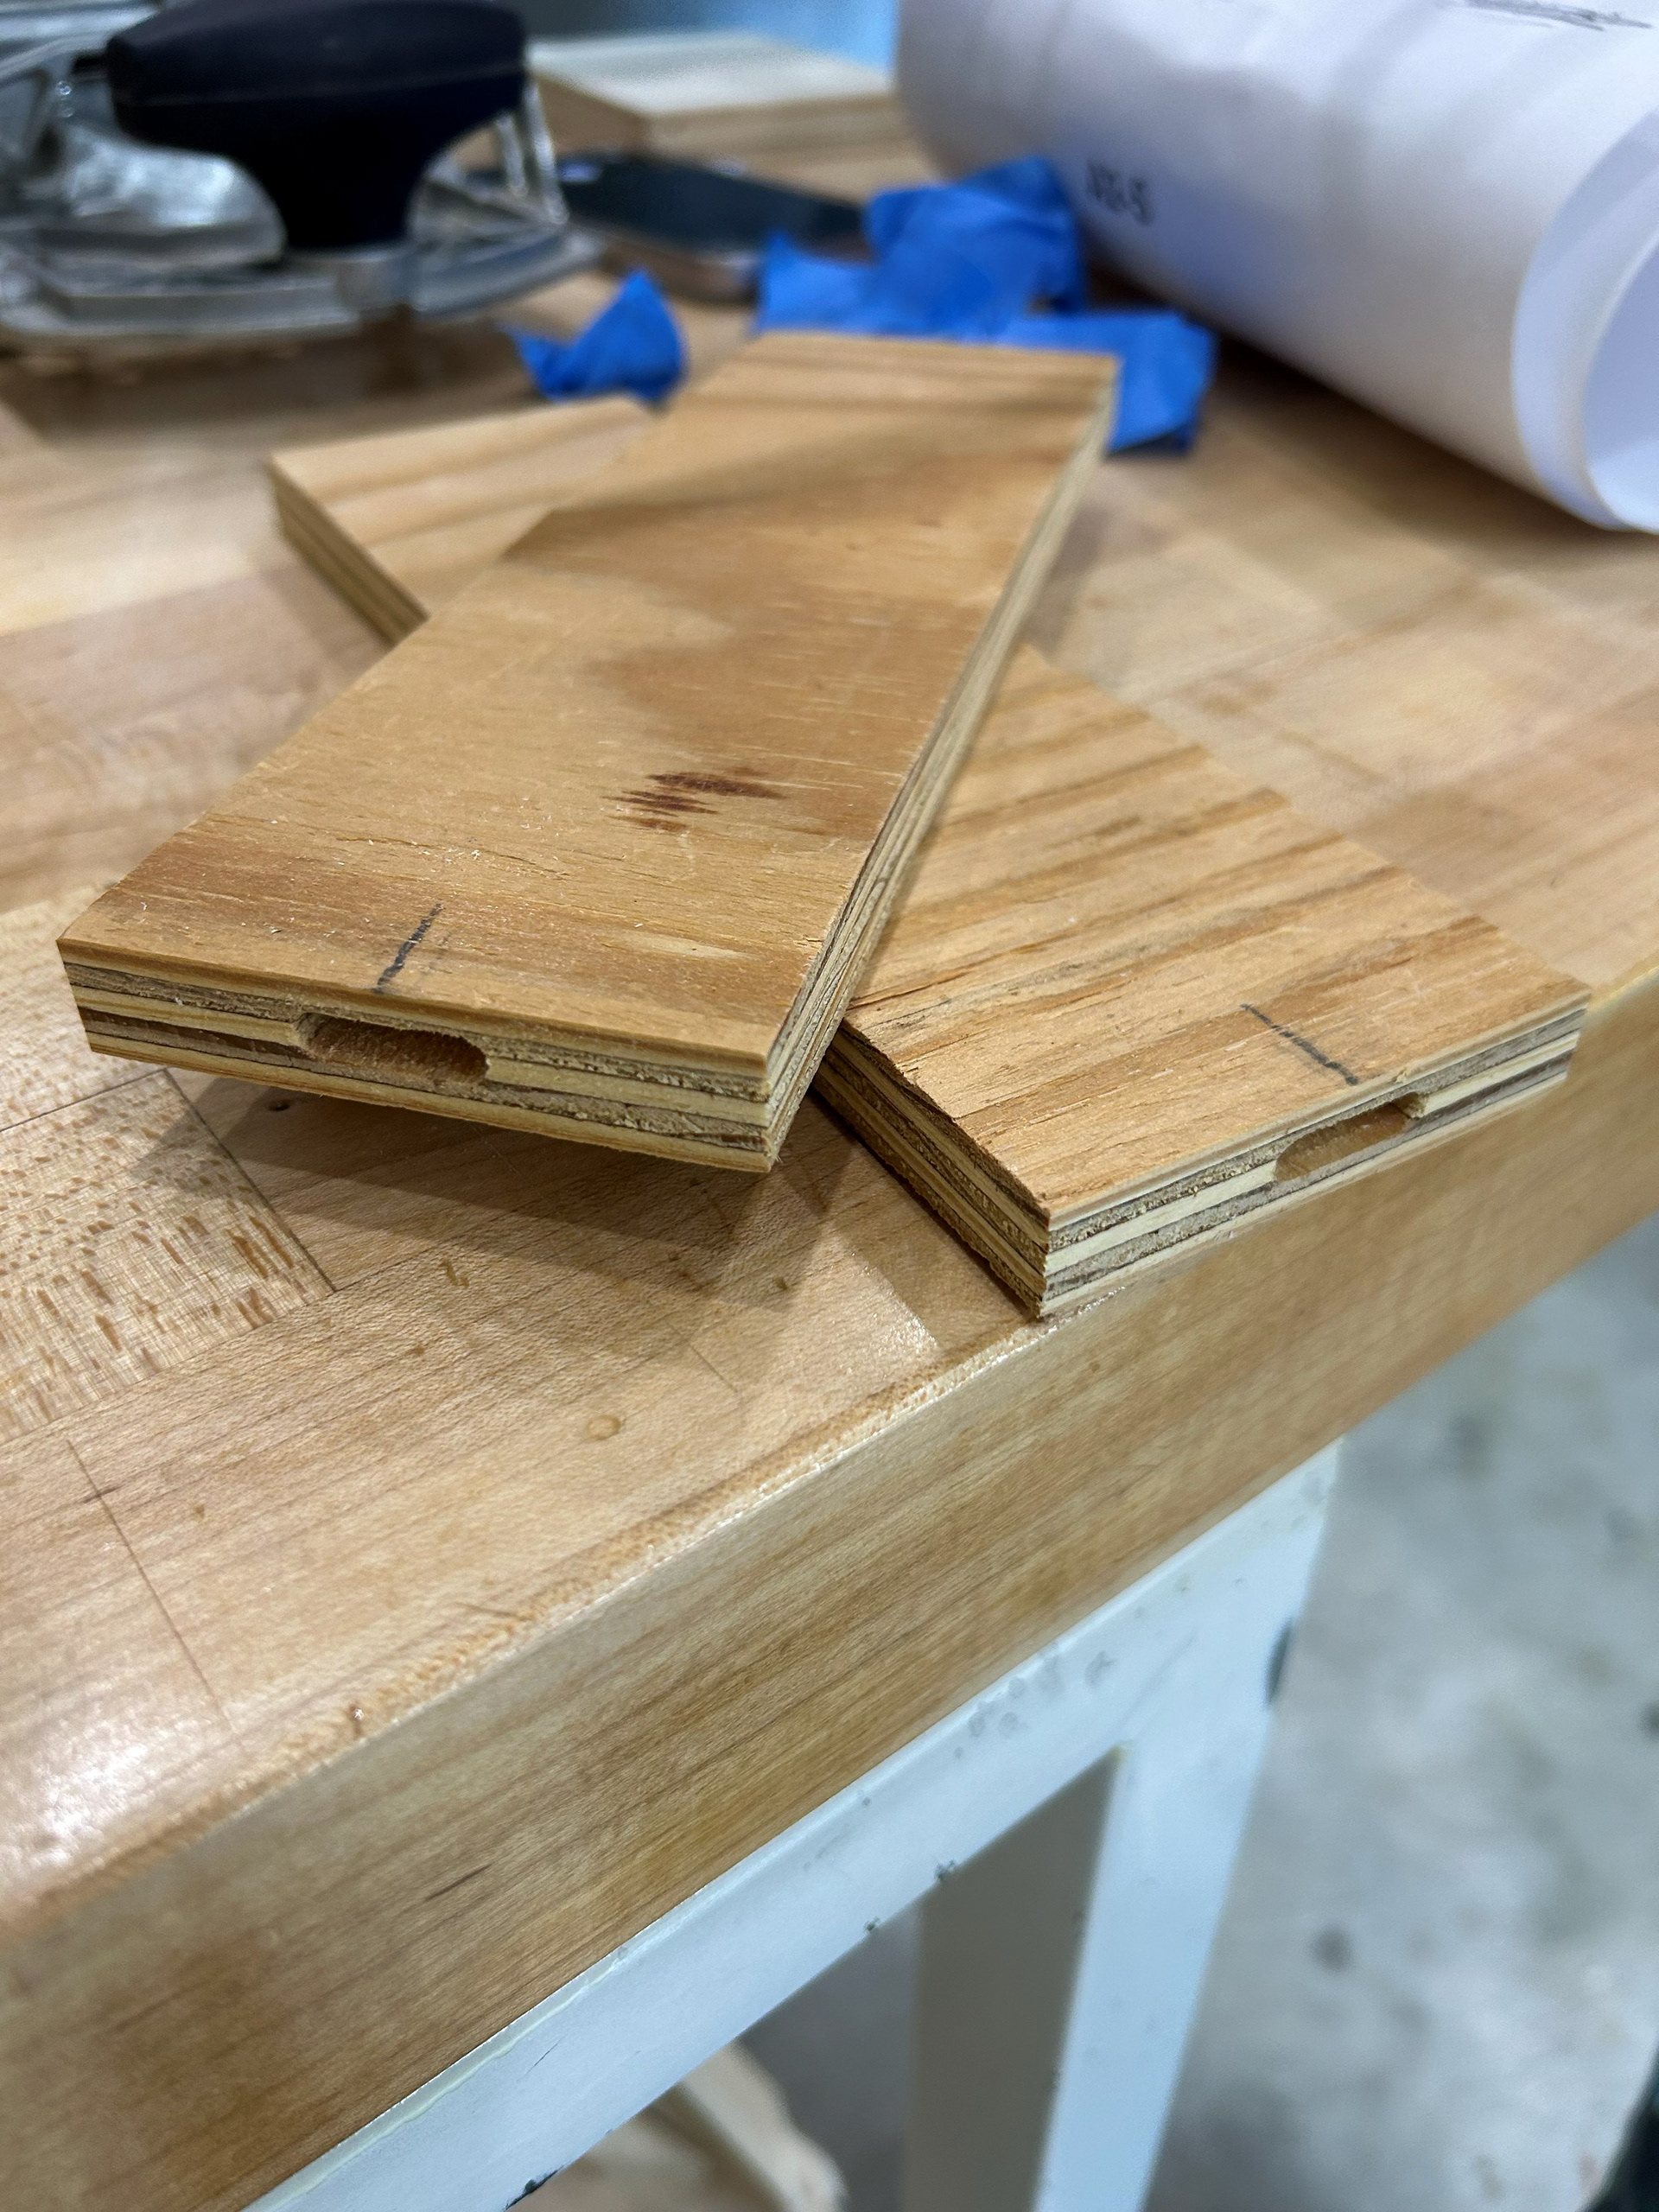
Image 17 | Practice Round with the Domino Tool Before Using it on the S-curve Pieces
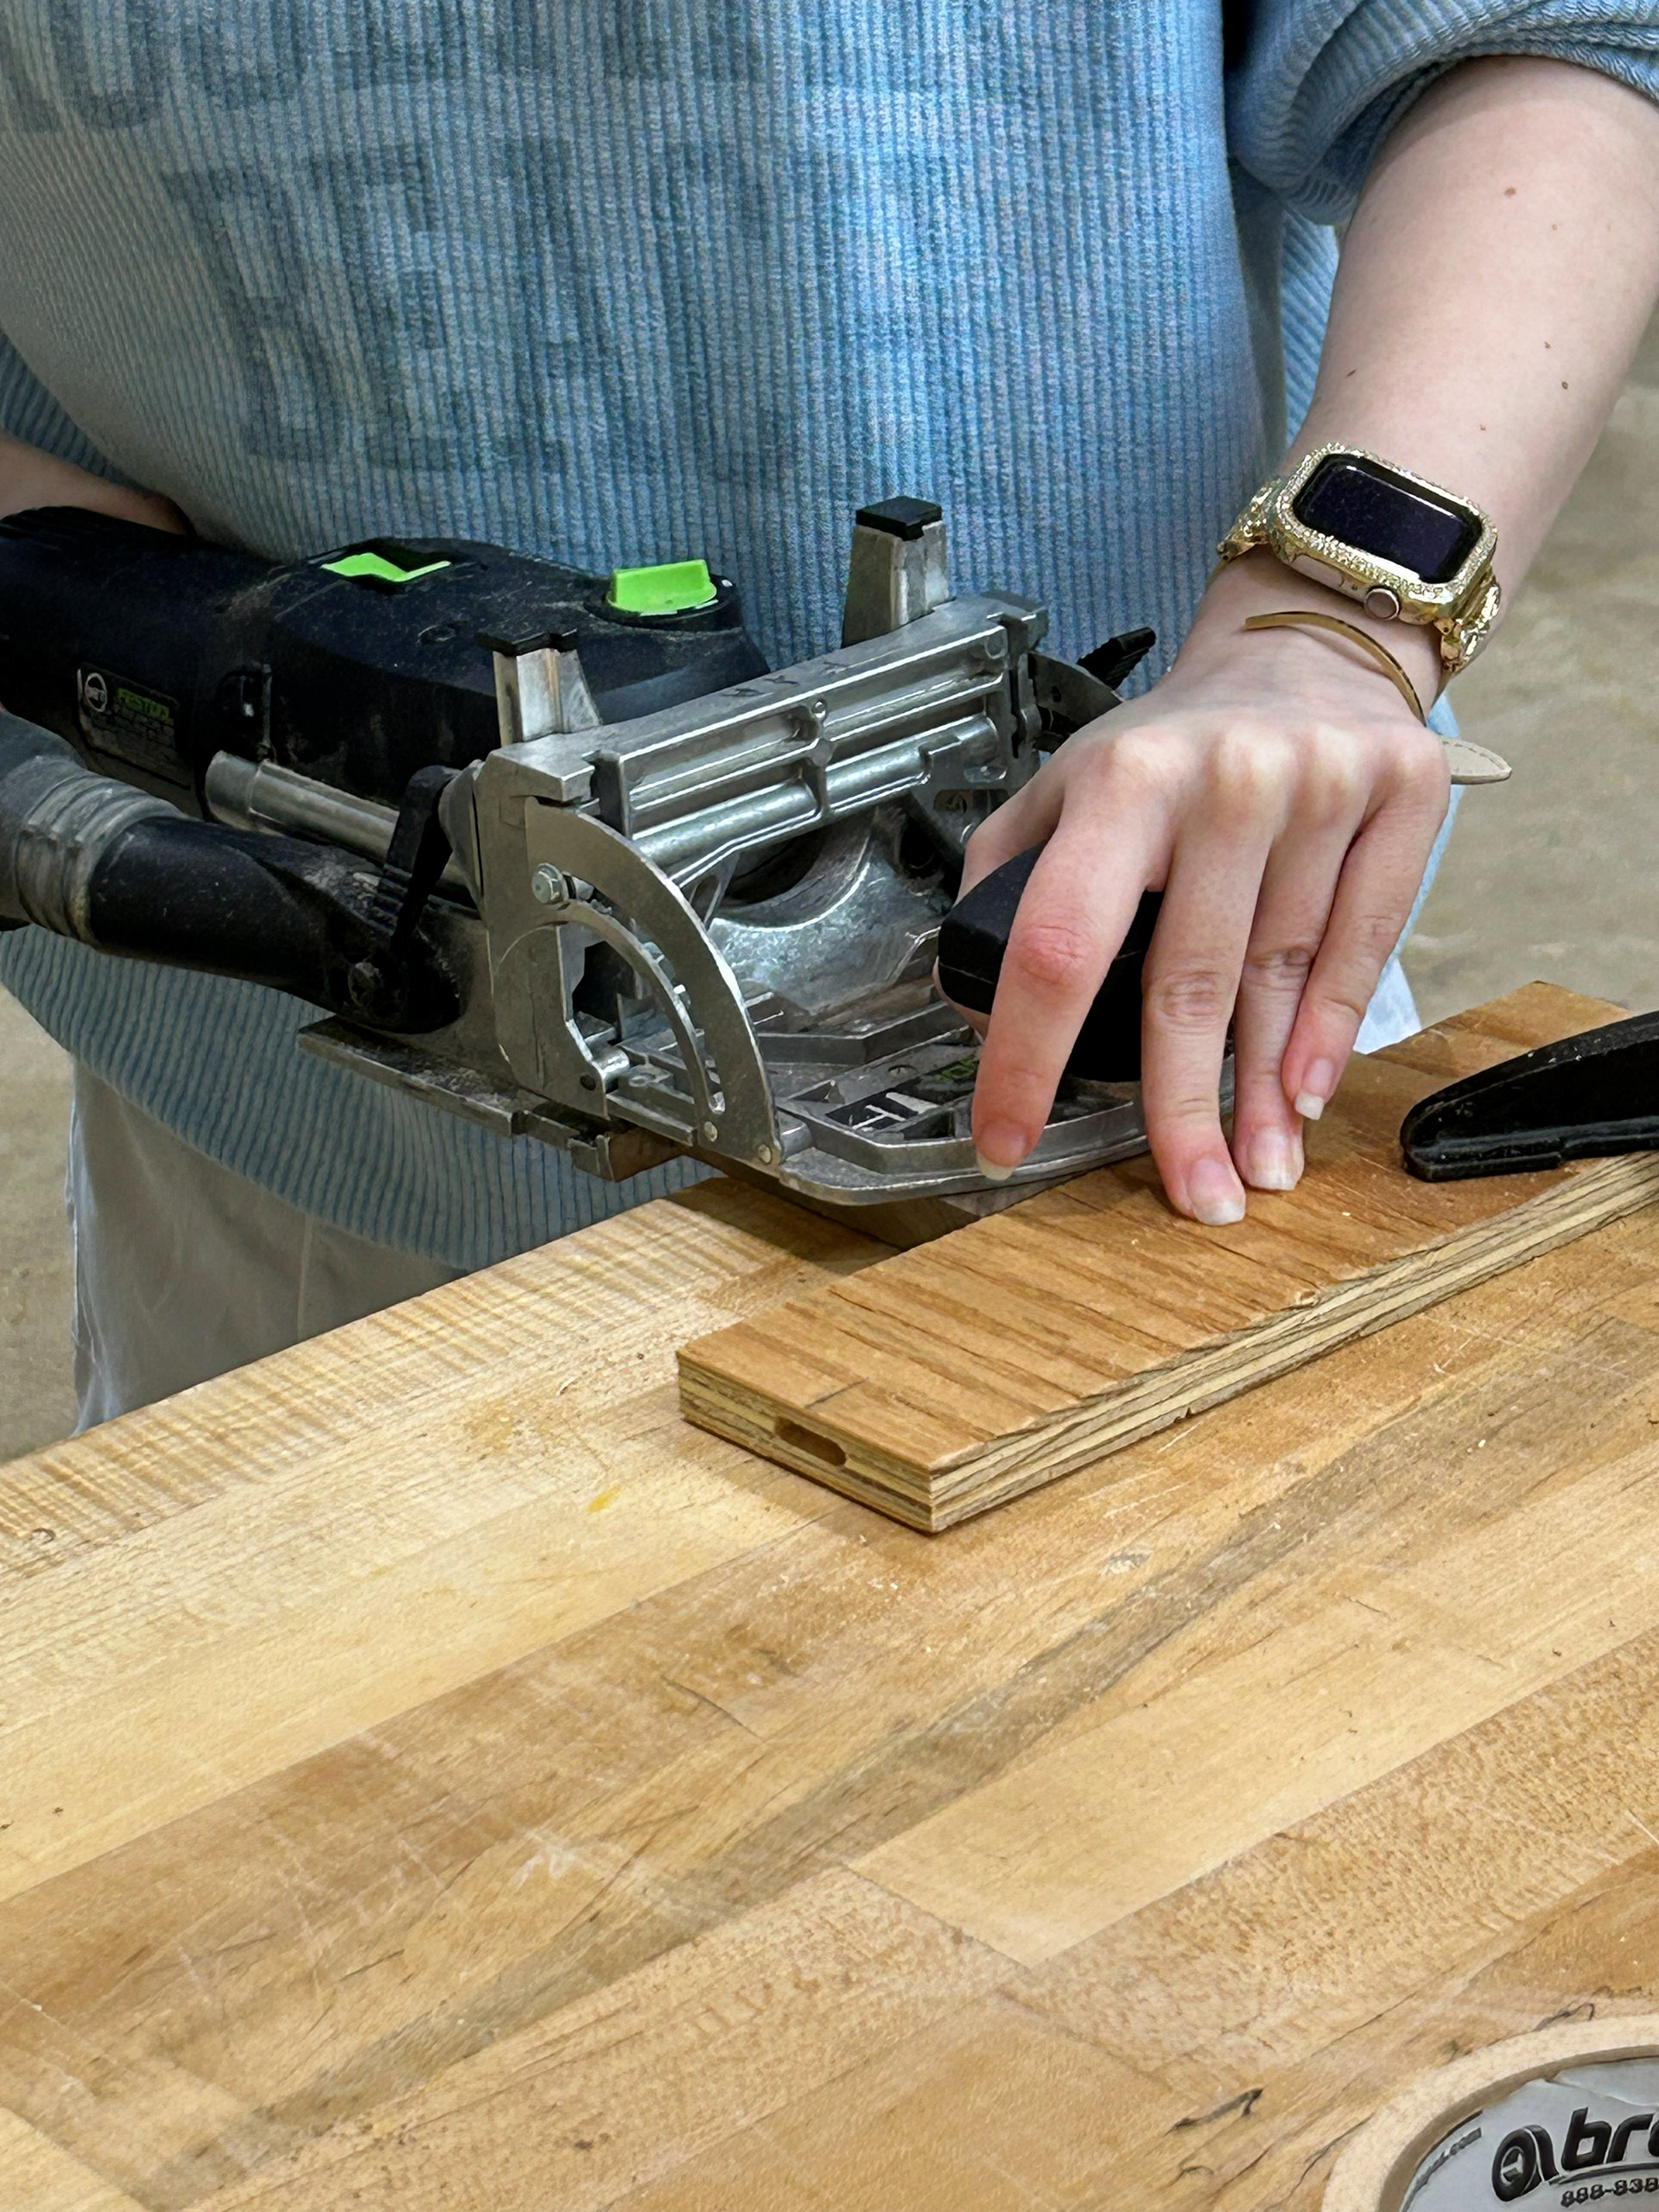
Image 18 | Using the Domino to Cut a Floating Mortise and Tenon Joint to Create the Structure and Shape of the S-curve Leg
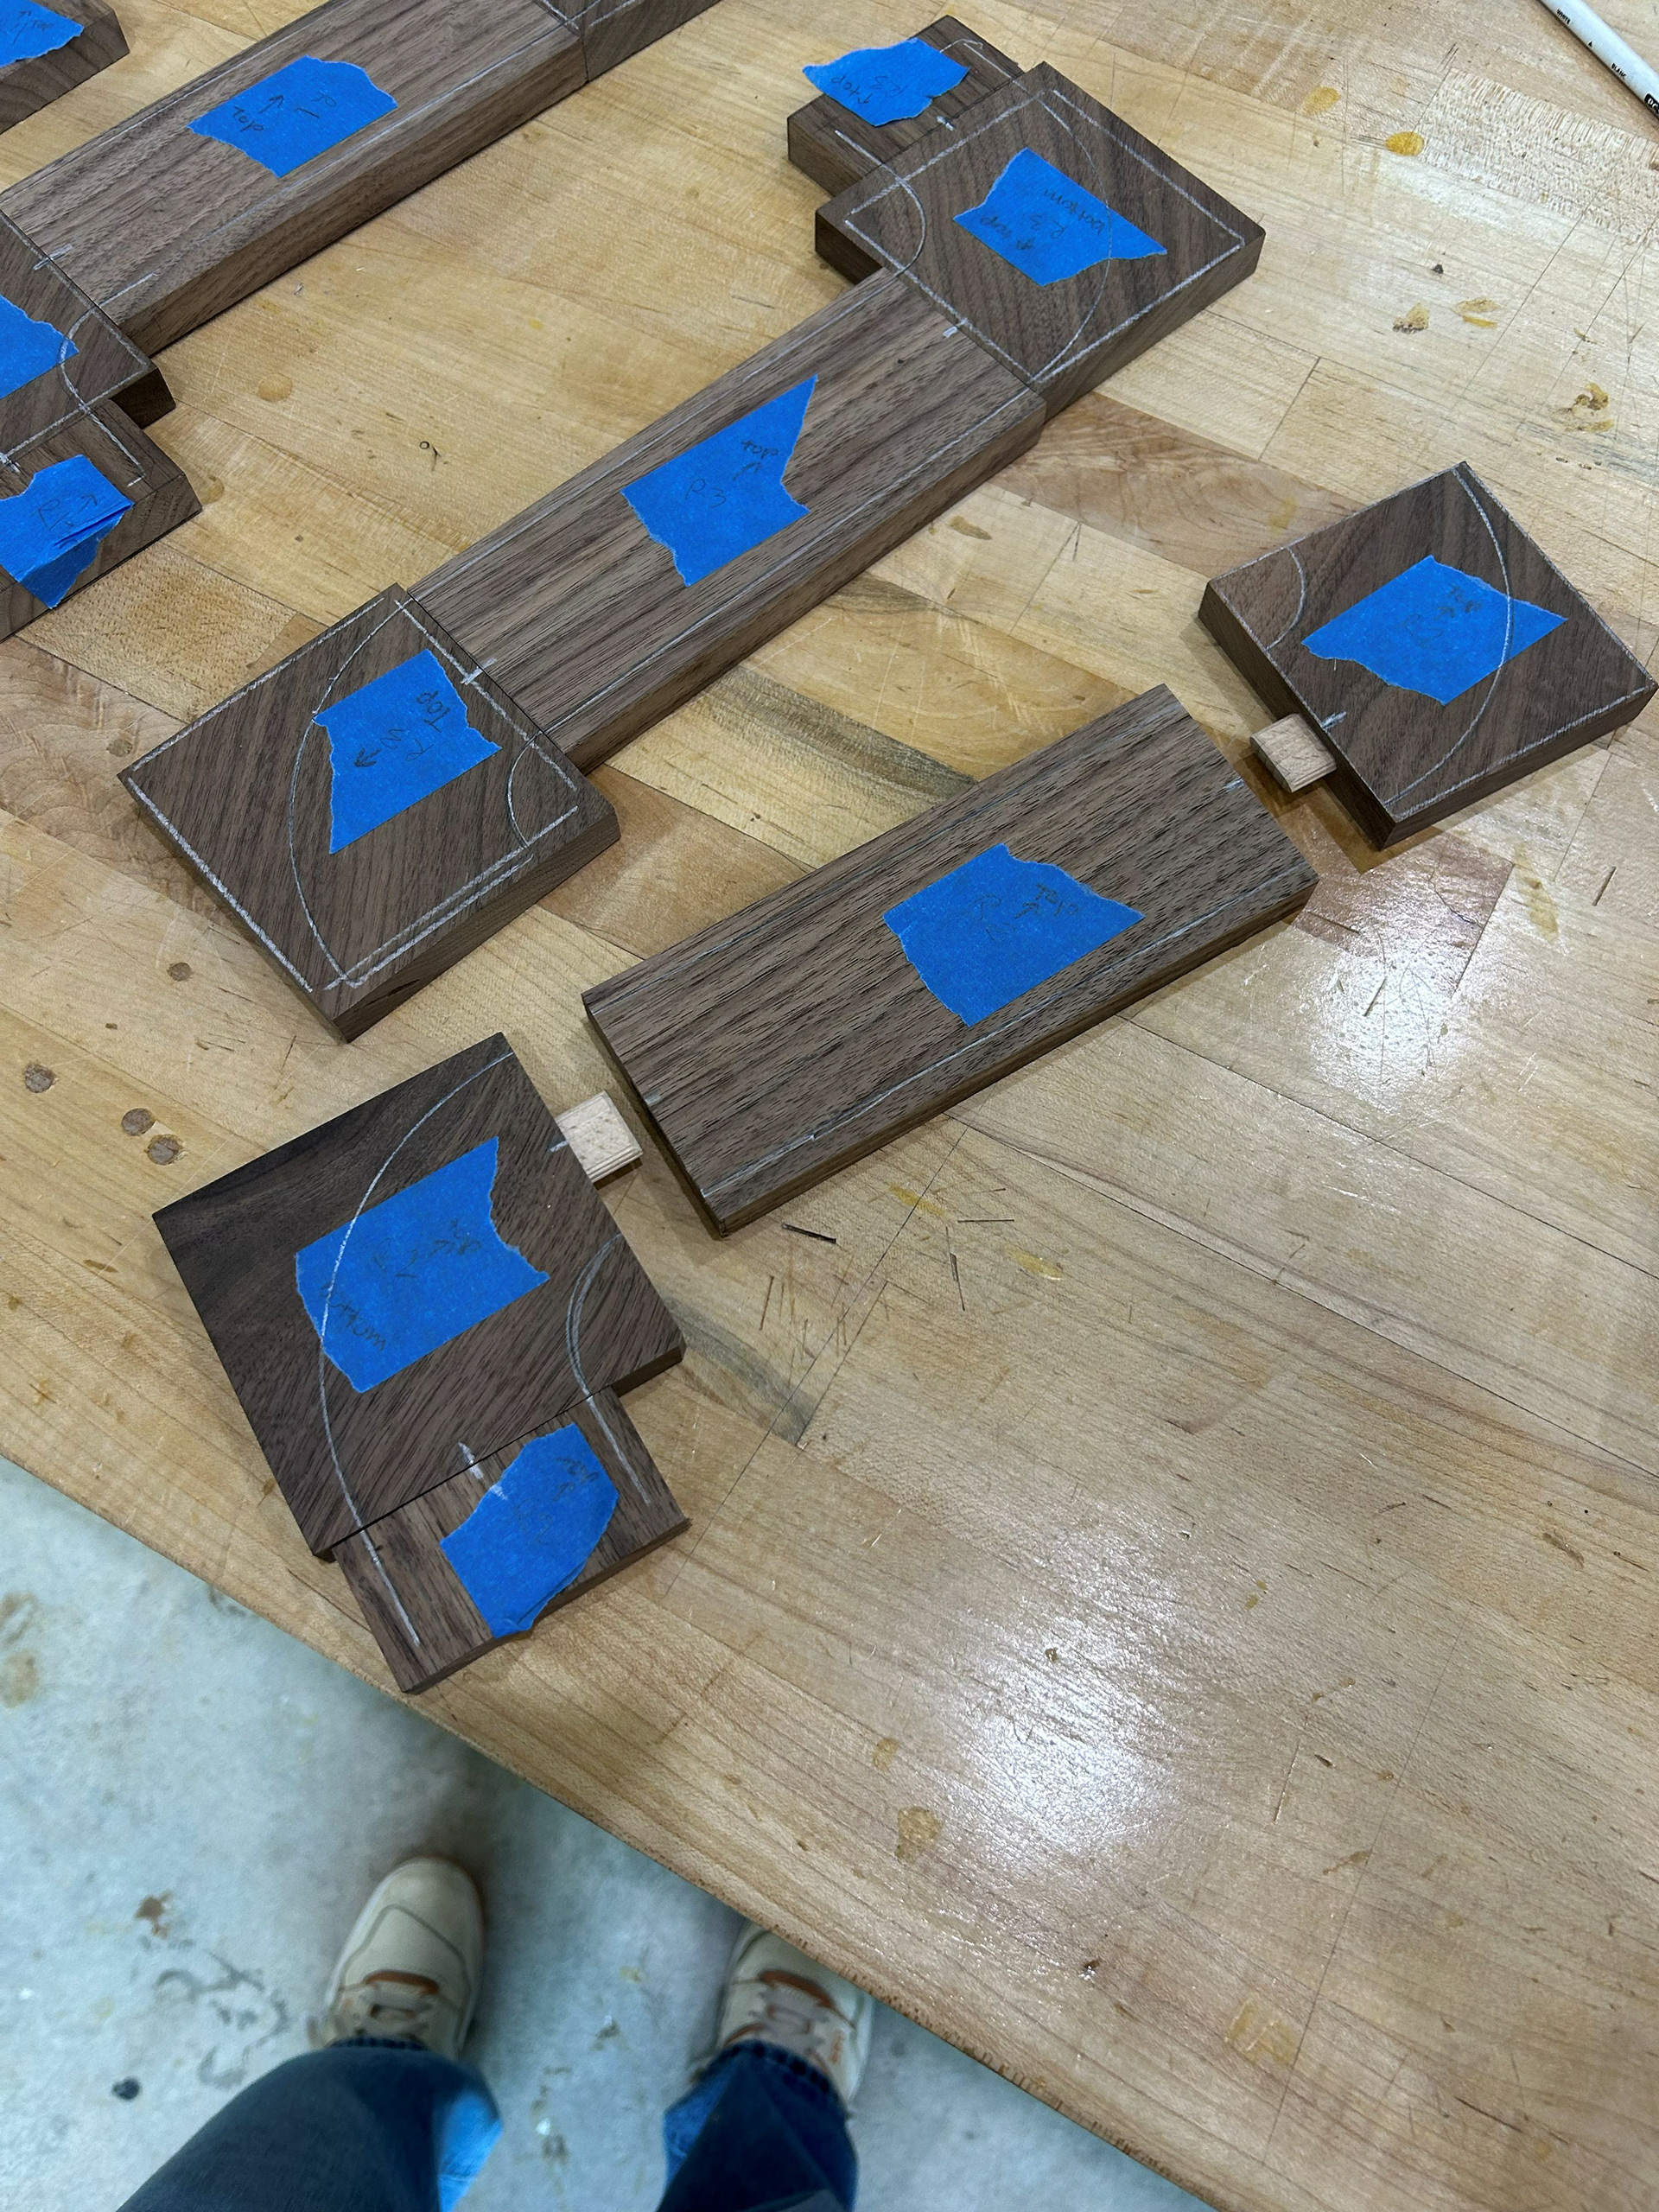
Image 19 | Dry-fitting the 4x20 Domino Pieces to Create the Initial S-curve Shape & Draw the Outline of the S-curve onto these Pieces
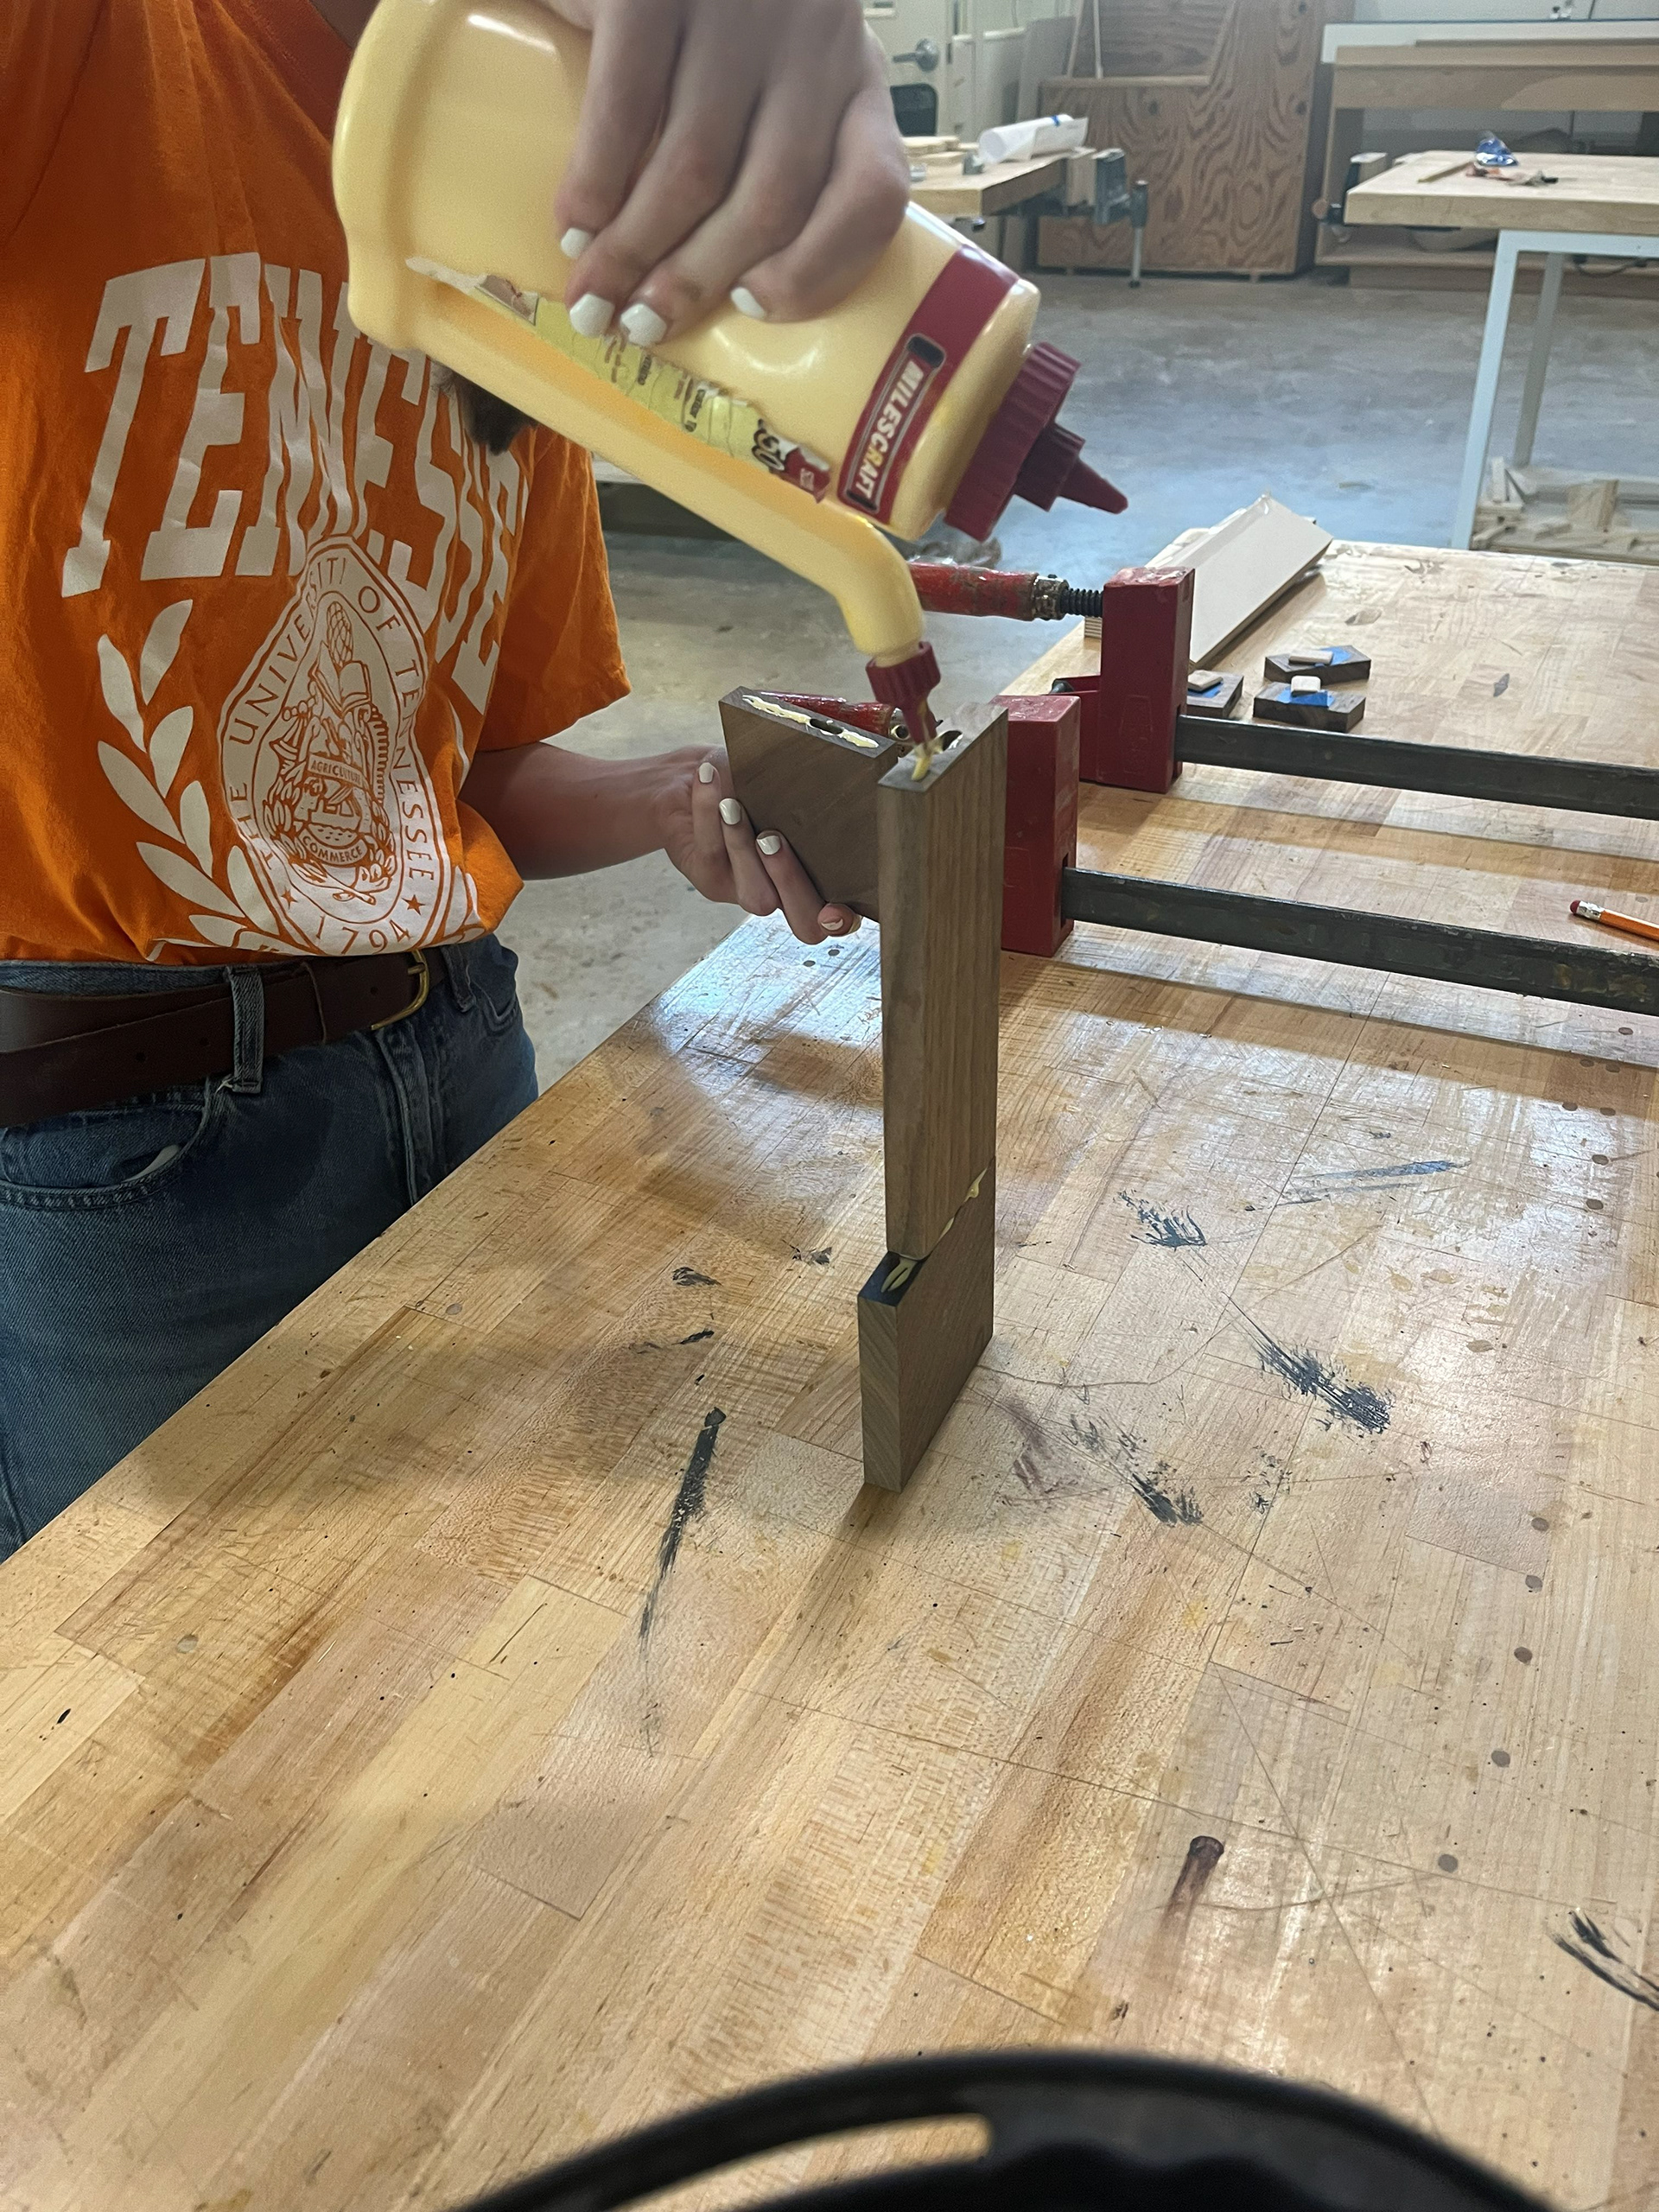
Image 20 | Gluing Together the Individual S-curve Leg Pieces
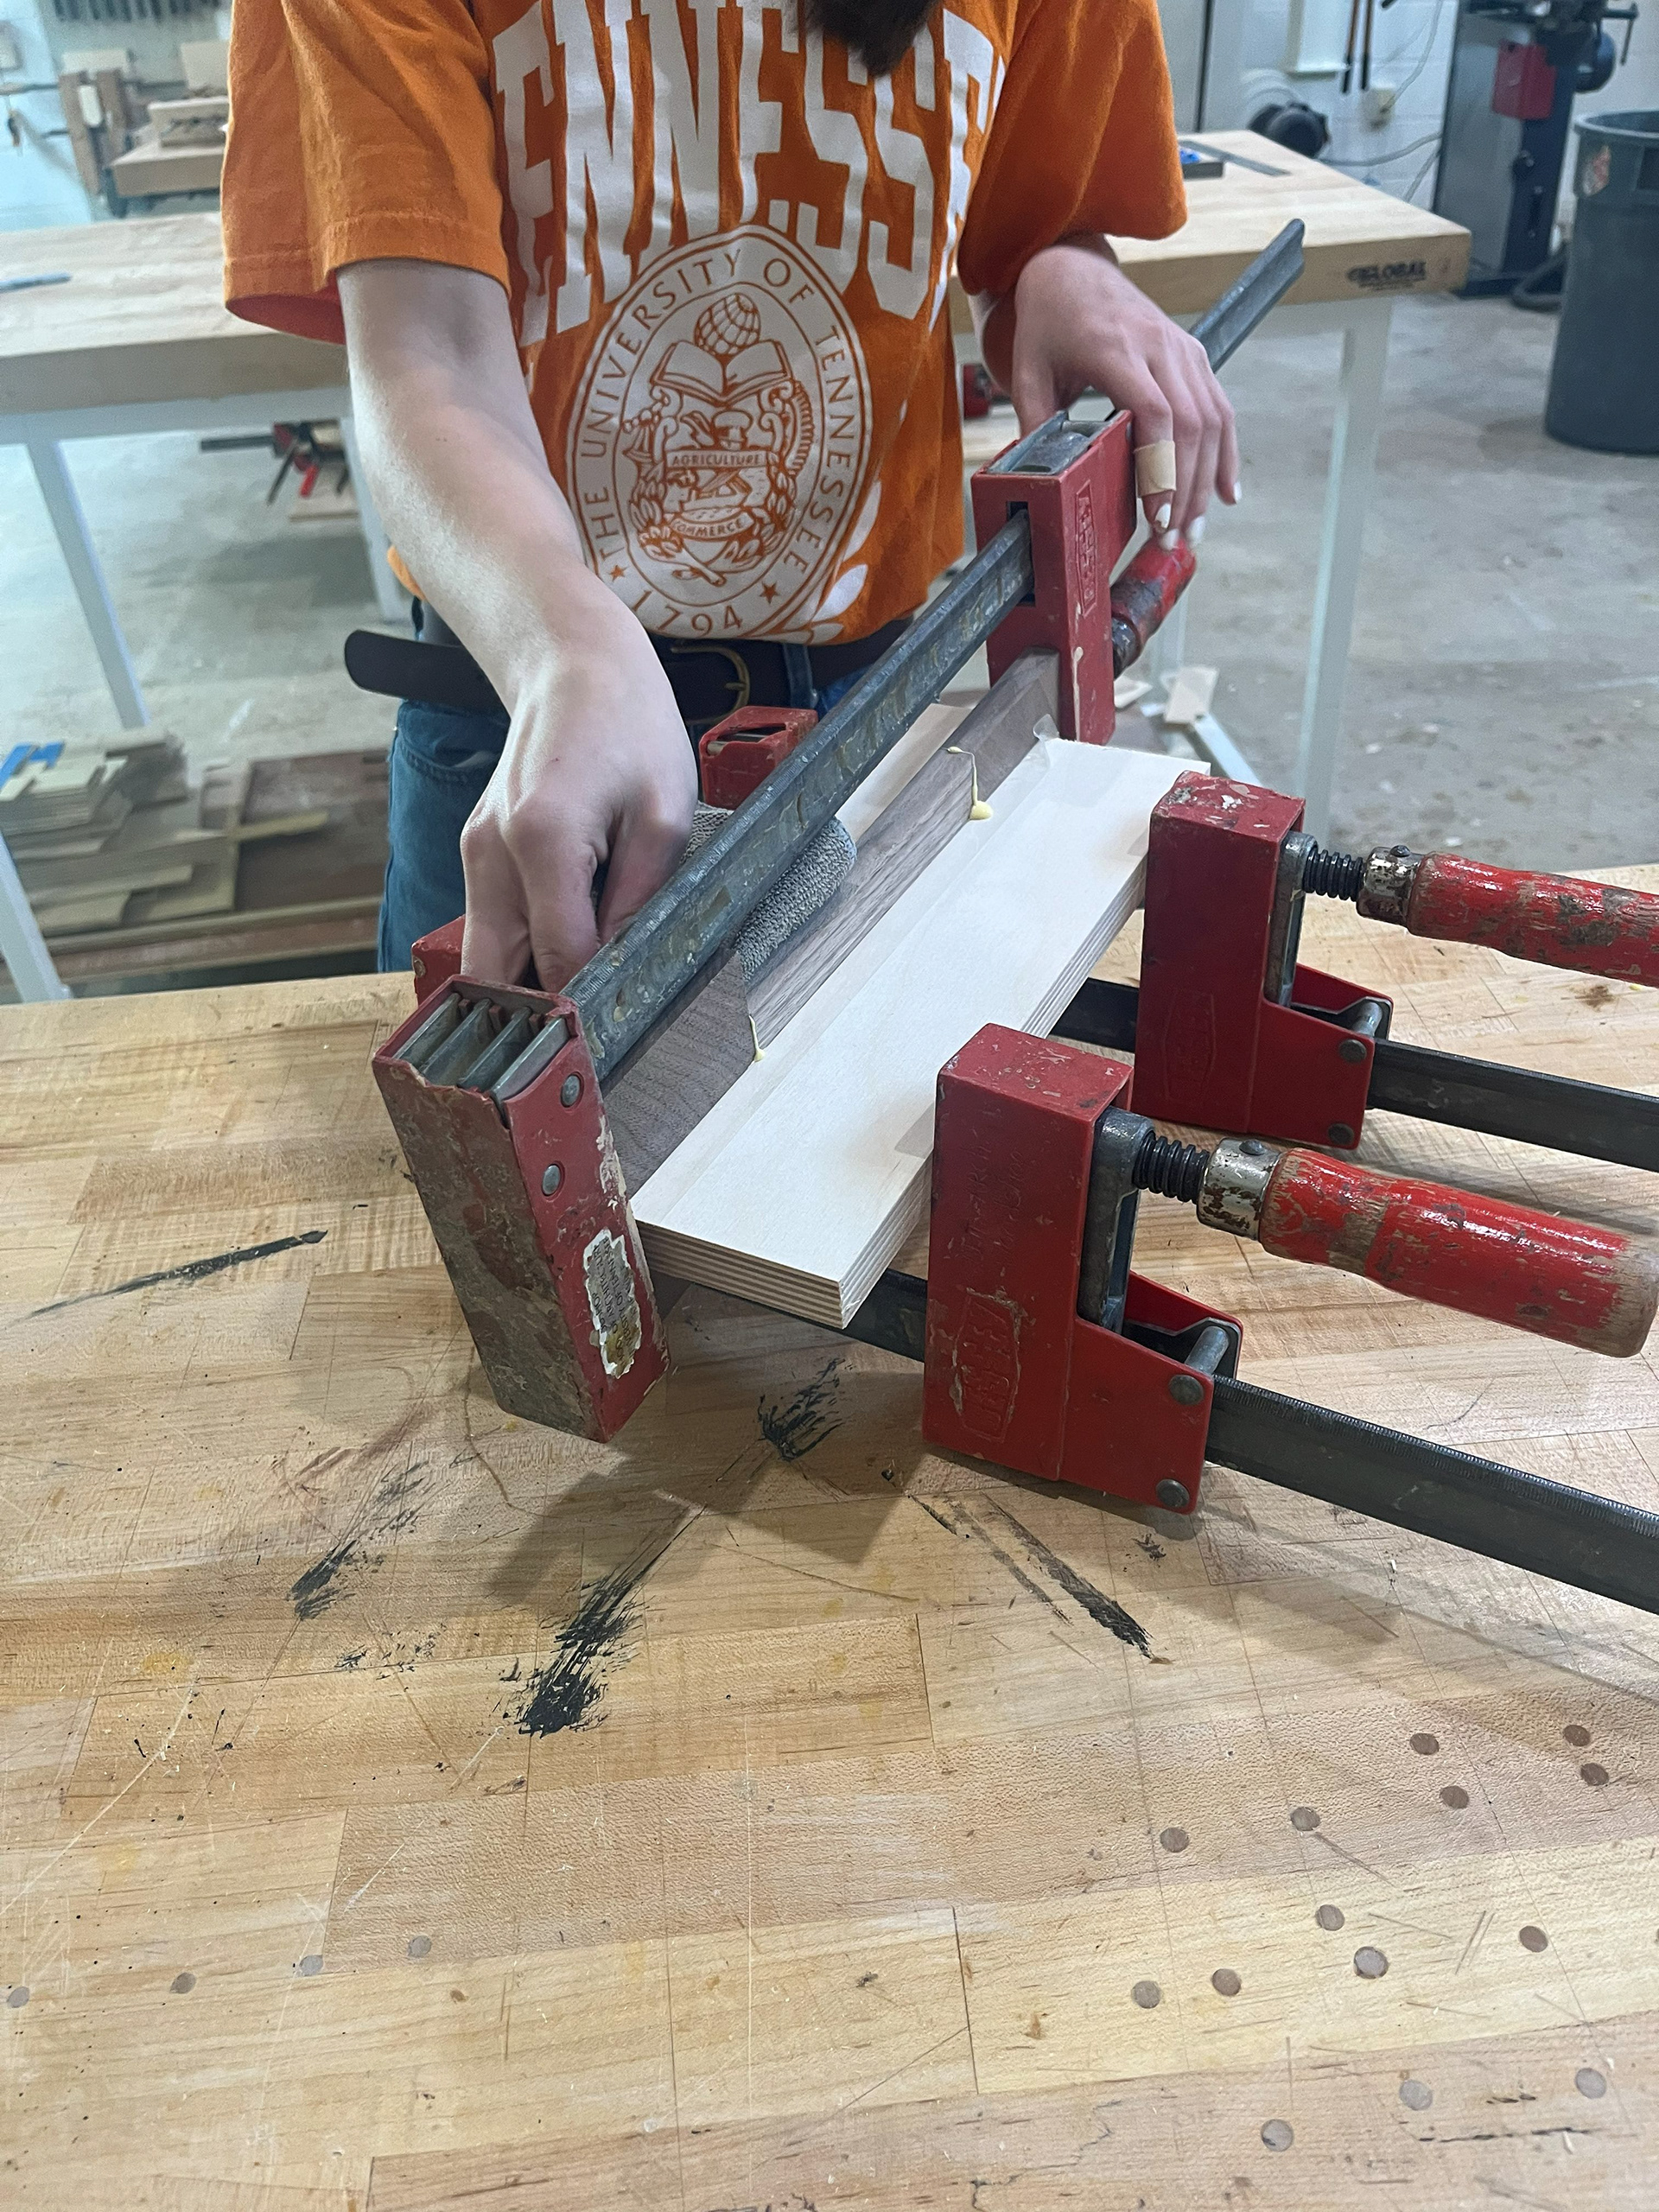
Image 21 | Clapping the Glued S-curve Leg between Two Pieces of Taped Plywood to Help Stabilize the Assembly in the Drying Process
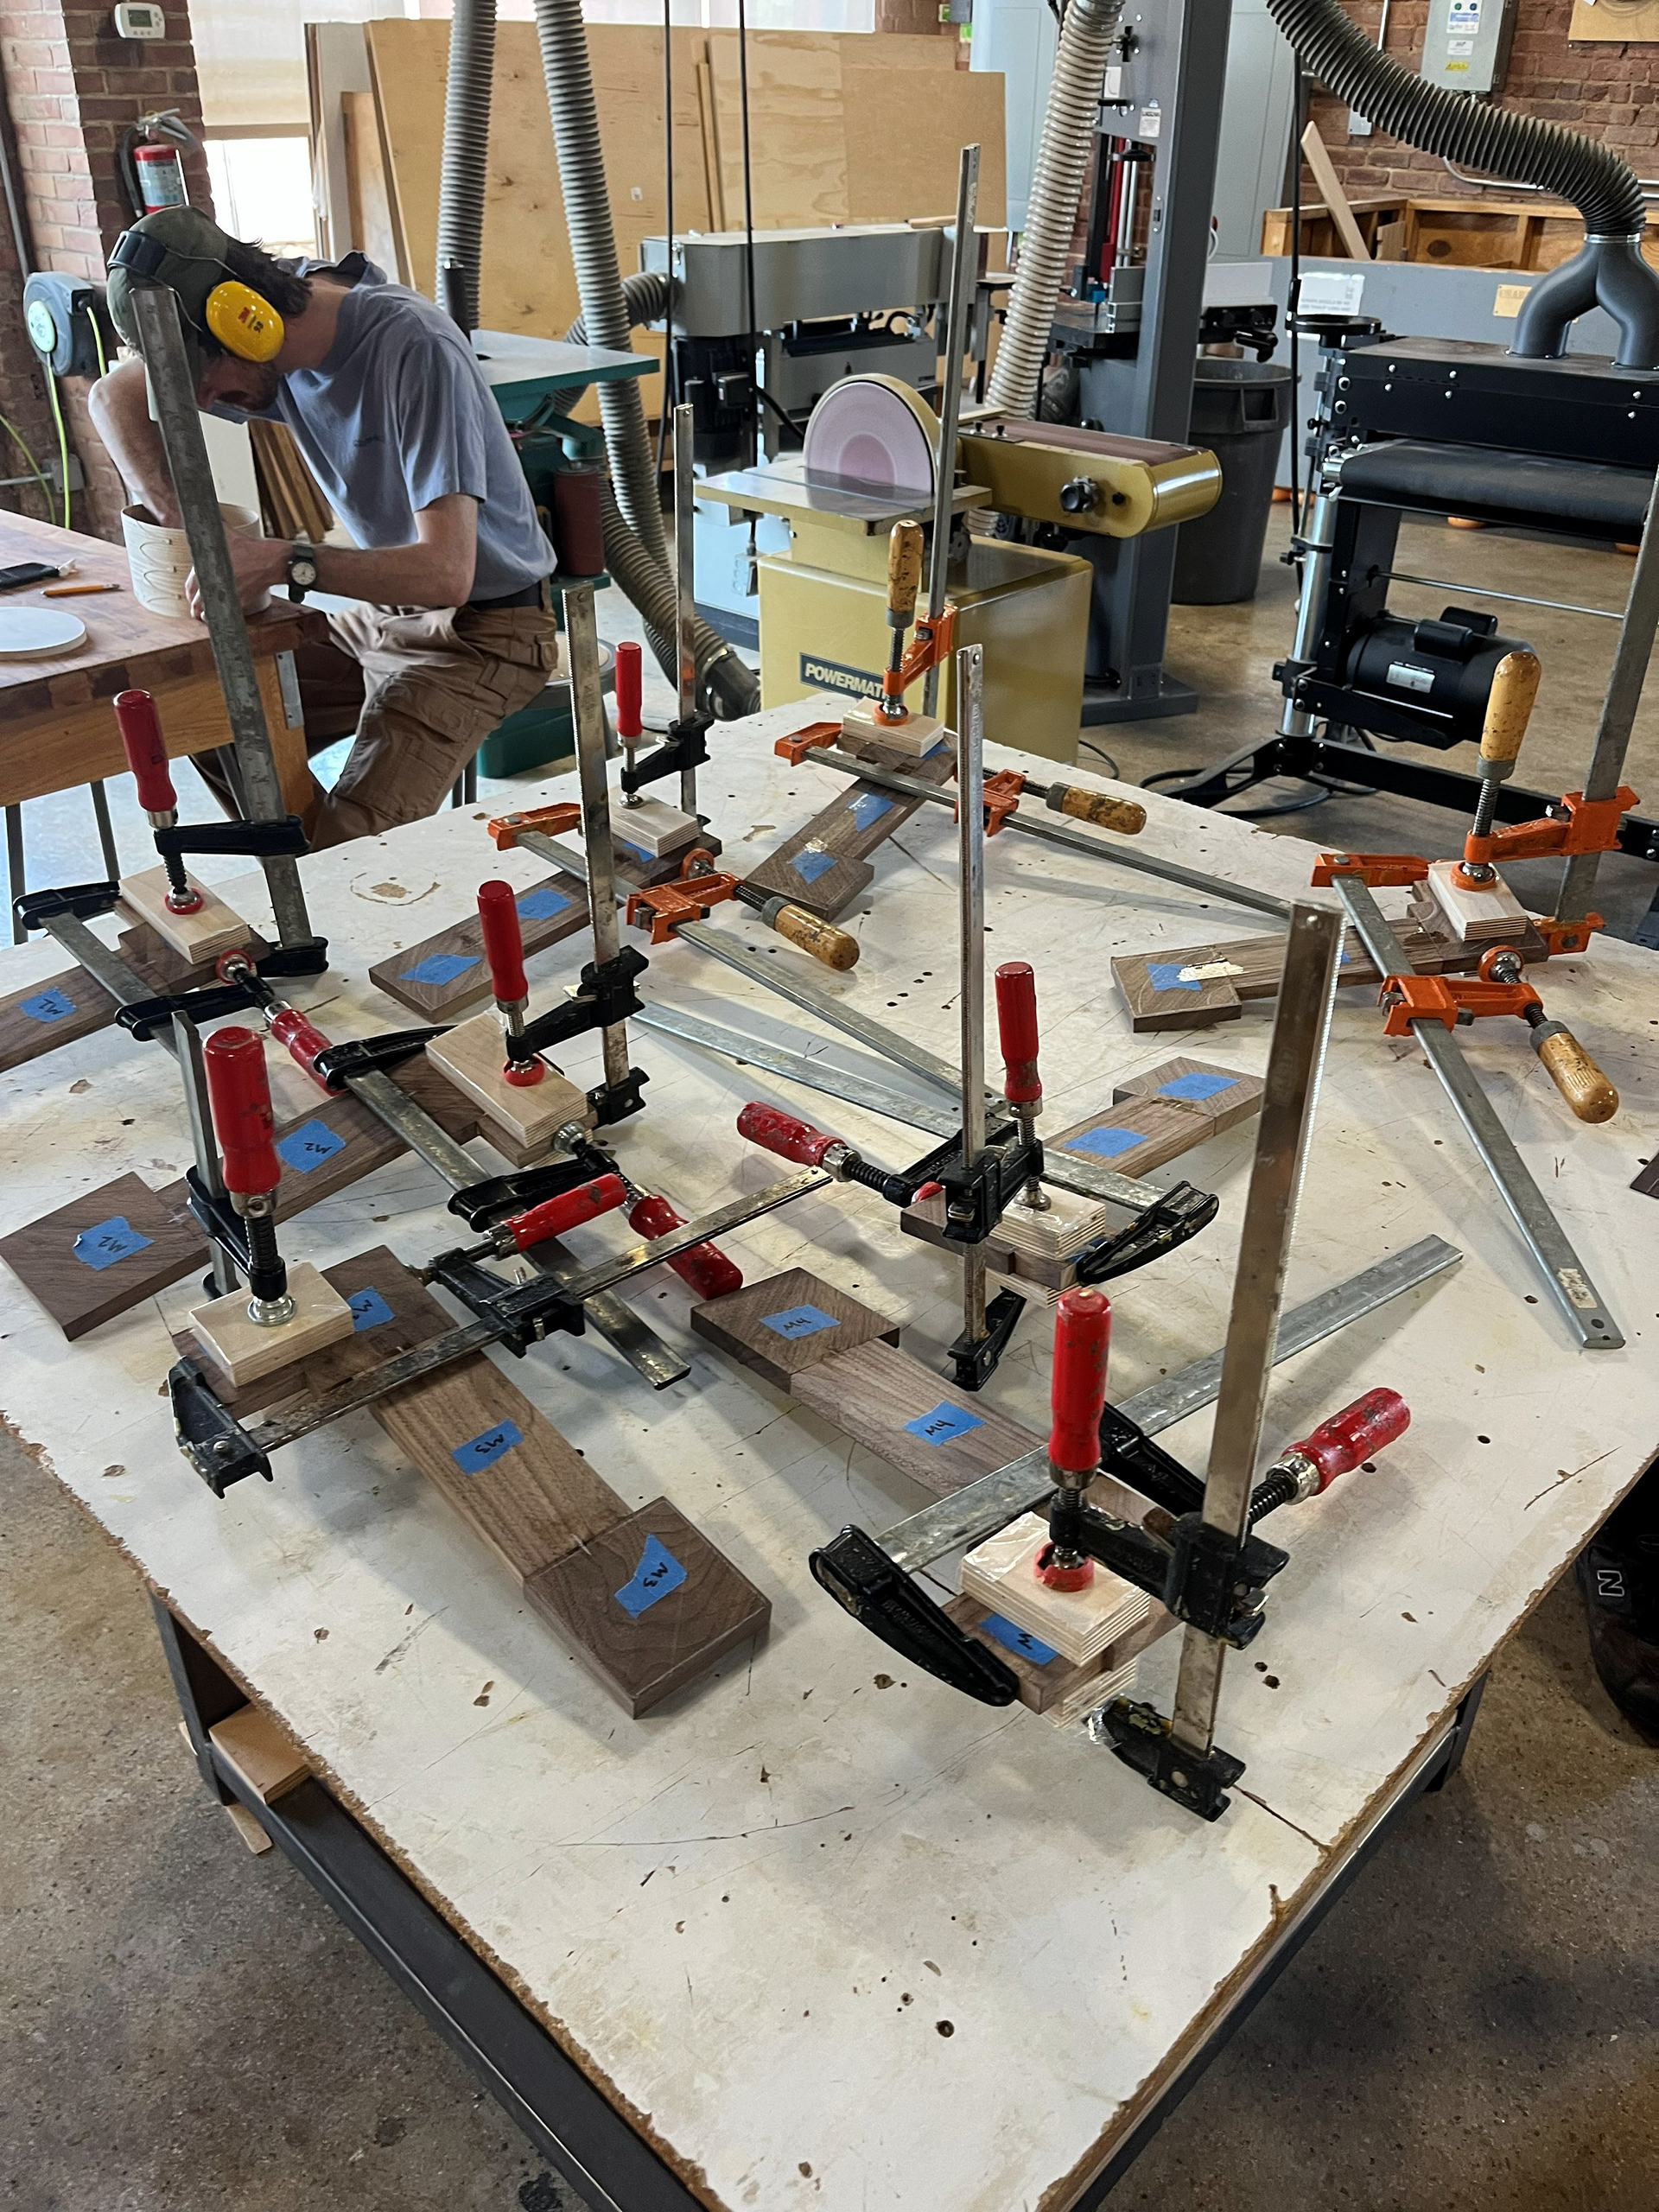
Image 22 | Gluing and Clapping the End Piece of the S-curve Legs after the First Glue-up Finished Drying
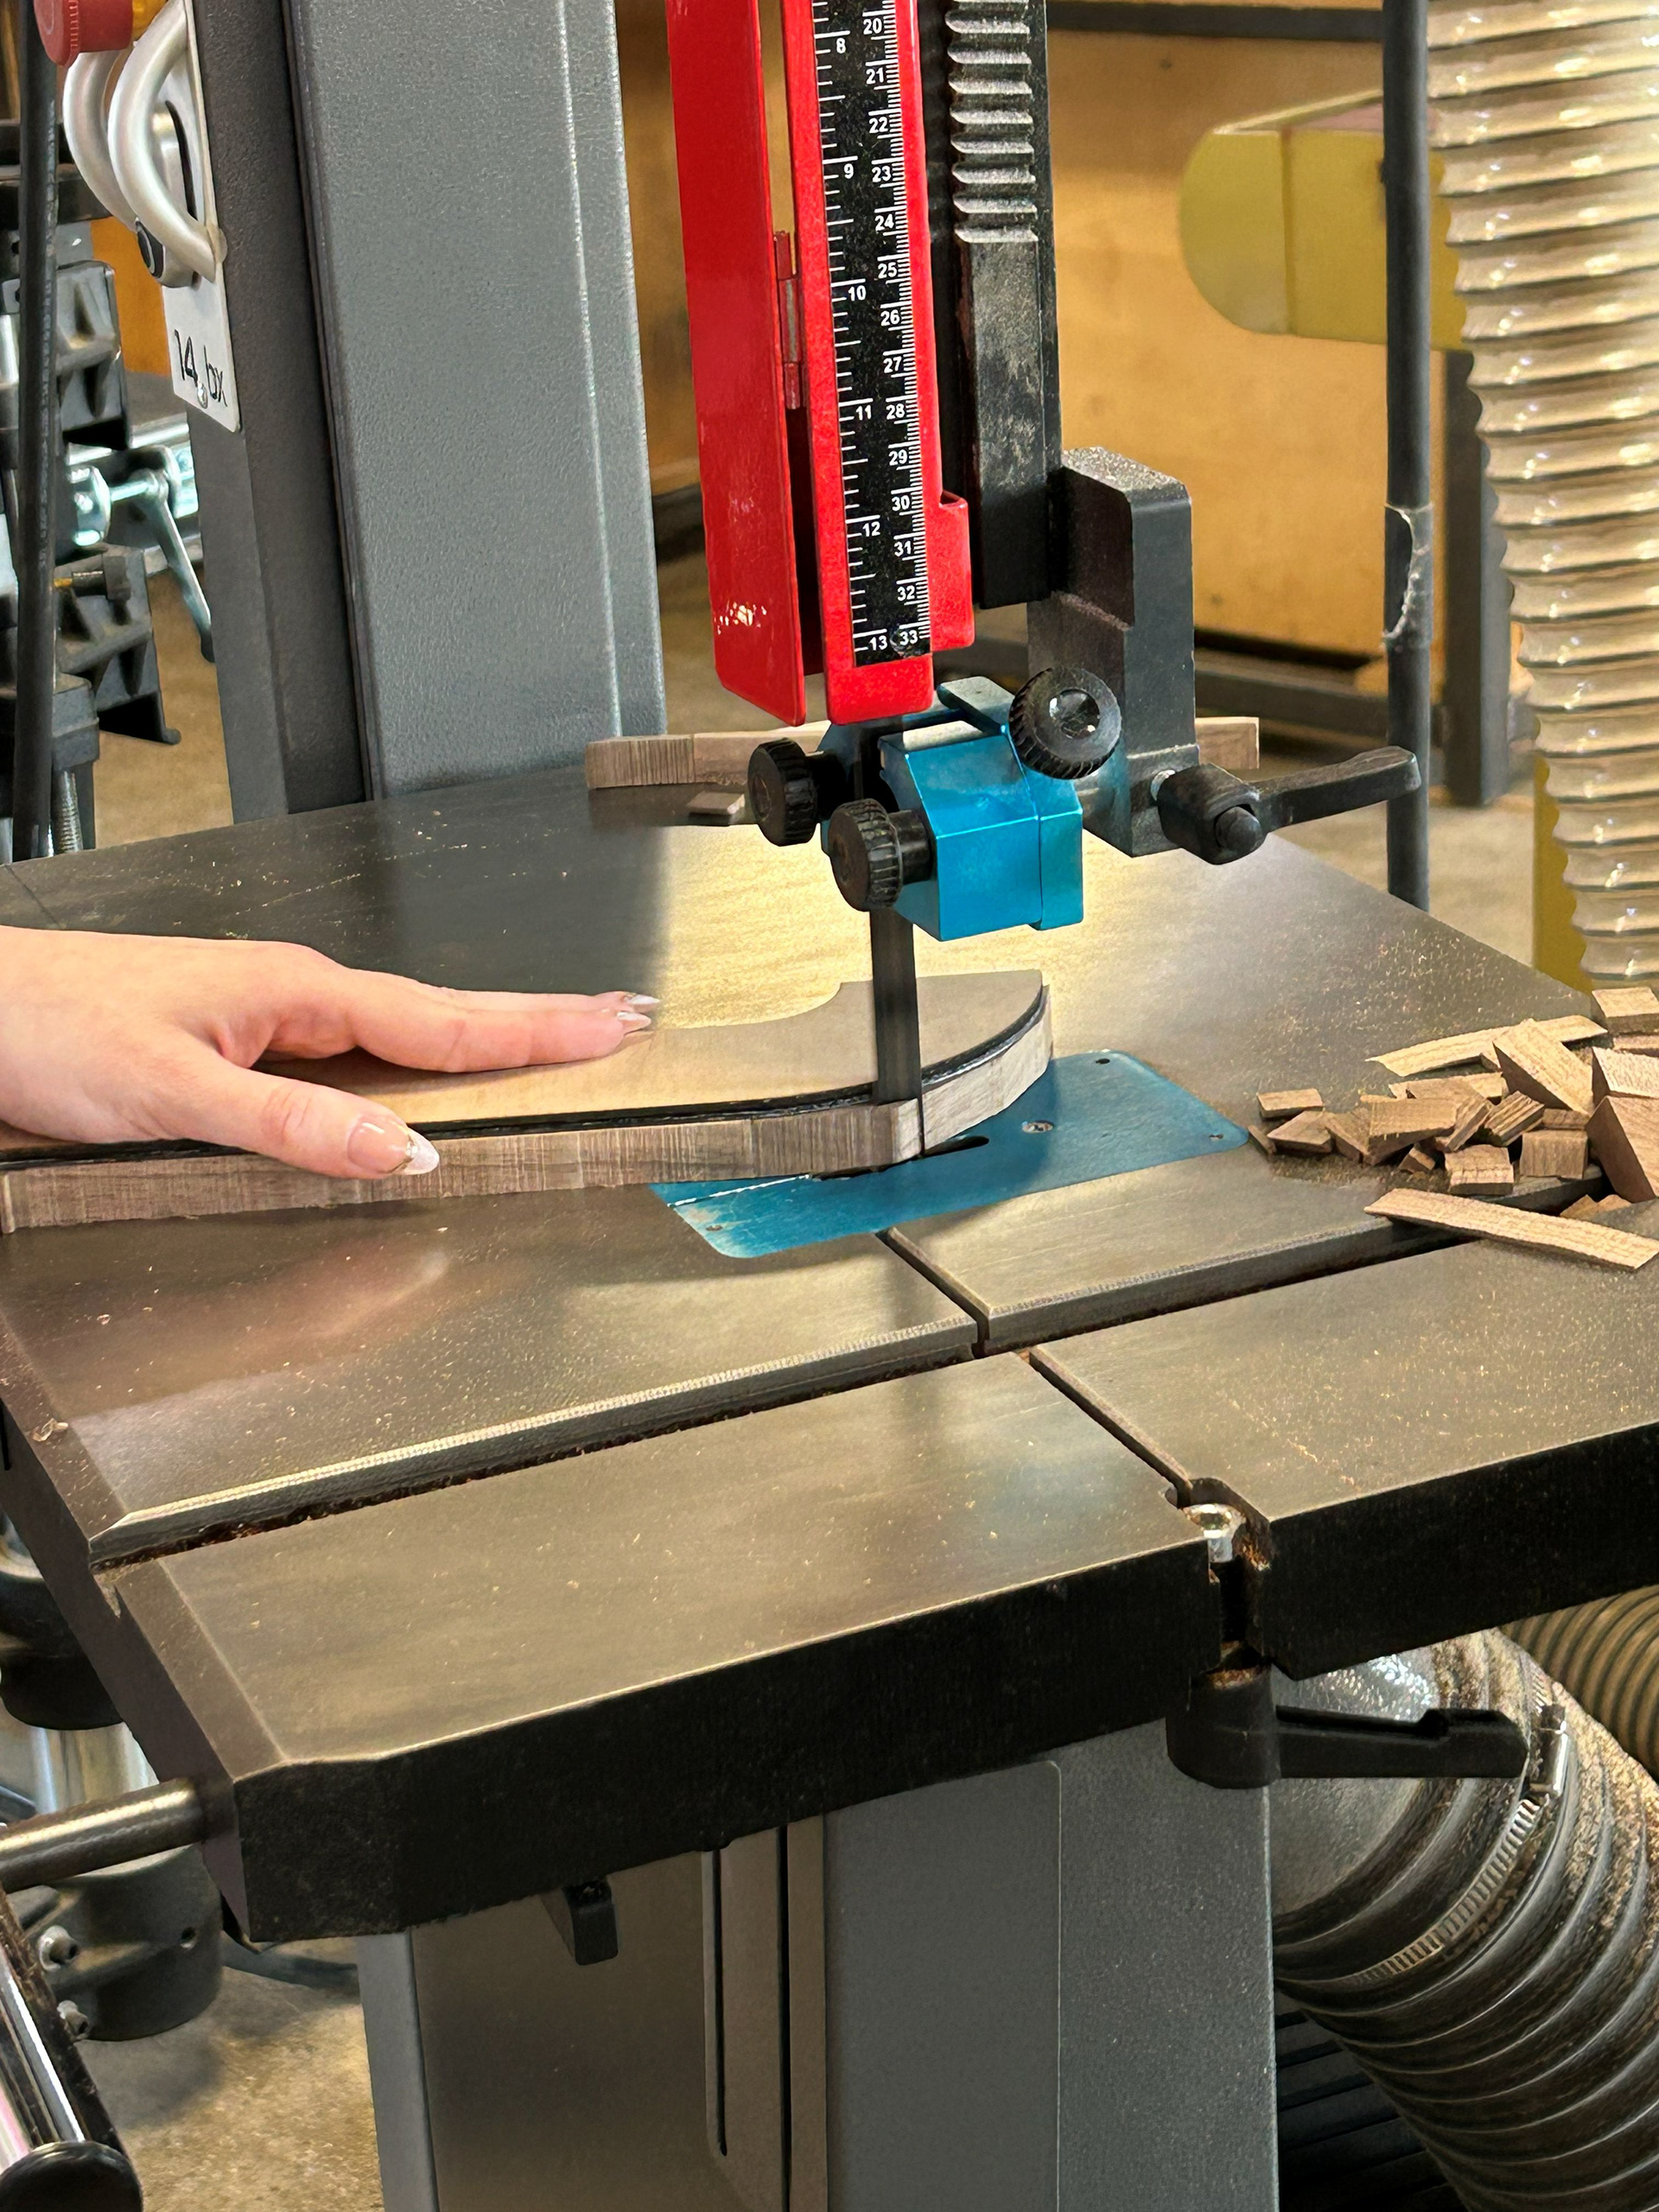
Image 23 | Cutting Out the Official Shape of the S-curve Leg using the Band Saw with the Plywood Template of the S-curve Taped on Top
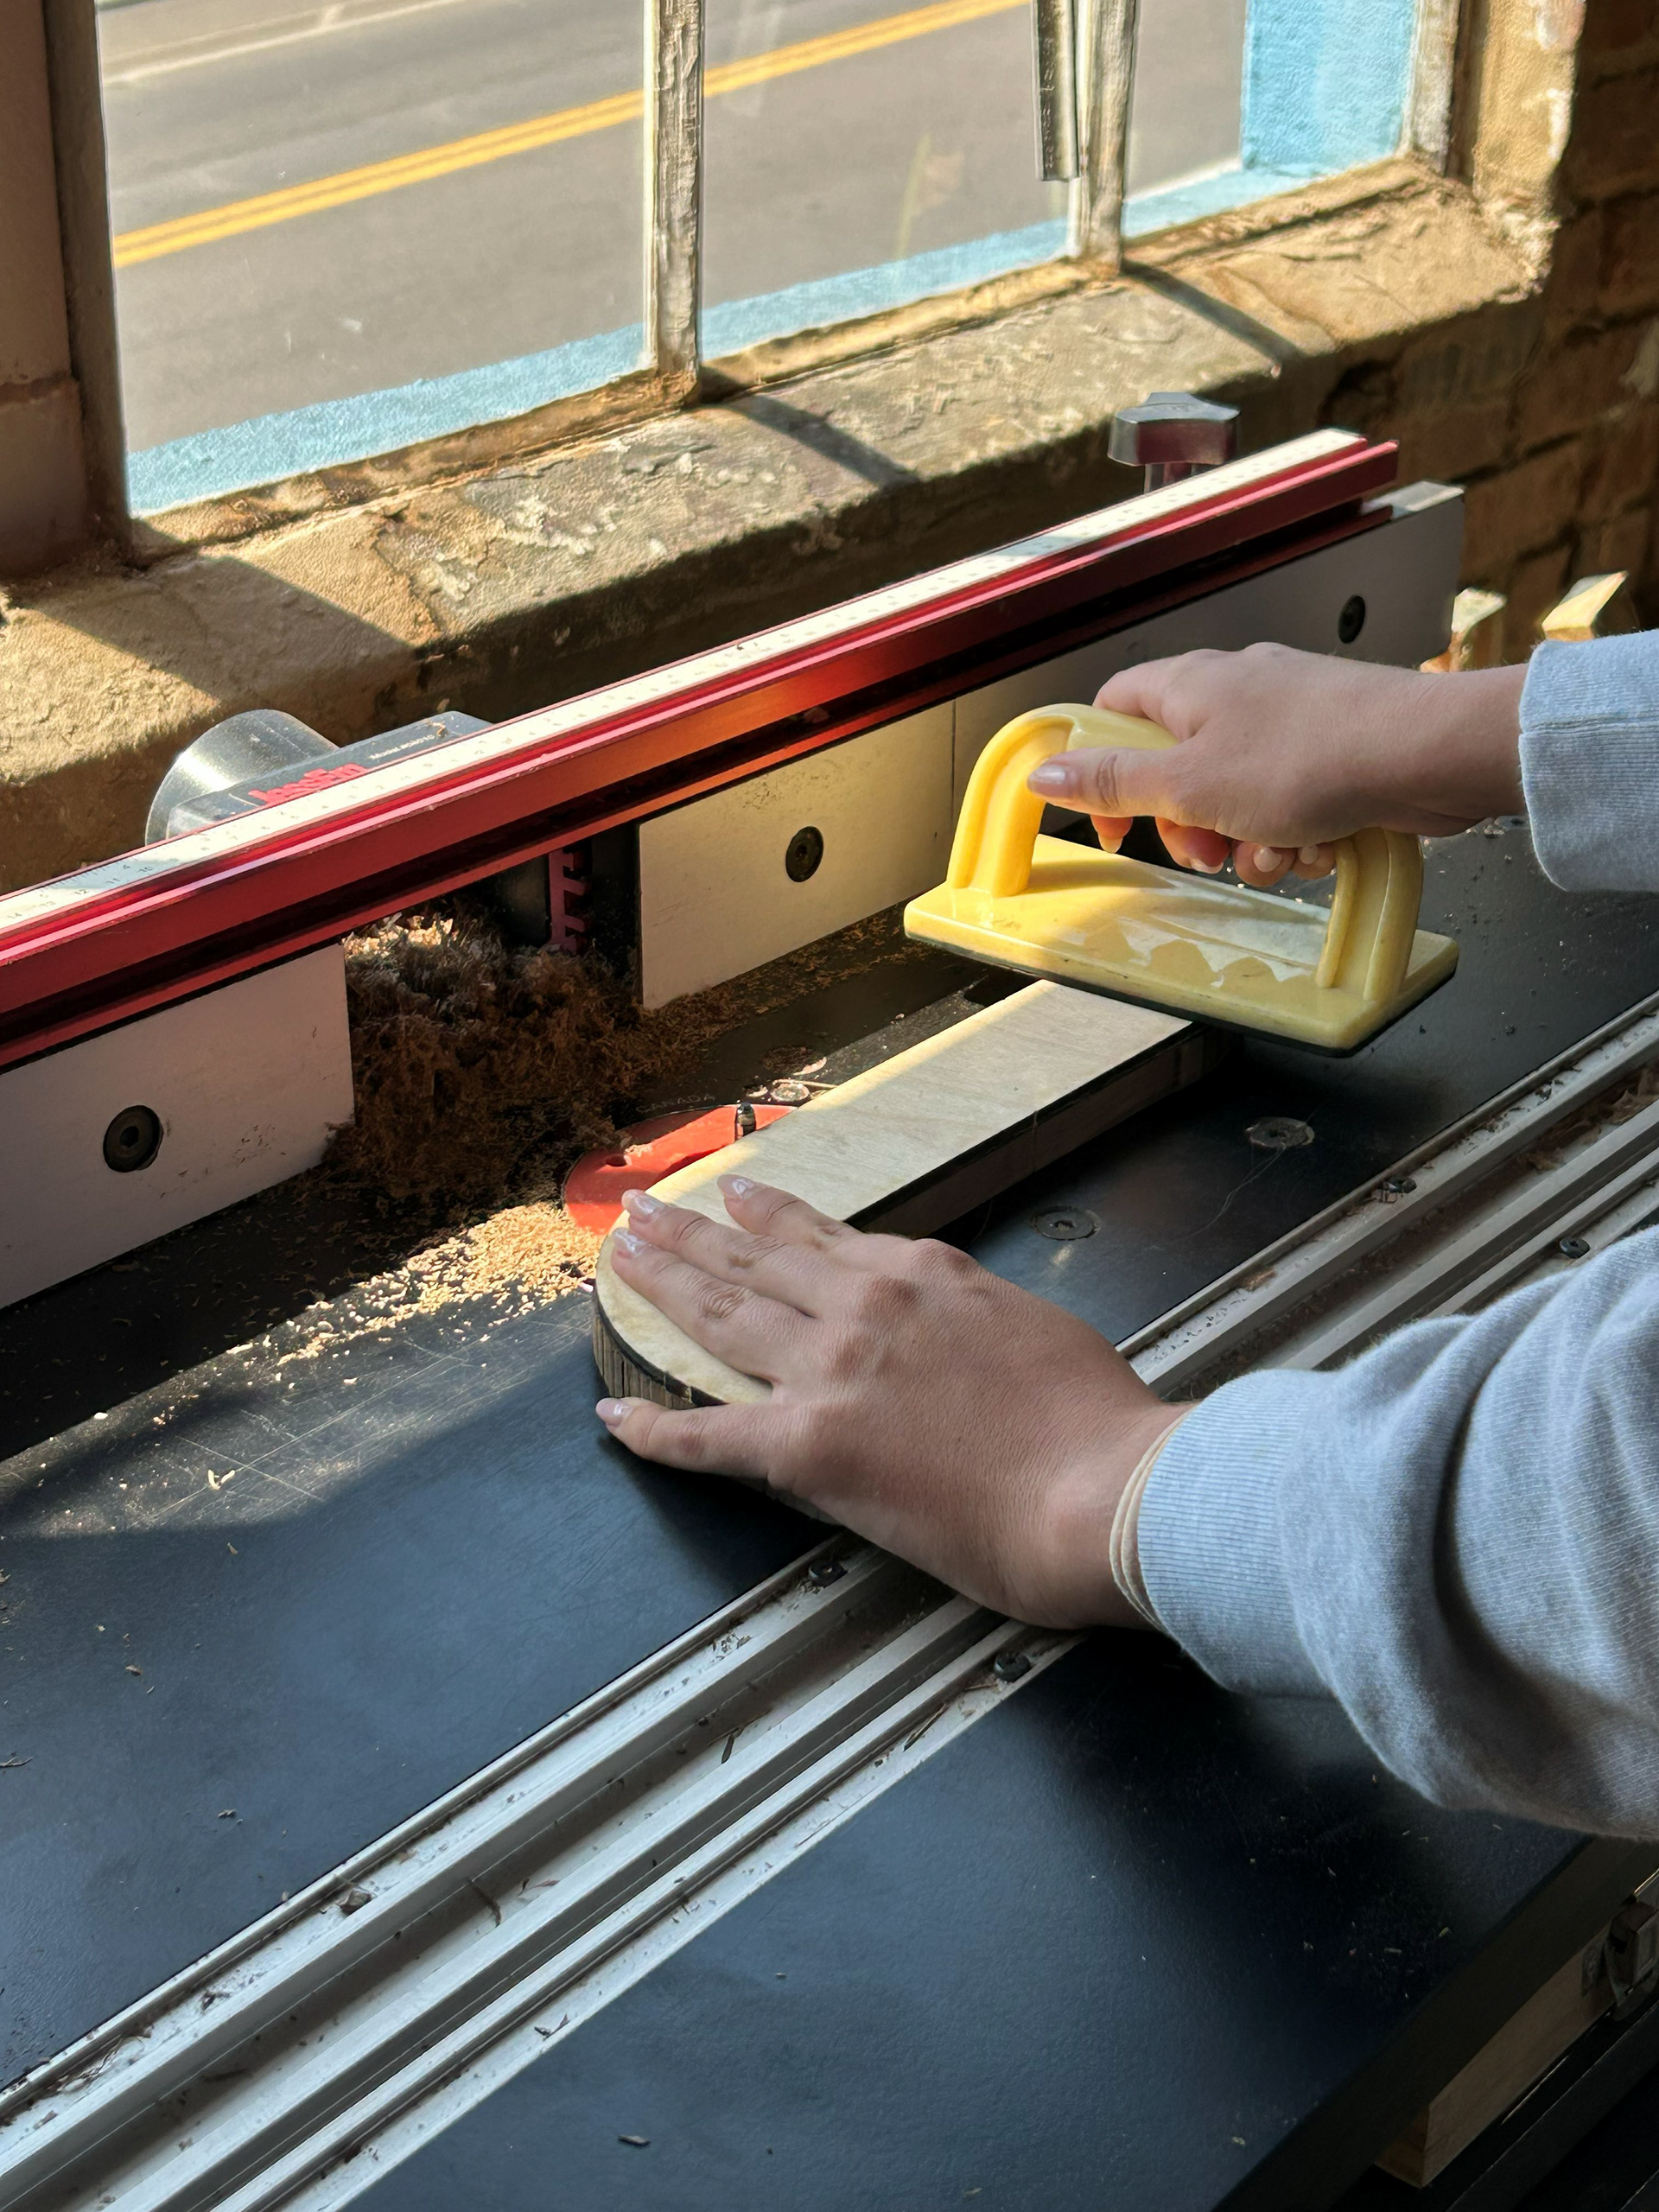
Image 24 | Routing the Straight Edges and the Tight Curves of the S-curve Leg Using the Table Router
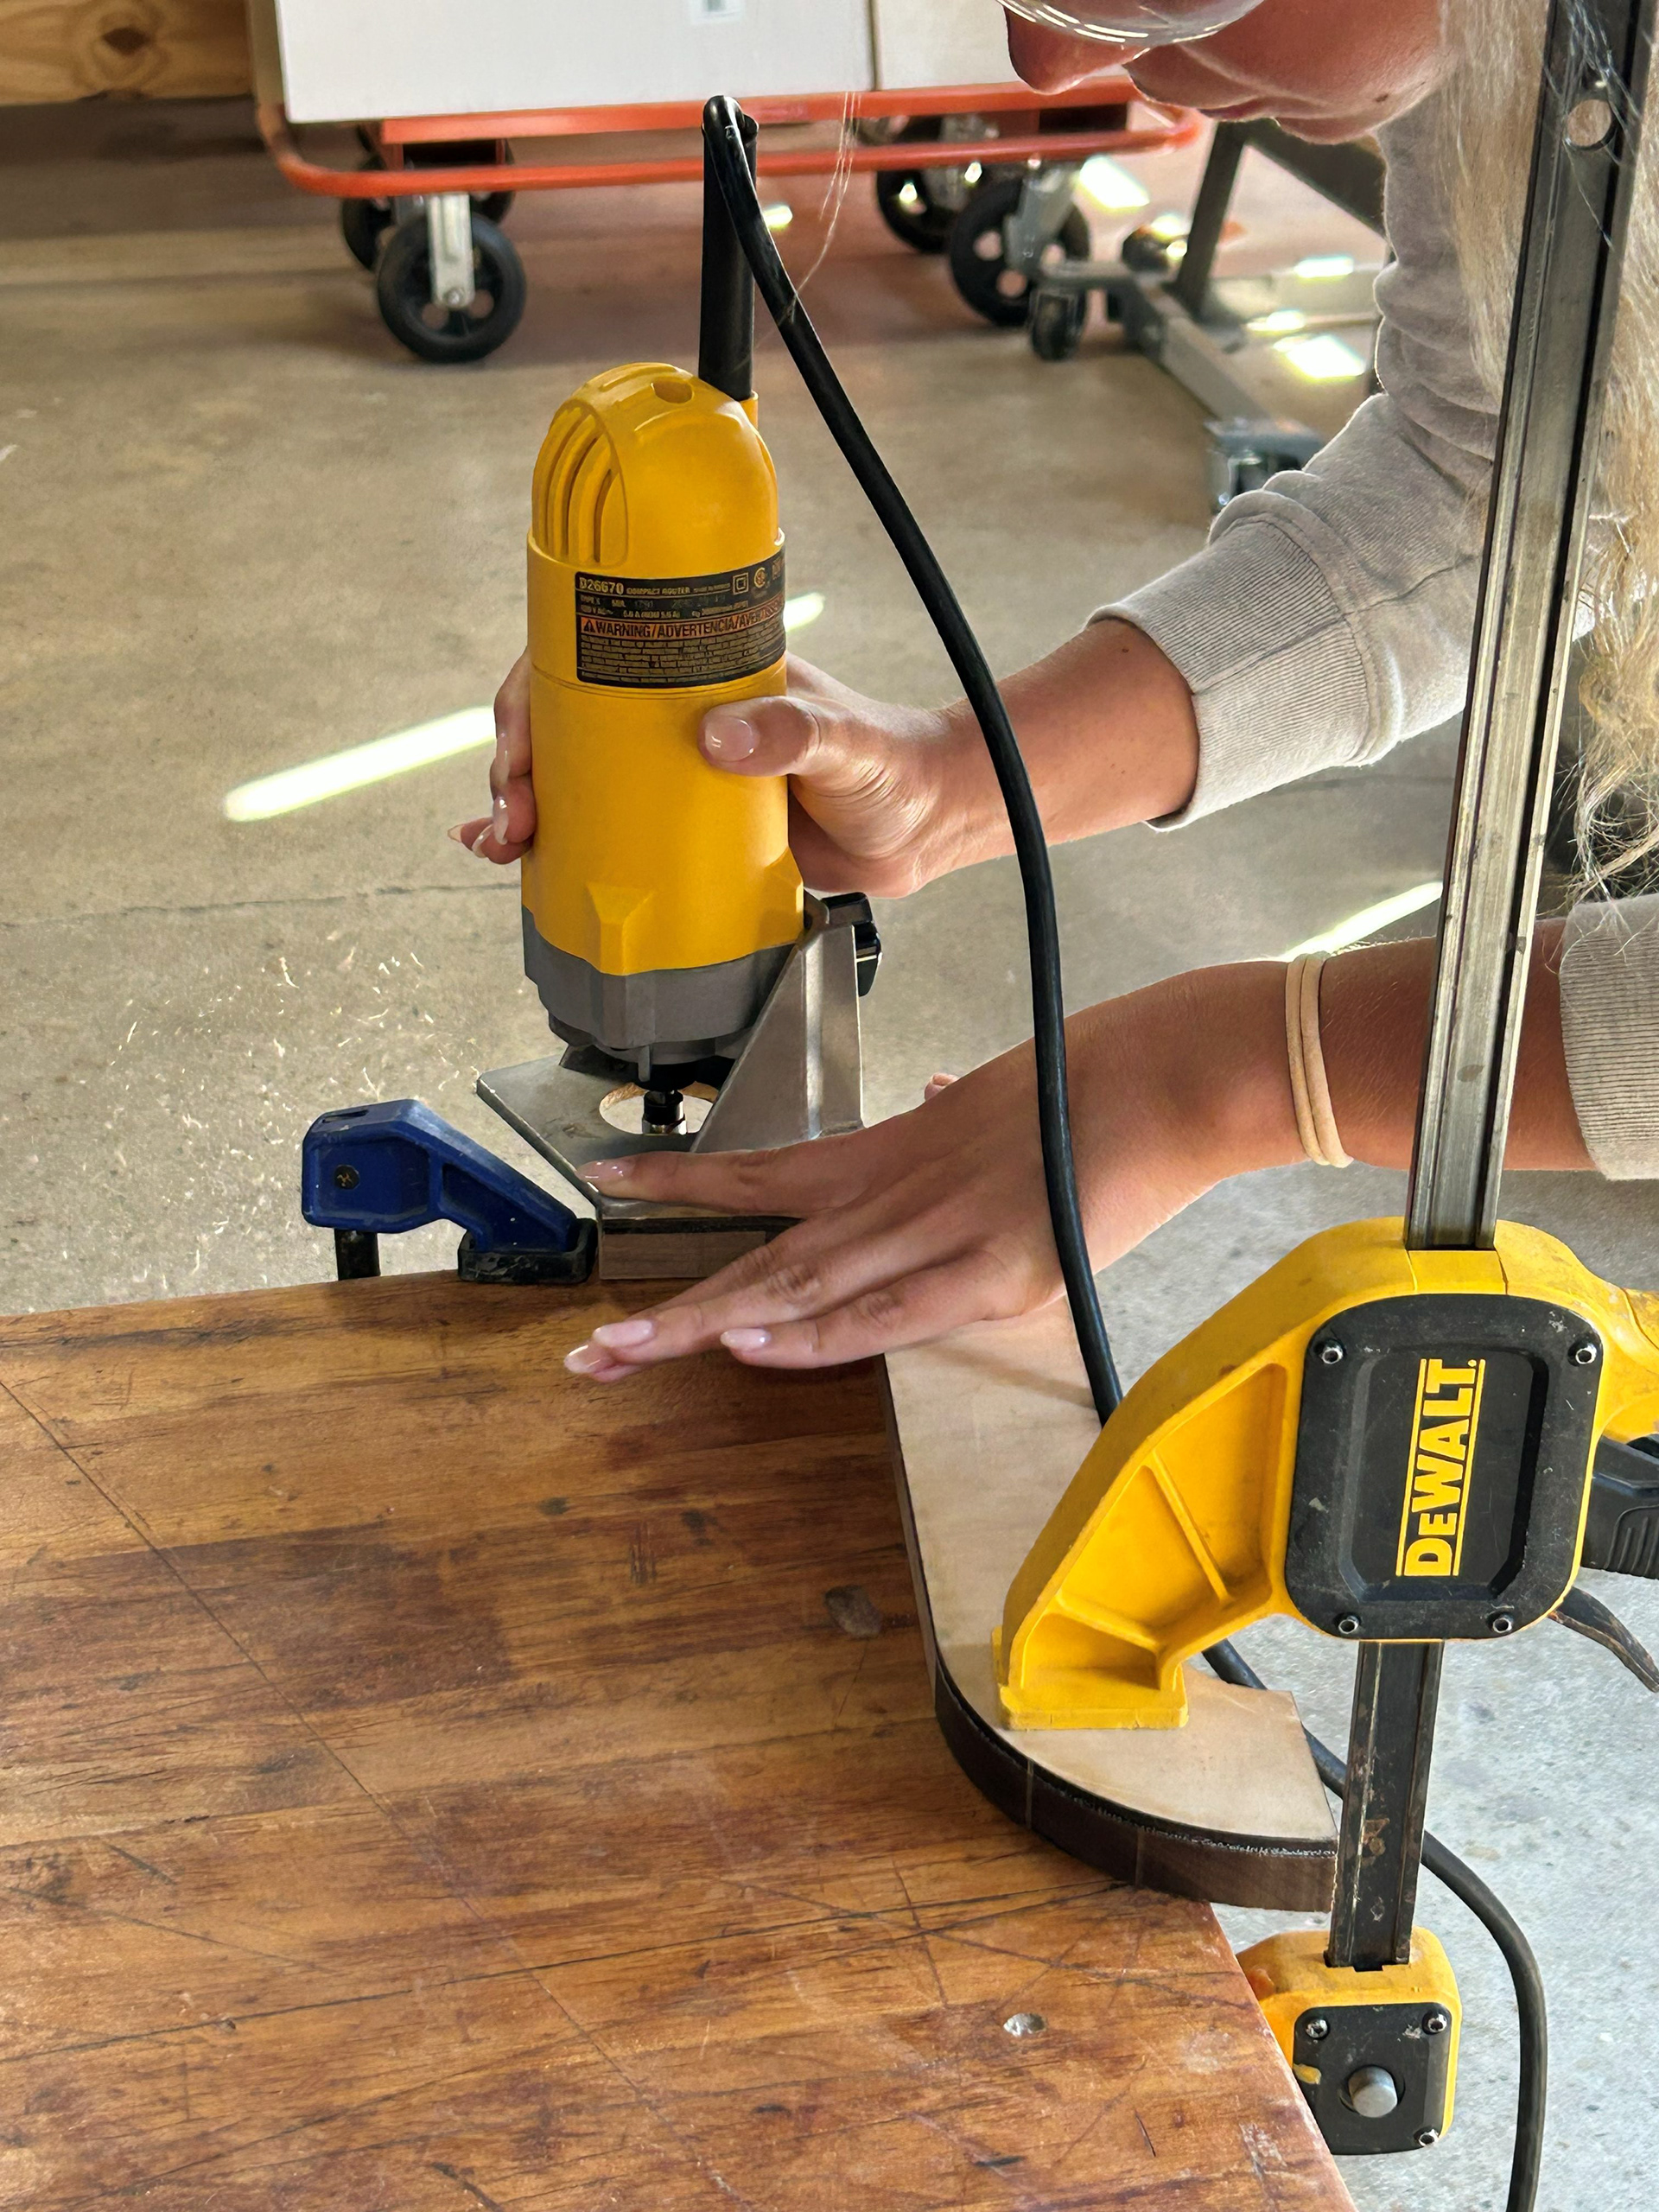
Image 25 | Routing the Larger Curves of the S-curve Leg using the Hand Router
Creating the Columnar Legs
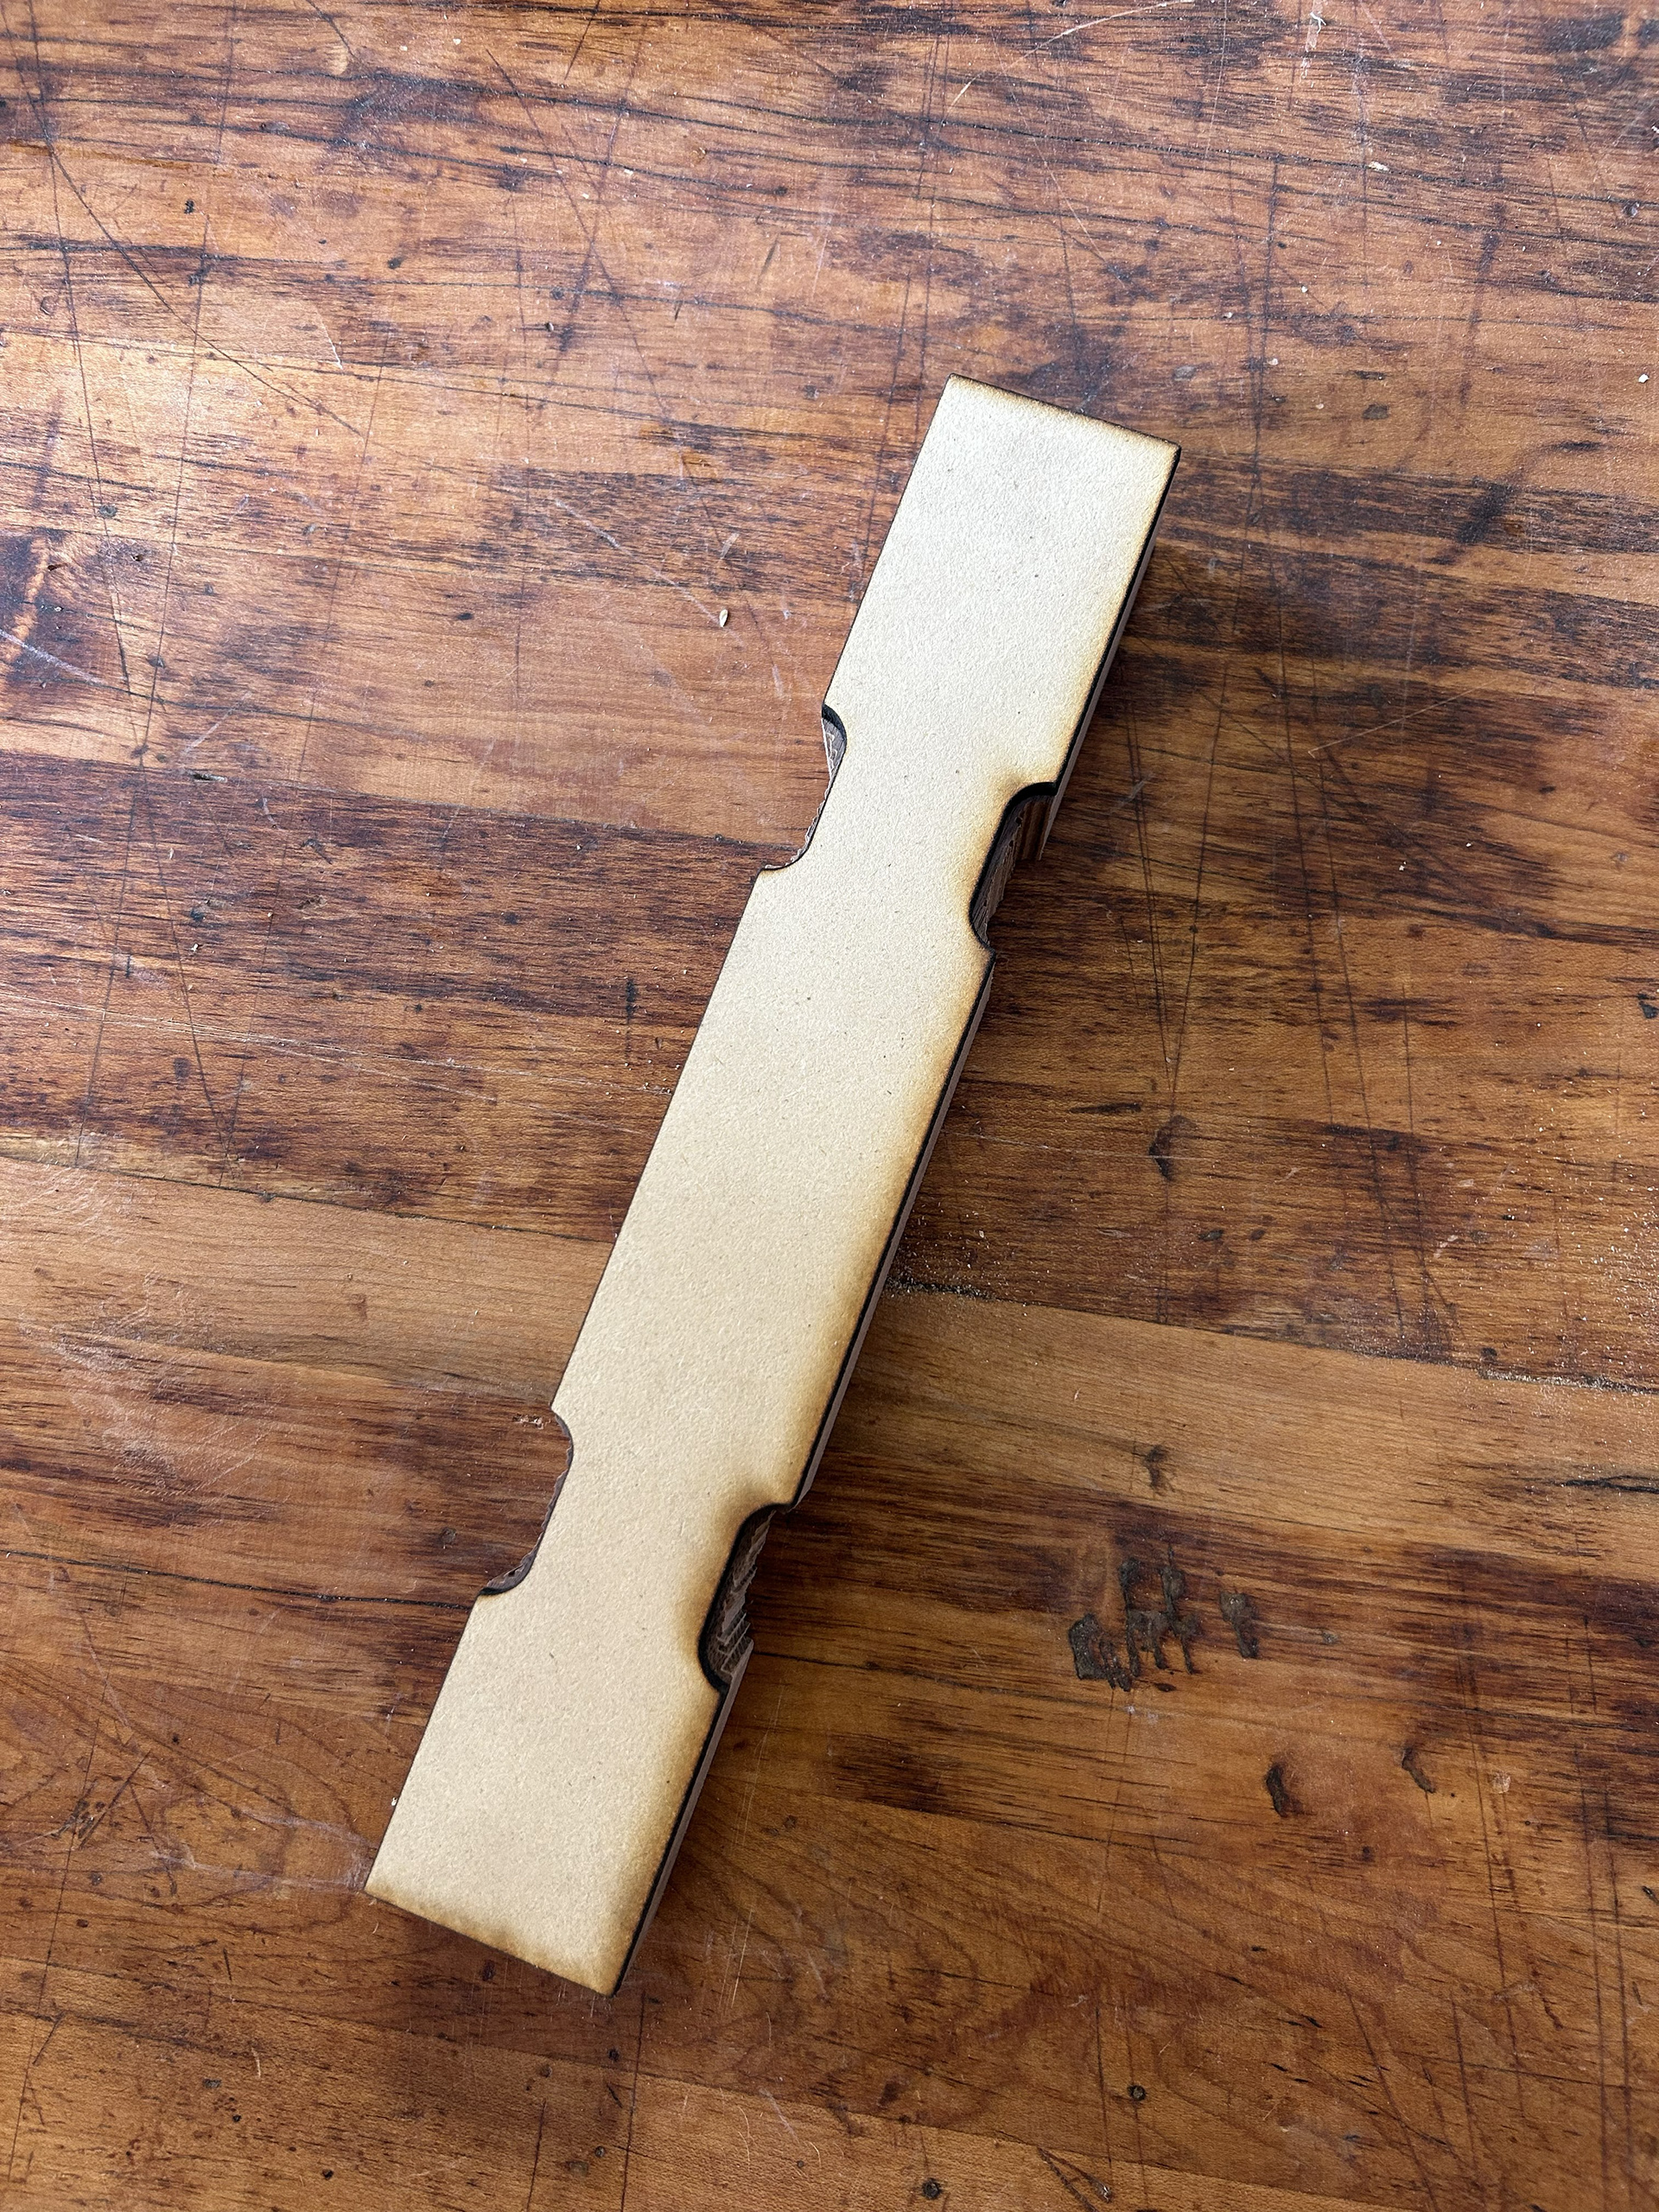
Image 26 | Plywood Template Placed on Top of the Columnar Leg

Image 27 | Carving the Curved Cut-outs Along the Columnar Leg with the Band Saw
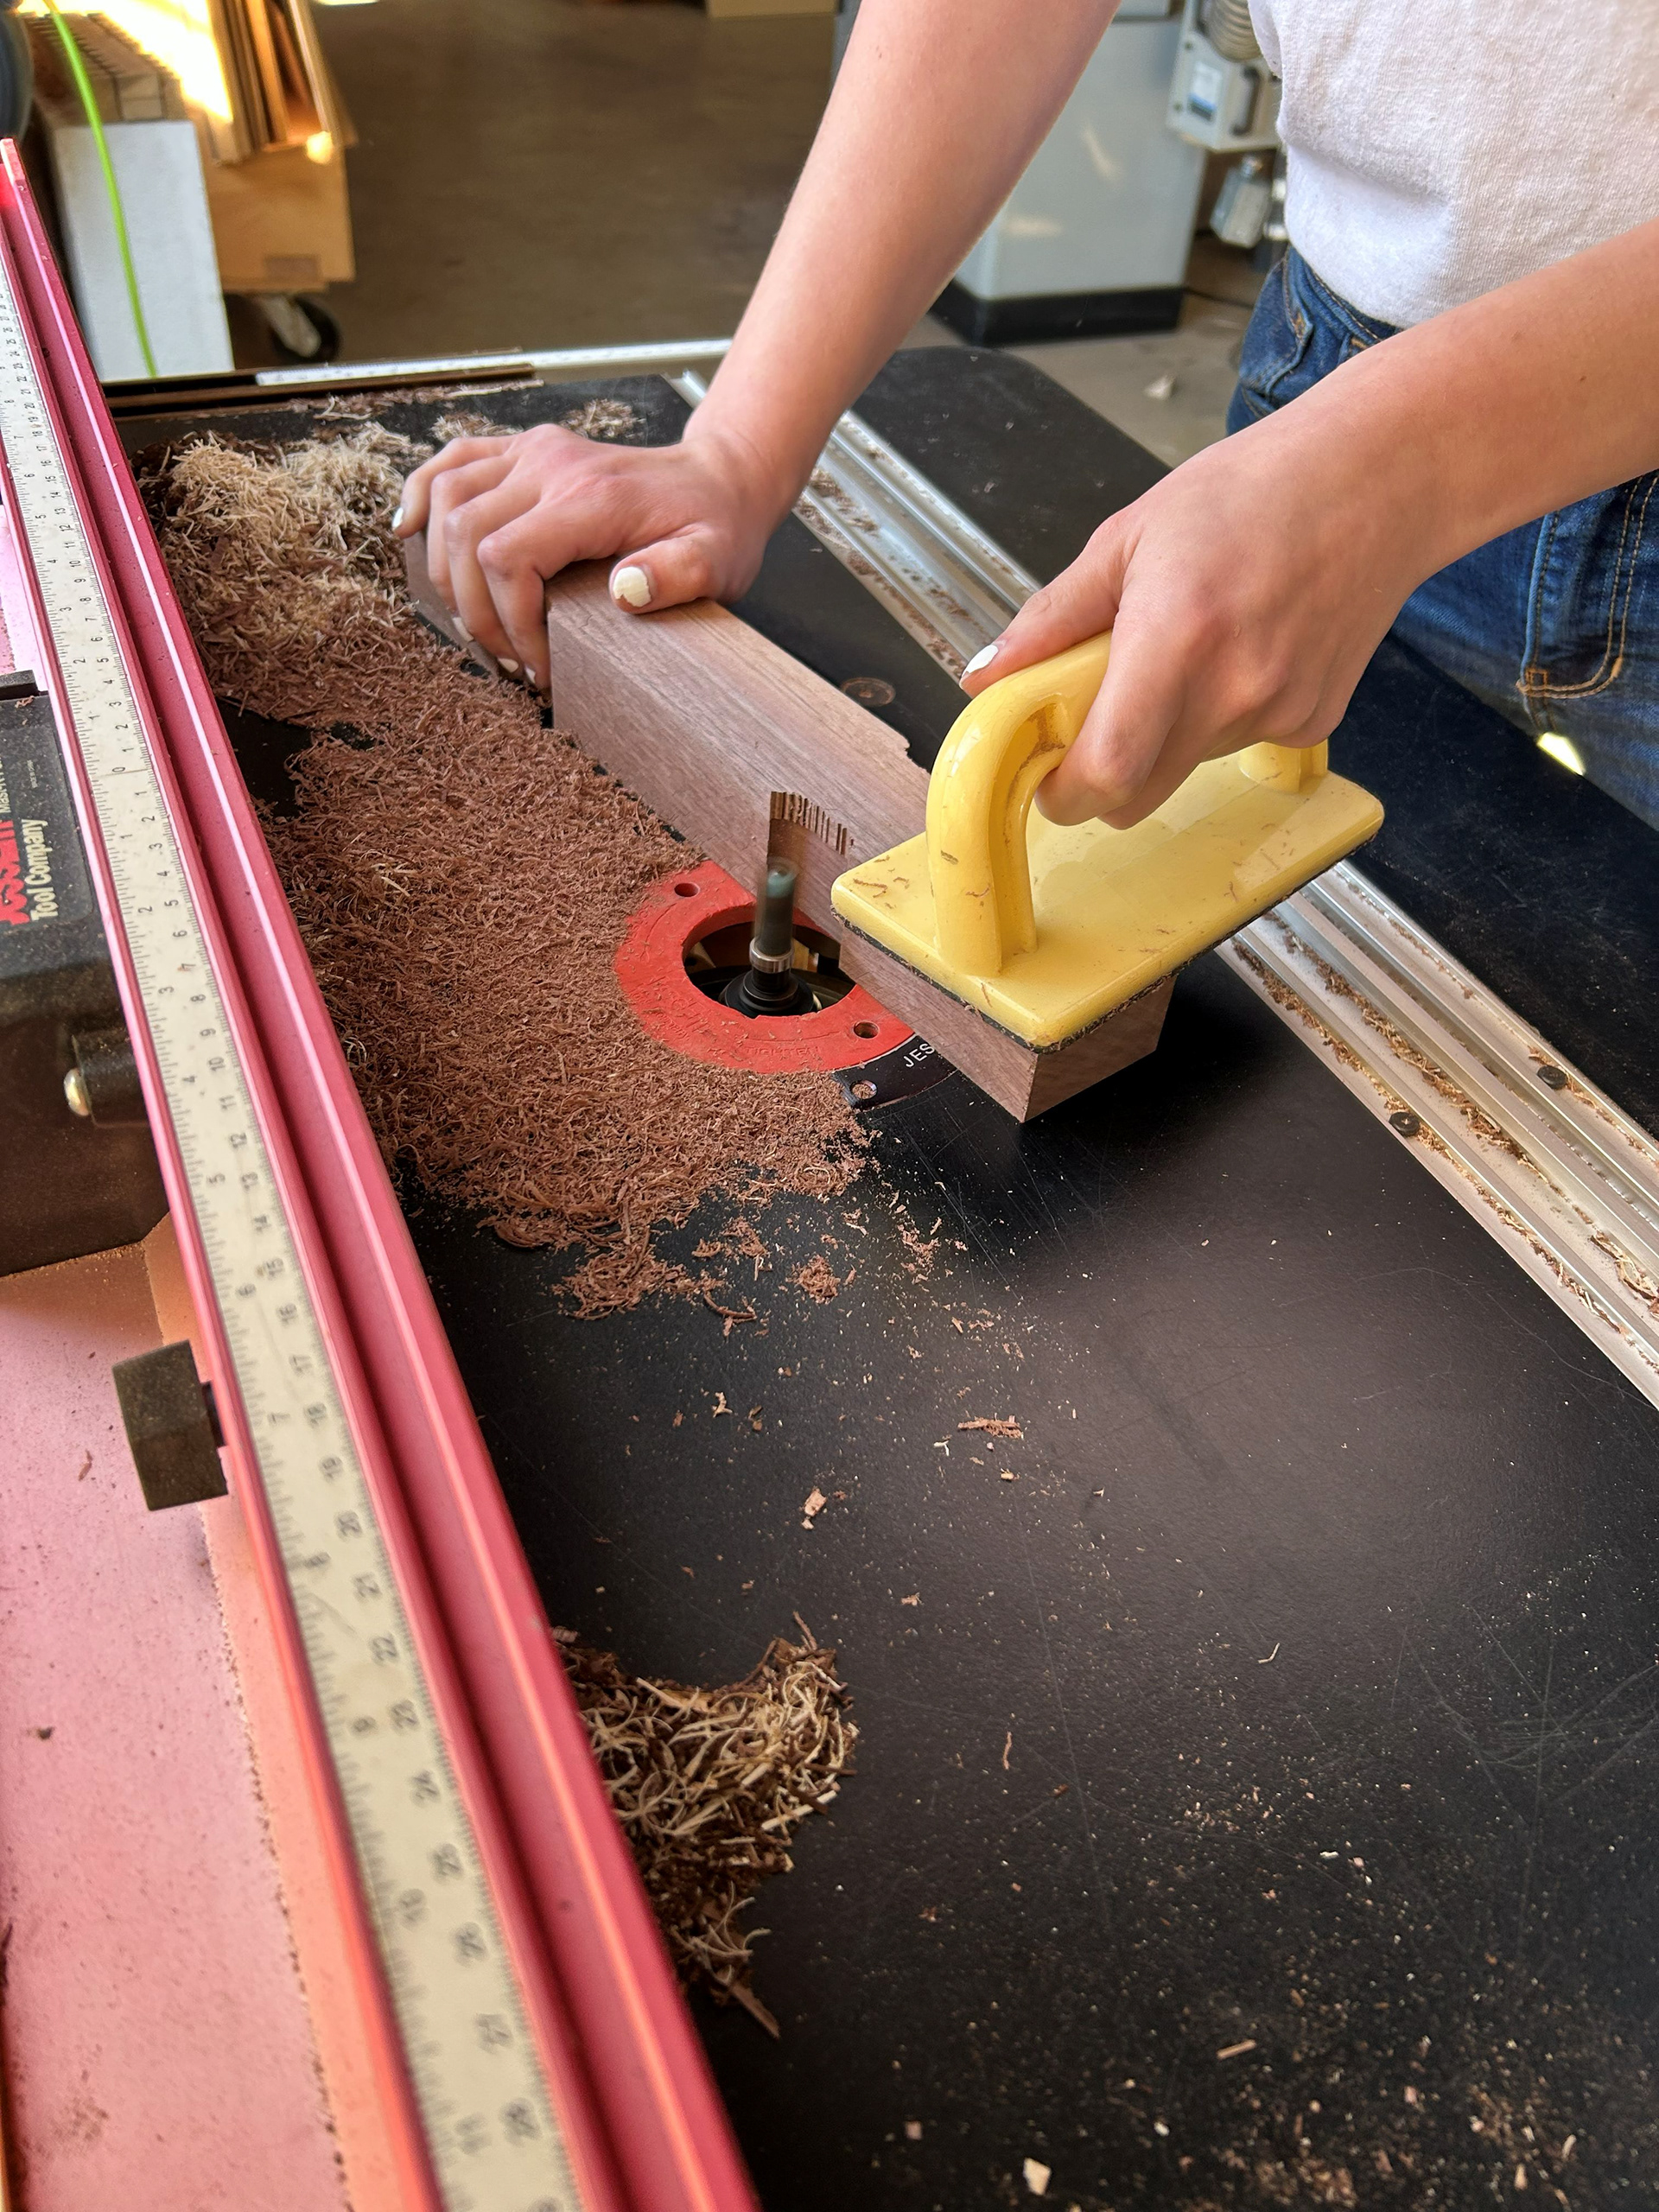
Image 28 | Routing the Curved Cut-outs Along the Columnar Leg Using the Table Router
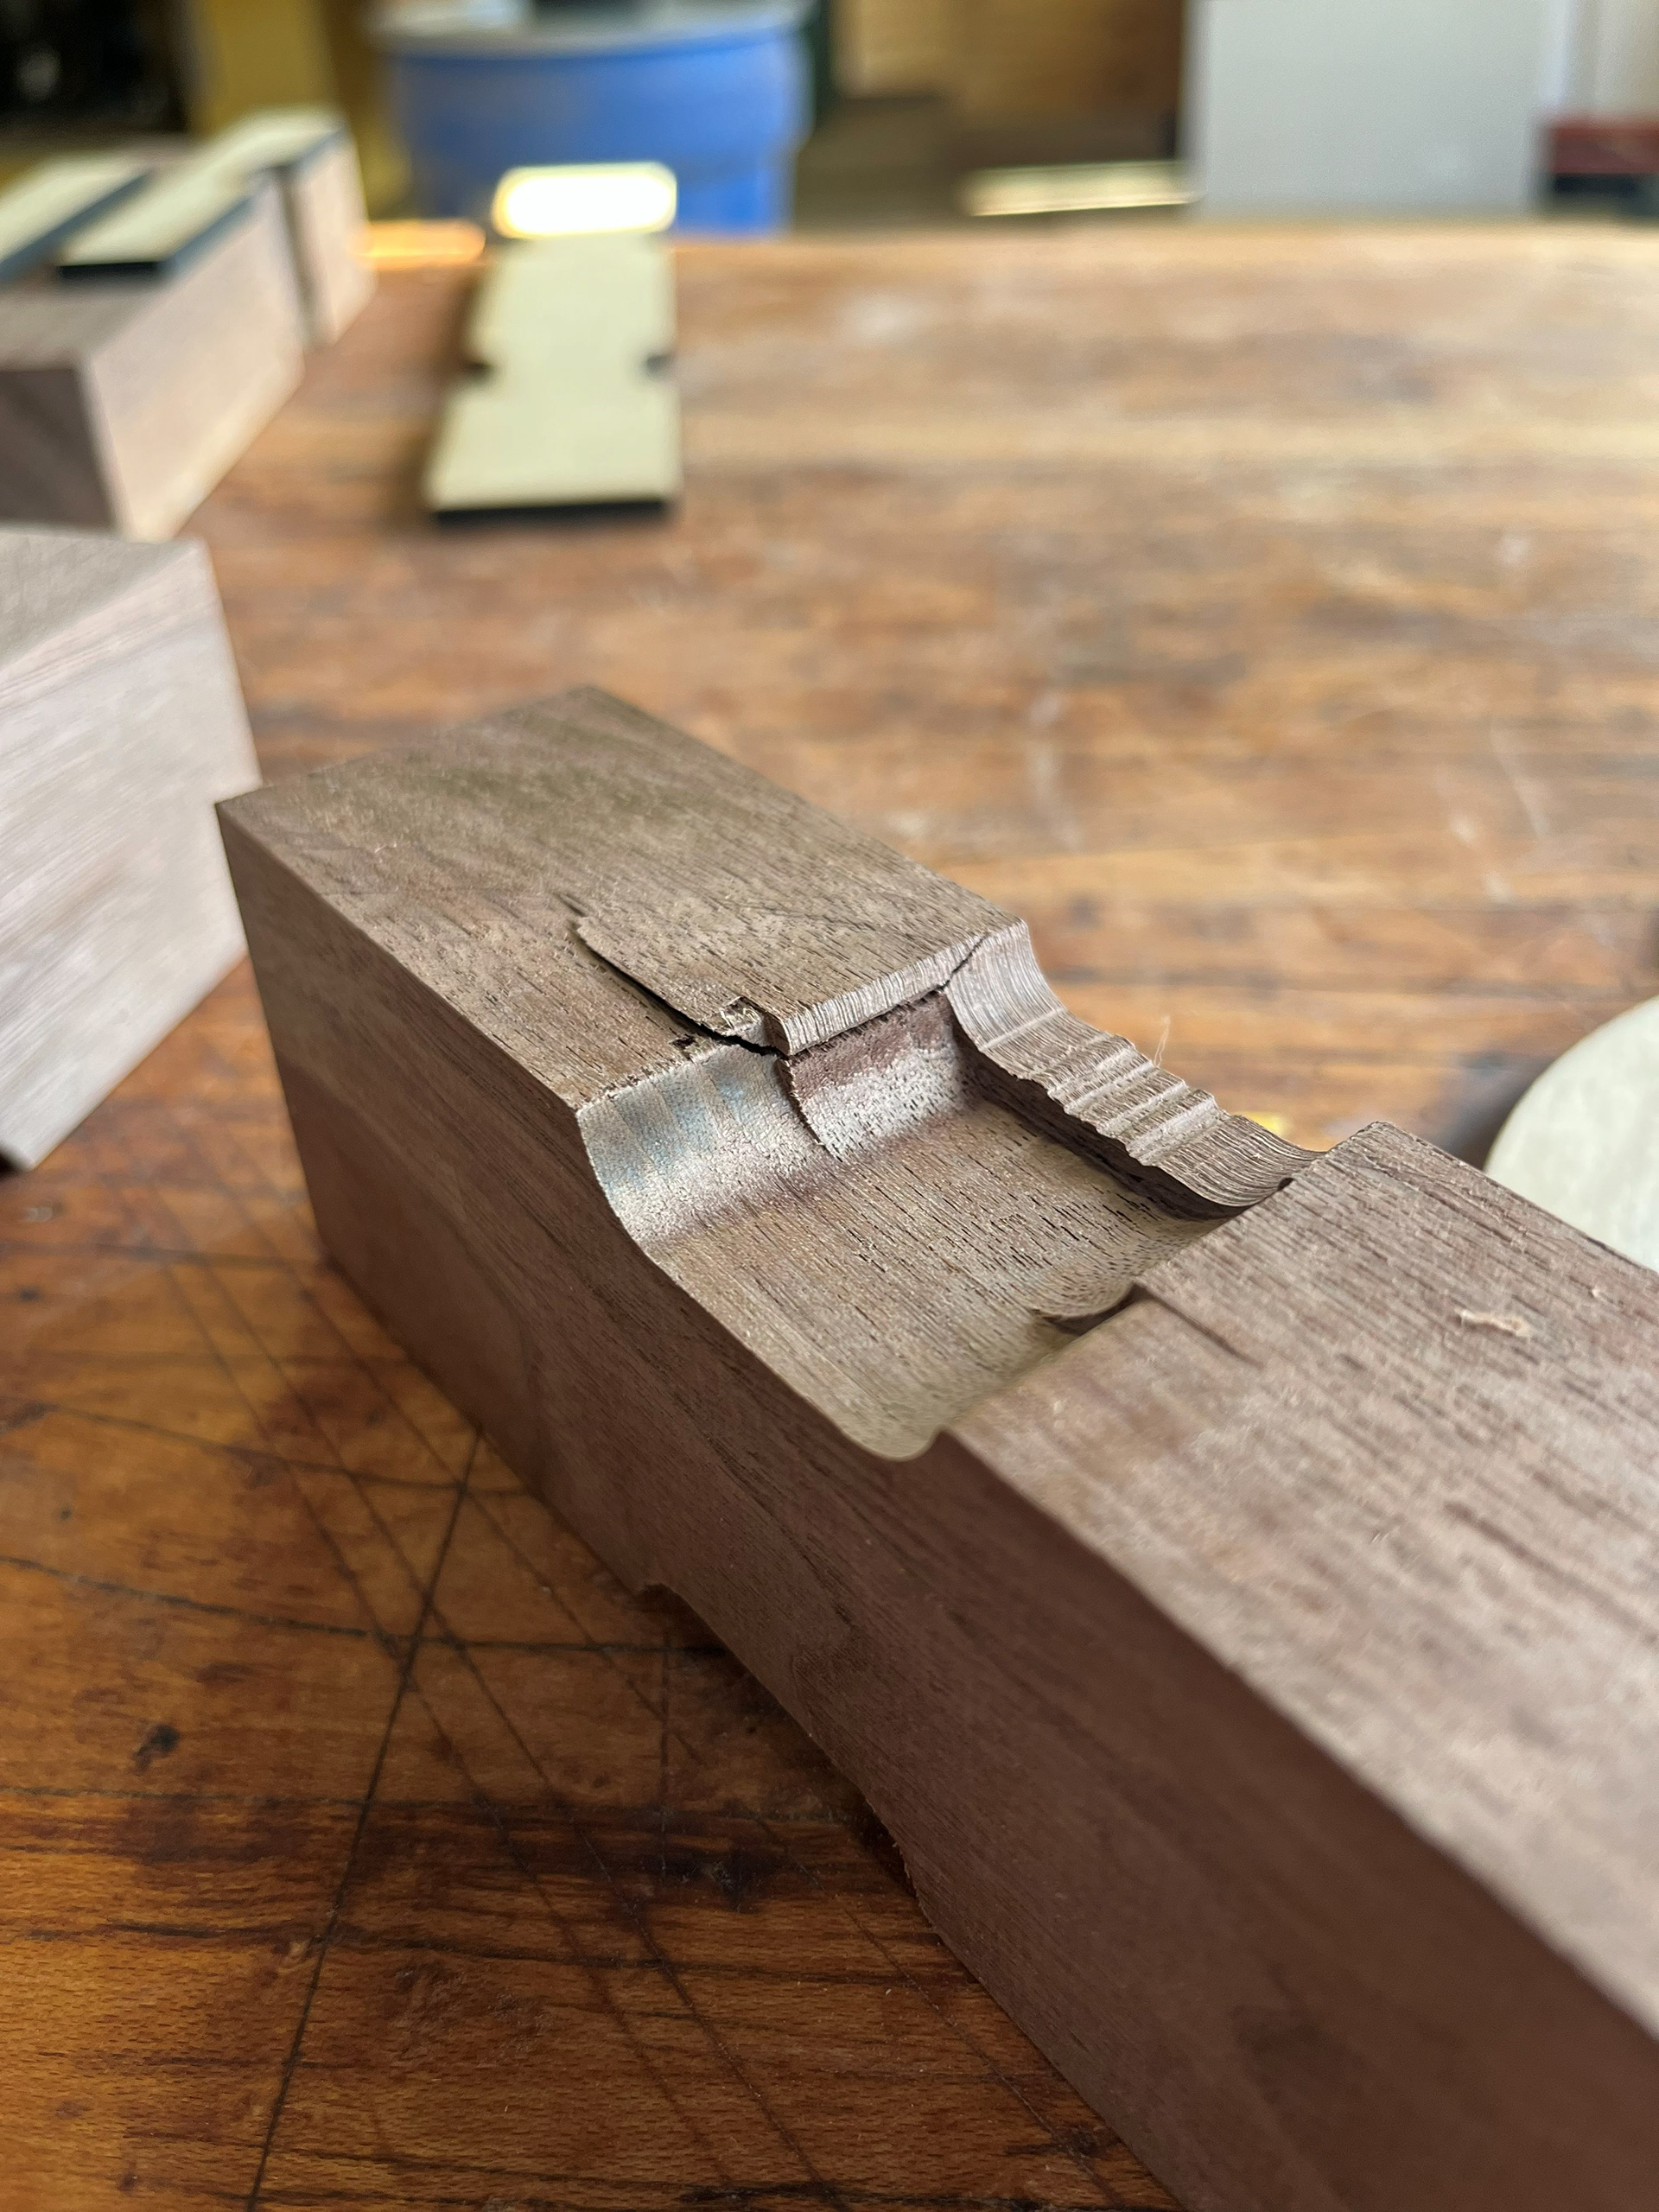
Image 29 | Table Router Starting to Rip Out Chunks of the Columnar Leg While Routing
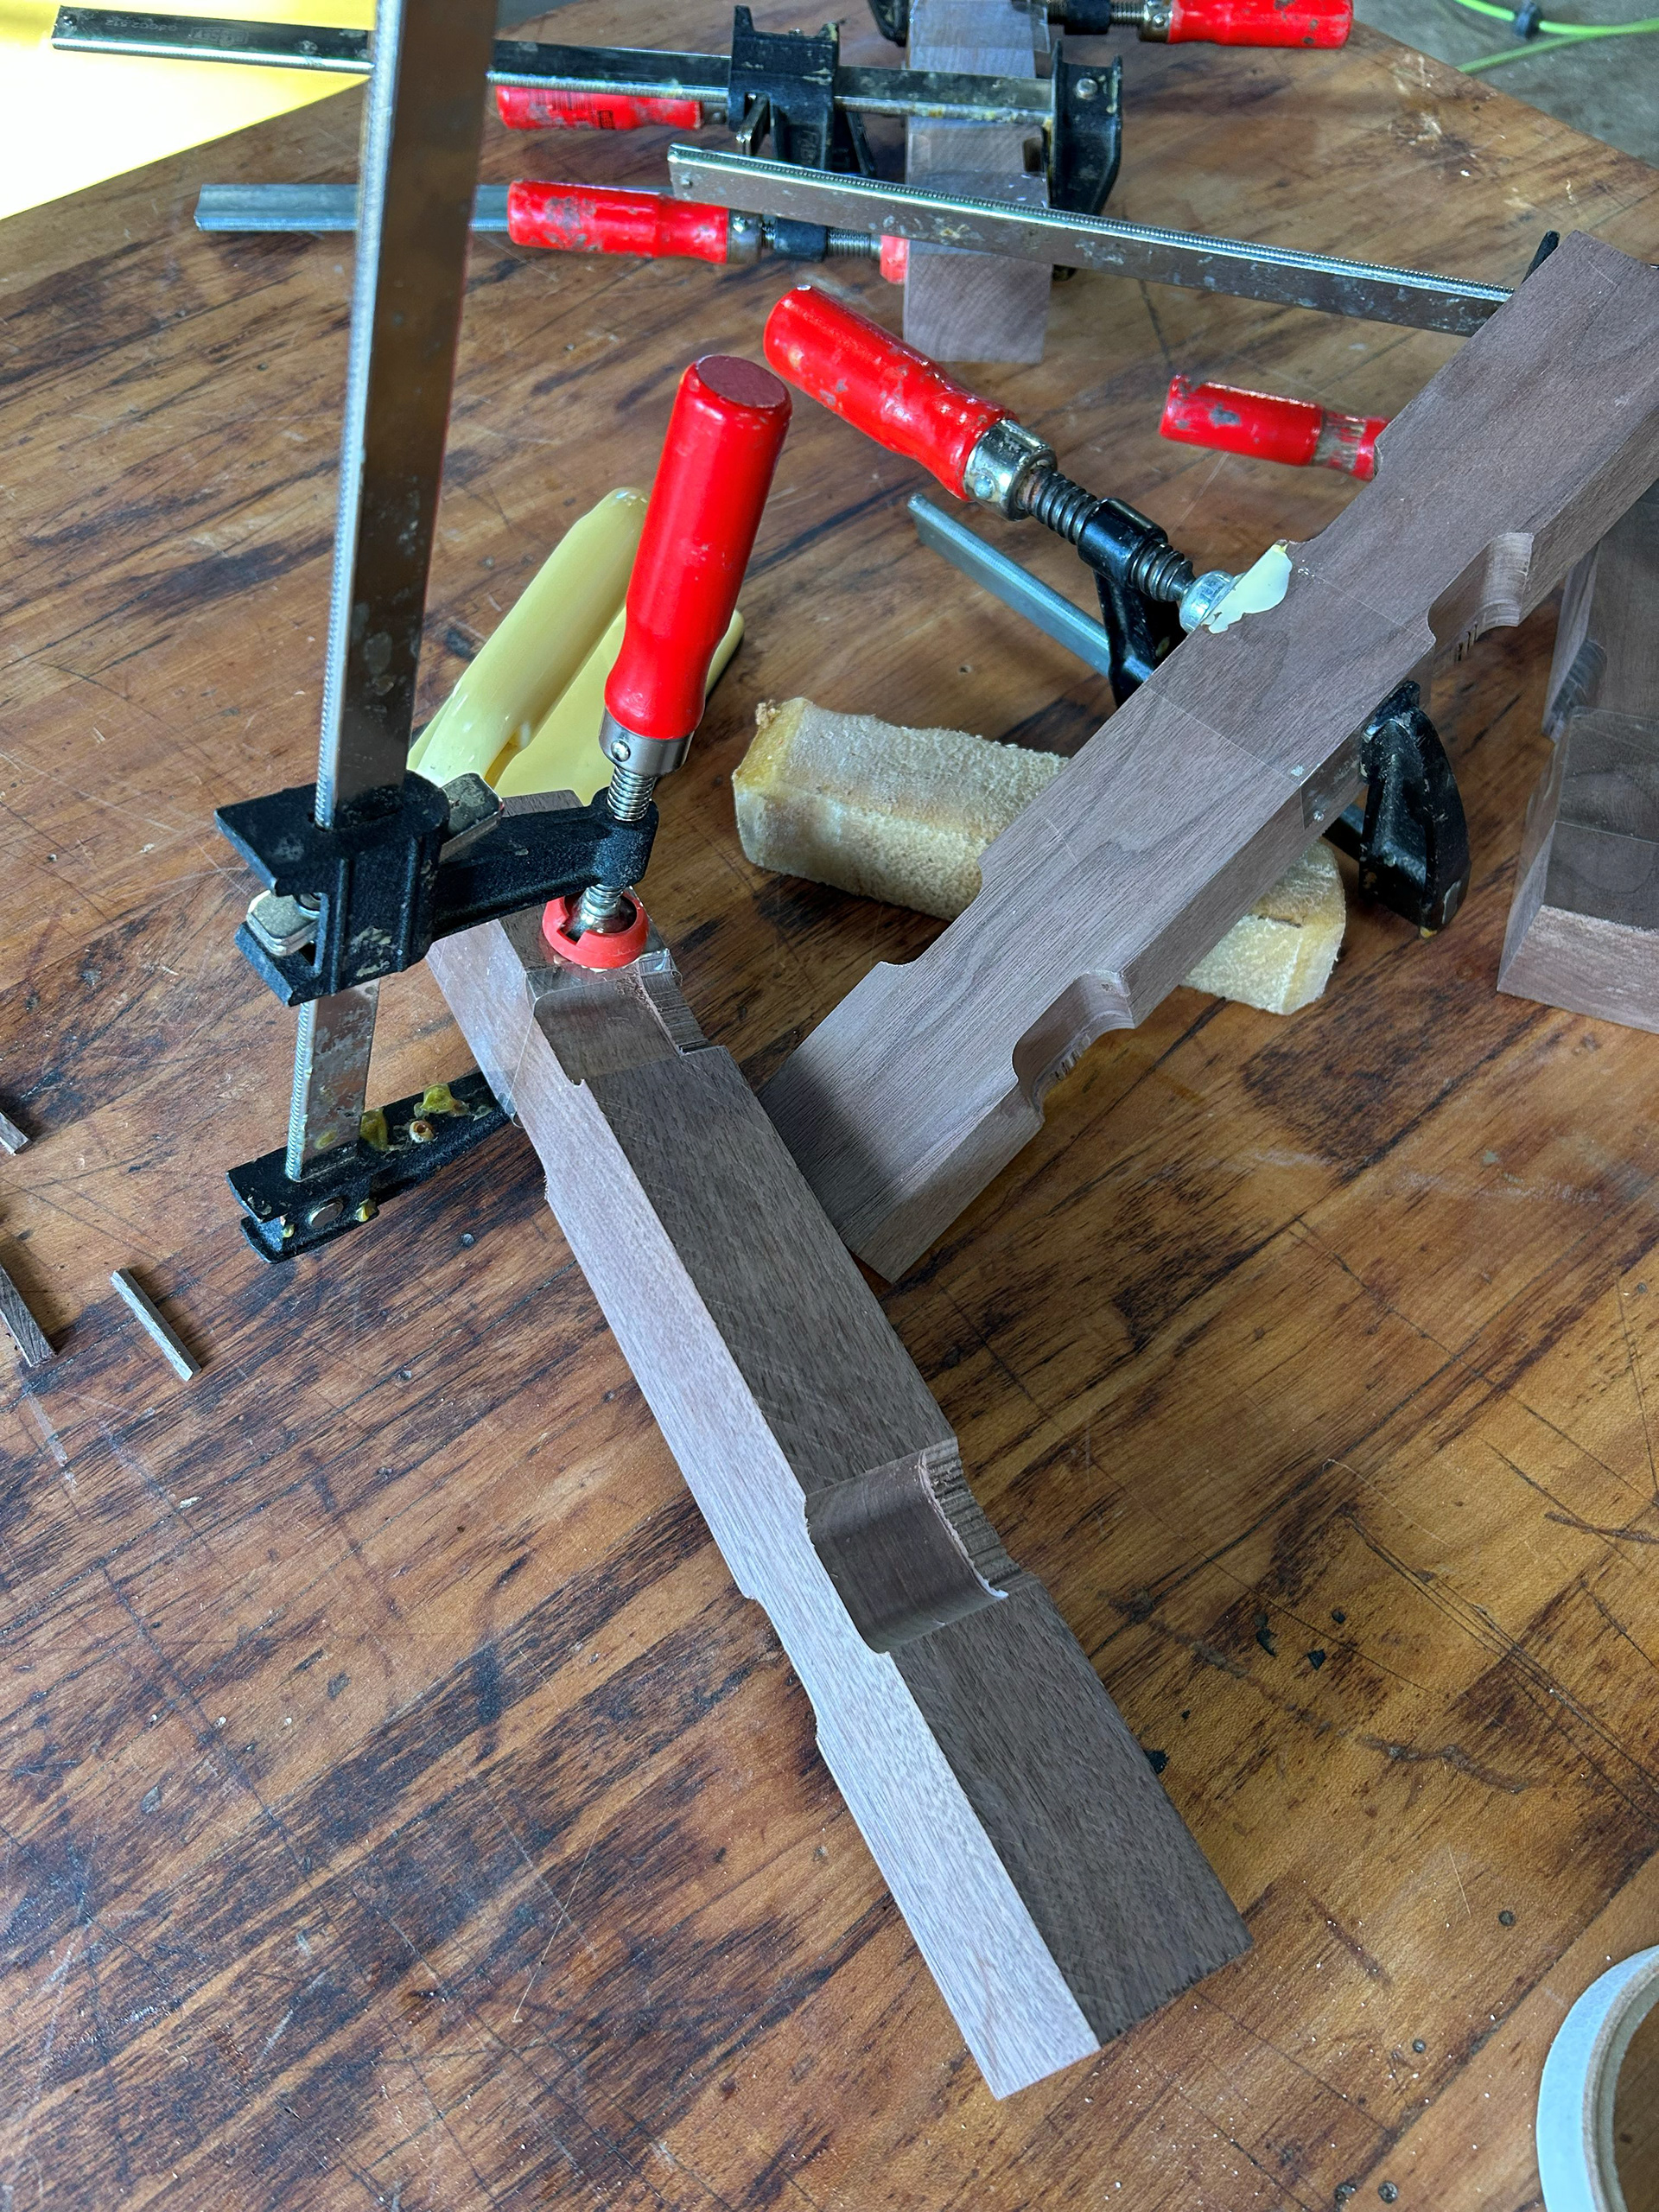
Image 30 | Gluing the Torn Out Pieces of the Columnar Leg & Finish the Routing Process by Sanding the Remaining Band Saw-cut Edges with the Spindel Sander
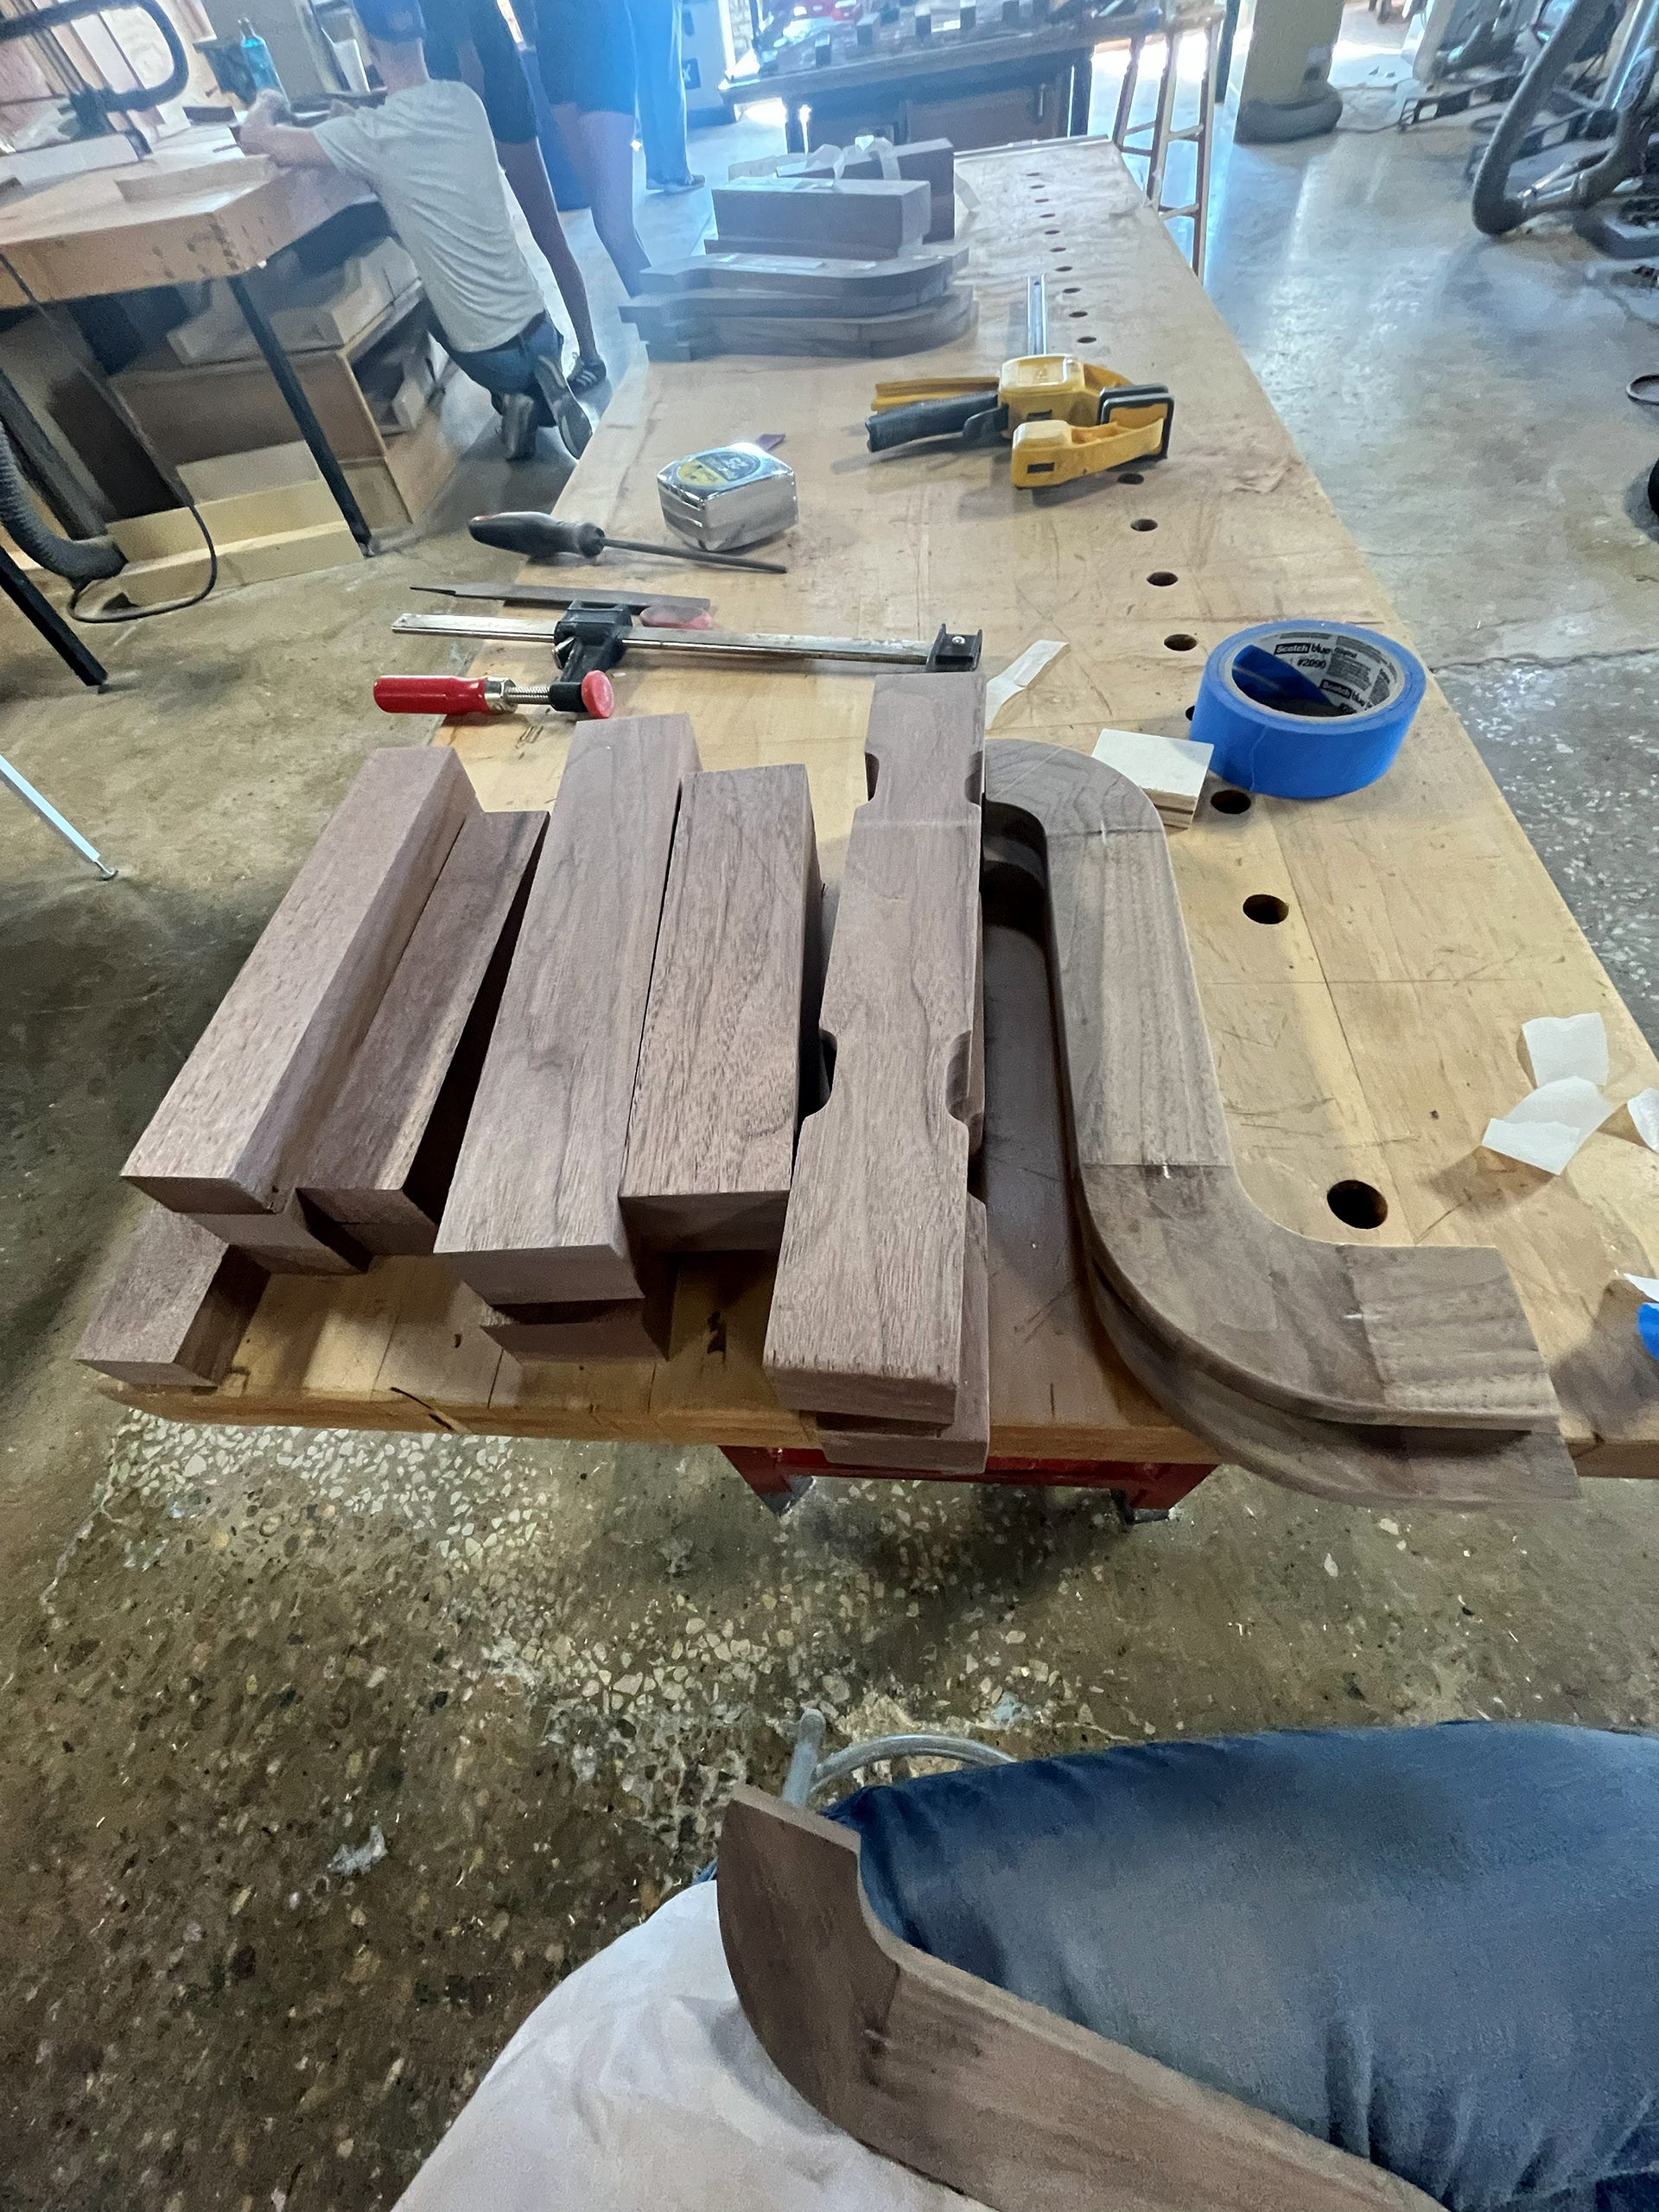
Image 31 | All Footstool Pieces Cut Out
Creating the S-curve Leg Tongue-and-Groove Joints
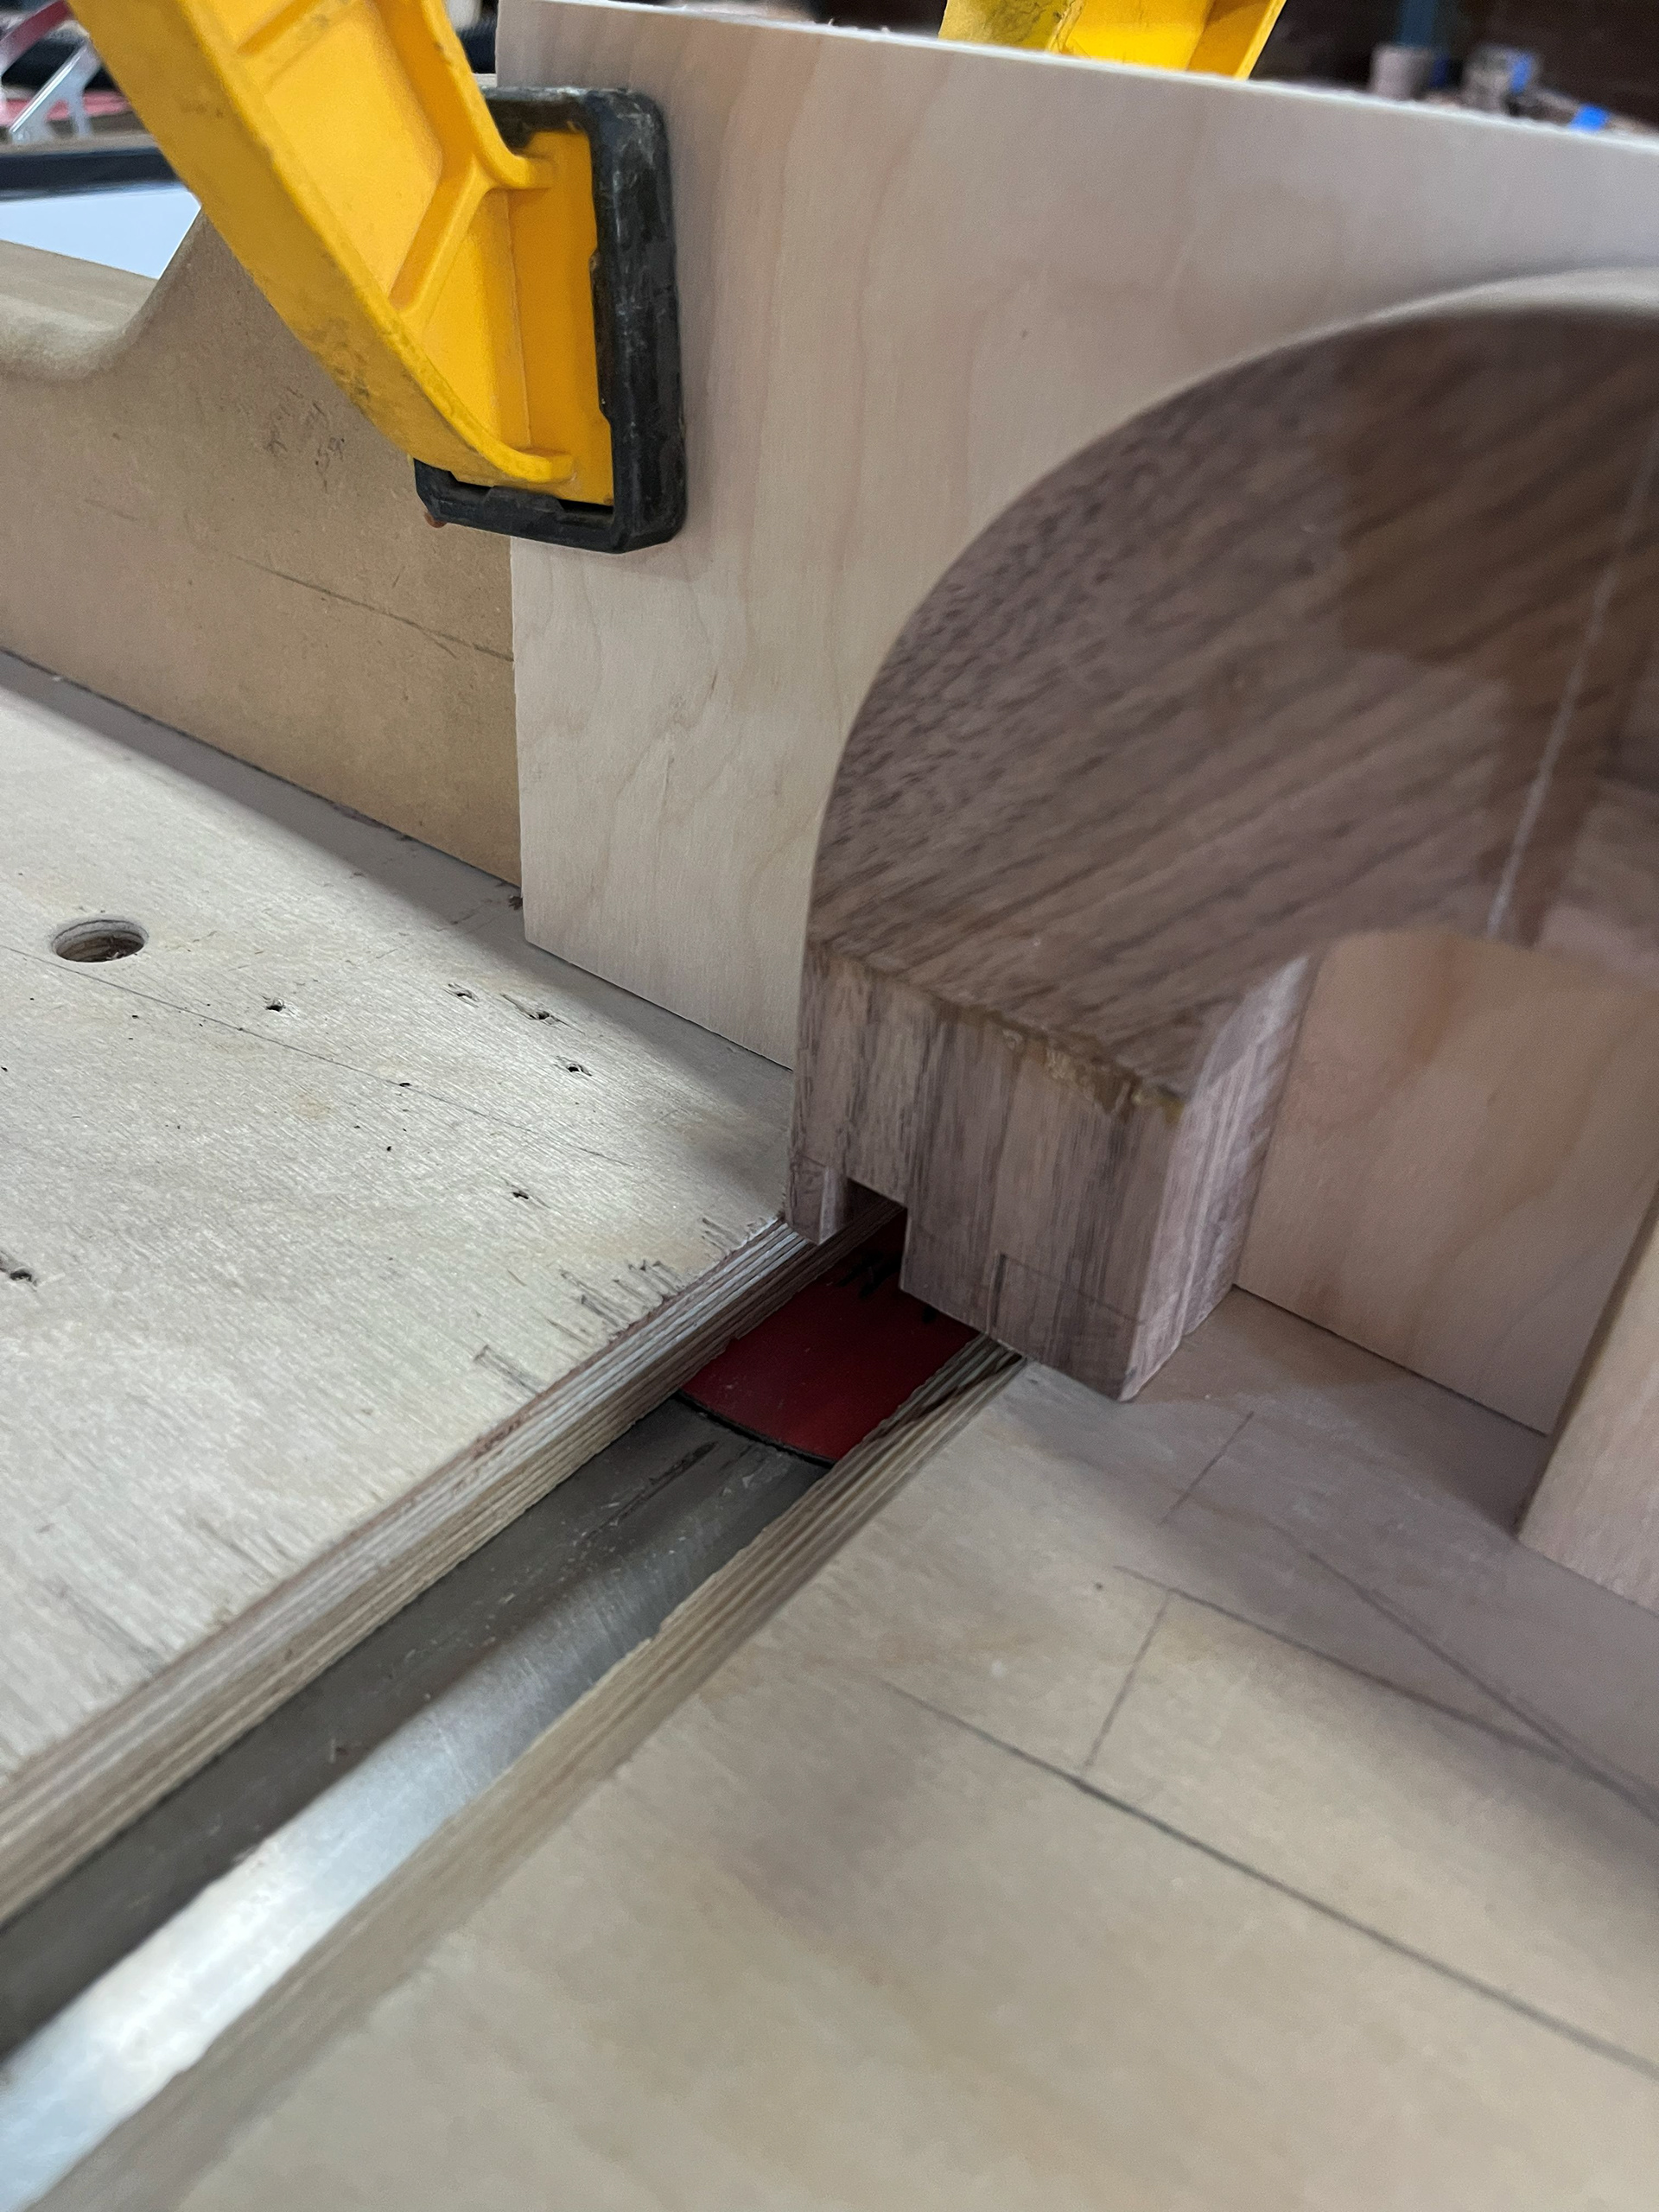
Image 32 | Ripping the Tongue Joint on the S-curve Leg with the Dado Blade on the Table Saw
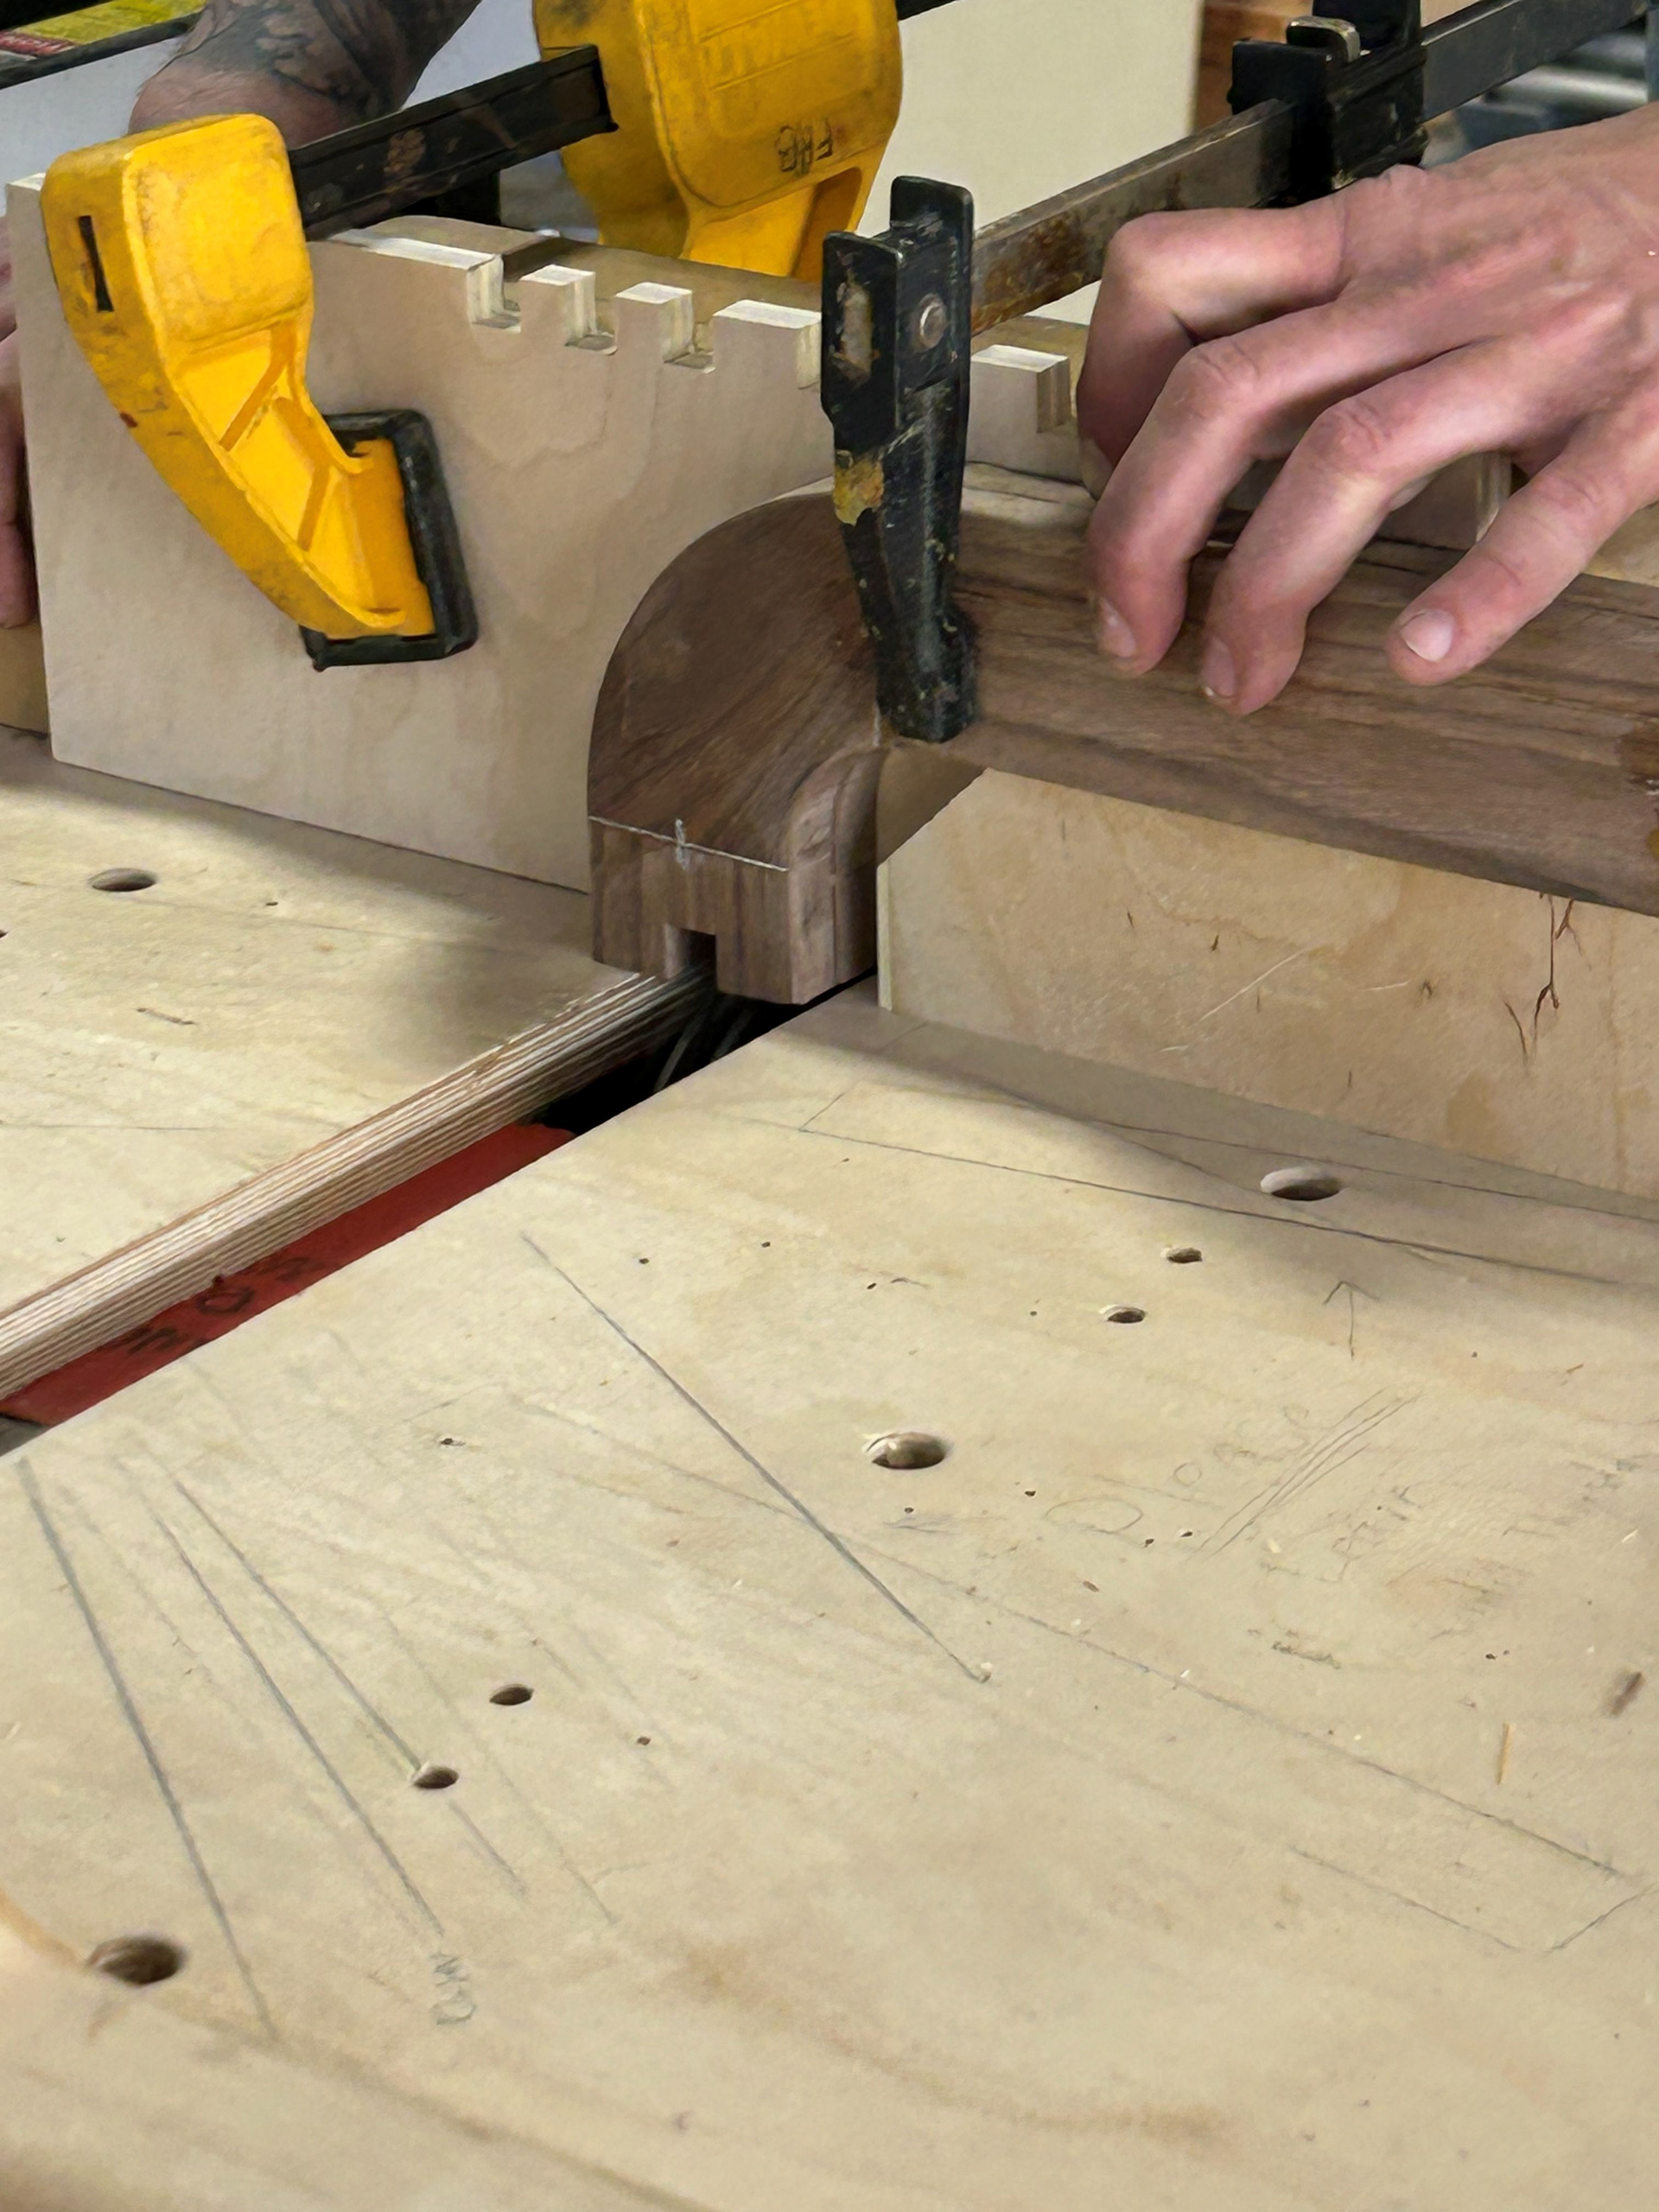
Image 33 | Ripping the Groove Joint on the S-curve Leg with the Dado Blade on the Table Saw
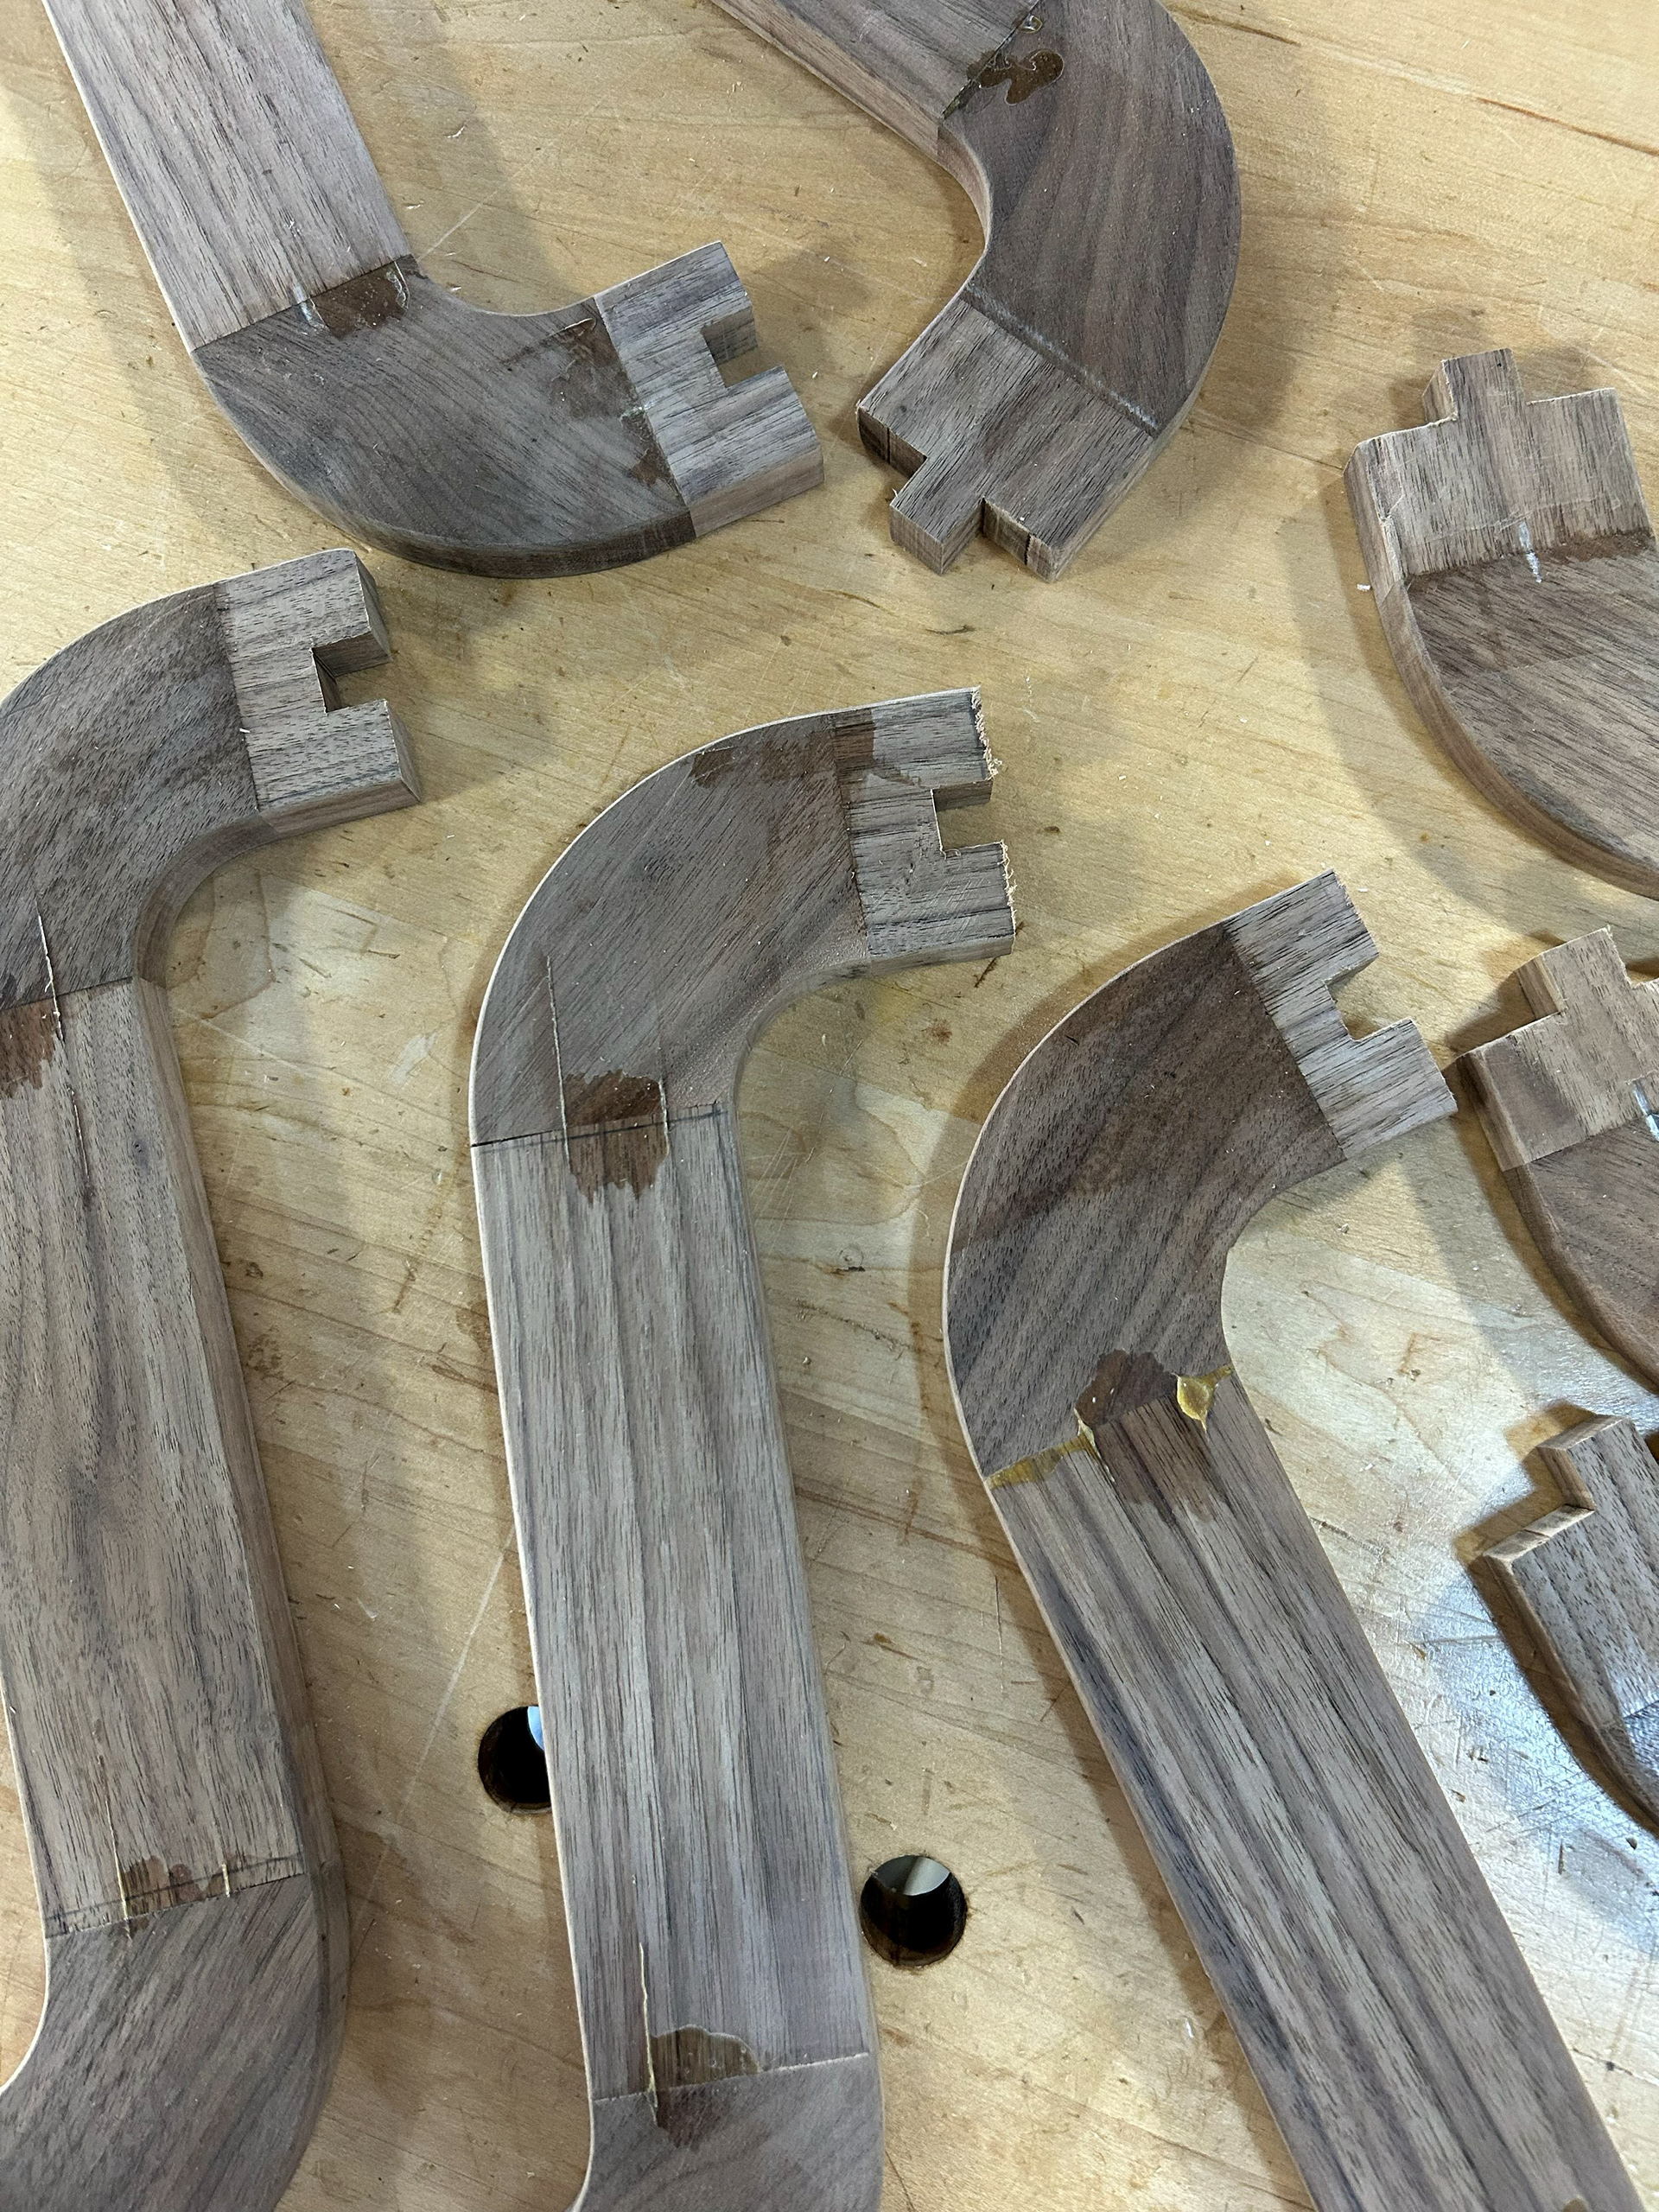
Image 34 | All Tongue and Groove Joints on the S-curve Legs Ripped Out
Domino Floating Mortise and Tenon Joints
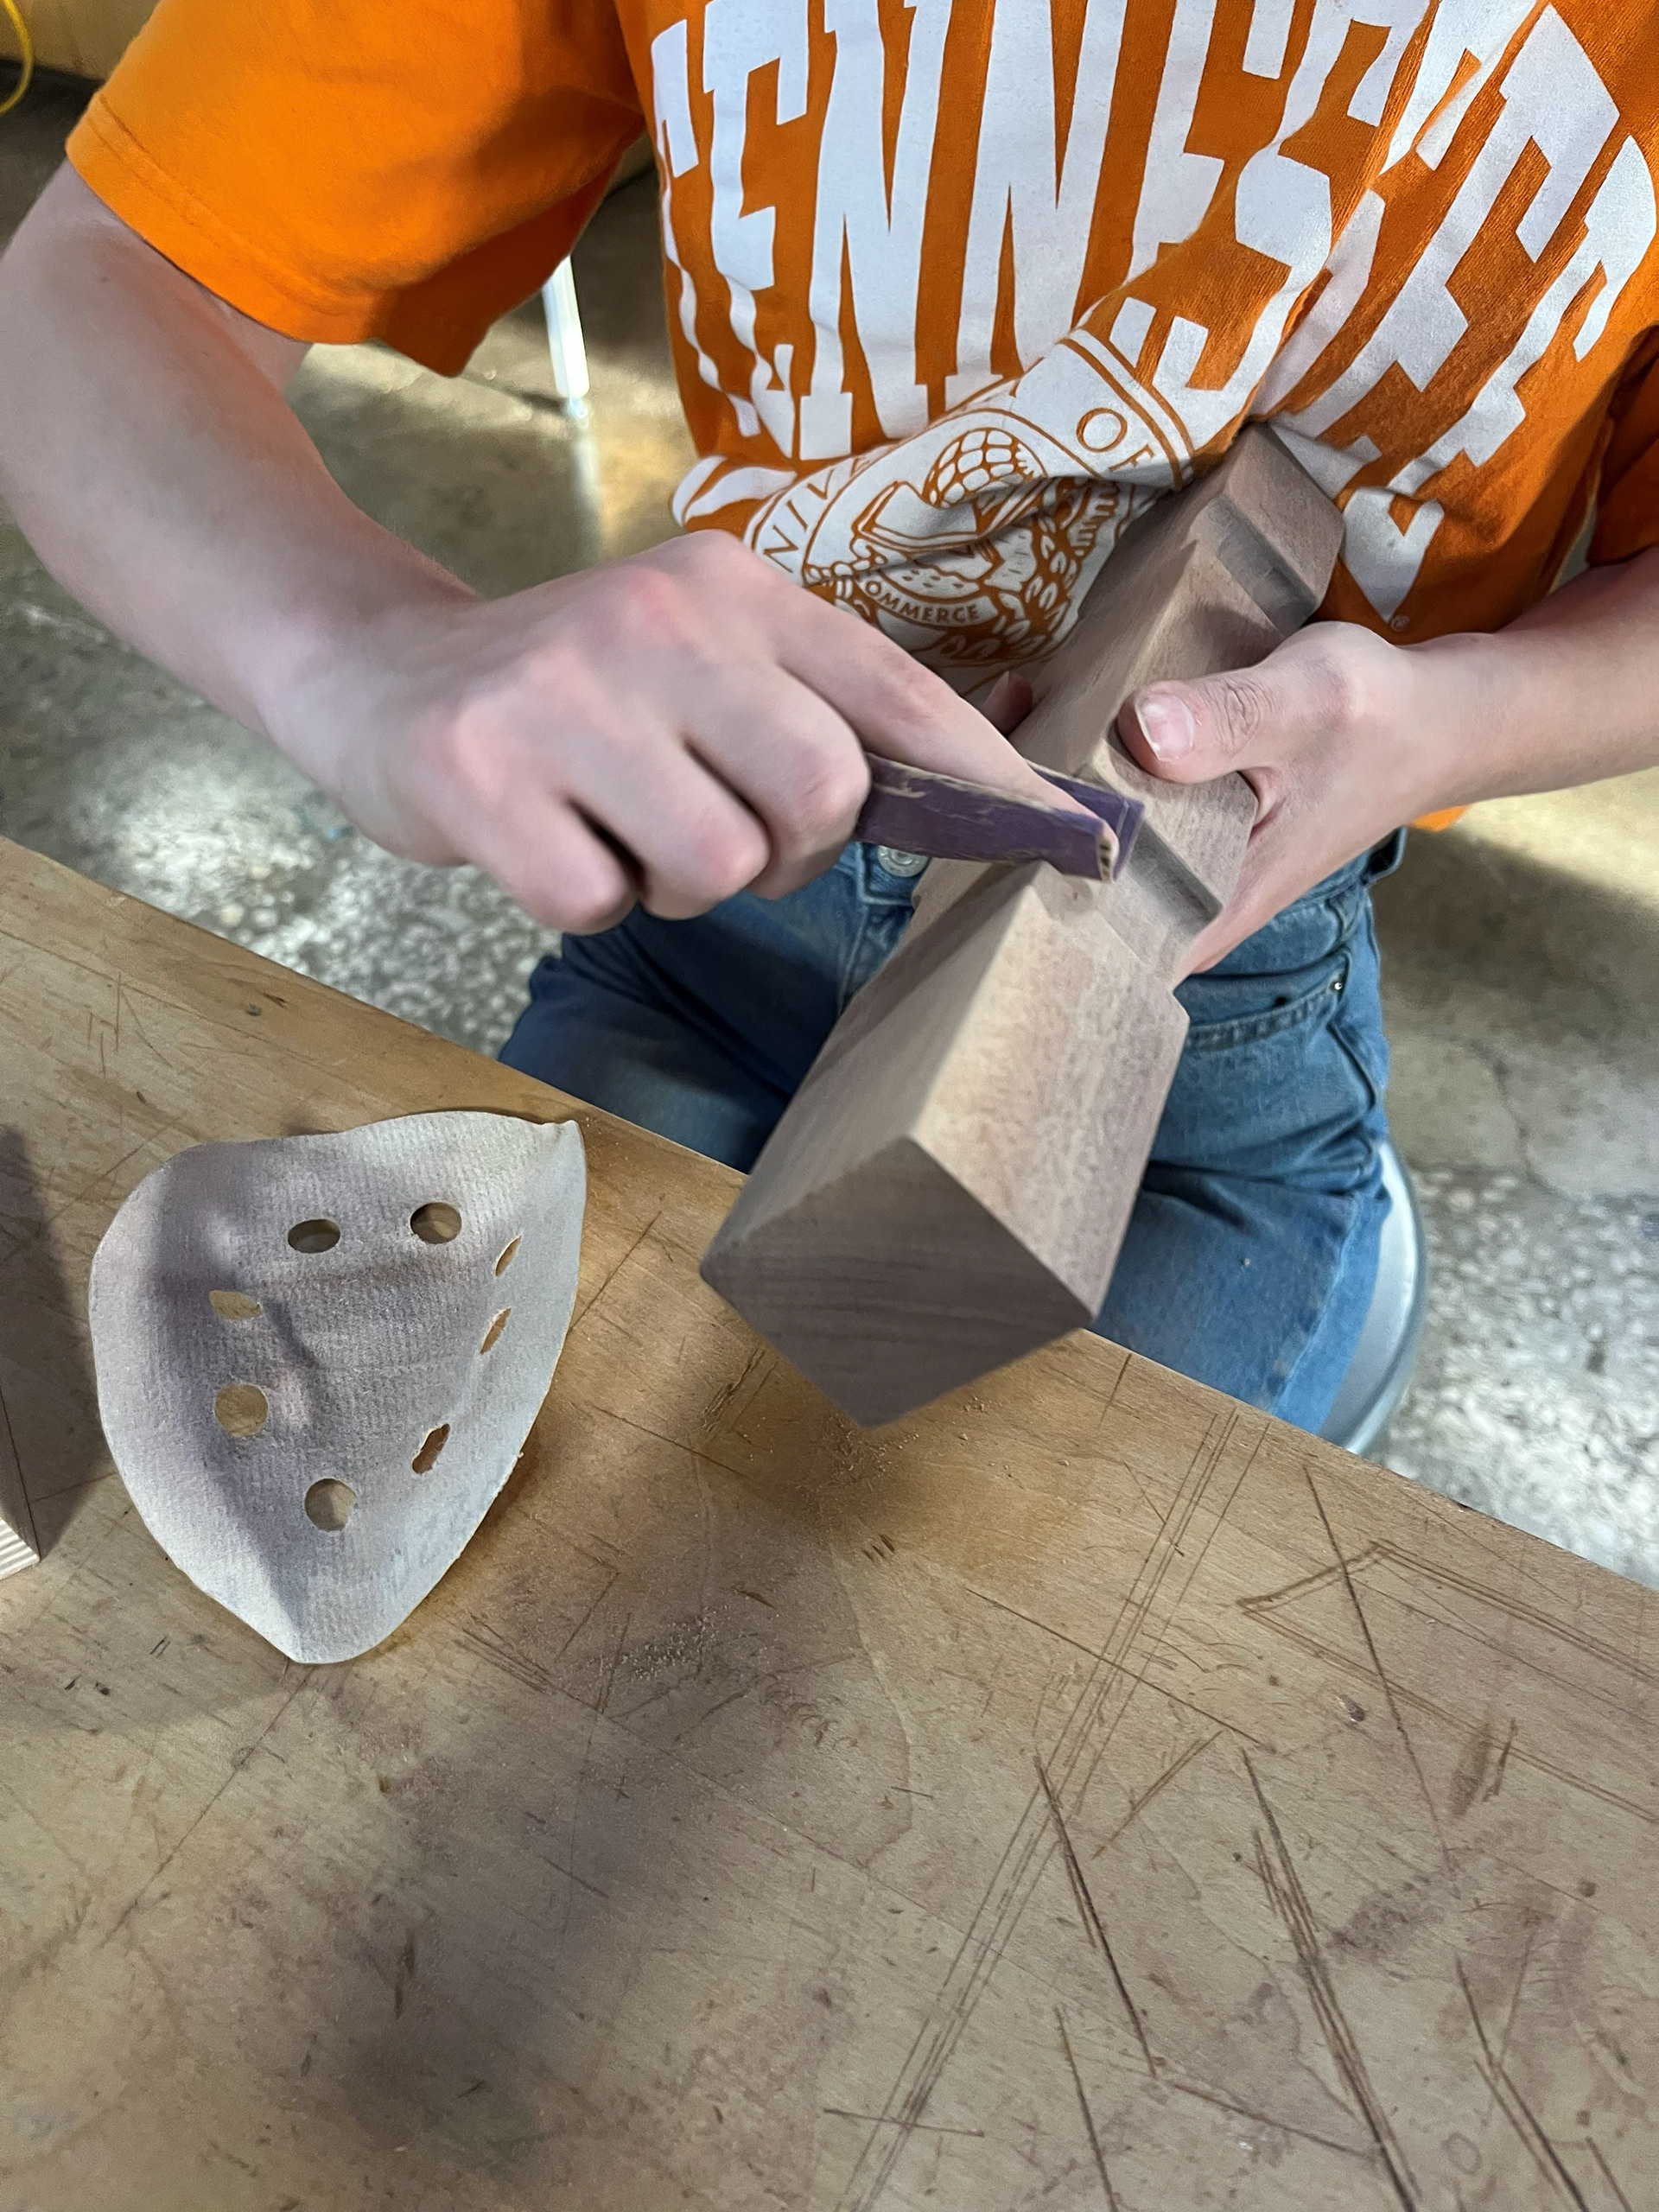
Image 35 | Hand-sanding All Faces of Footstool Pieces with 80, 120, and 220 Grit Sand Paper
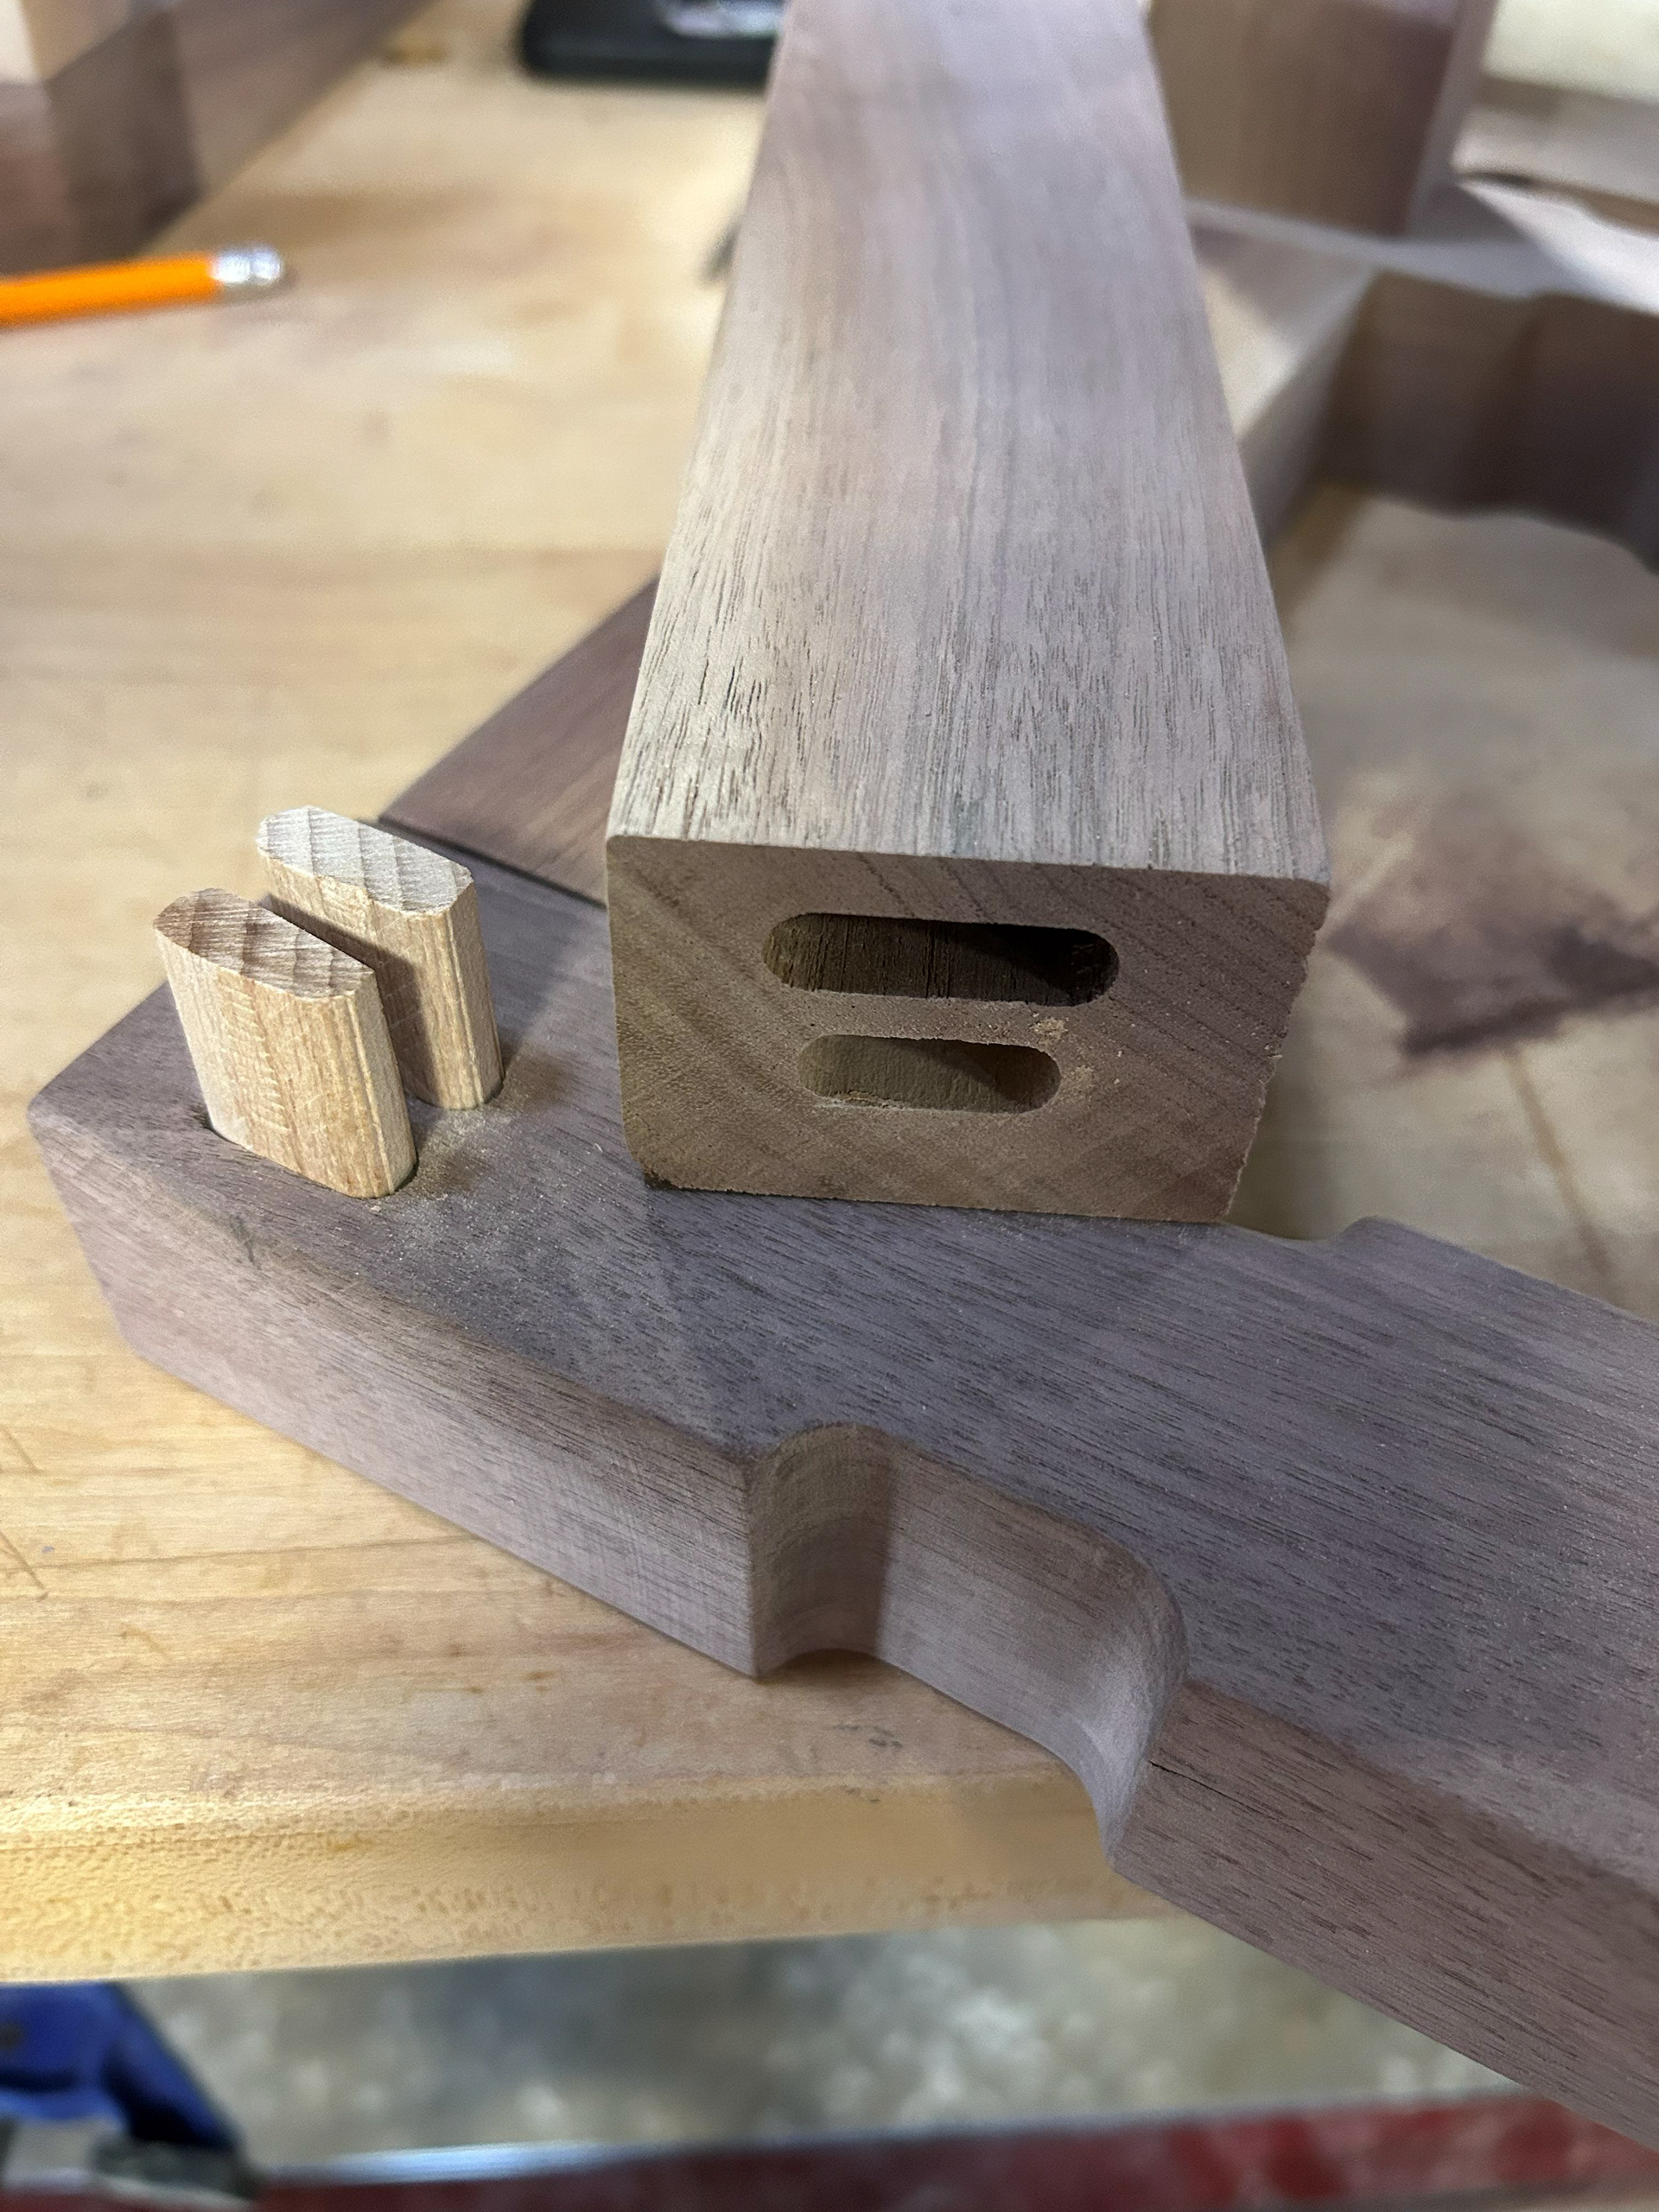
Image 36 | Using the Domino Tool to Cut 8x40 Floating Mortise and Tenon Joints for the Main Footstool Assembly
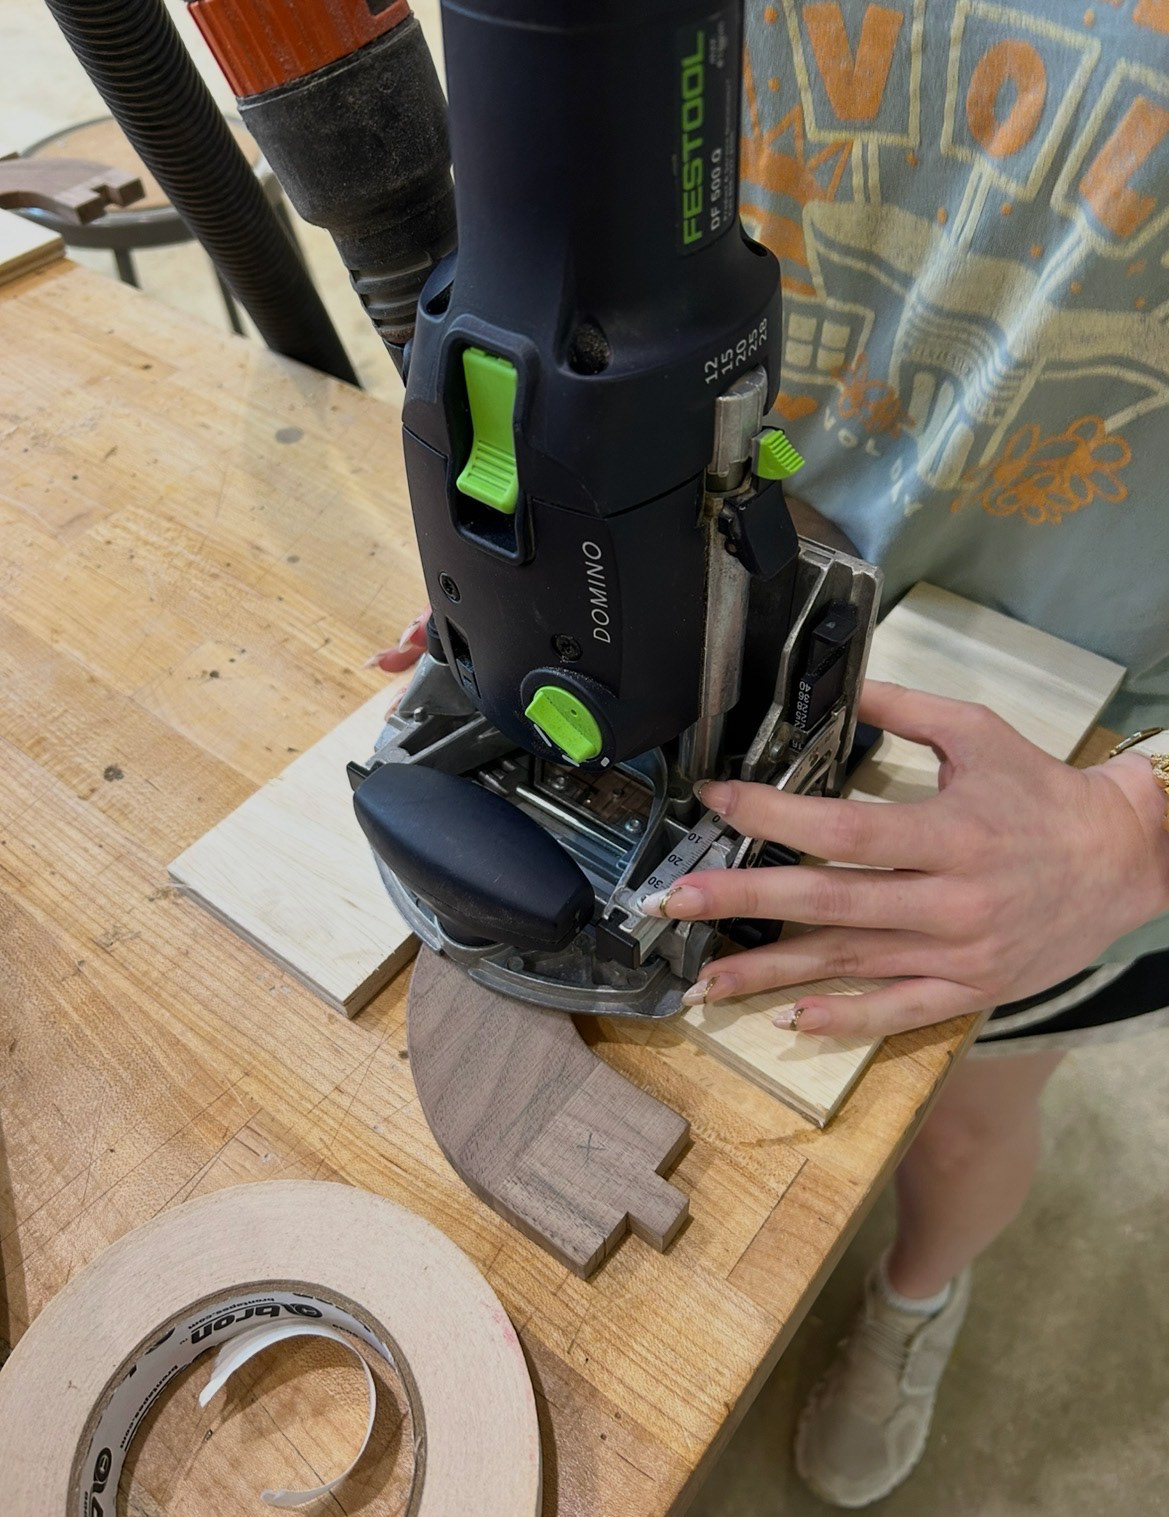
Image 37 | Using the Domino Tool to Cut 4x20 Floating Mortise and Tenon Joints on the Interior Face of Two S-curve Legs per Footstool Assembly
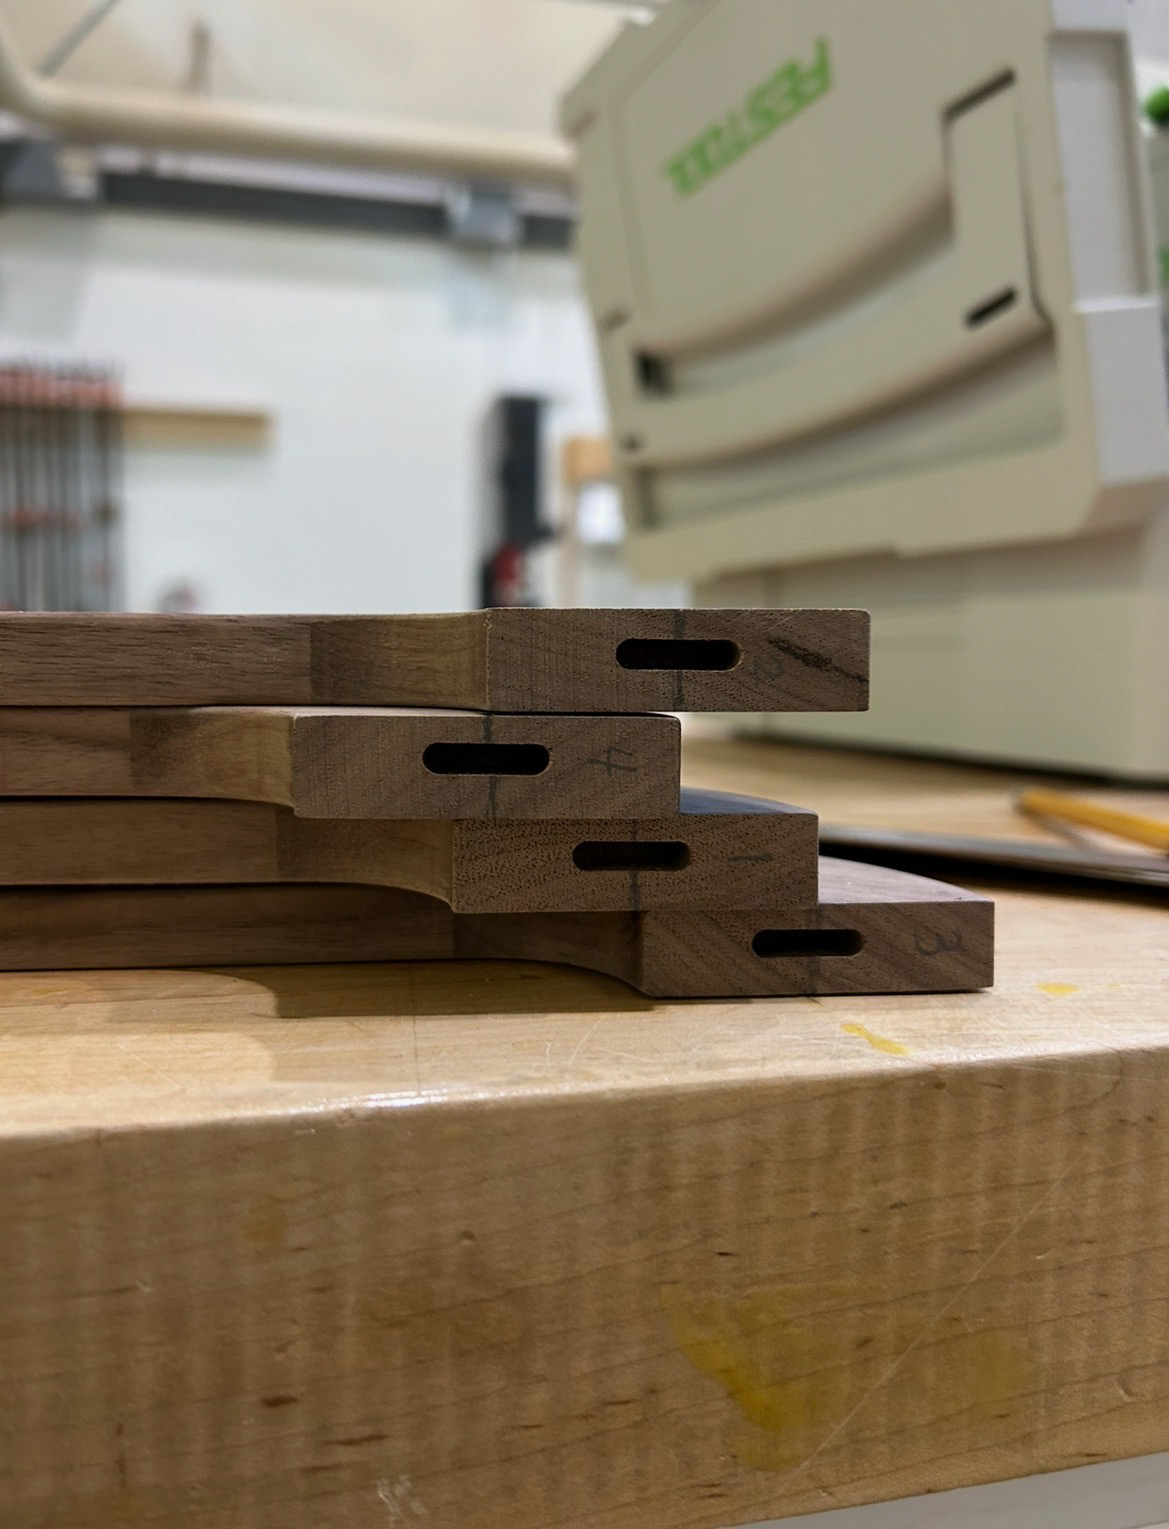
Image 38 | Using the Domino Tool to Cut 4x20 Floating Mortise and Tenon Joints at the Connection Edge Between the S-curve Leg Pieces and the Main Footstool Assembly
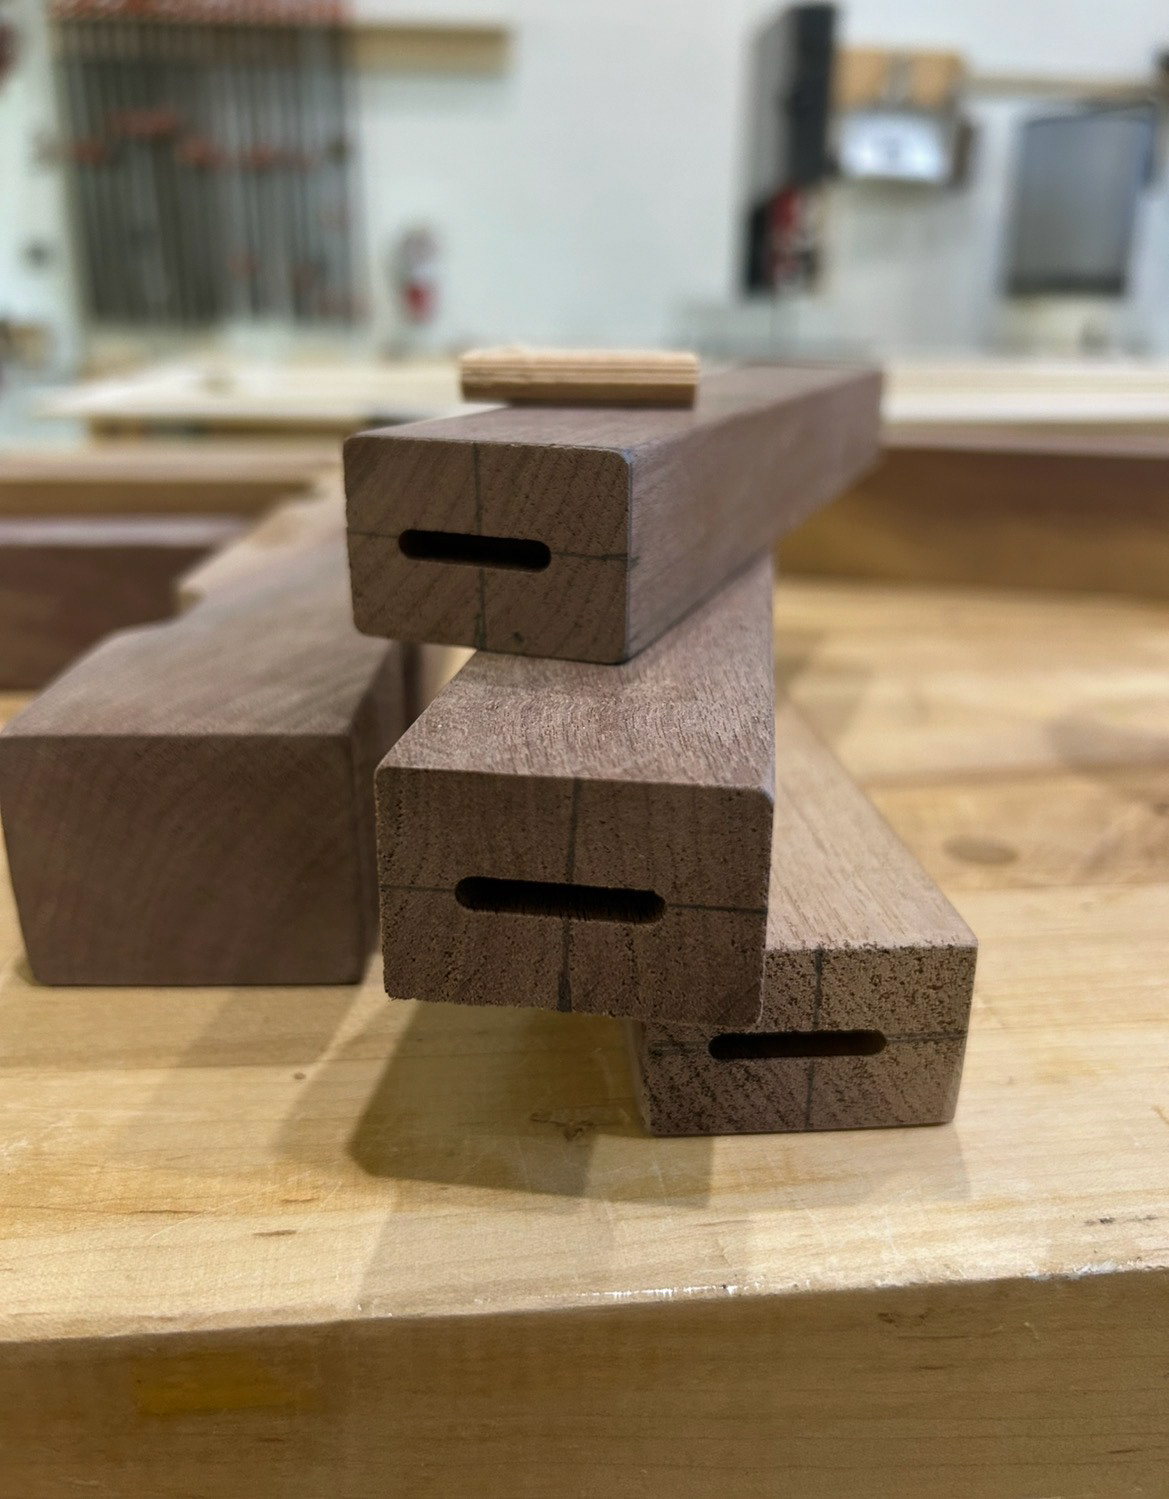
Image 39 | Using the Domino Tool to Cut 4x20 Floating Mortise and Tenon Joints into the Stretcher Bars Supporting the S-curve Leg Structure
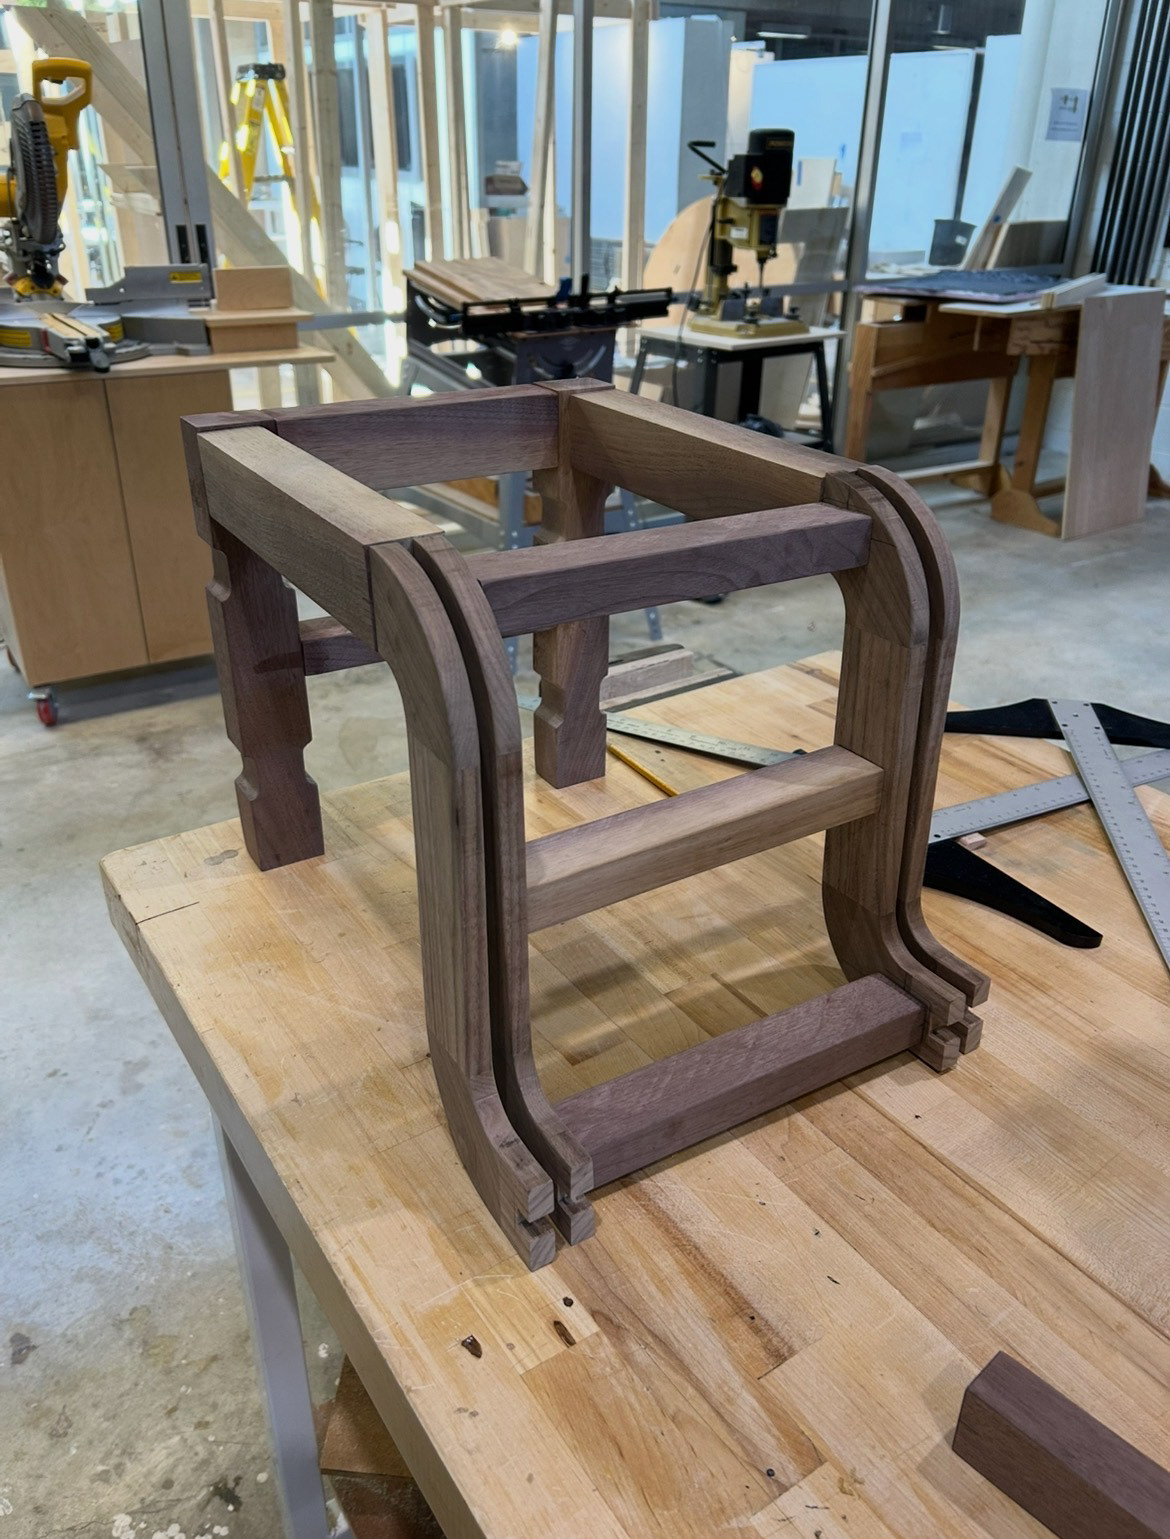
Image 40 | Dry-fitting Entire Footstool Assembly with Dominos Inside the Floating Mortise and Tenon Joint Cut-outs
Creating the S-curve Leg Dowels
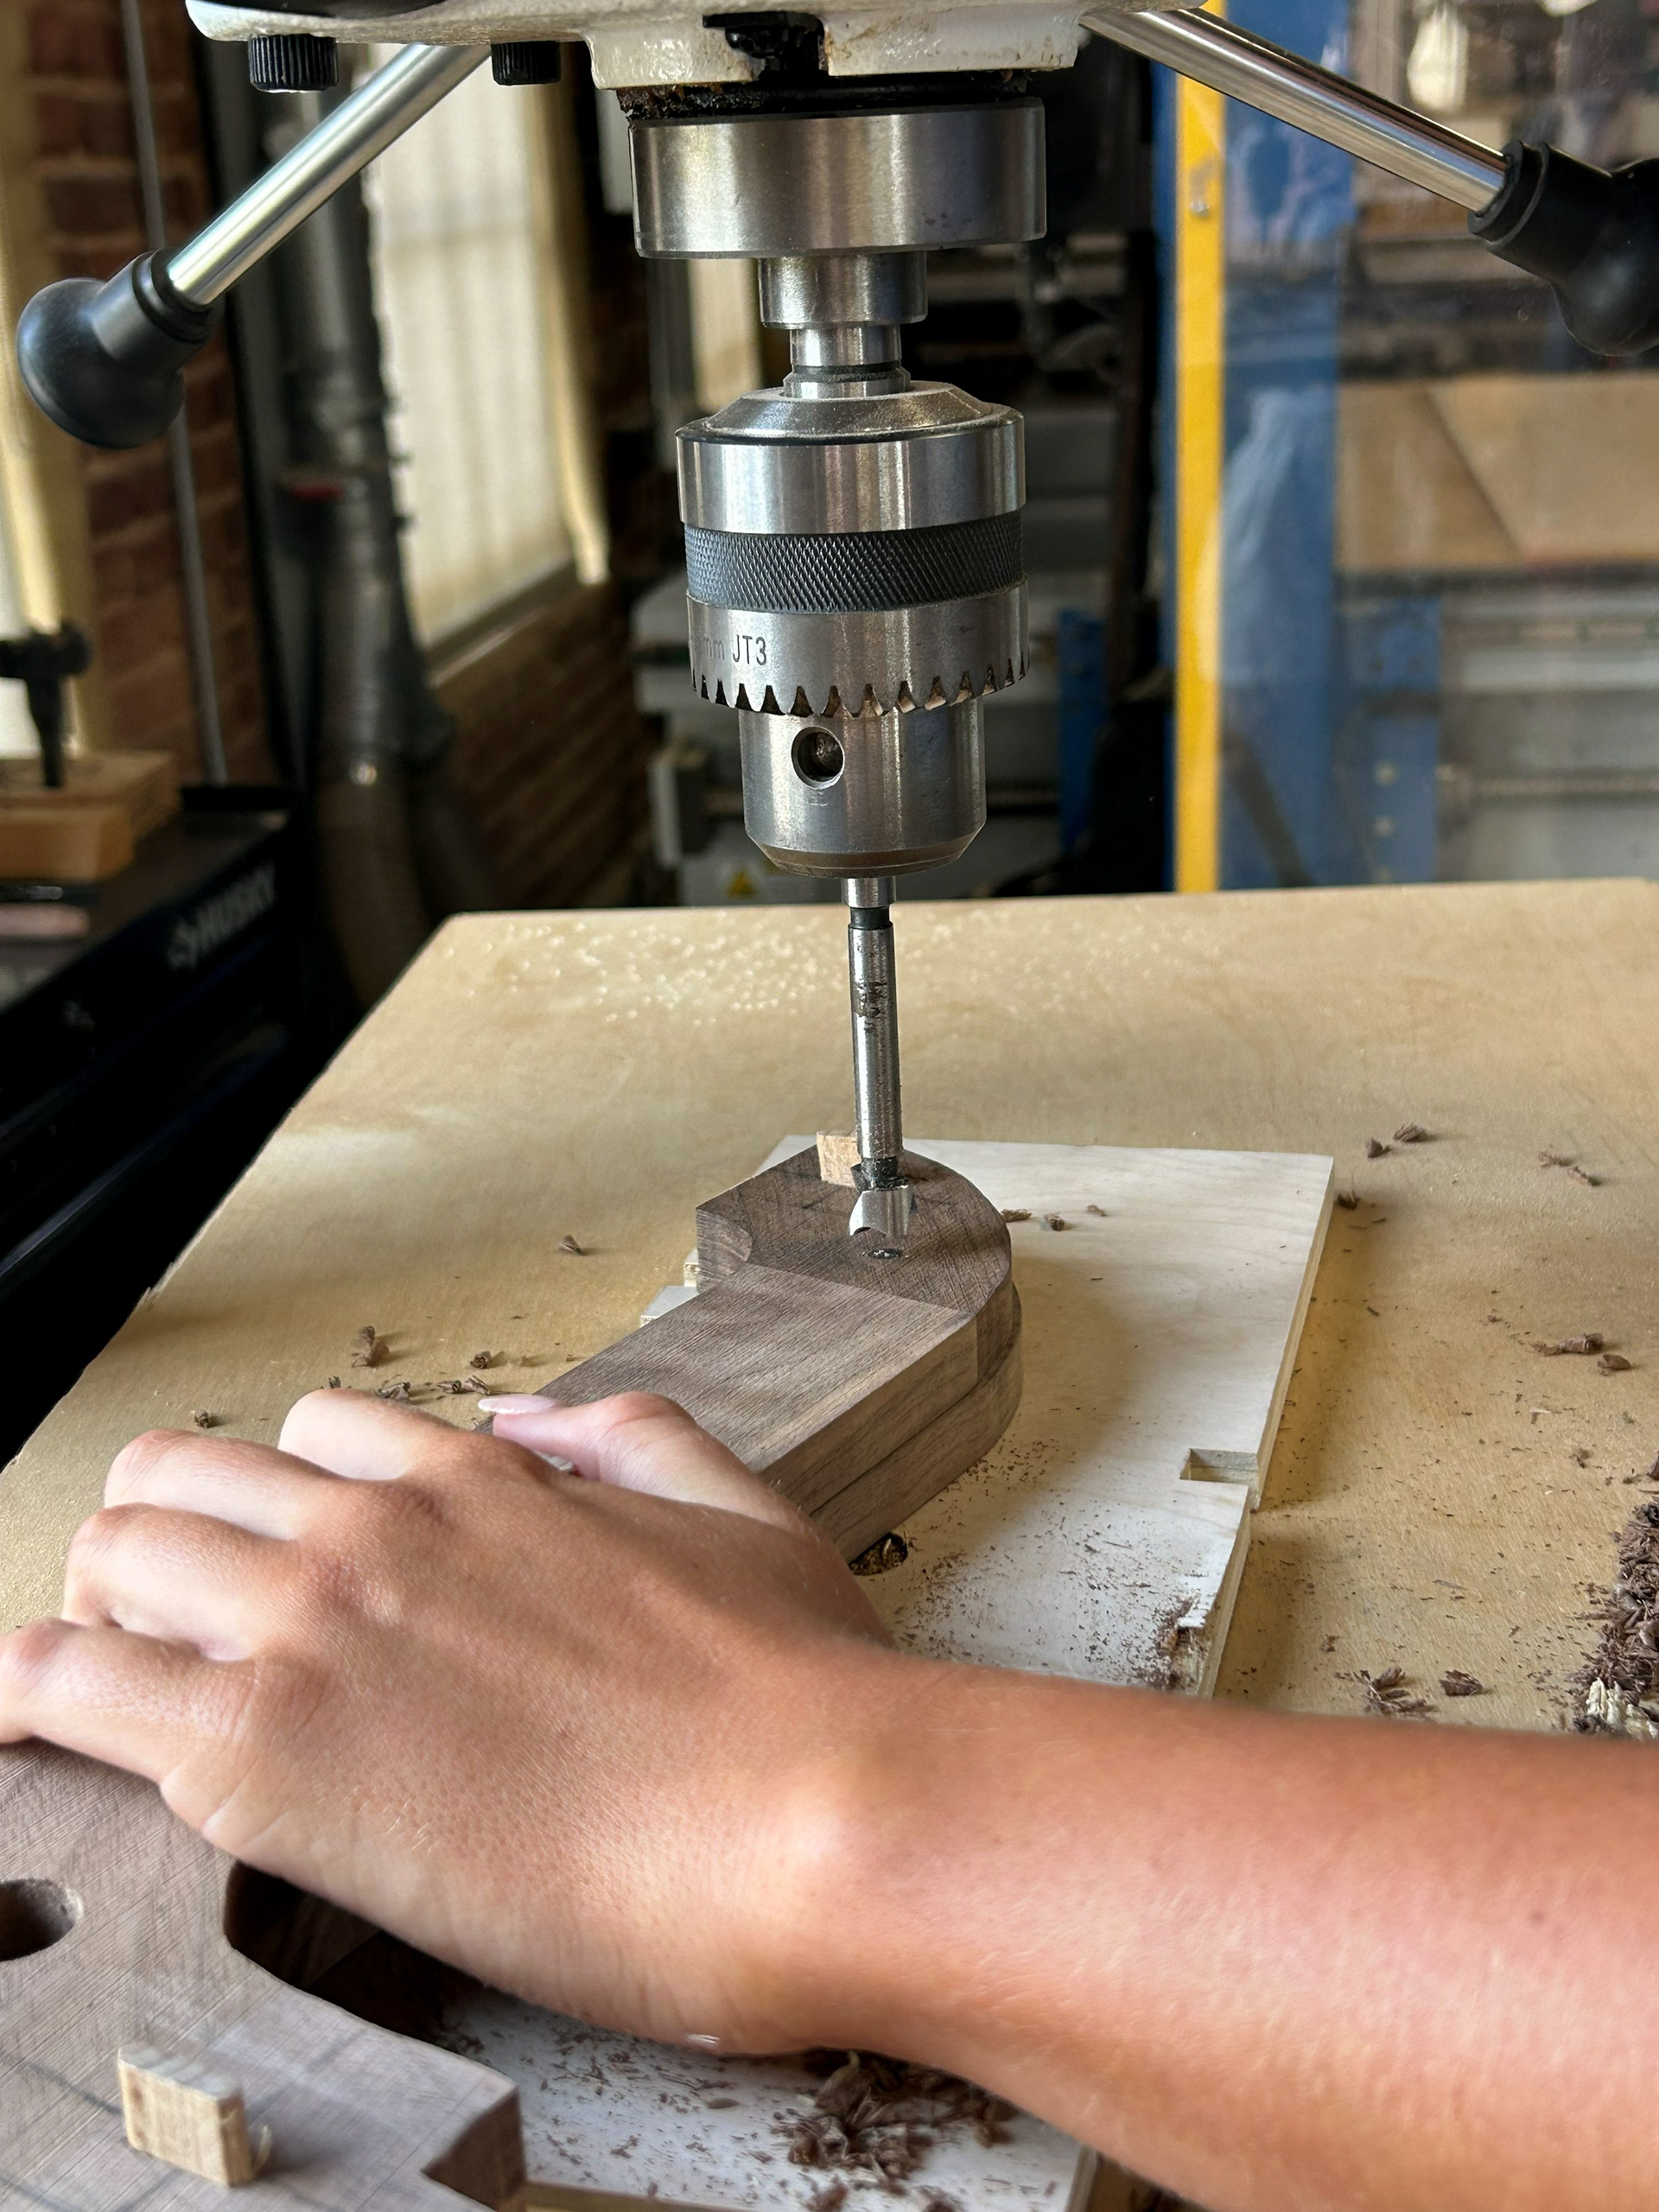
Image 41 | Using the Drill Press to Drill 5/8” Holes for the Dowels Supporting the Space Between the Two Sets of S-curve Legs
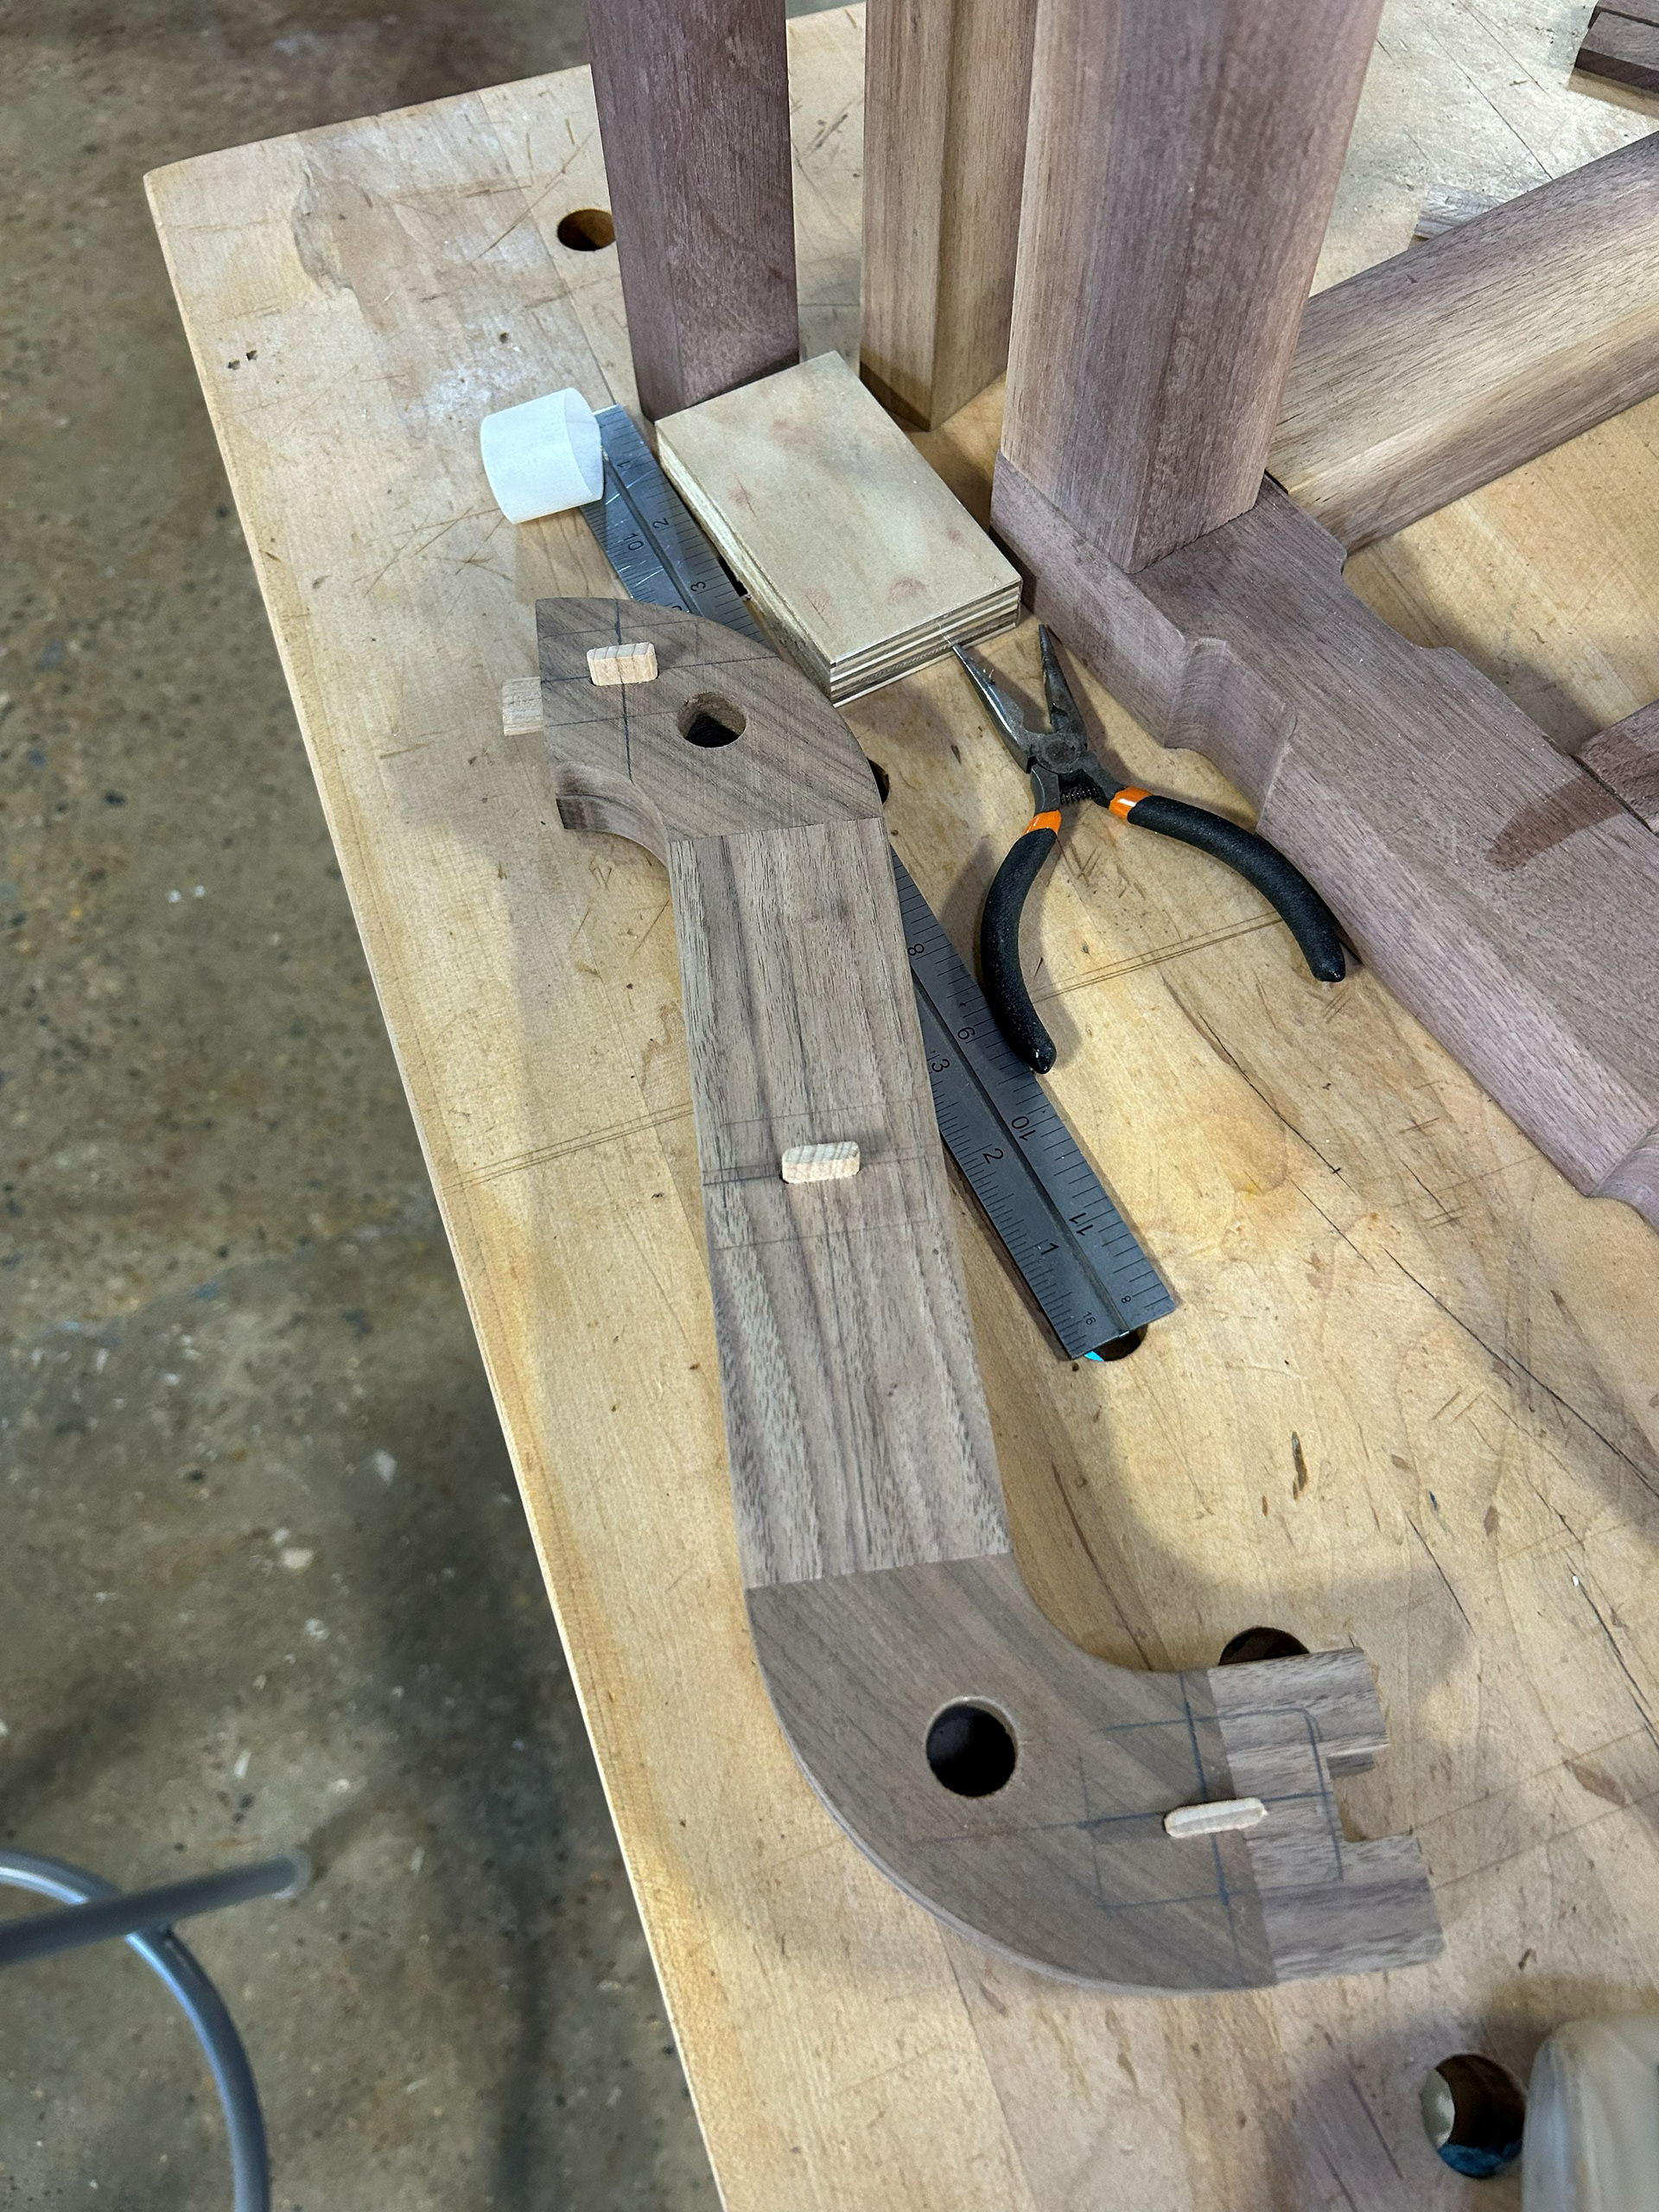
Image 42 | Final S-curve Leg With All Dominos and Dowel Cut-outs
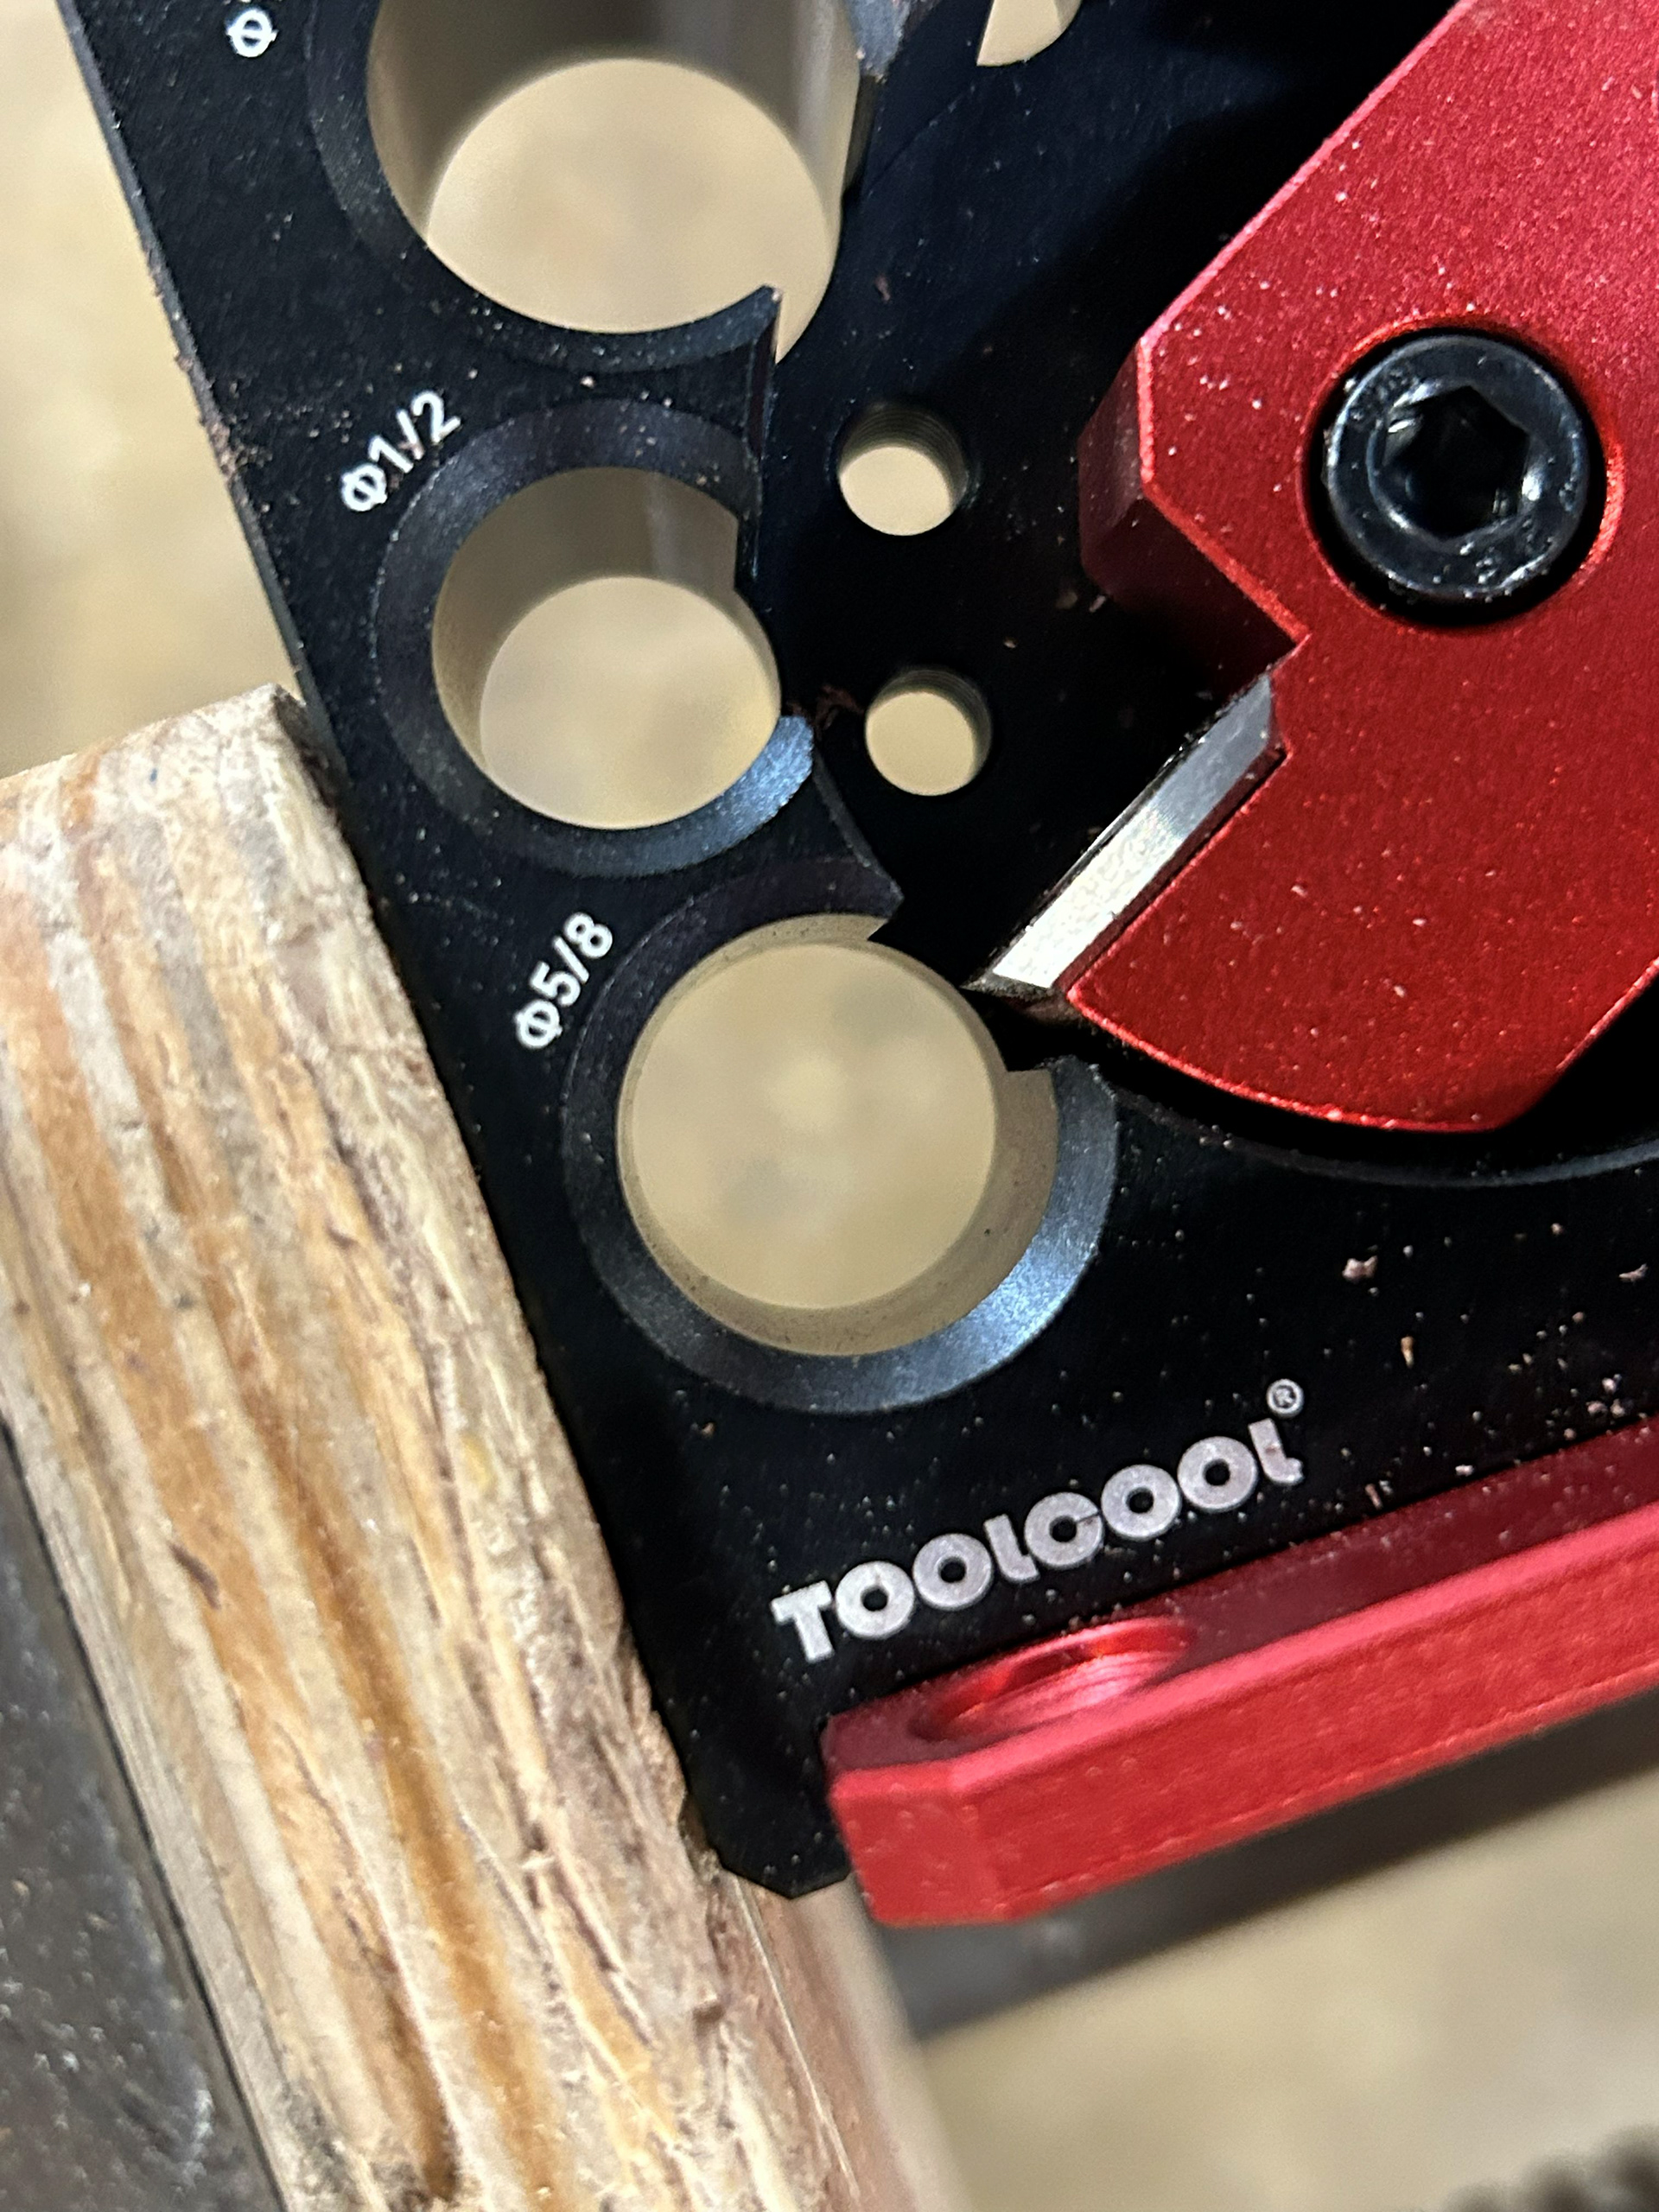
Image 43 | Selecting the Diameter of the Dowels for the S-curve Legs
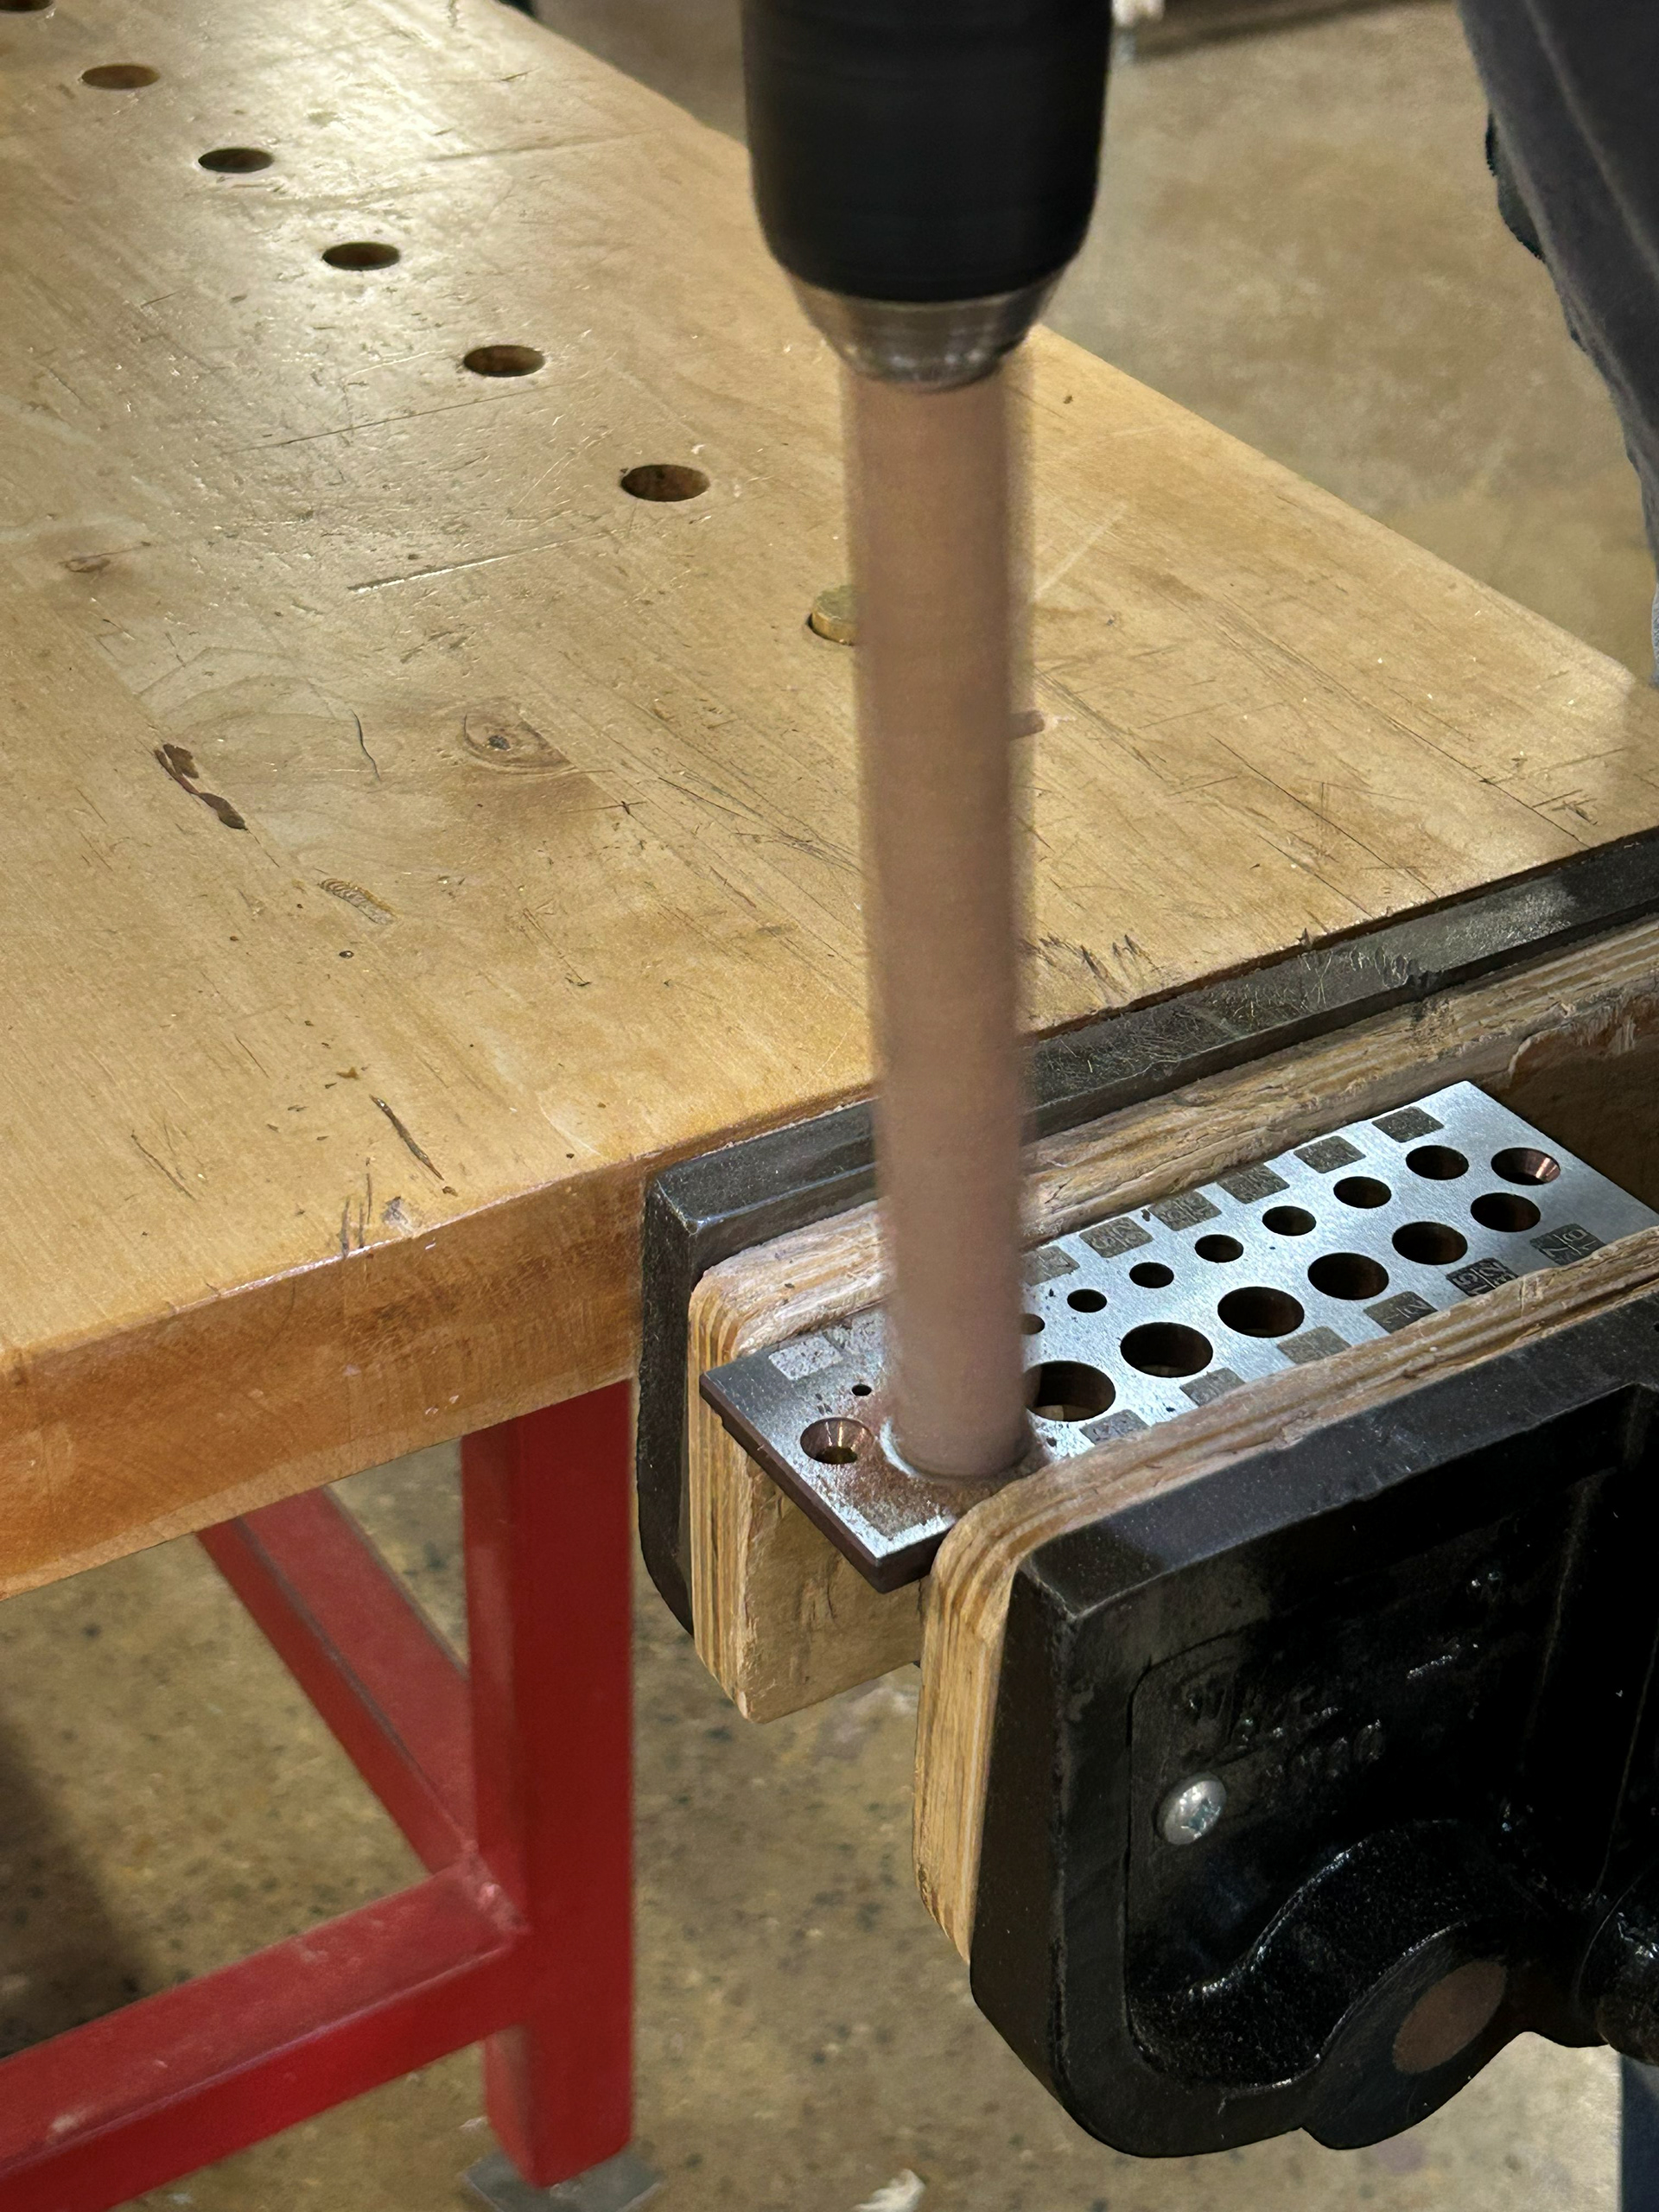
Image 44 | Drilling the S-curve Dowels Into the 5/8” Diameter Using an Electric Hand Drill
Final Footstool Assembly

Image 45 | Glue-up and Clamping of the Columnar Legs and Adjacent Short Apron Piece and Stretcher Bar
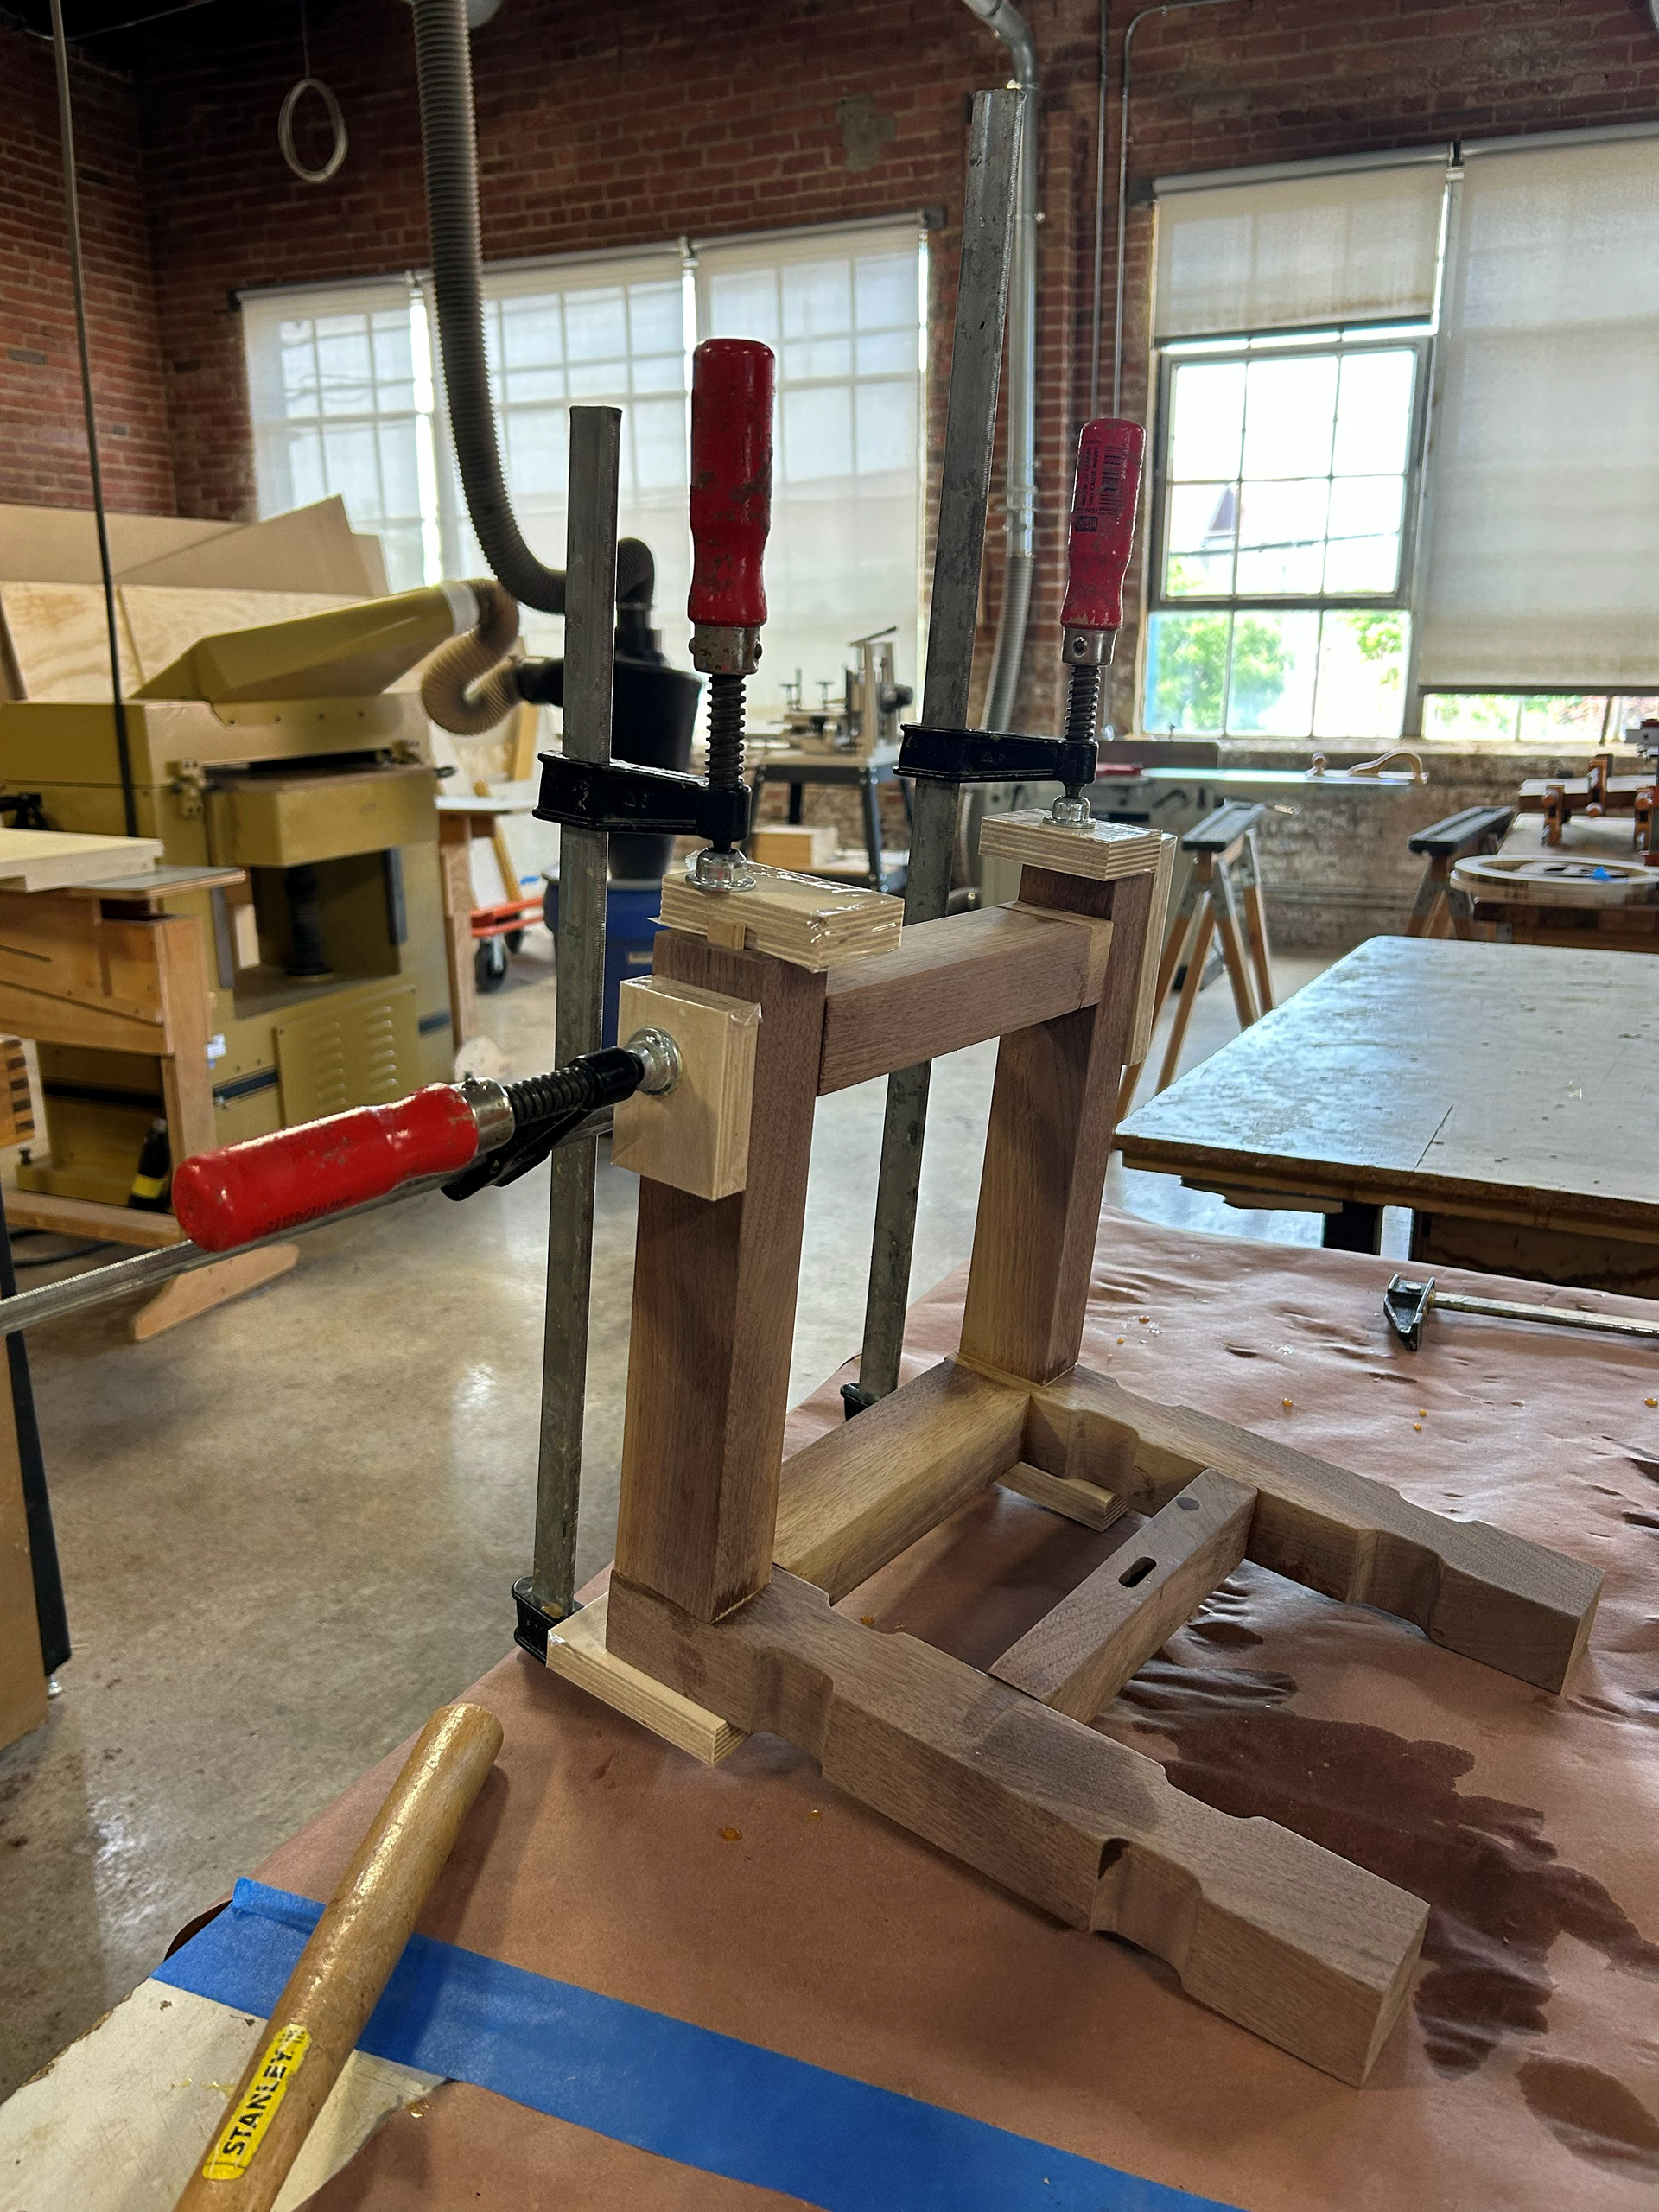
Image 46 | Glue-up and Clamping of Dry Columnar Section With Perpendicular Long and Short Apron Pieces
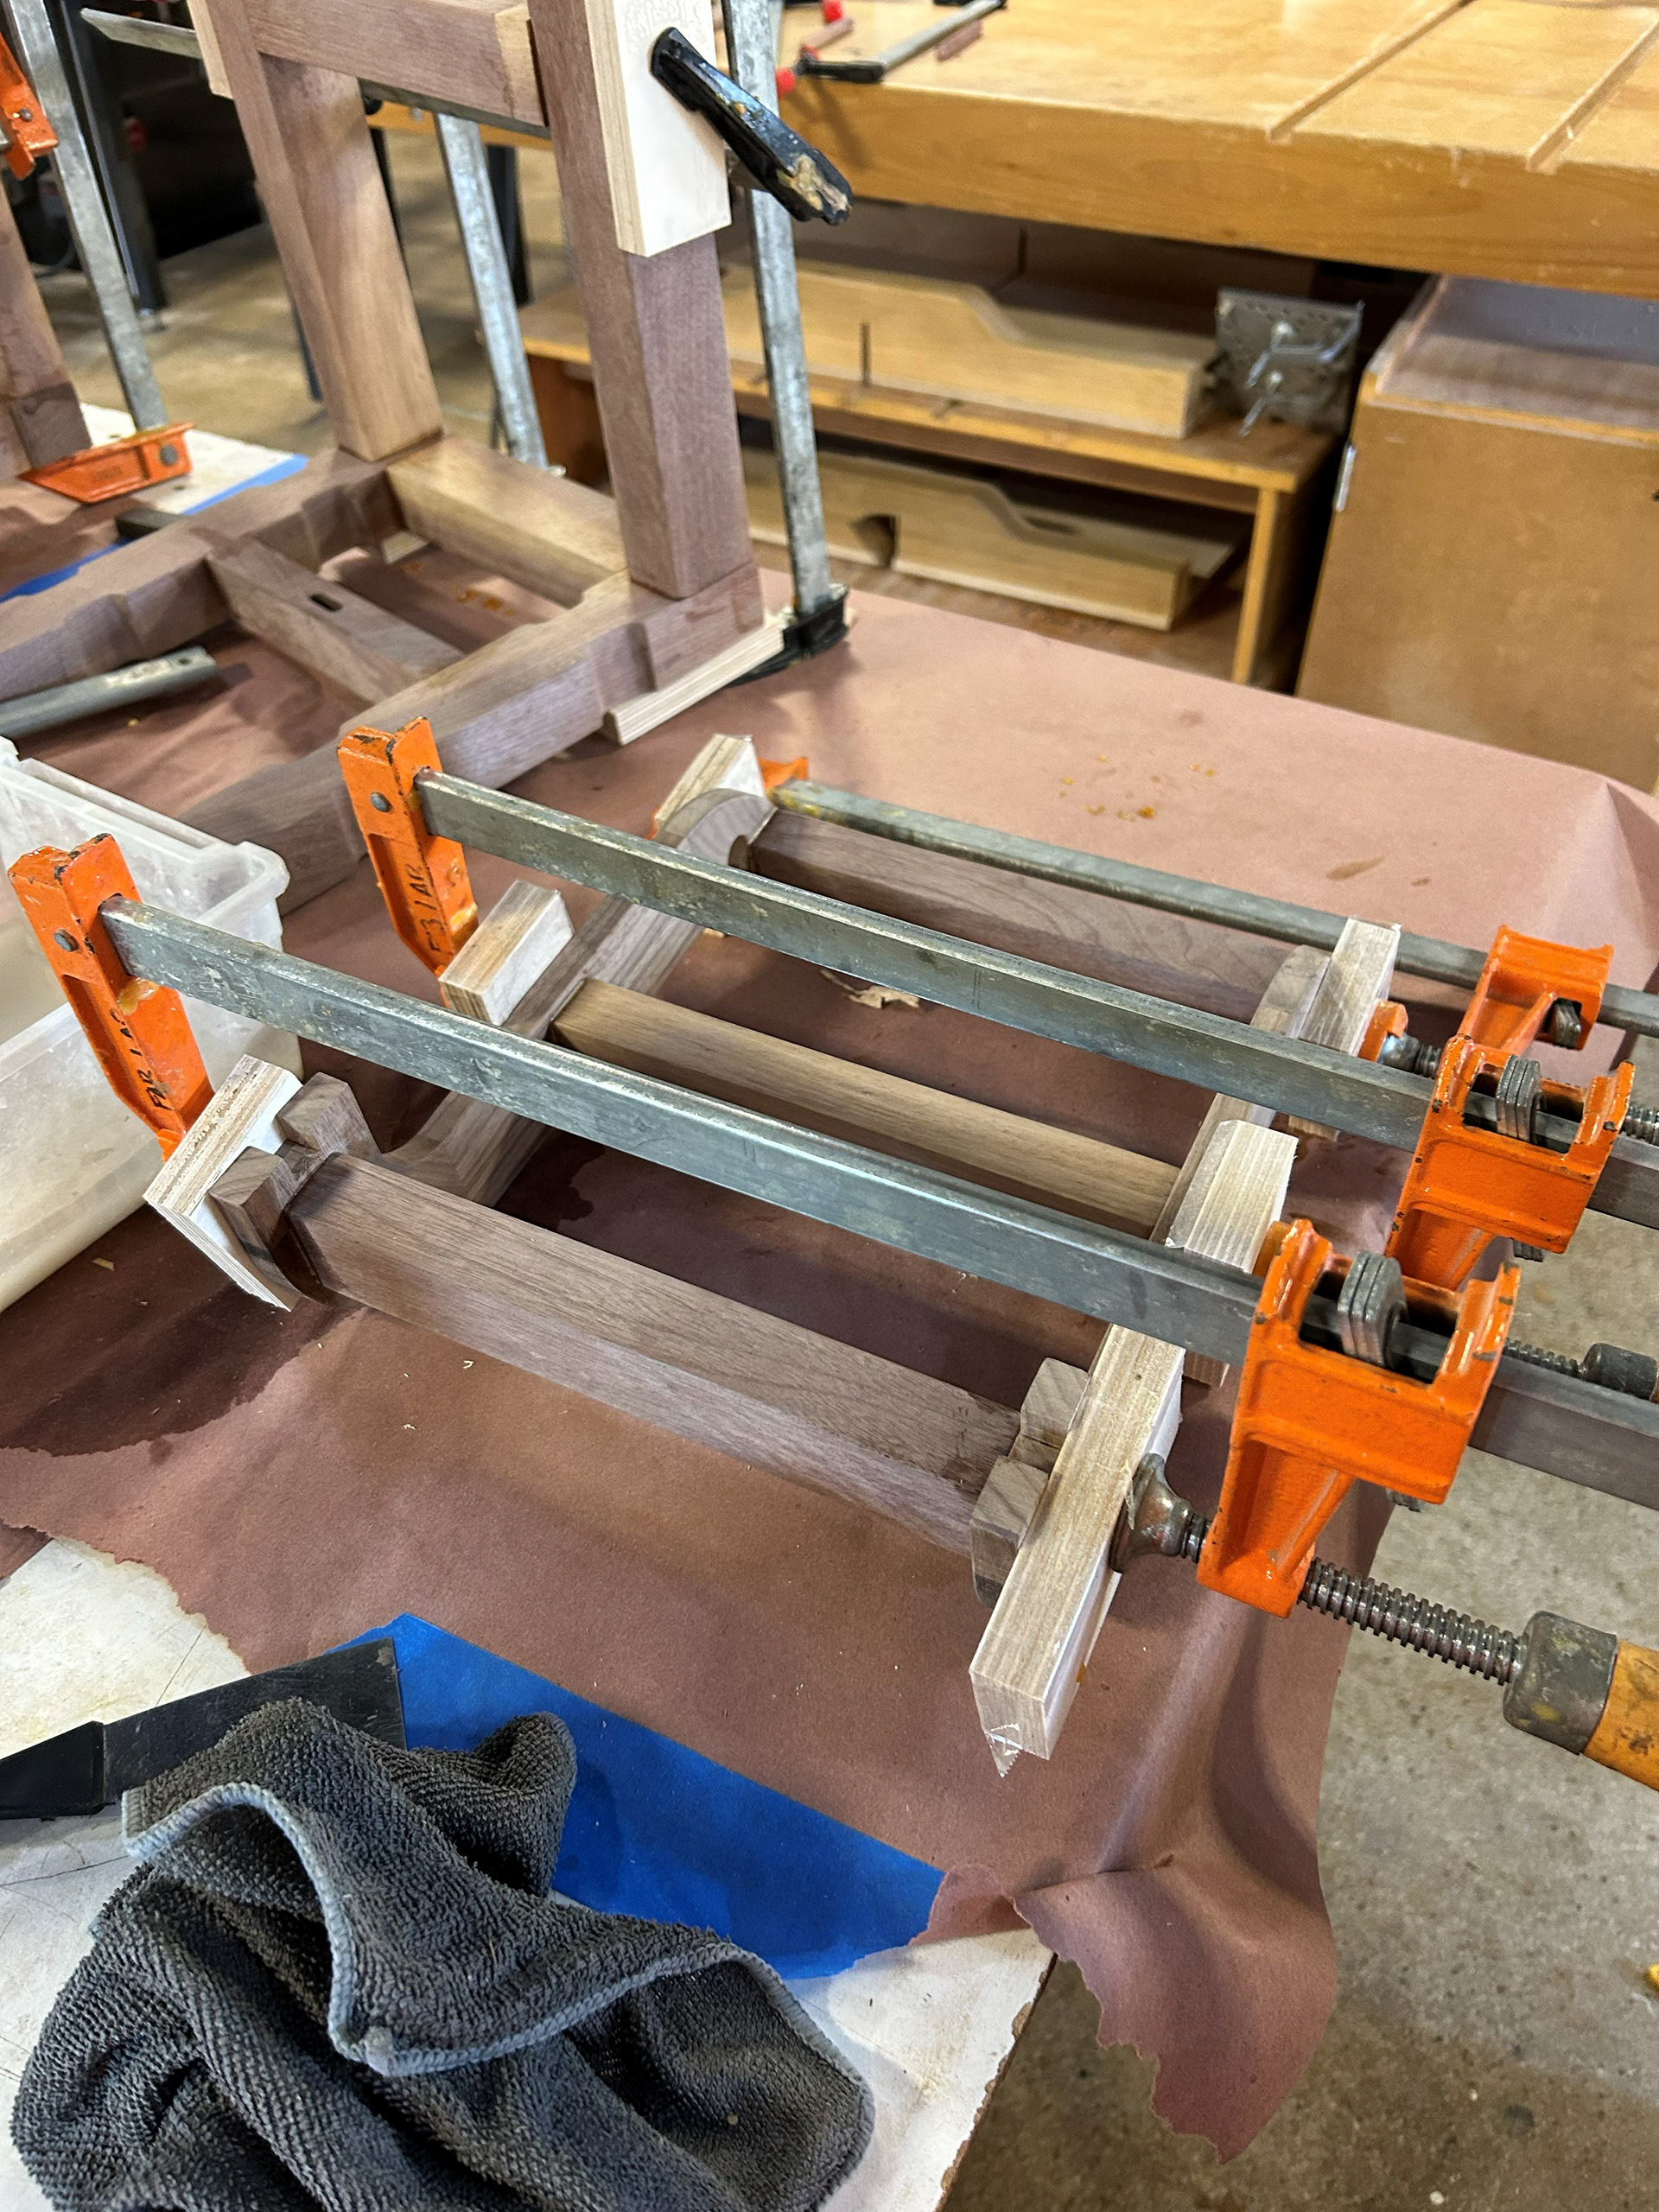
Image 47 | Glue-up and Clamping of Interior S-curve Pieces with Supporting Stretcher Bars
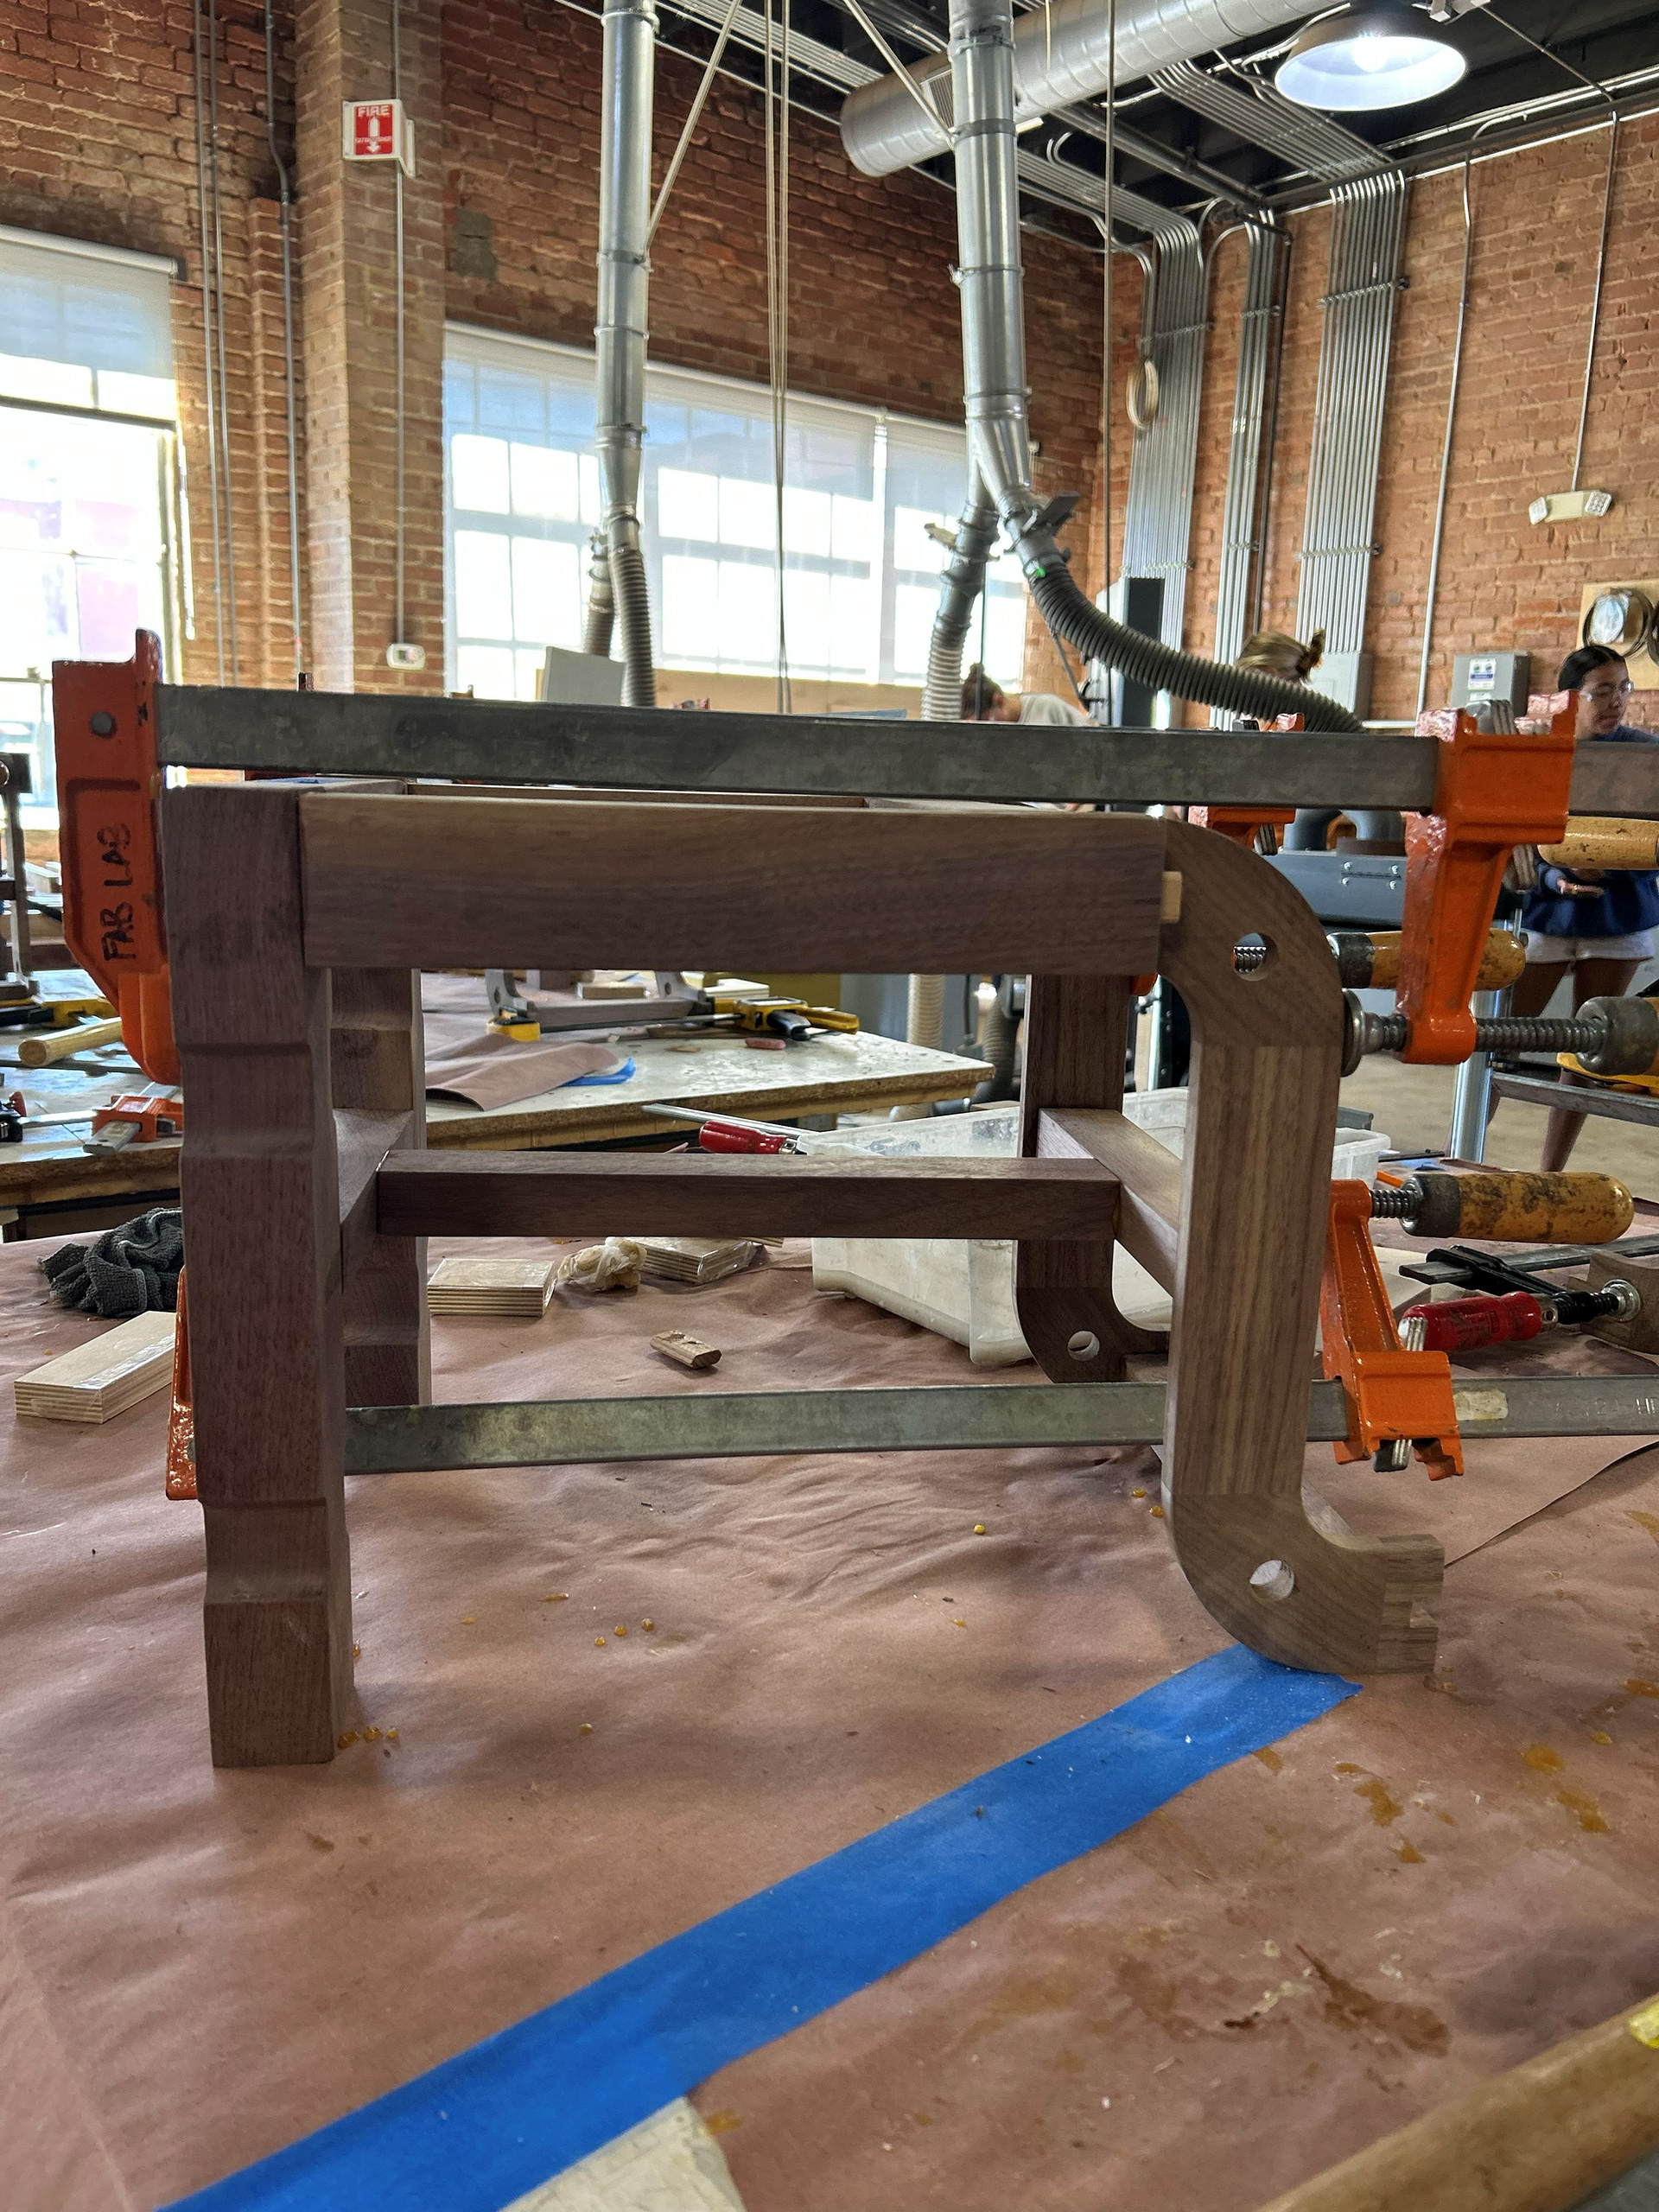
Image 48 | Glue-up and Clamping of Interior S-curve Section, Long Stretcher Bar, and Main Columnar Section of the Footstool Assembly
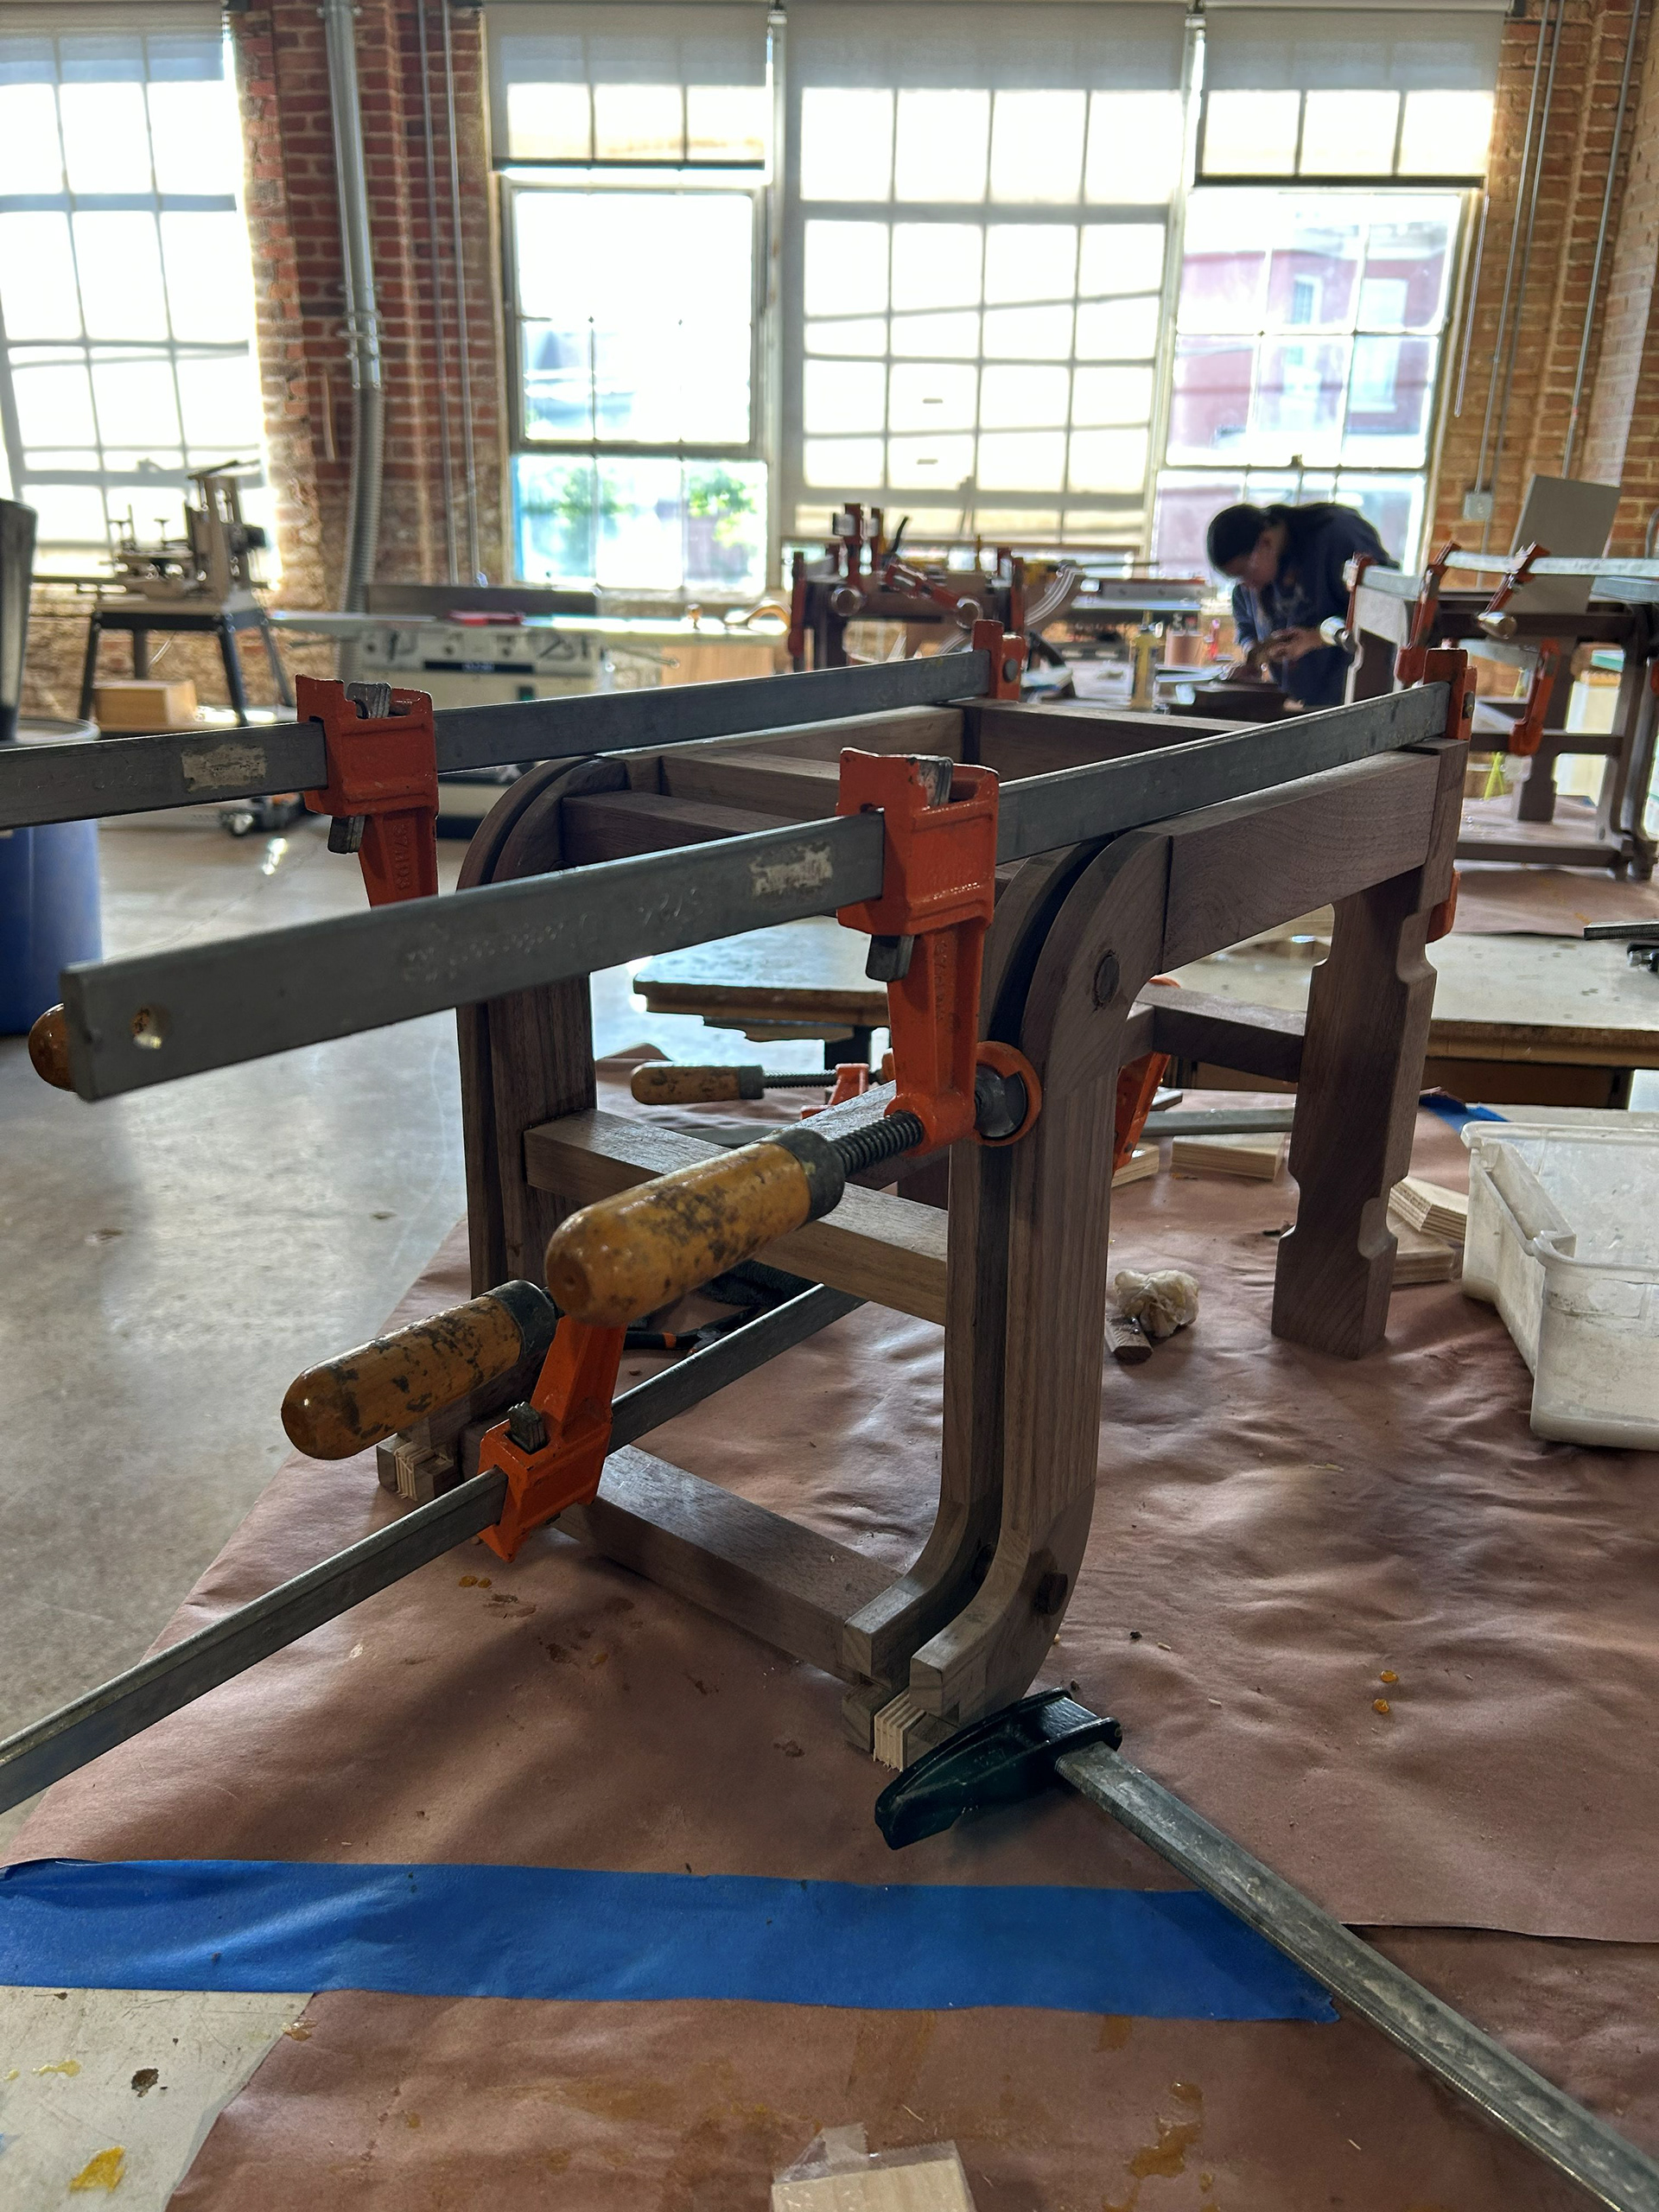
Image 49 | Glue-up and Clamping of Outside S-curve Pieces and Dowels to the Footstool Assembly
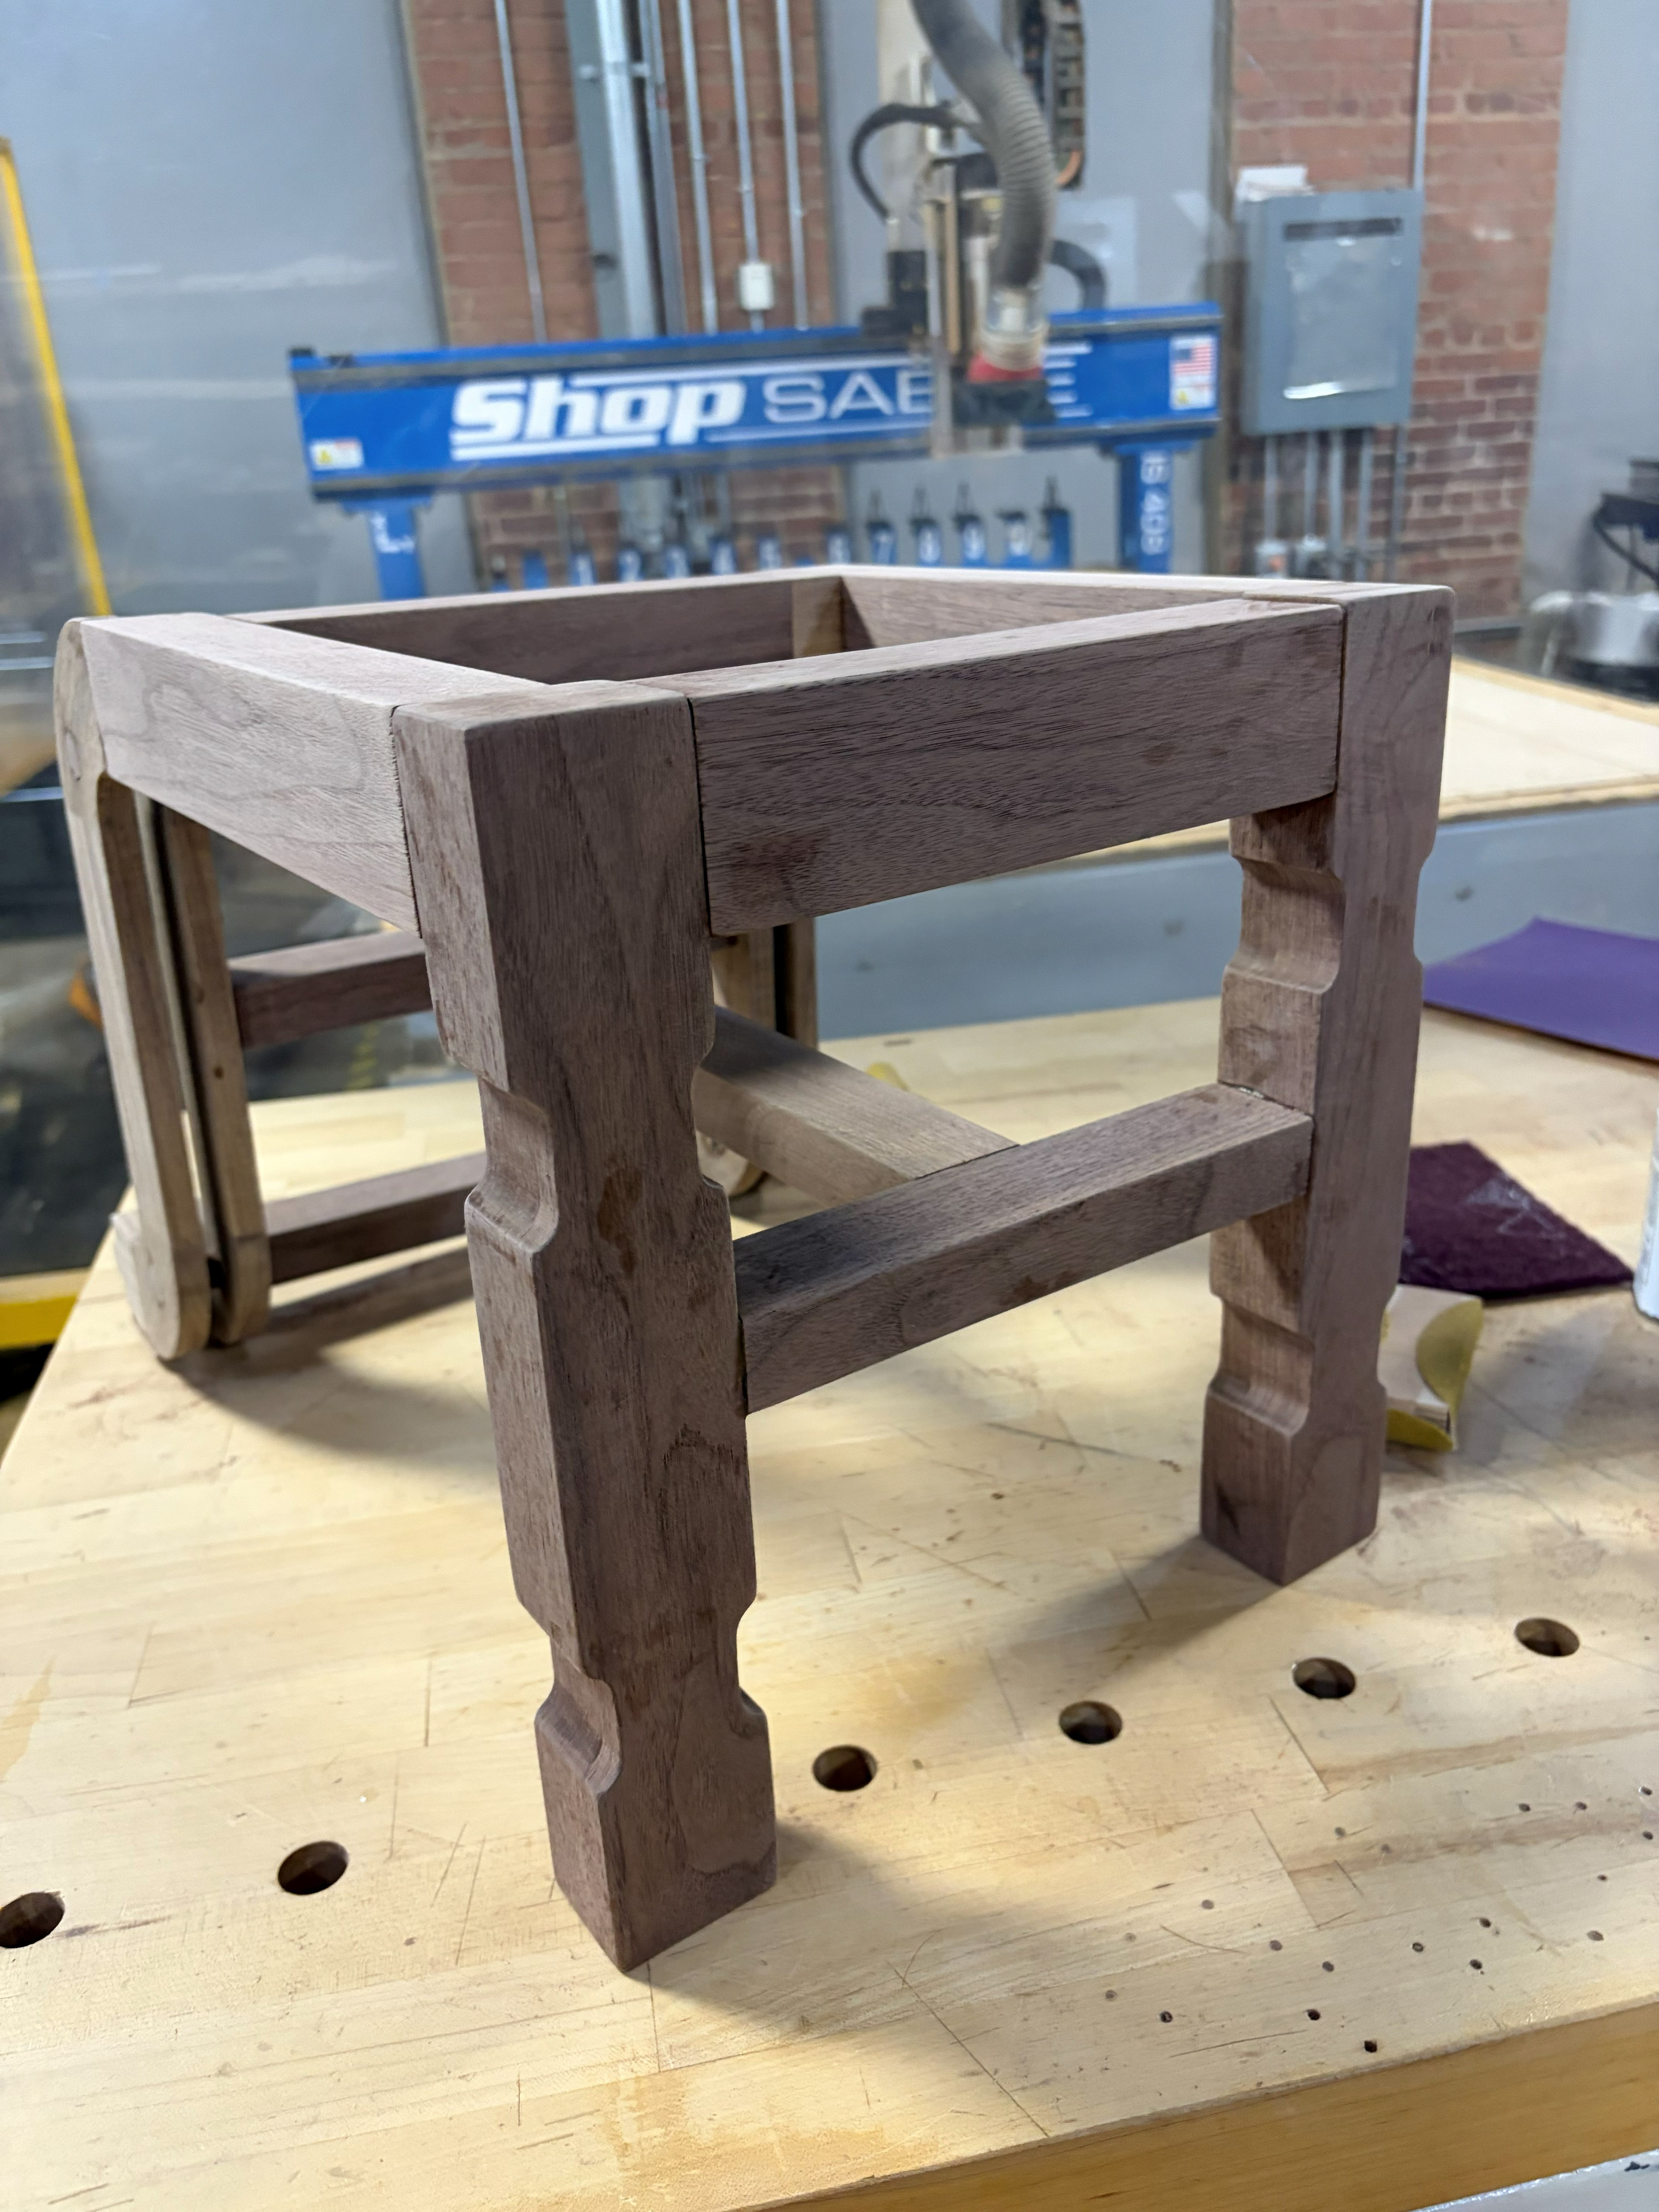
Image 50 | Full Footstool Assembly After Drying and Go Back Over the Entire Footstool with 120 and 220 Grit Sand Paper
Danish Oil Finish Application
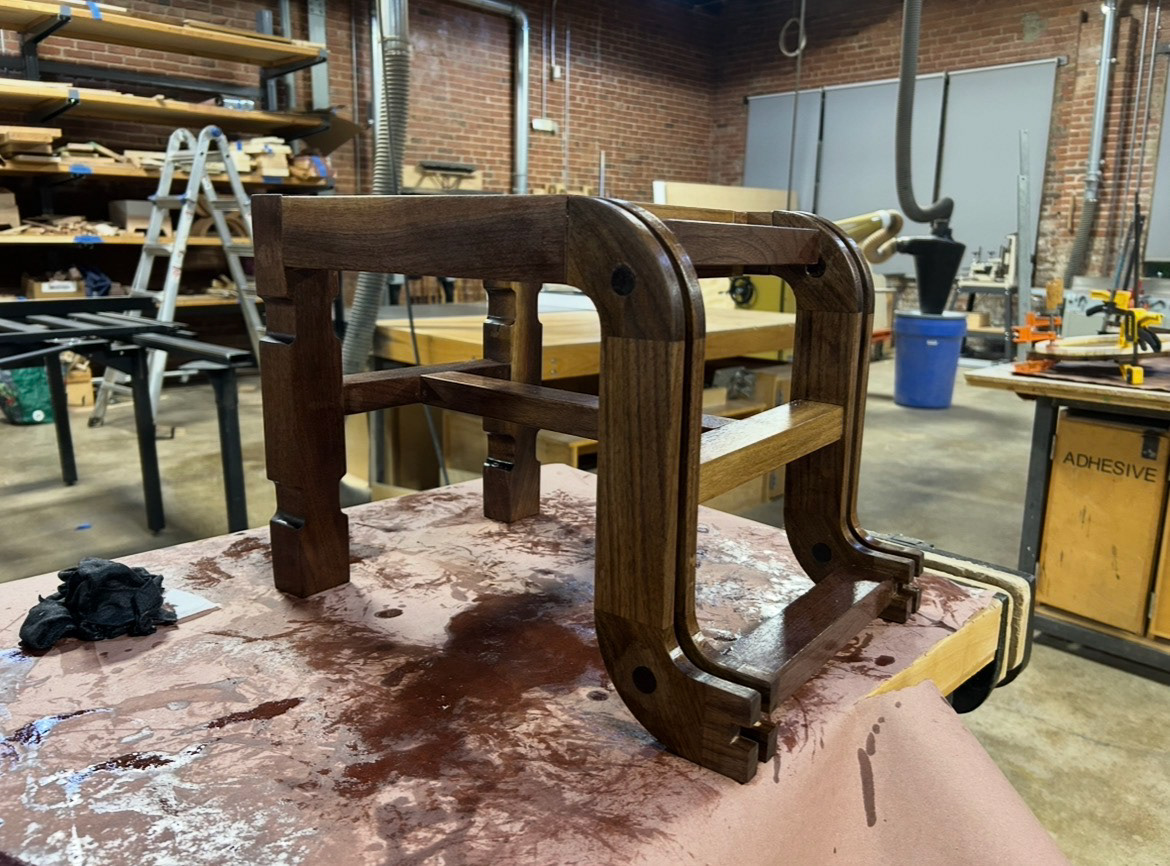
Image 51 | Applying the Danish Oil Finish to the Footstool Assembly Using an Old Cotton T-shirt
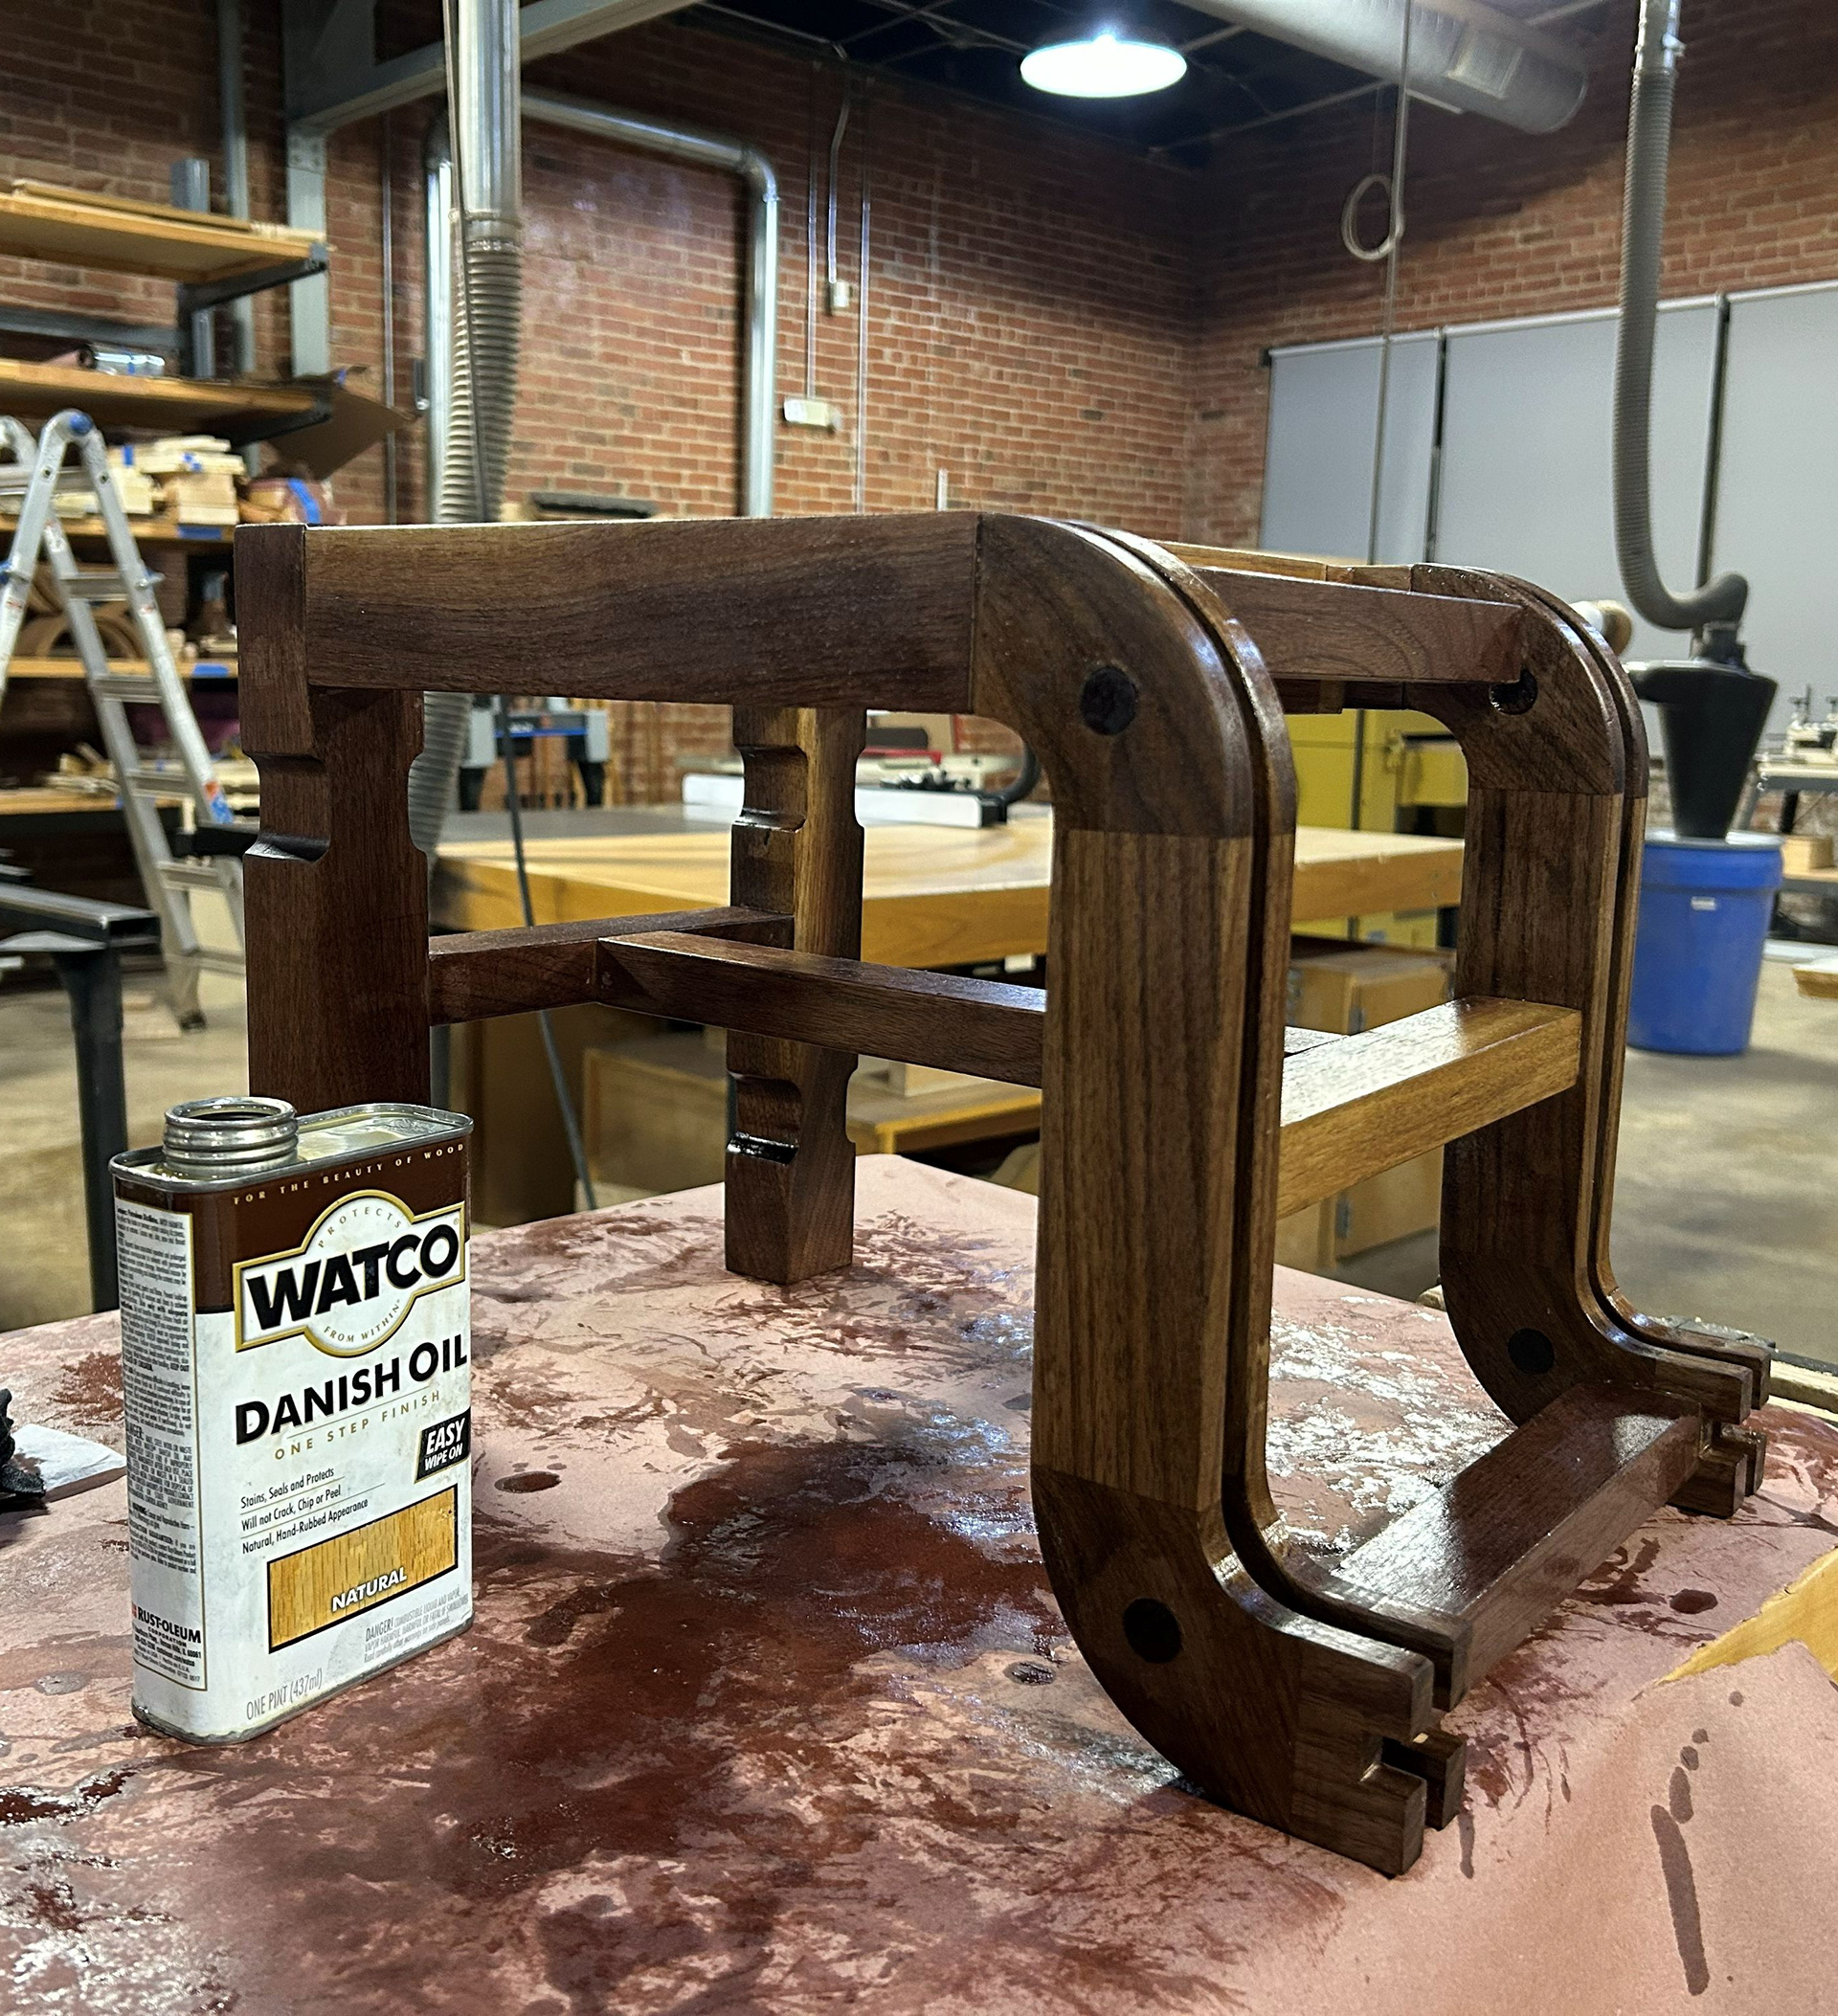
Image 52 | Wiping the Excess Danish Oil After Initial Wipe-on and Waiting for the Danish Oil to Dry for 12 Hours
Weaving Rope Upholstery
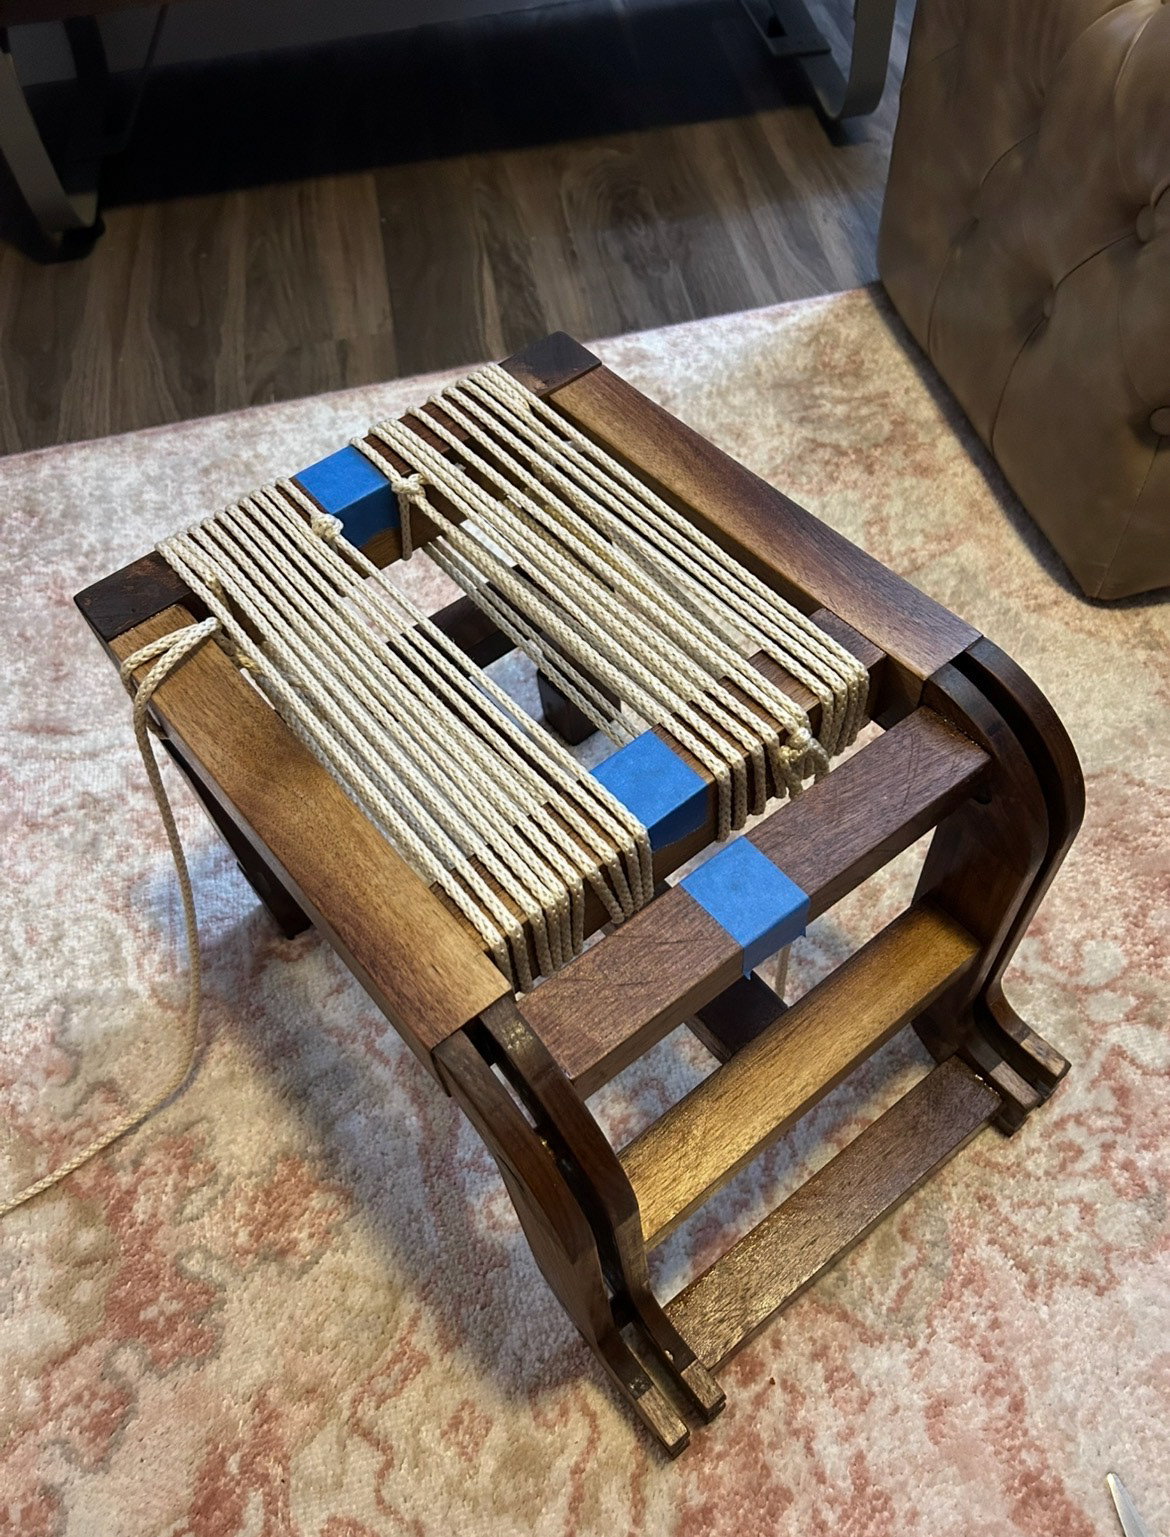
Image 53 | Wrapping 6mm Braided Rope Around the Footstool Seat to Create the Warp for the Woven Seat
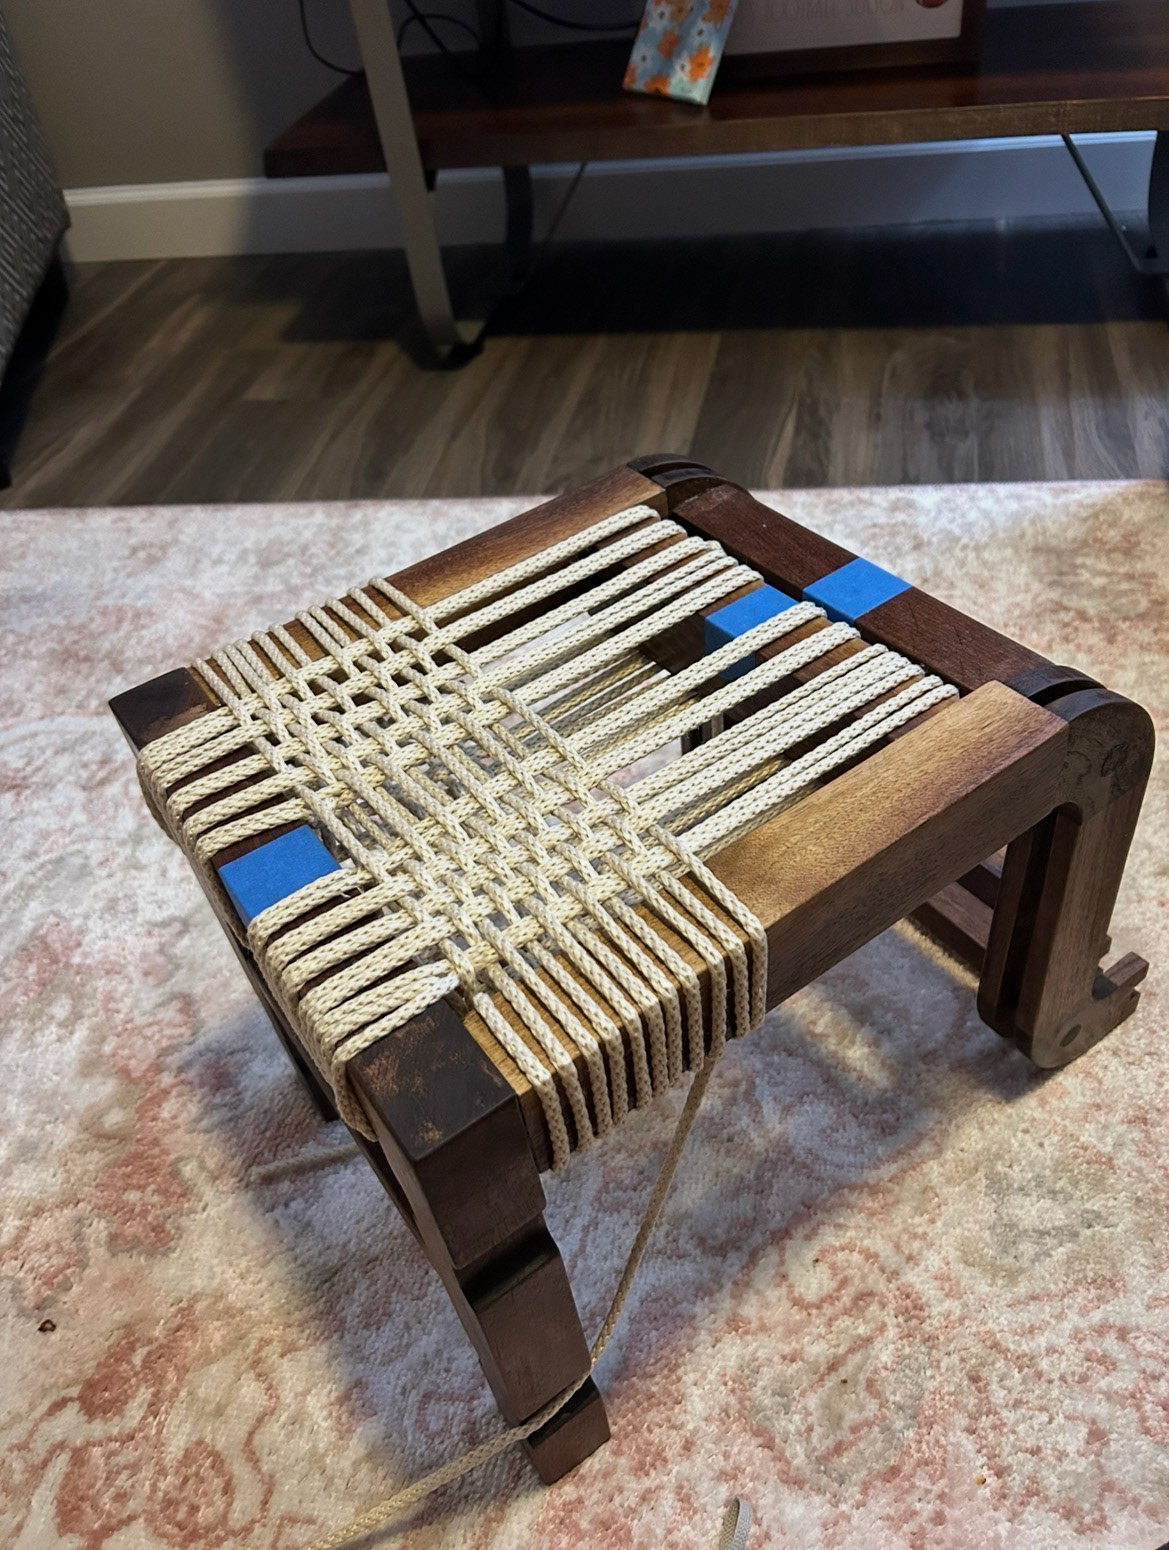
Image 54 | Weaving the Weft Between the Warp Rope to Create the Woven Seat
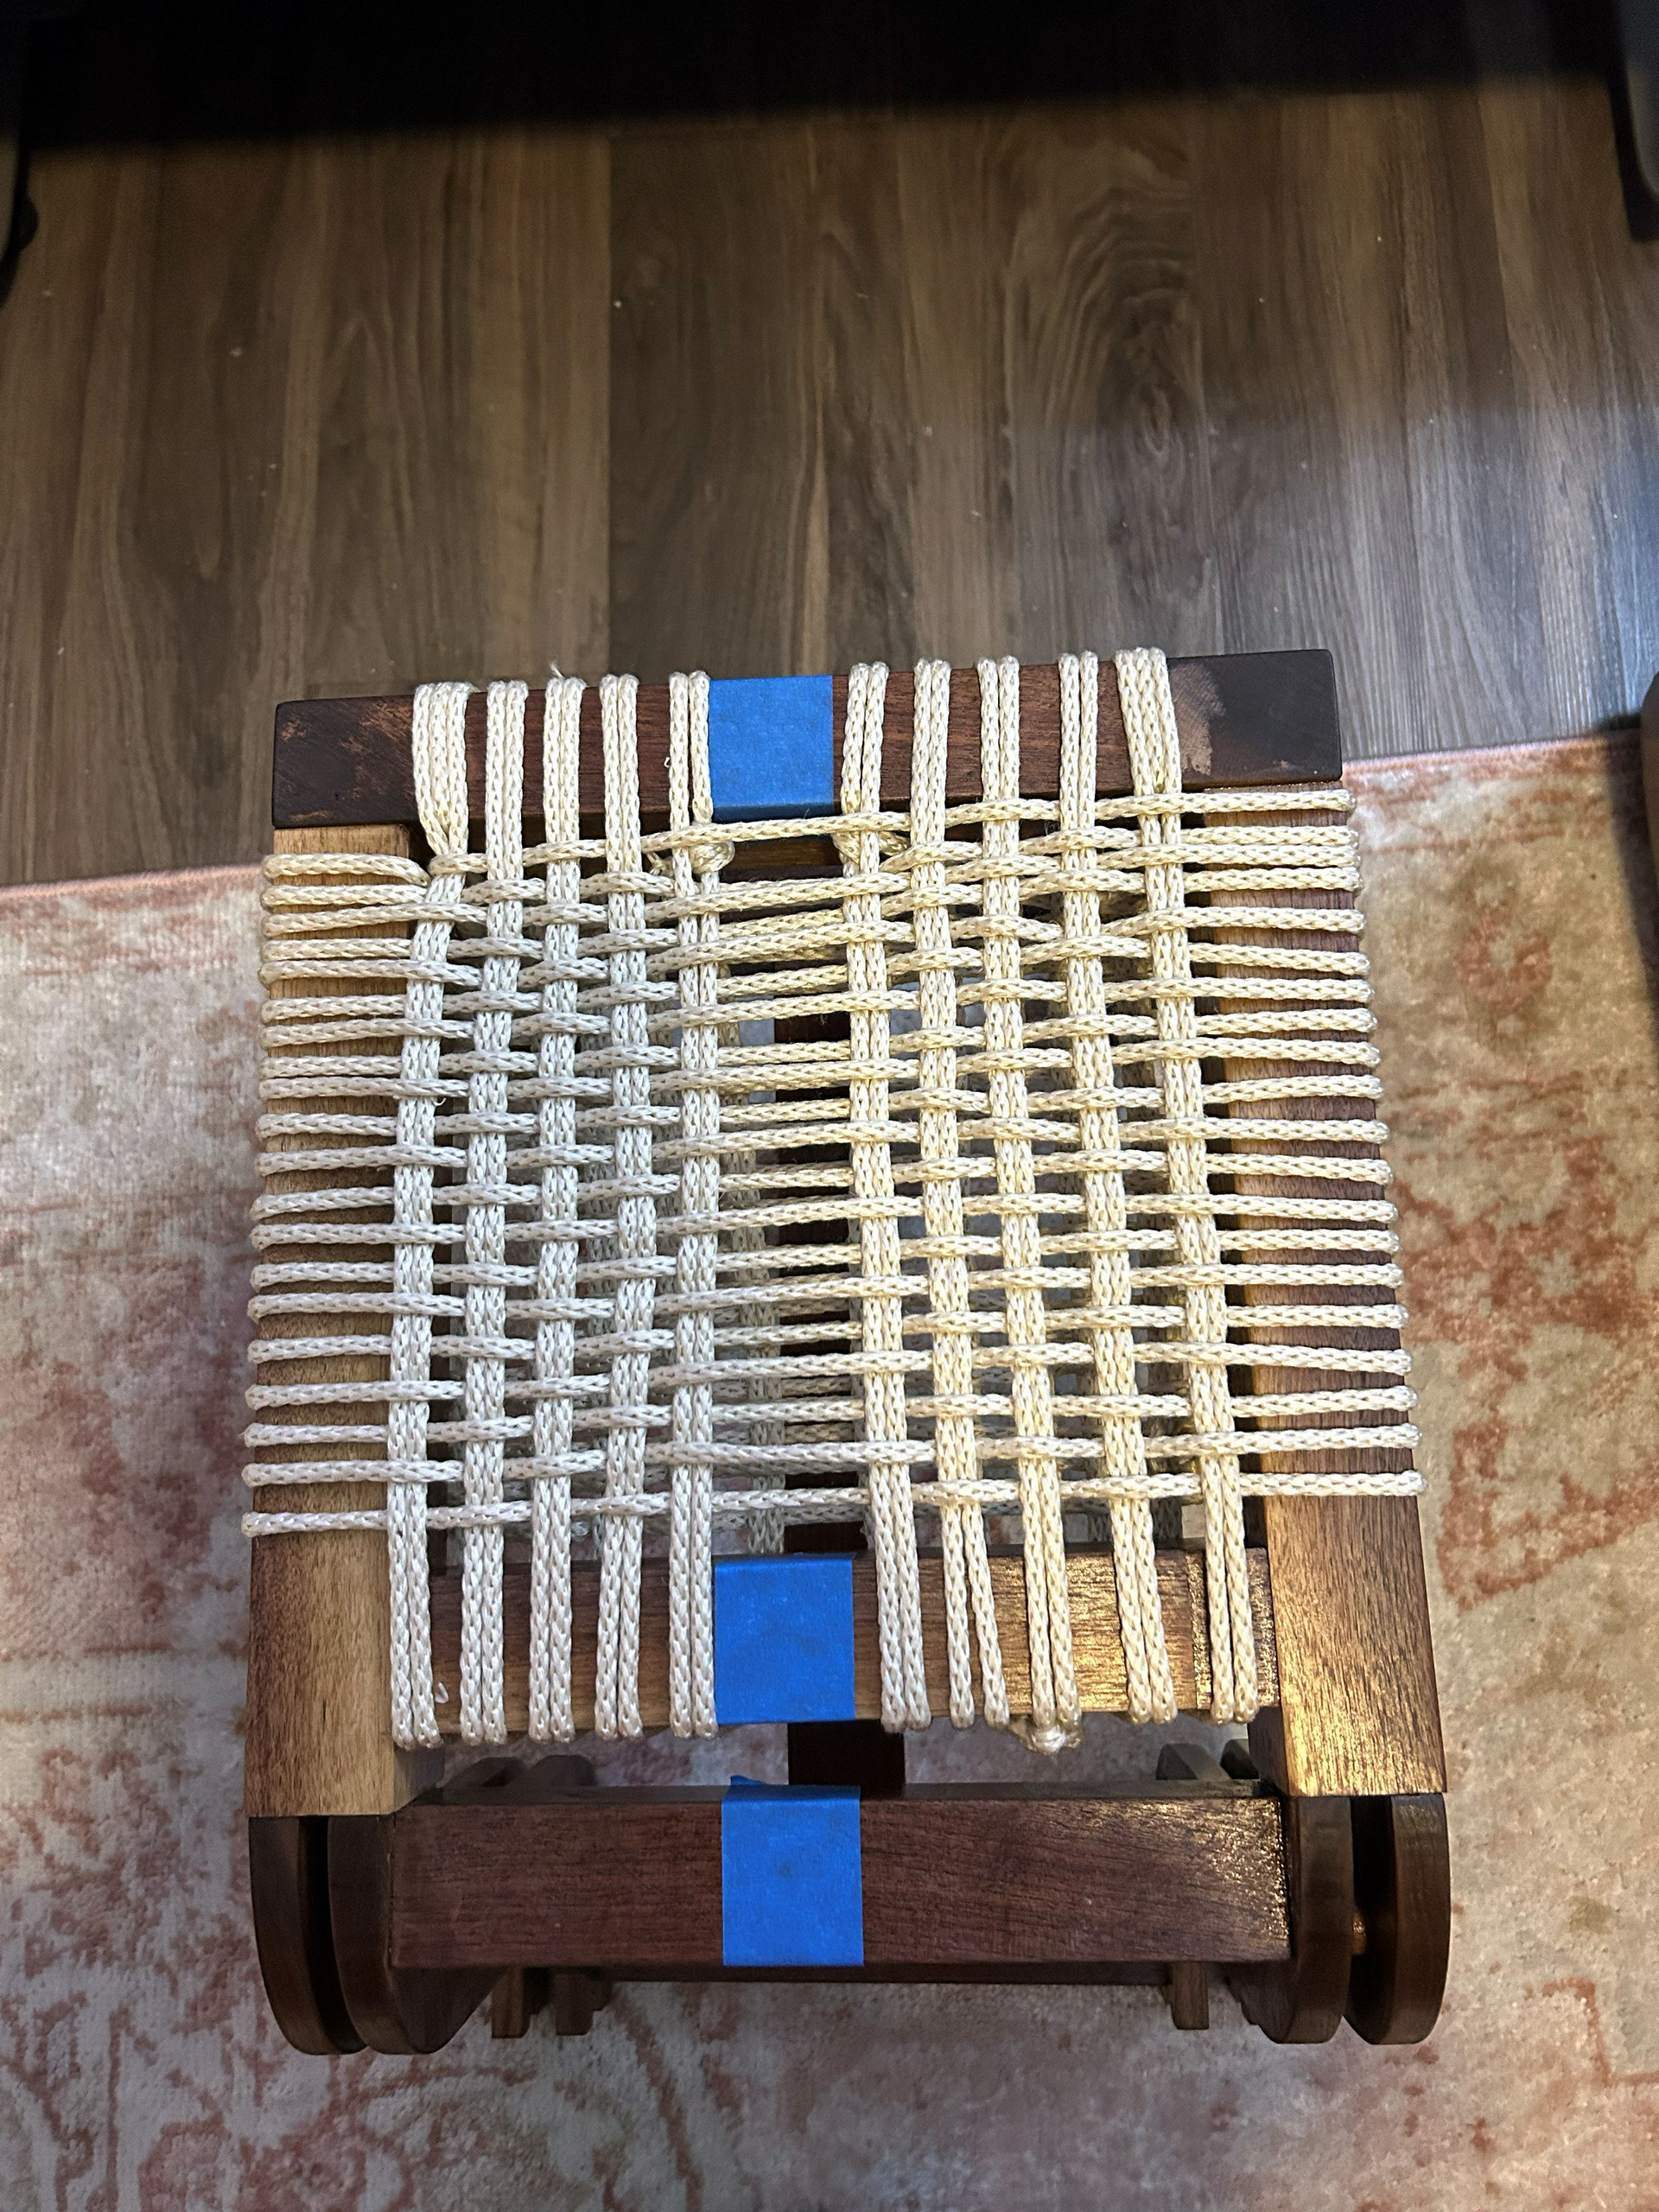
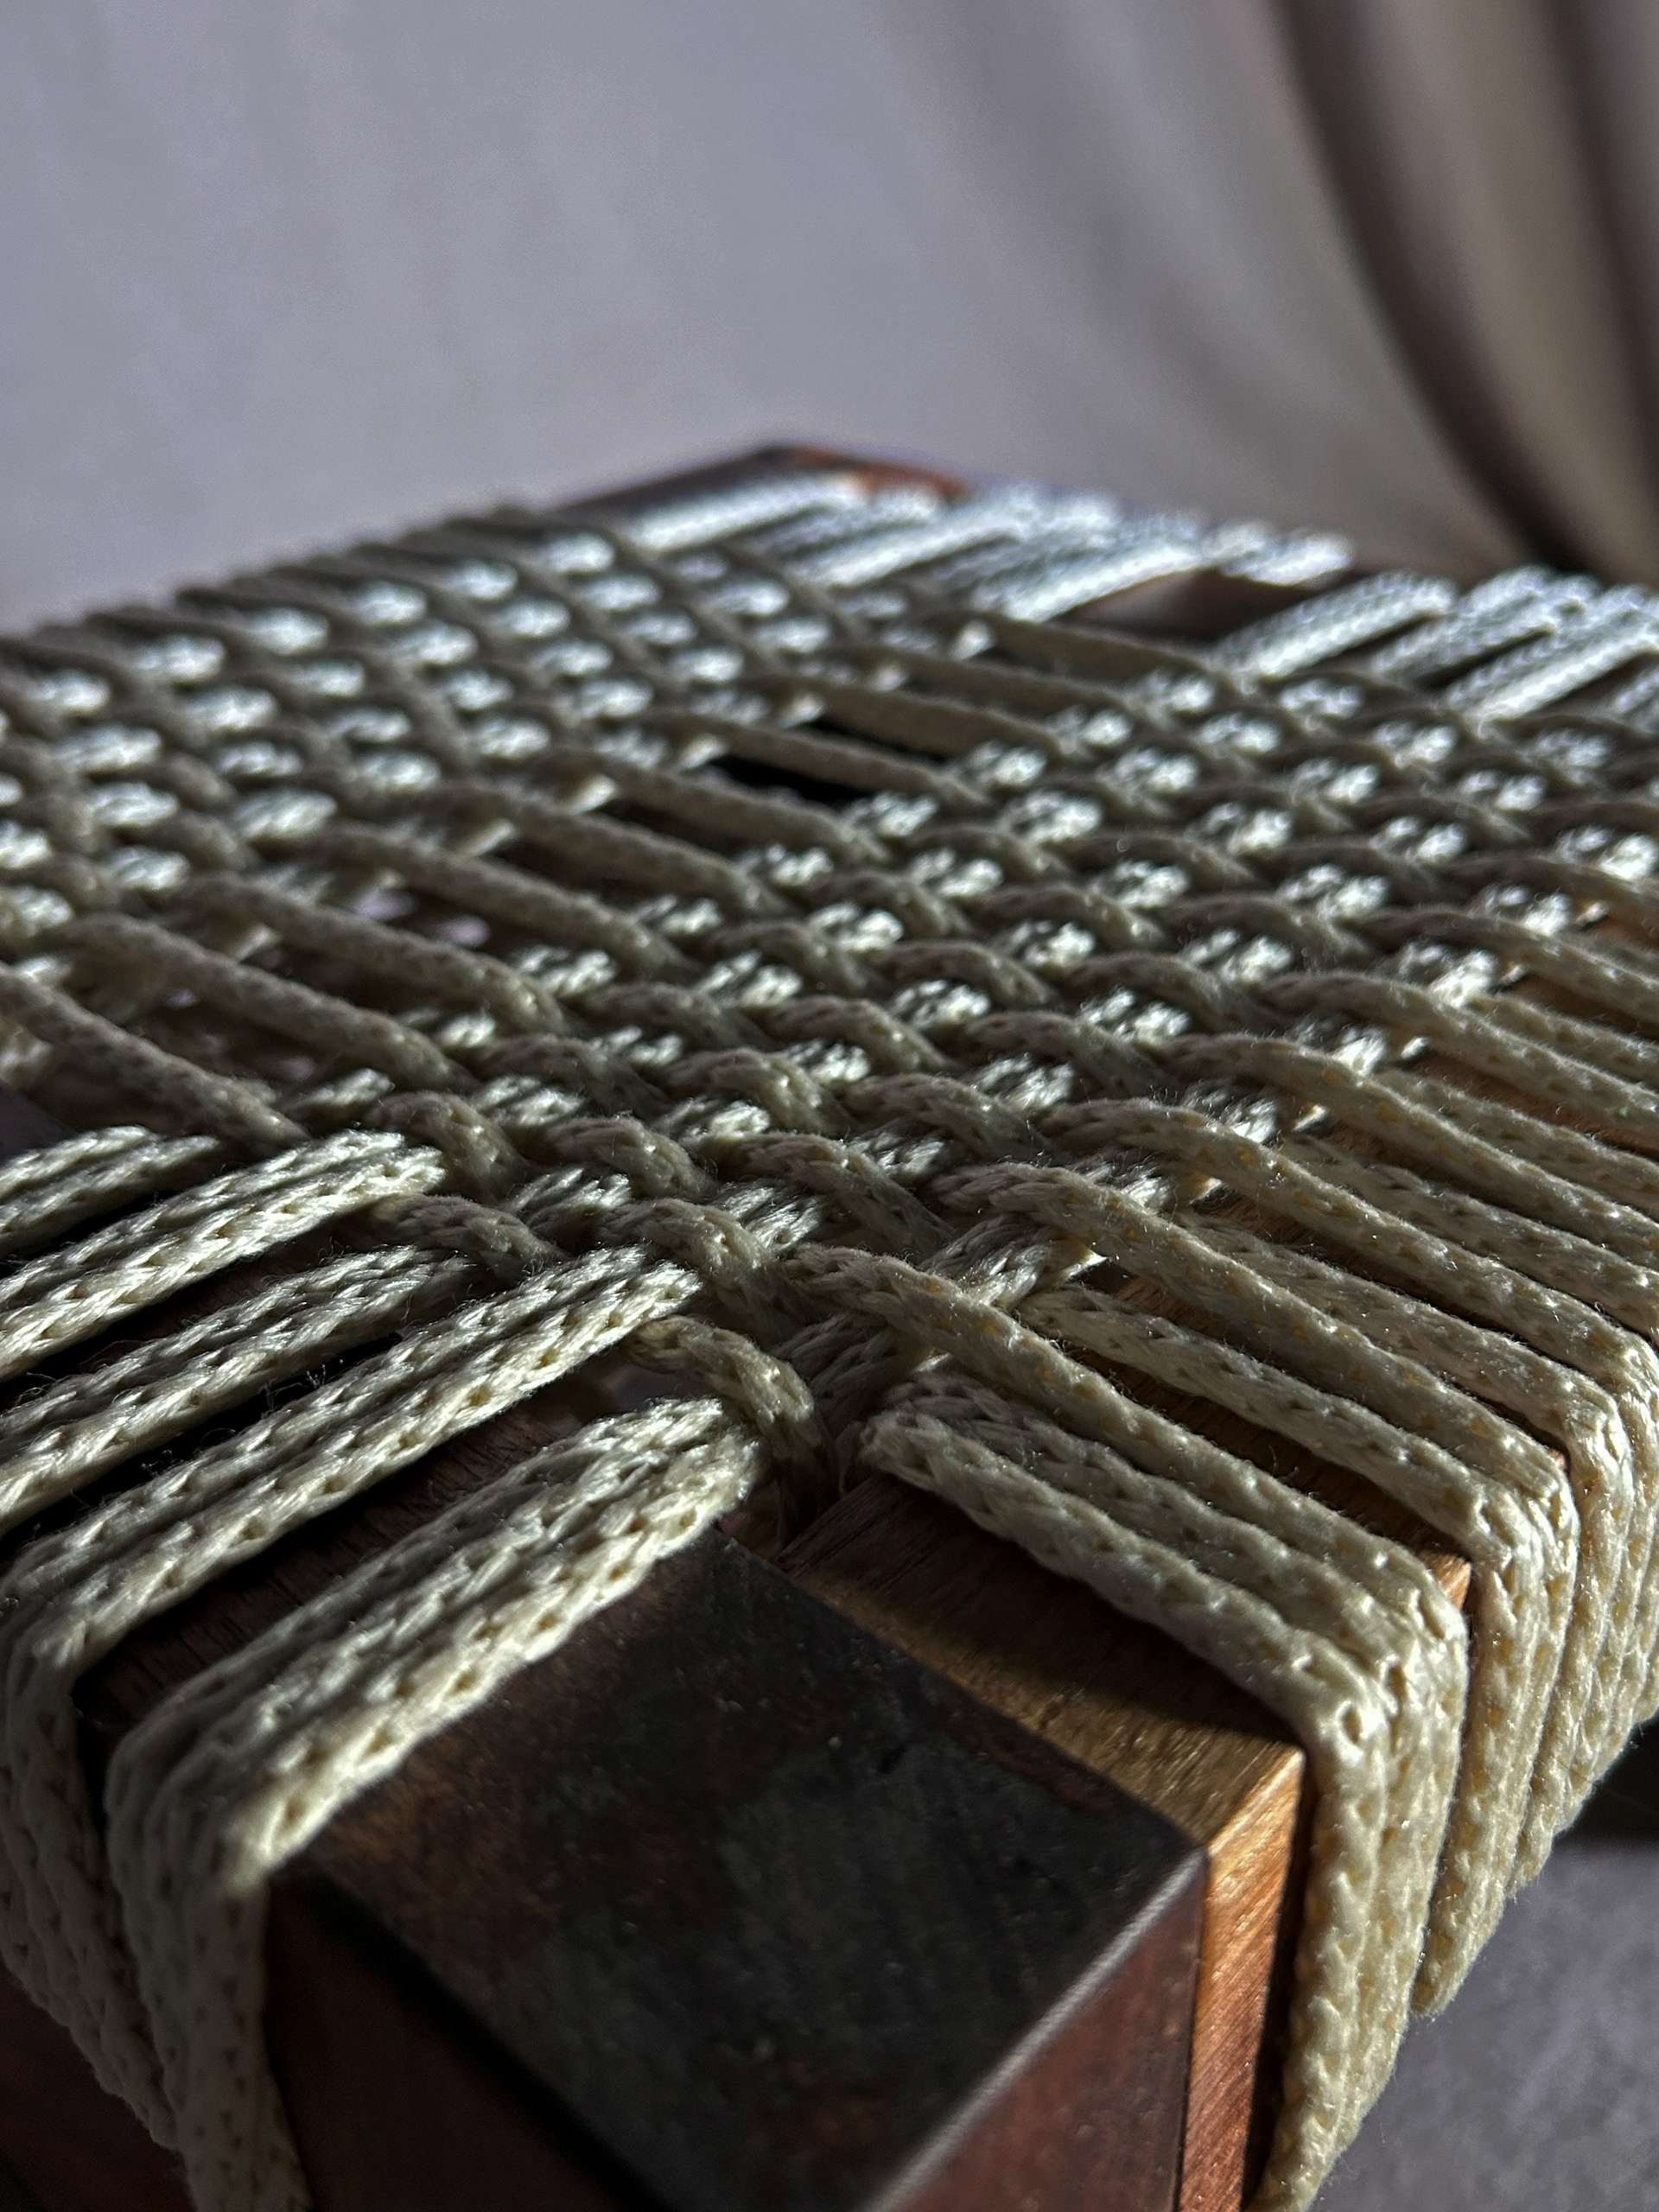
Image 55 | Final Woven Seat
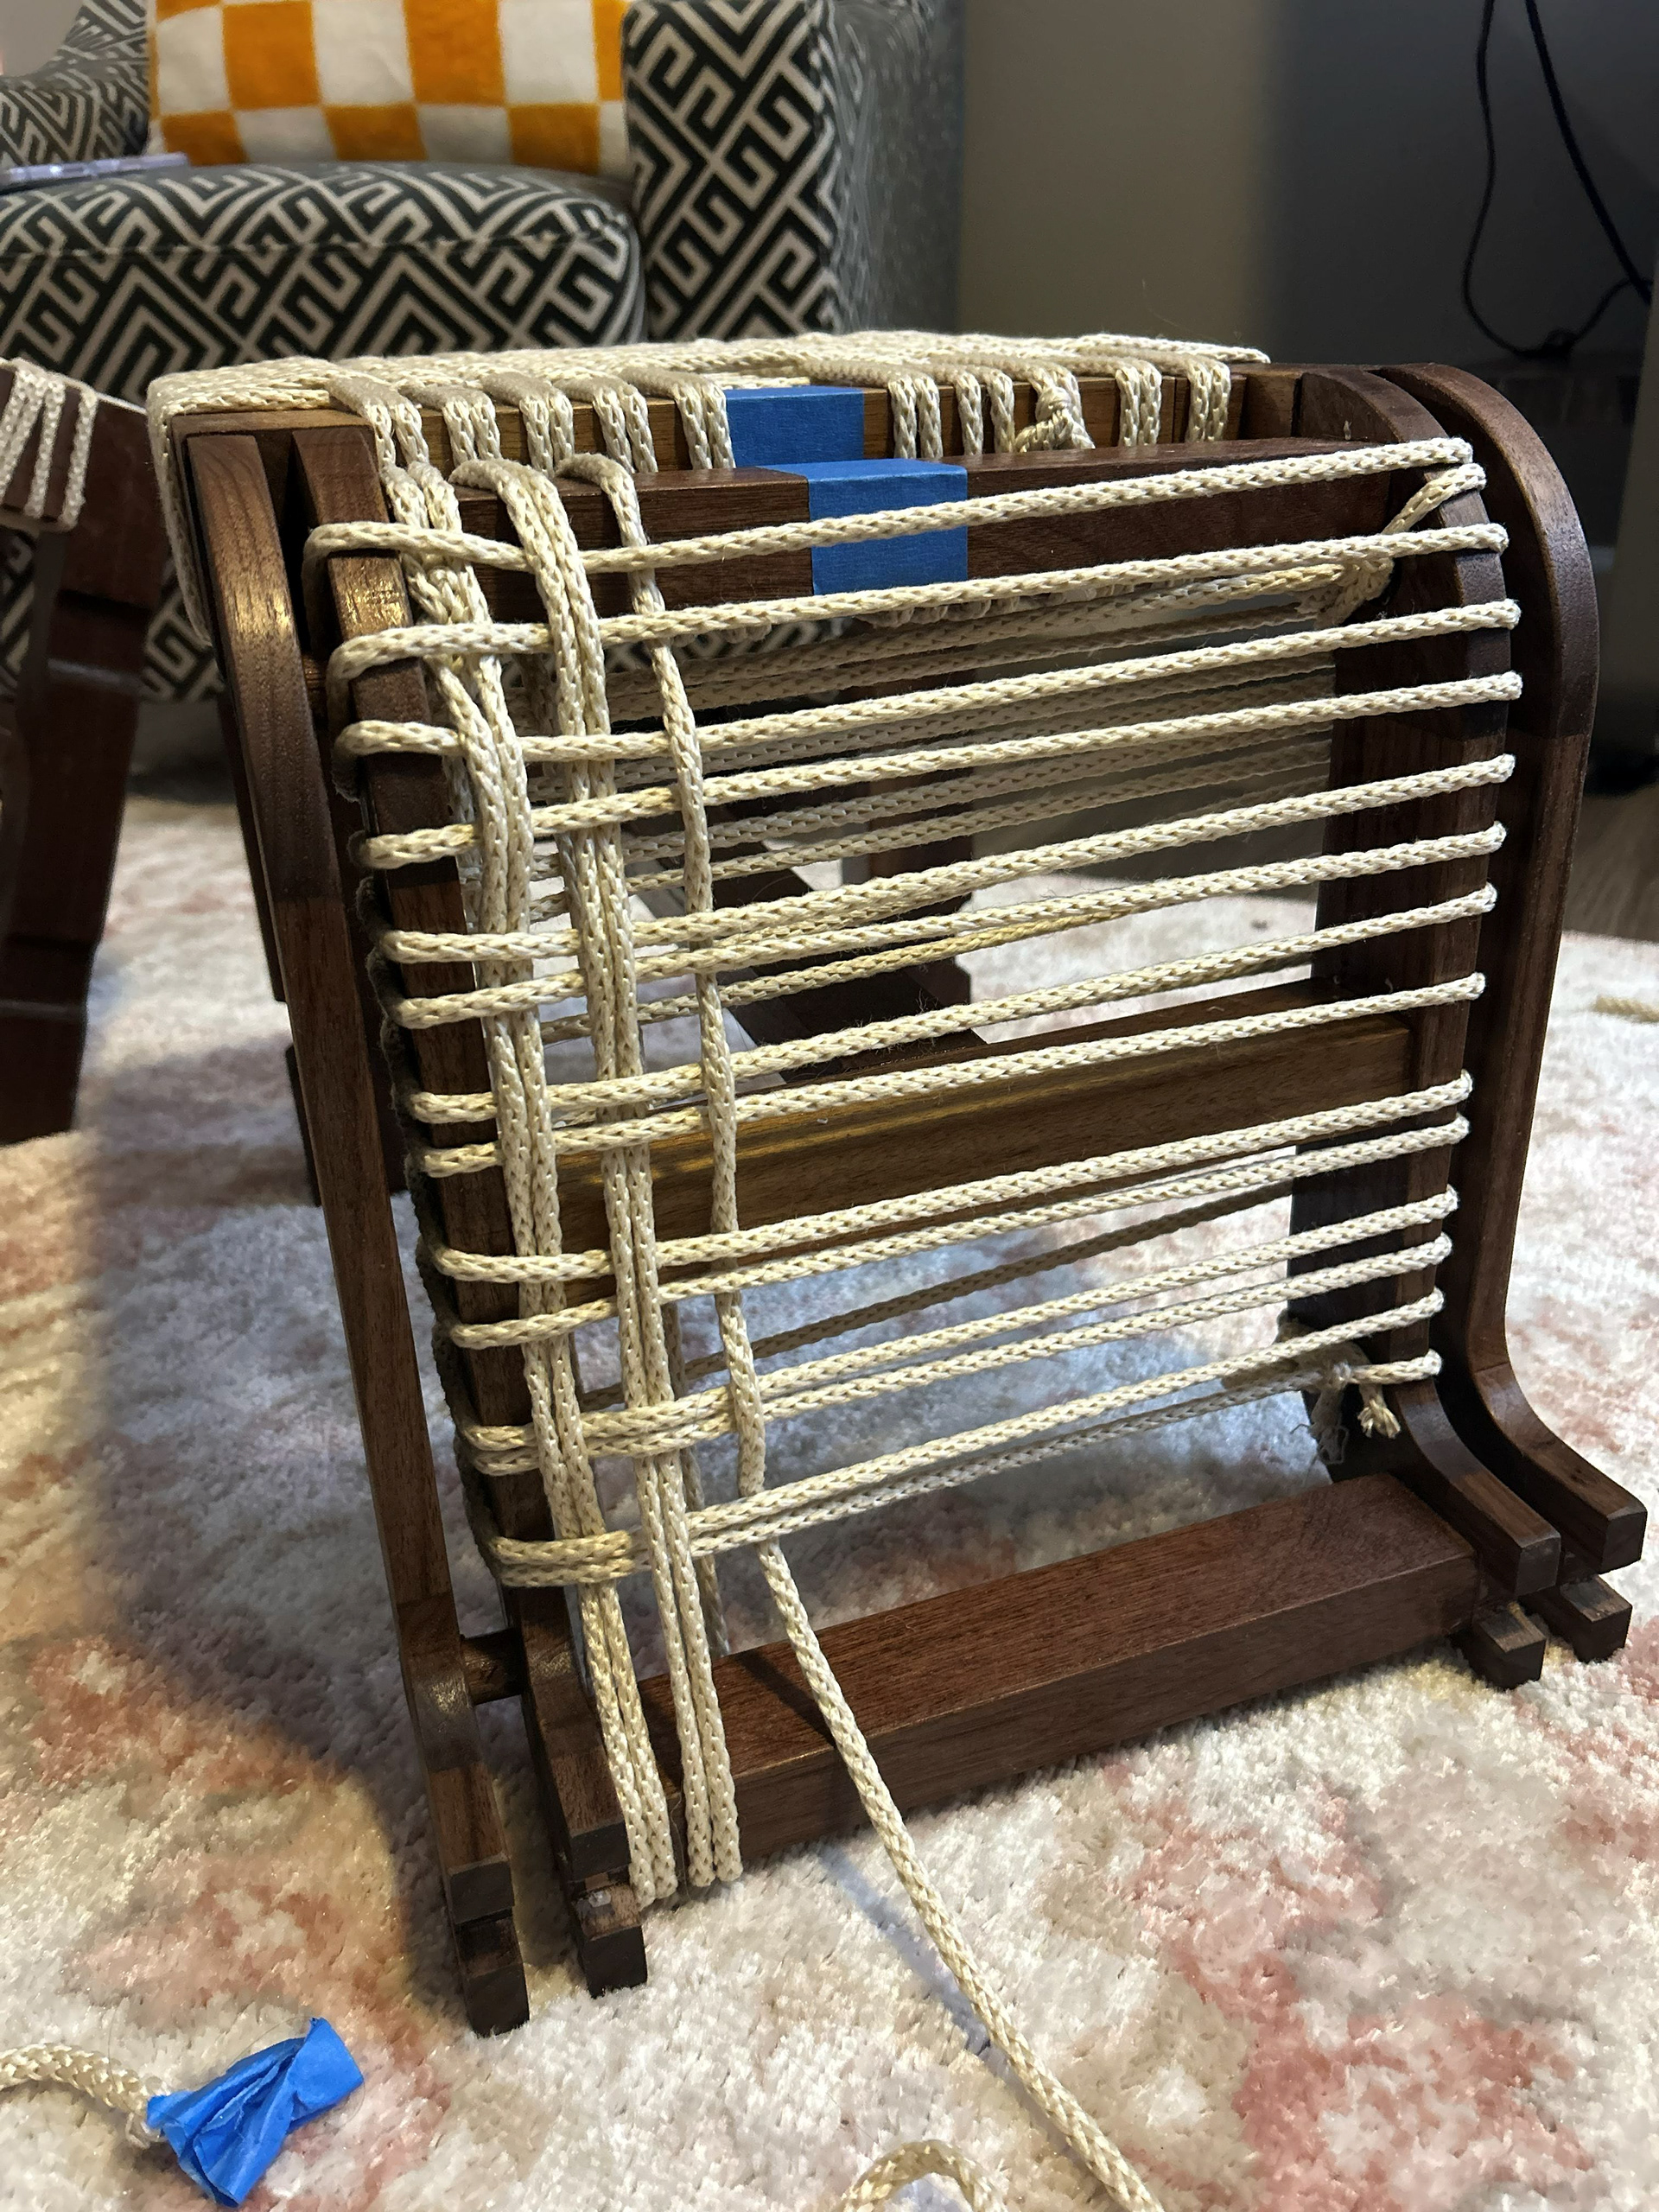
Image 56 | Weaving the Weft Rope Through the Warp Wrapped Around the Interior S-curve Legs to Create the Woven S-curve
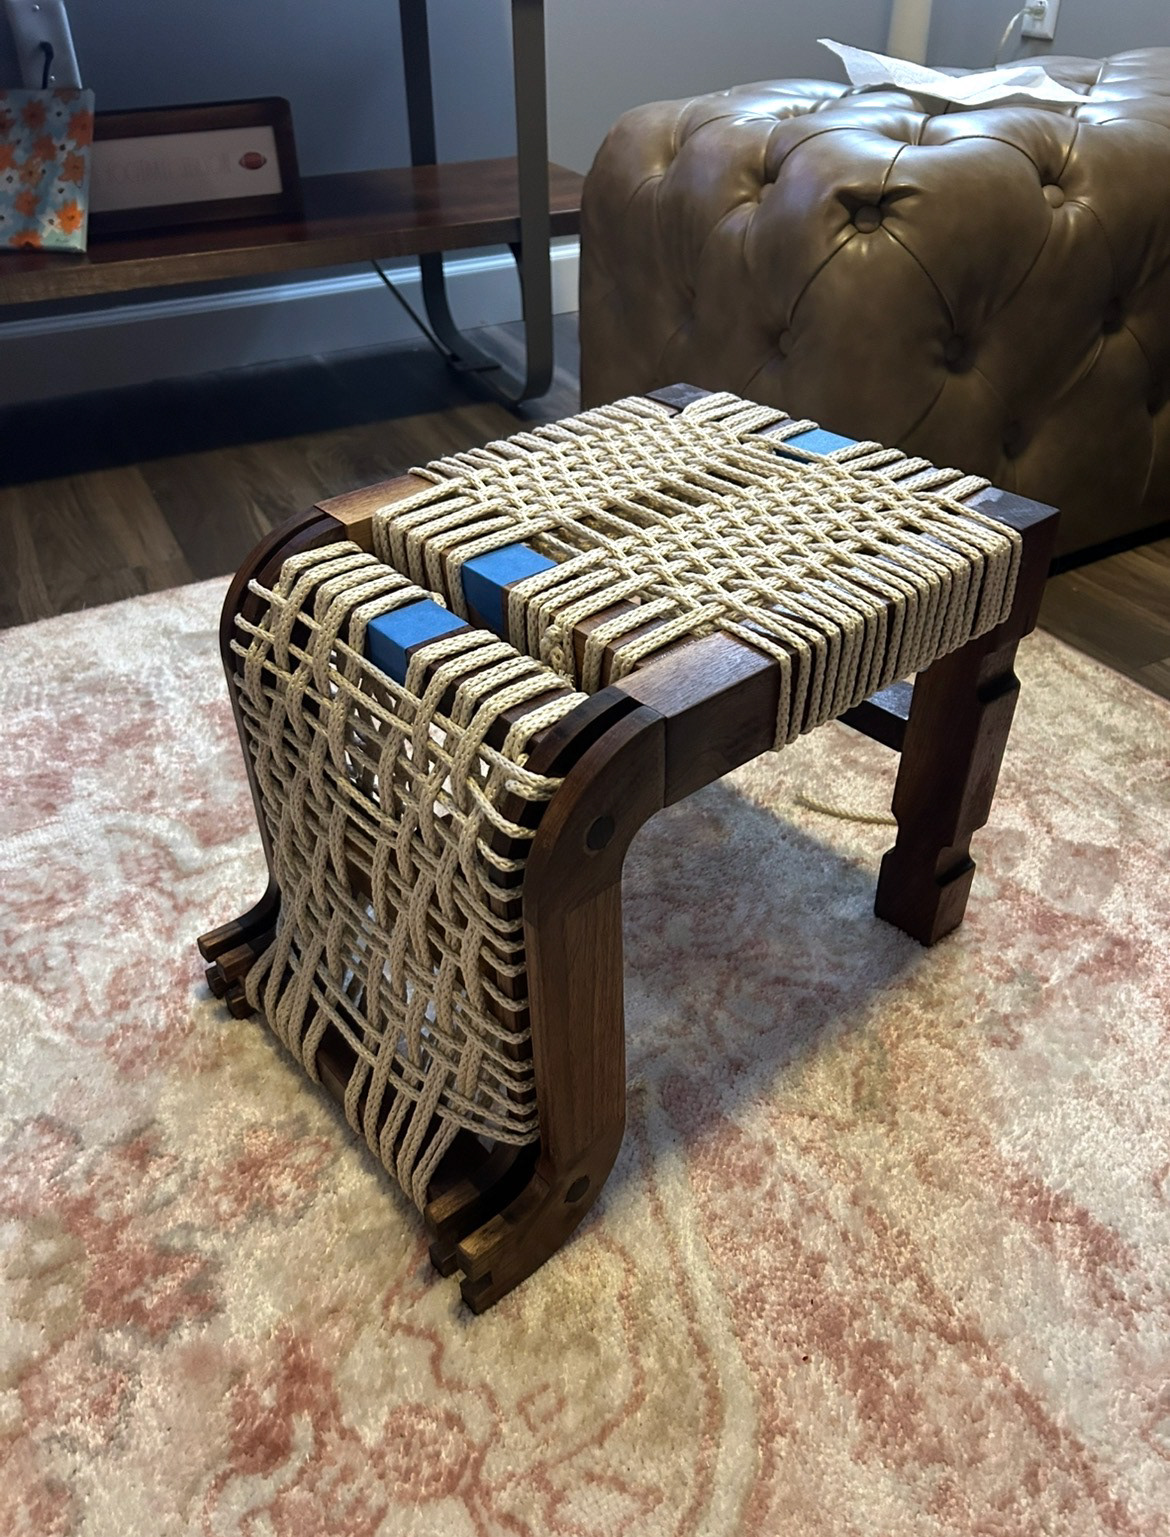
Image 57 | Final Woven S-curve and Seat
Photographs of the Final Overall Footstool System
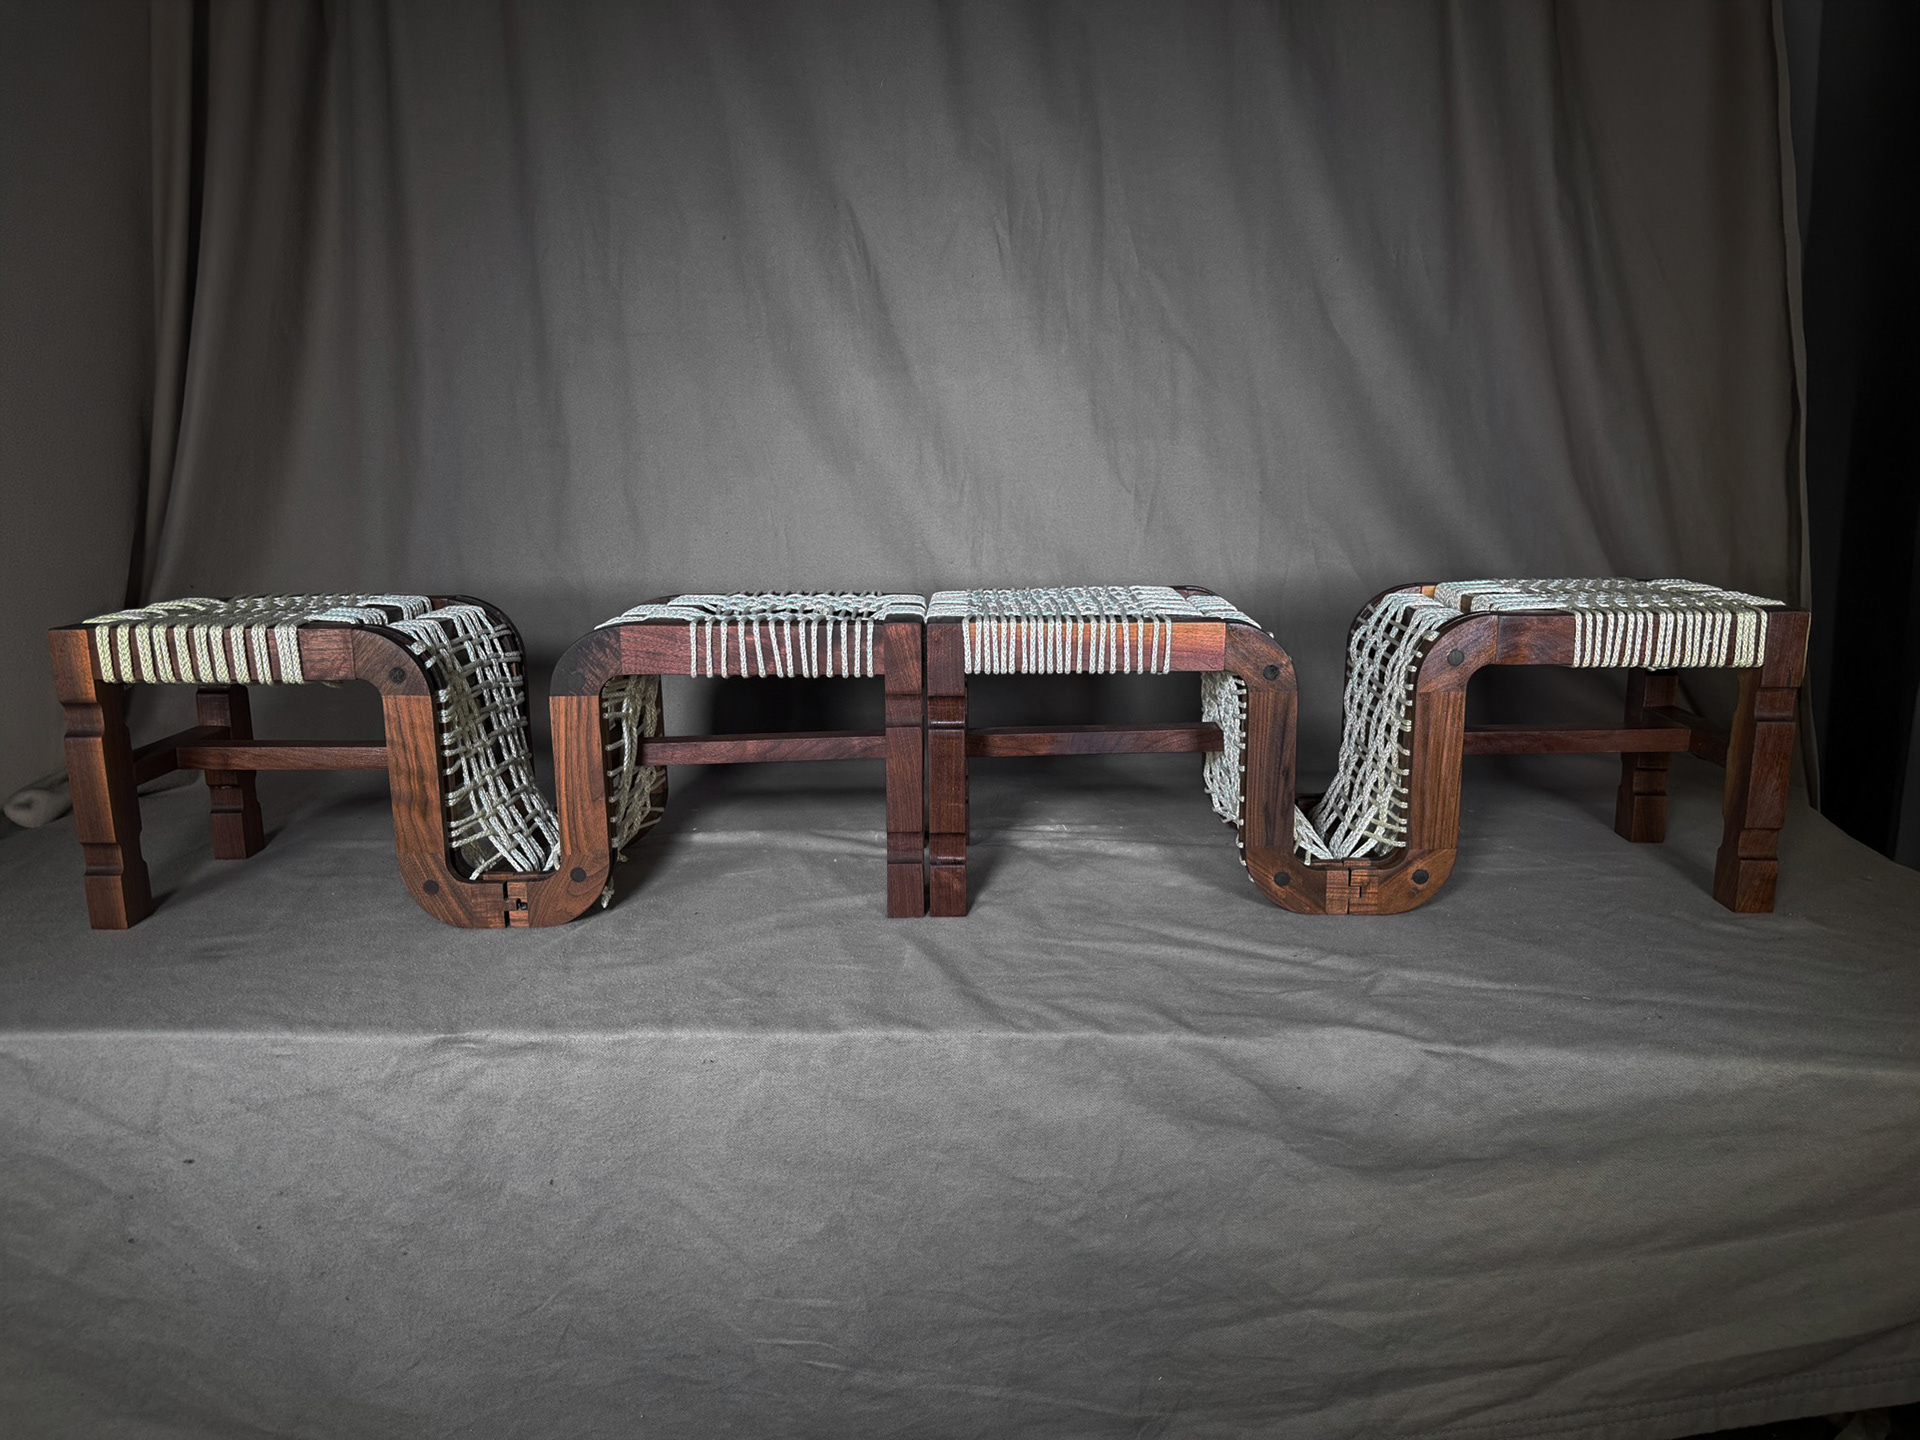
Image 1 | Side View
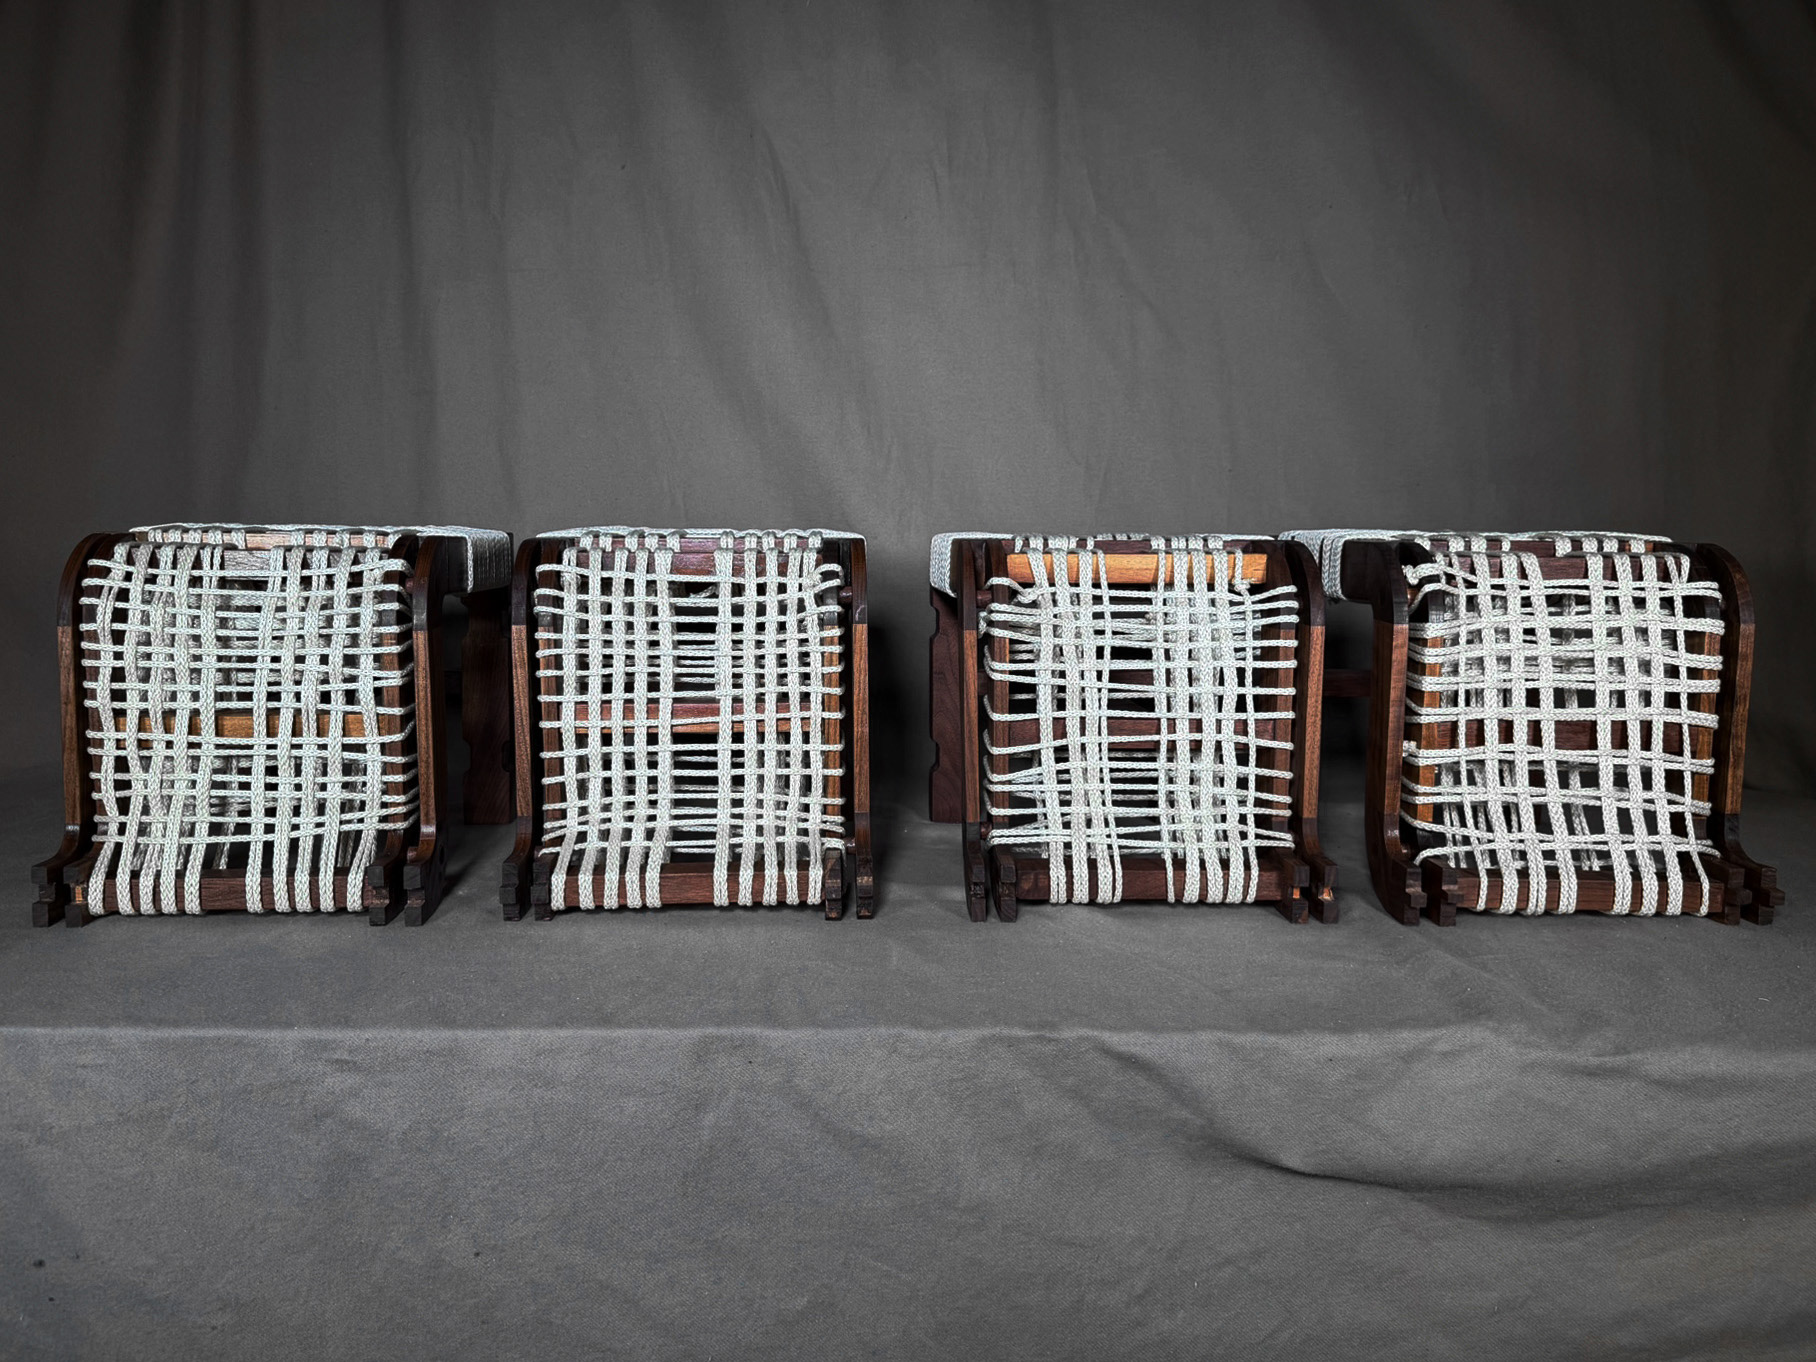
Image 2 | View of the S-curve Leg
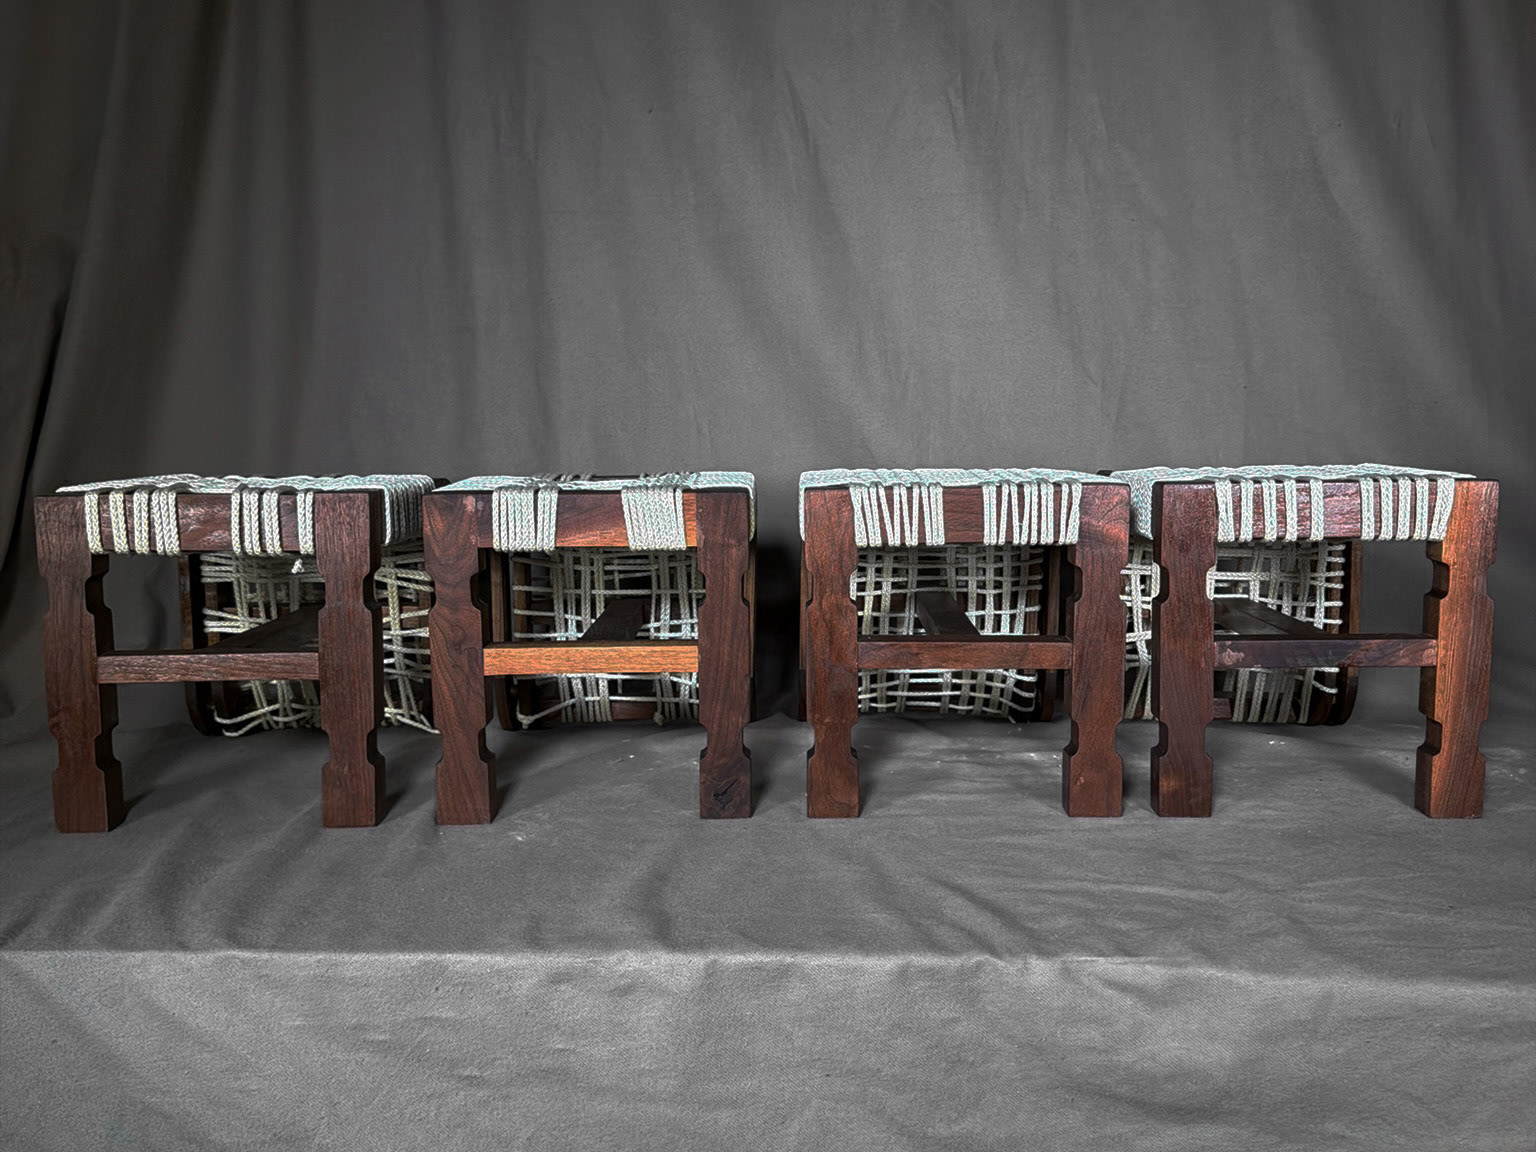
Image 3 | View of the Columnar Leg
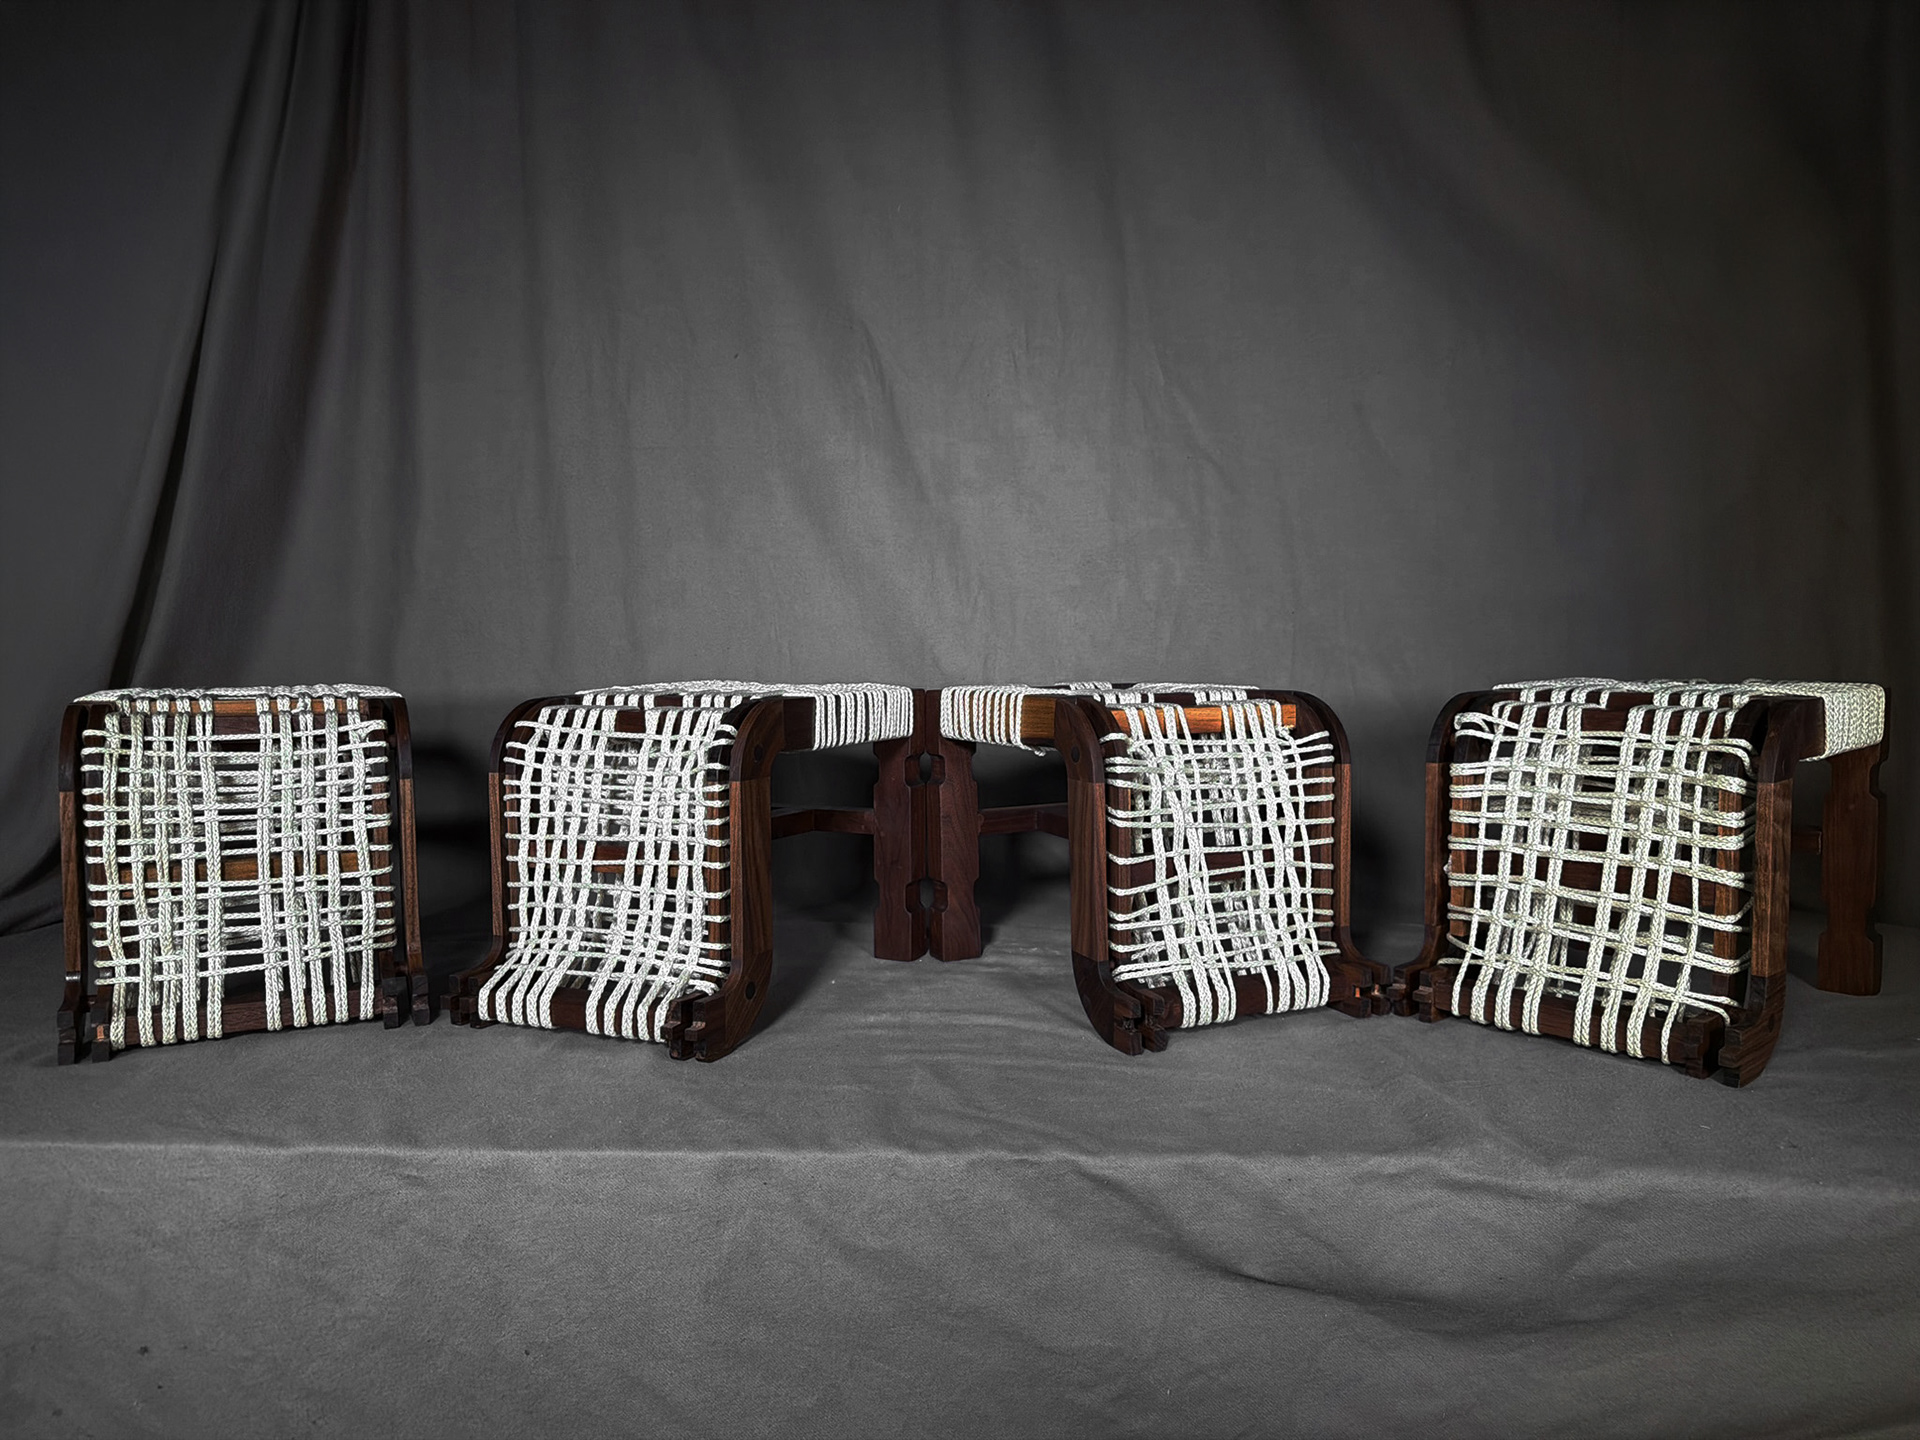
Image 4 | Perspective
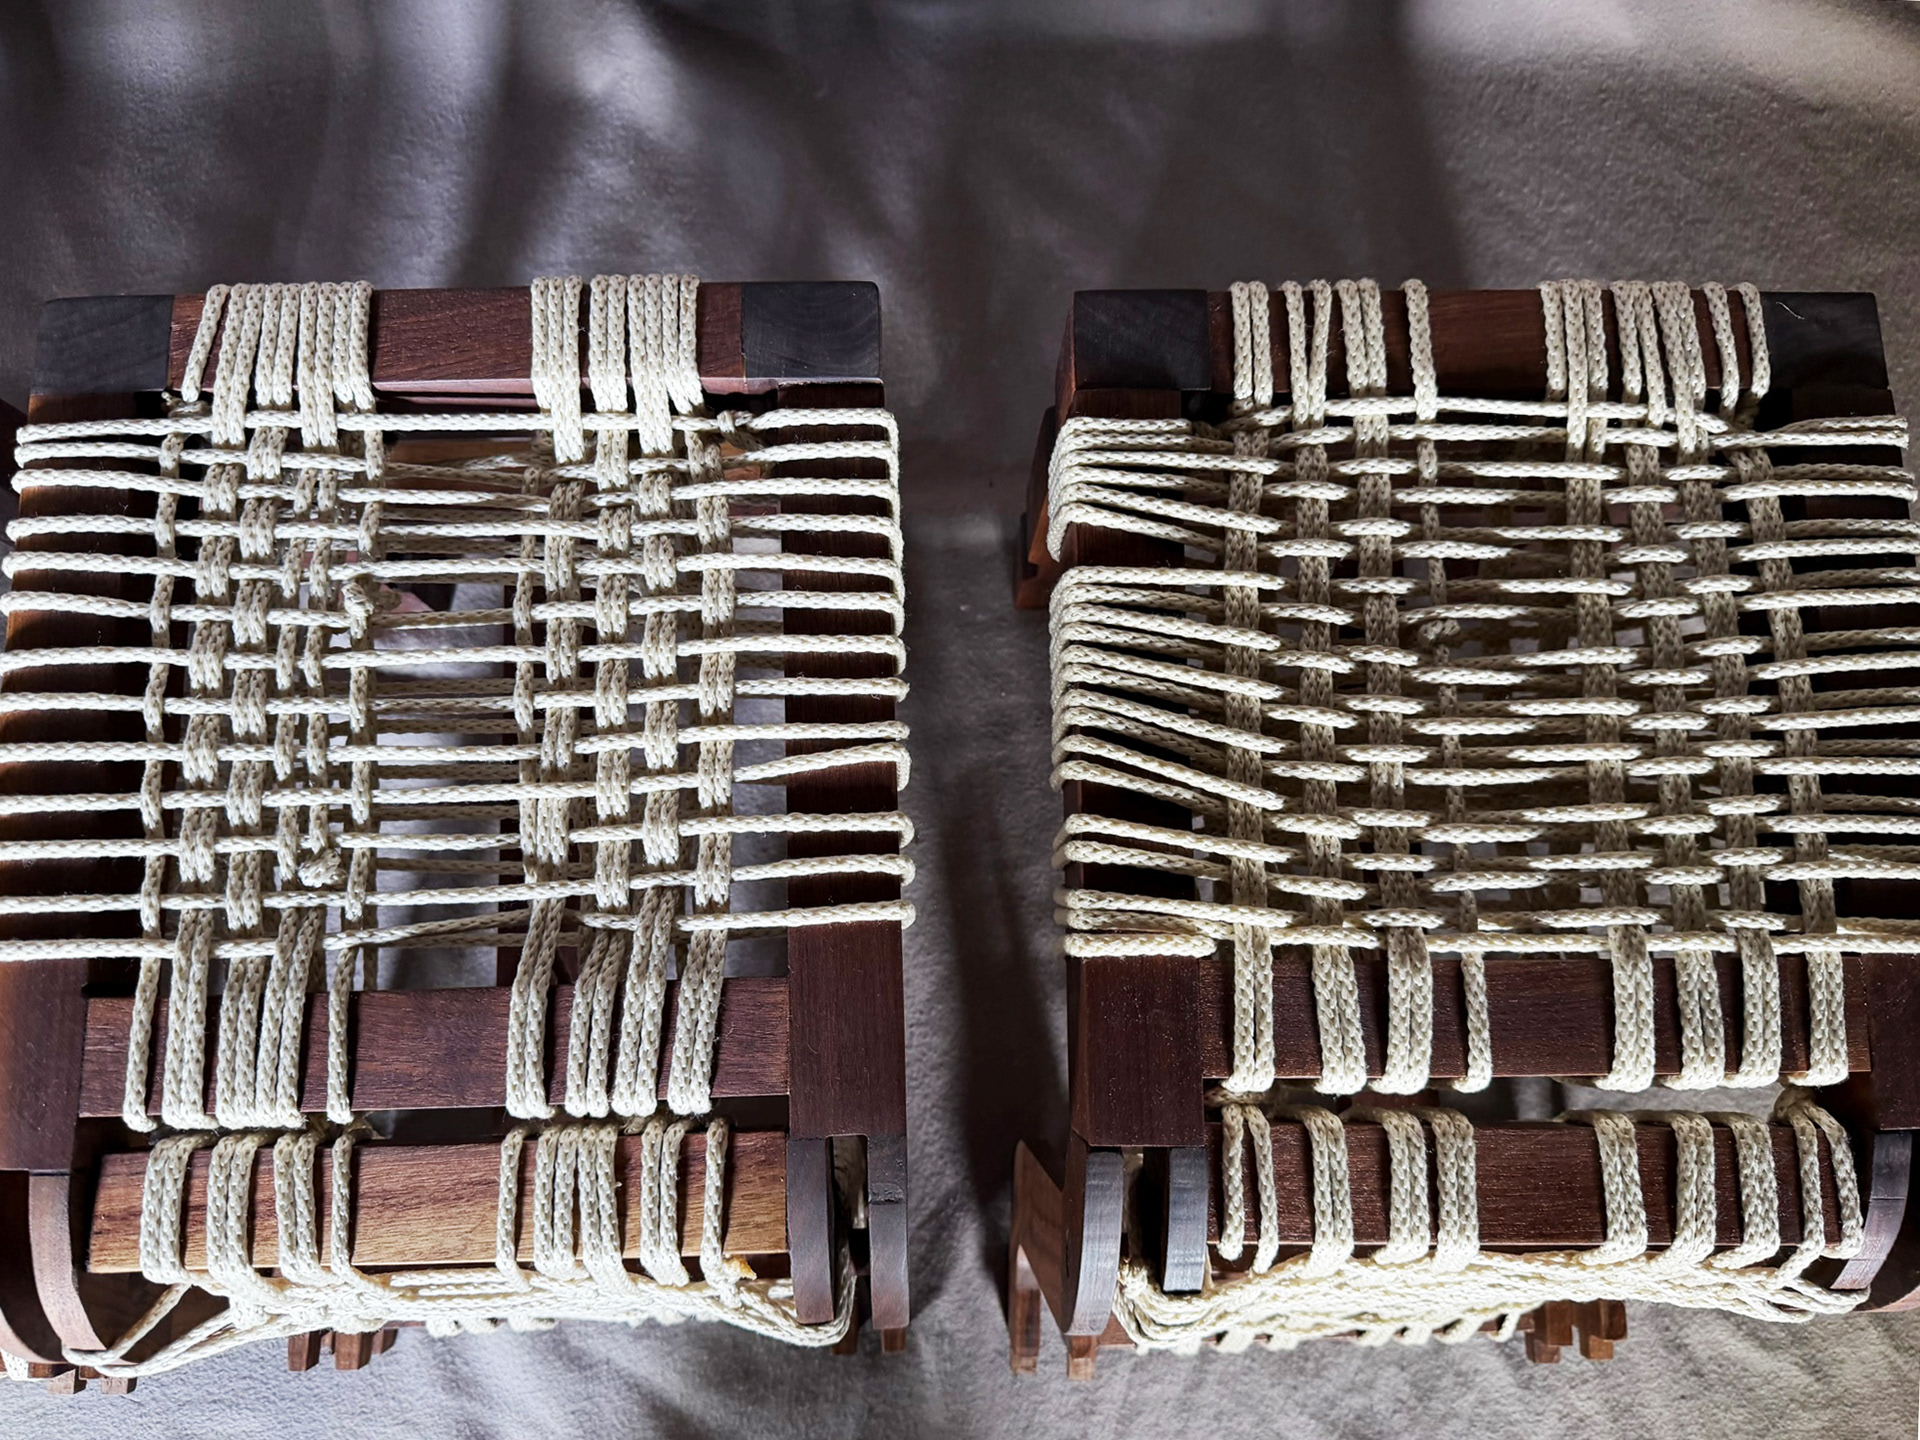
Image 5 | Plan View 1
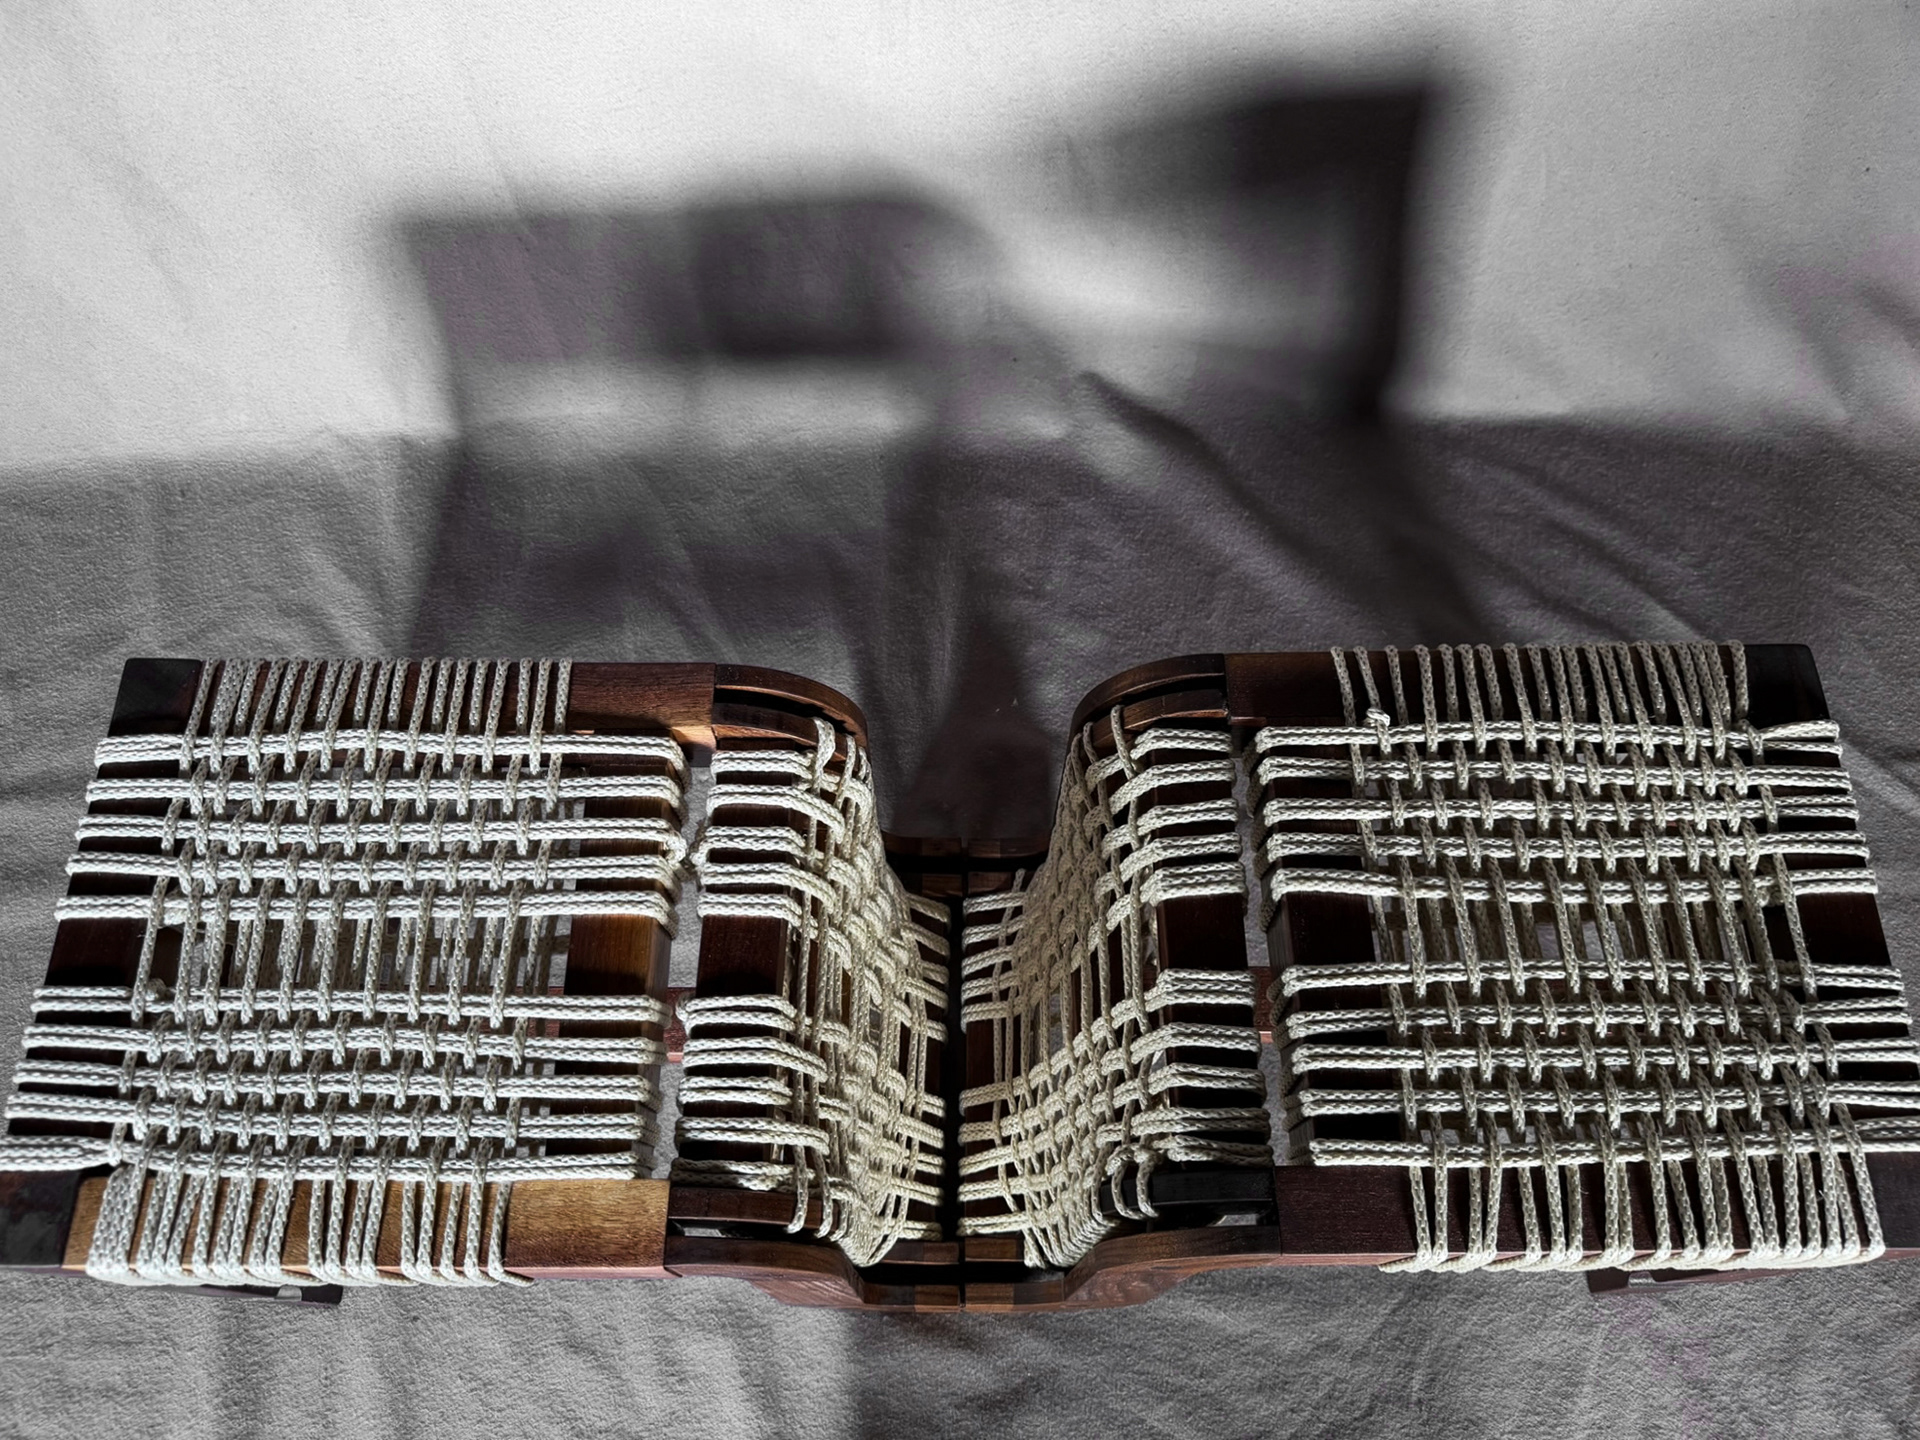
Image 6 | Plan View 2
Detail Photos of the Overall Footstool System
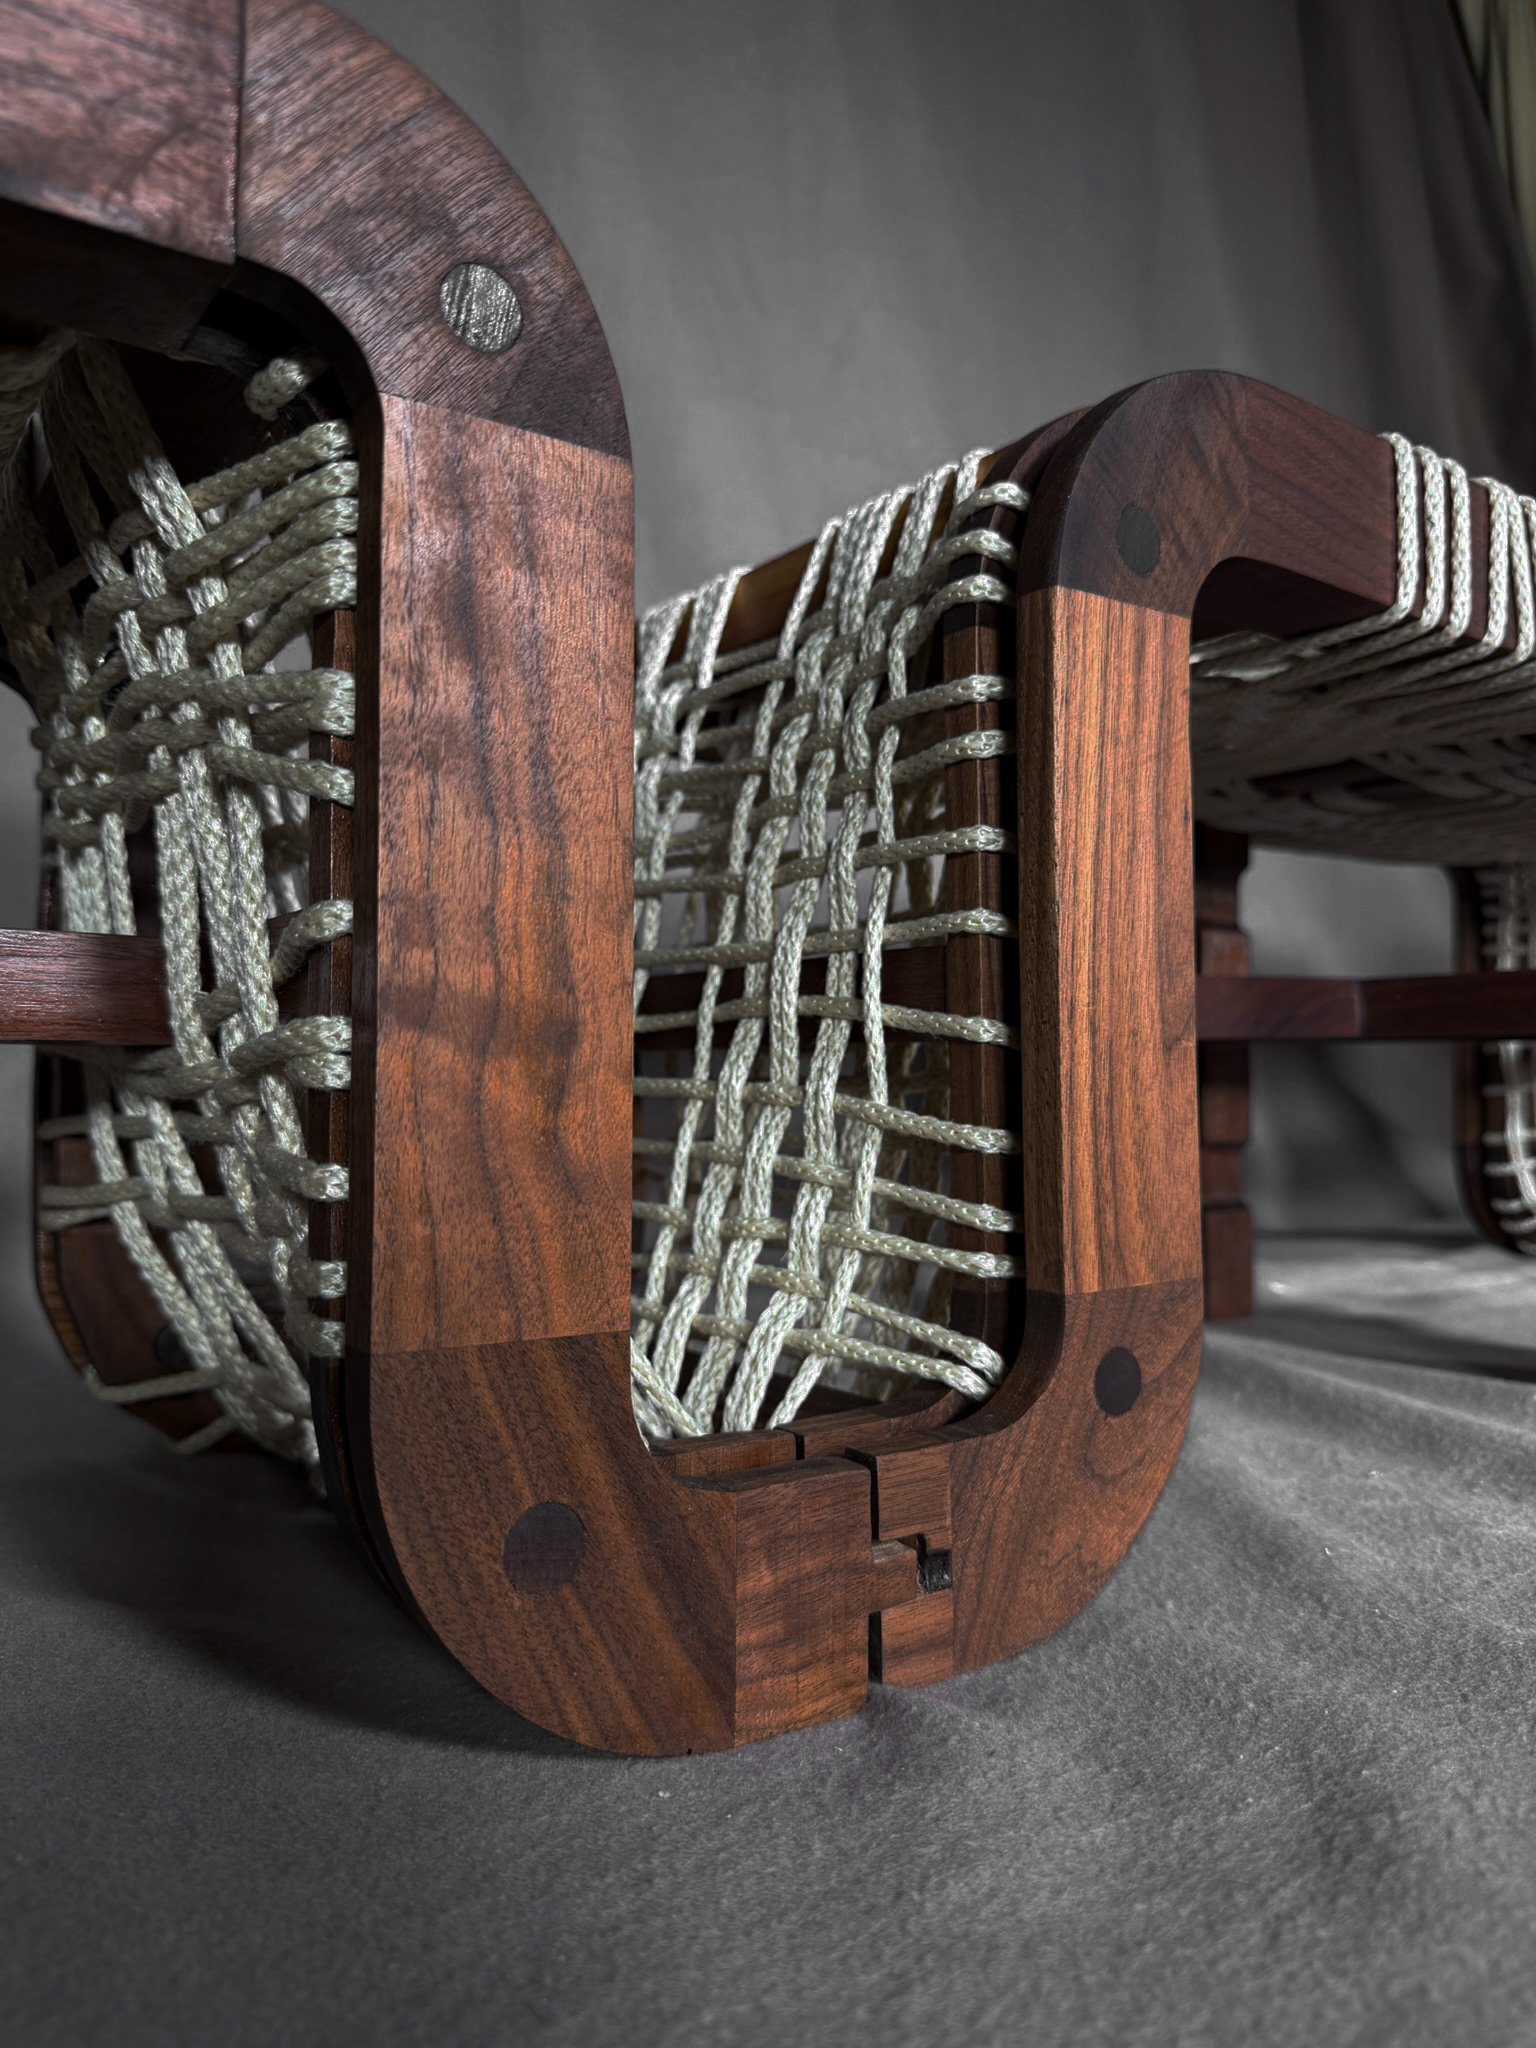
Image 1 | Tongue and Groove Joint Connection Within the System
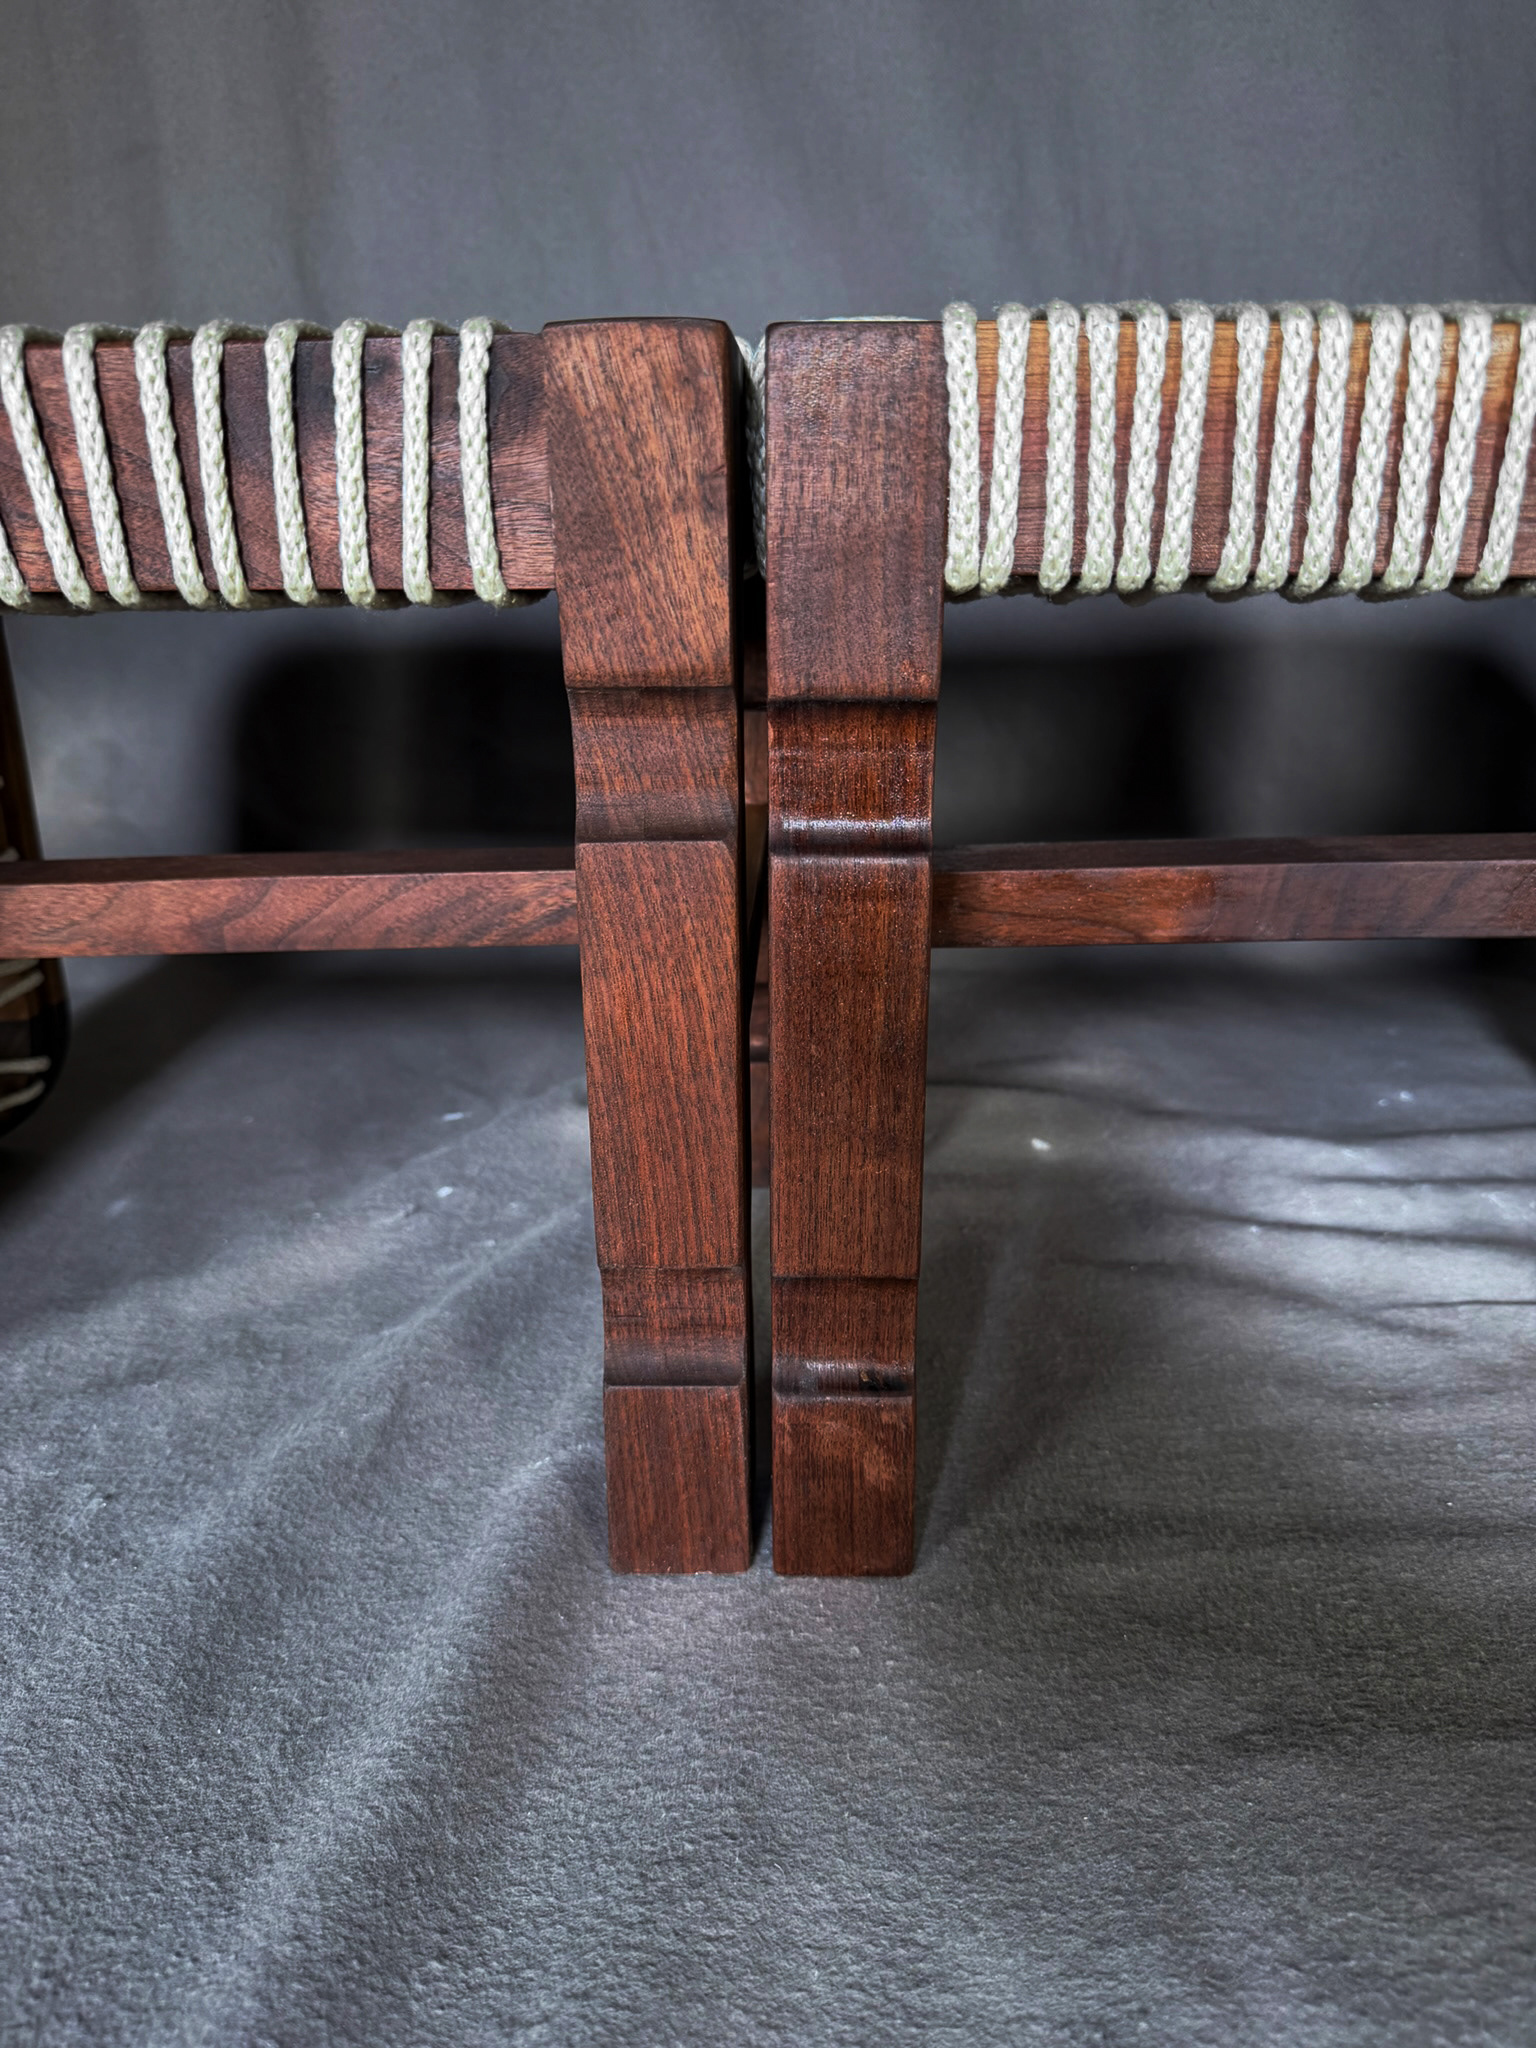
Image 2 | Columnar Connection Within the System
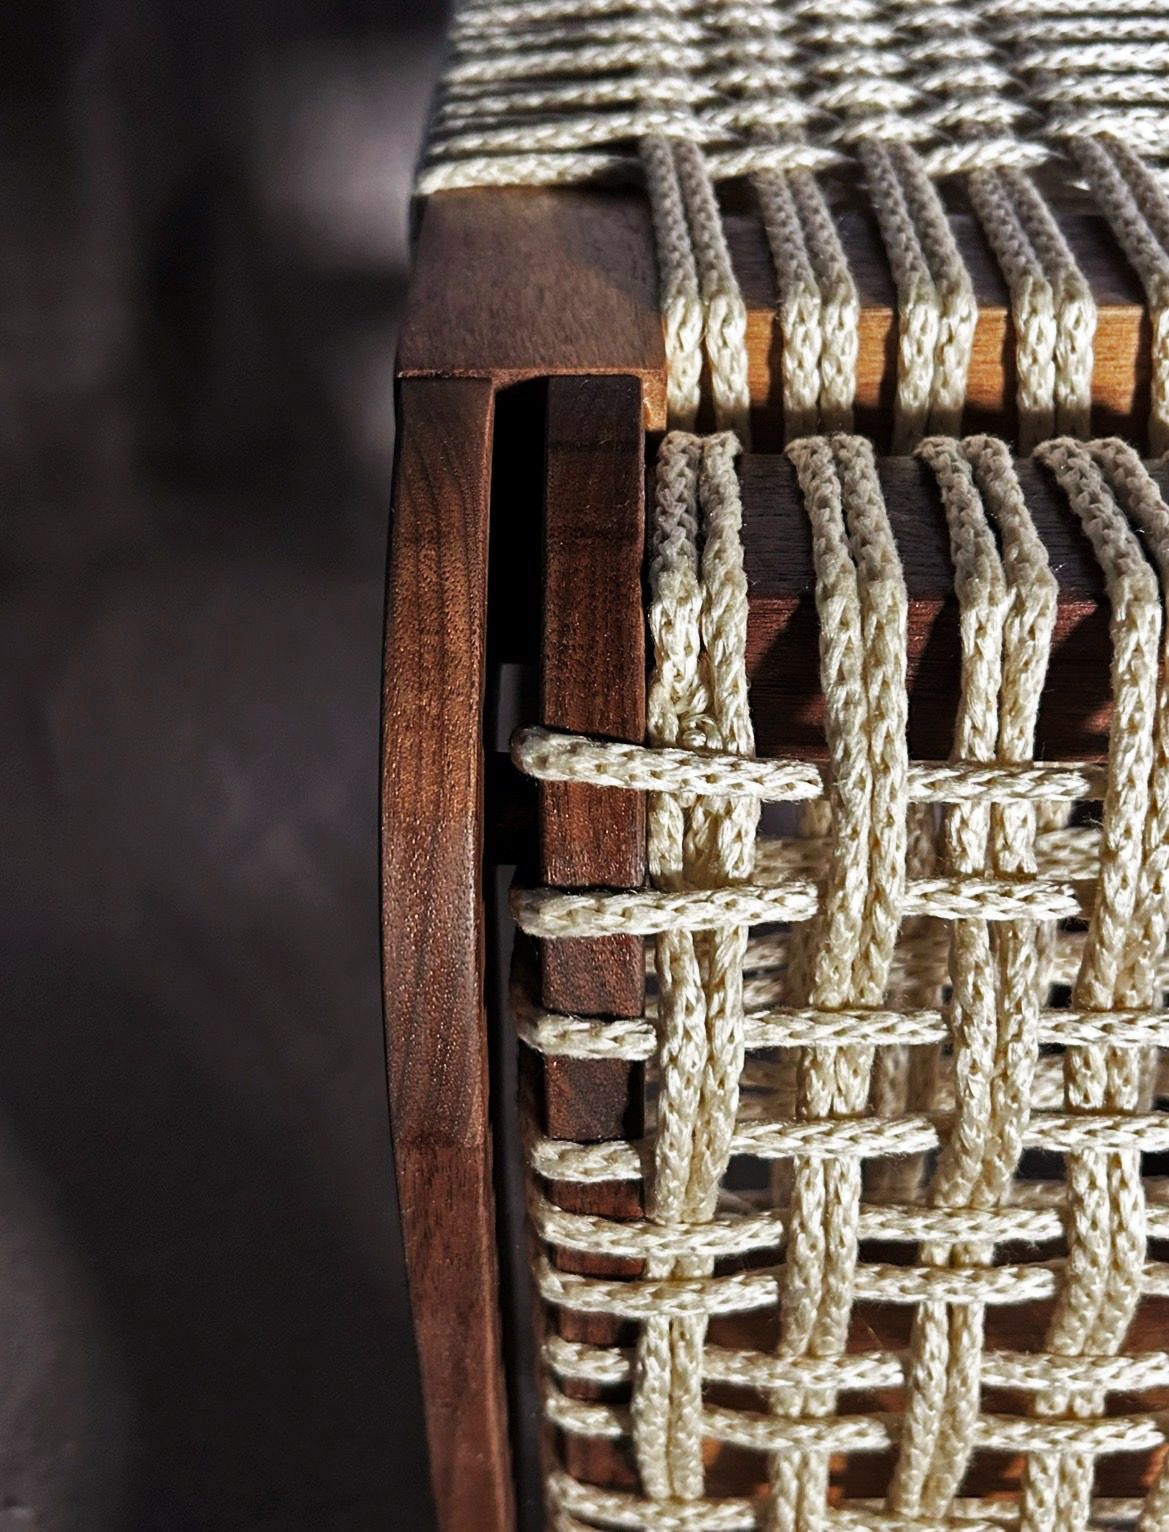
Image 3 | Dowel, S-curve, & Woven Rope Intersection Within the Footstool
Photographs of Final Footstool 1
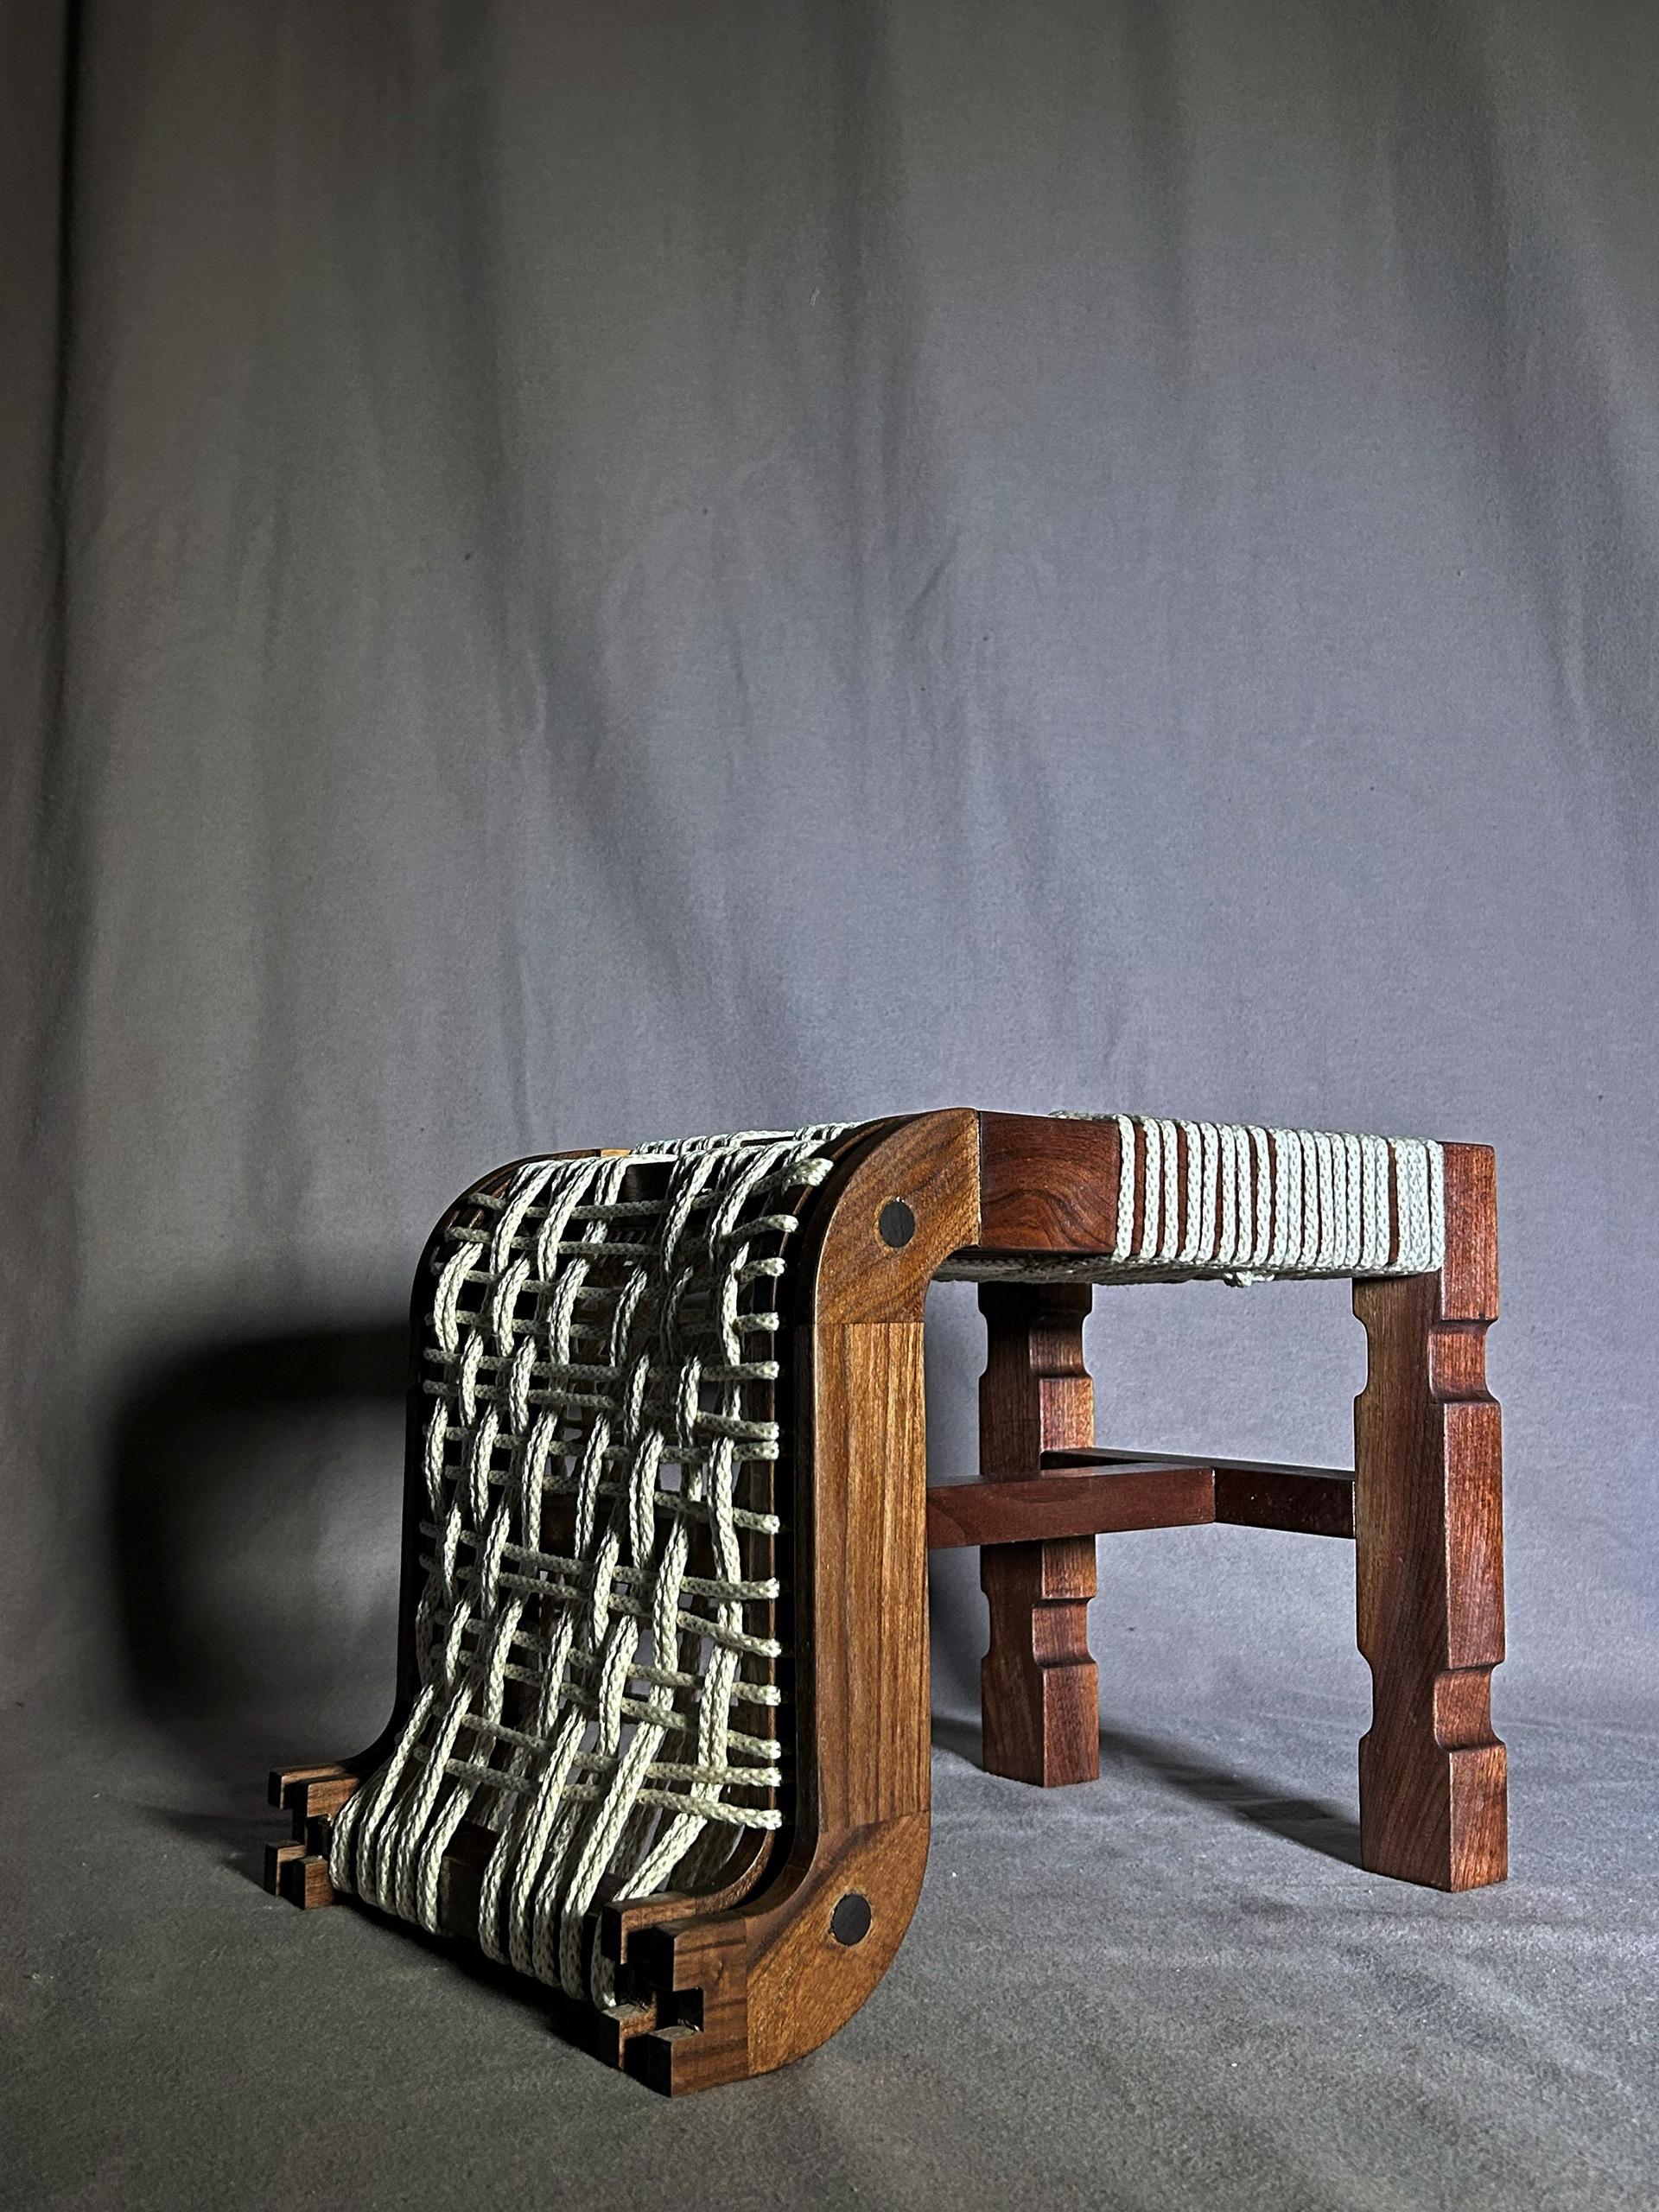
Image 1 | Perspective View 1
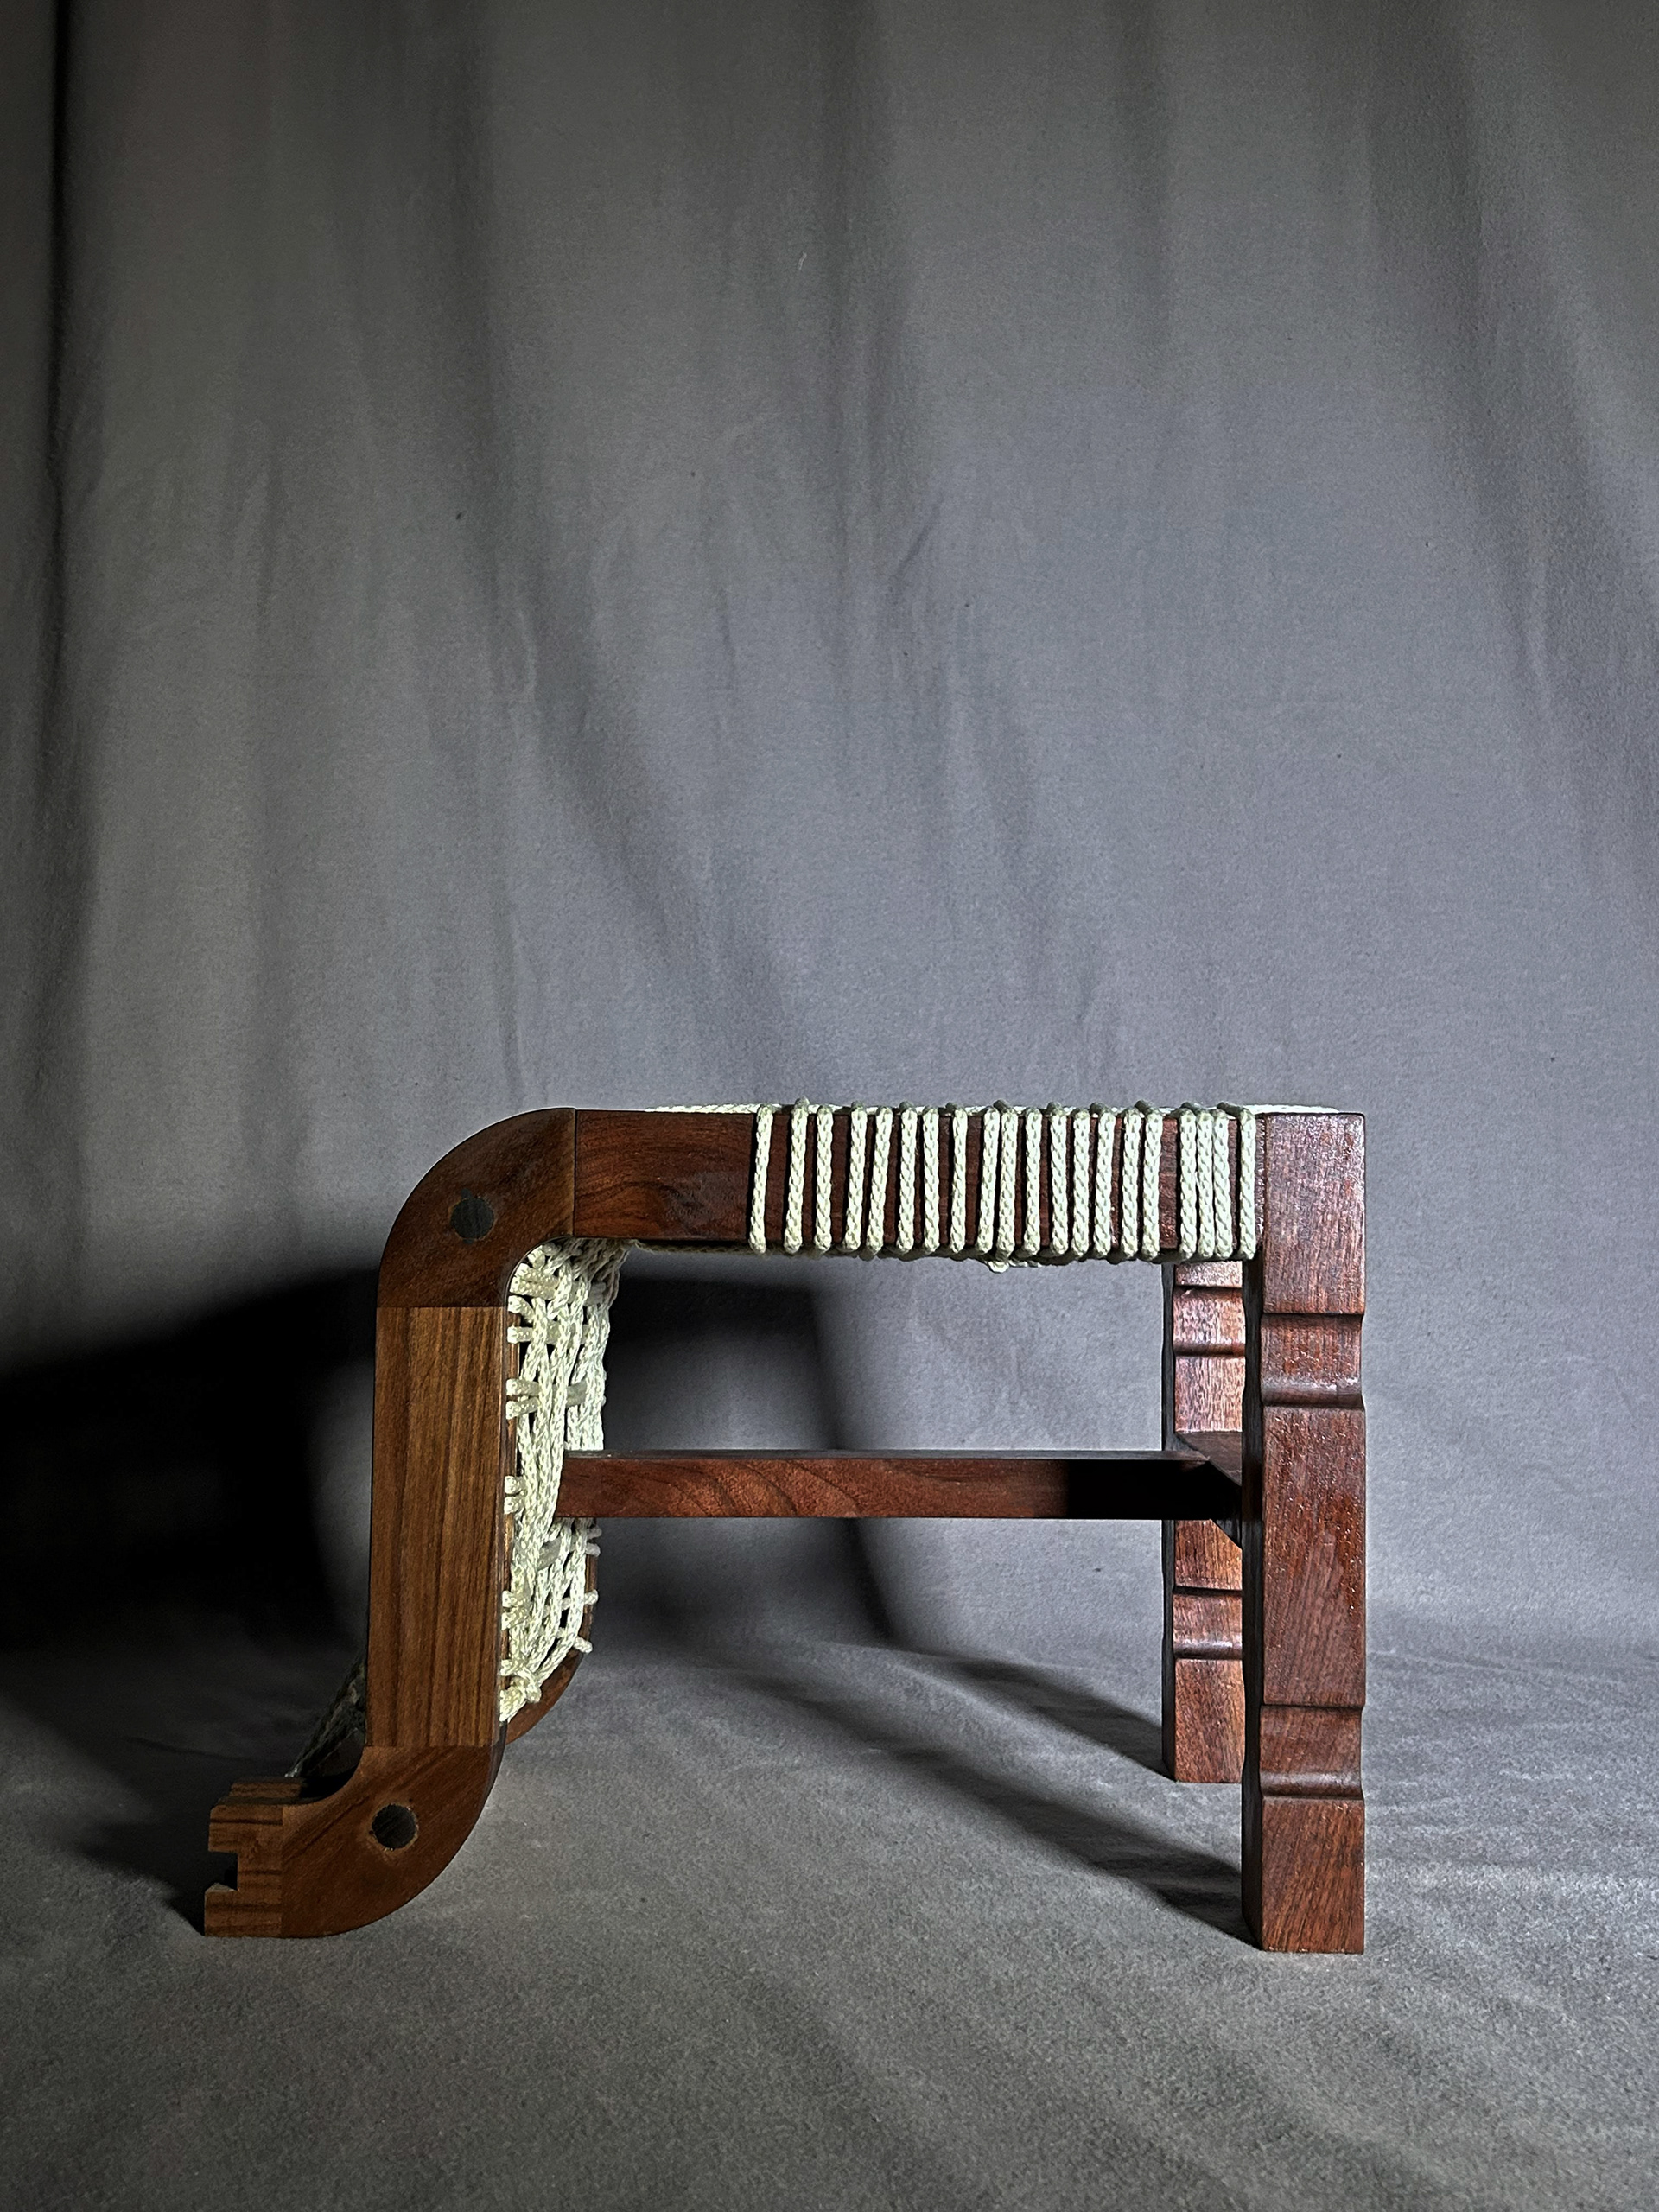
Image 2 | Side View 1
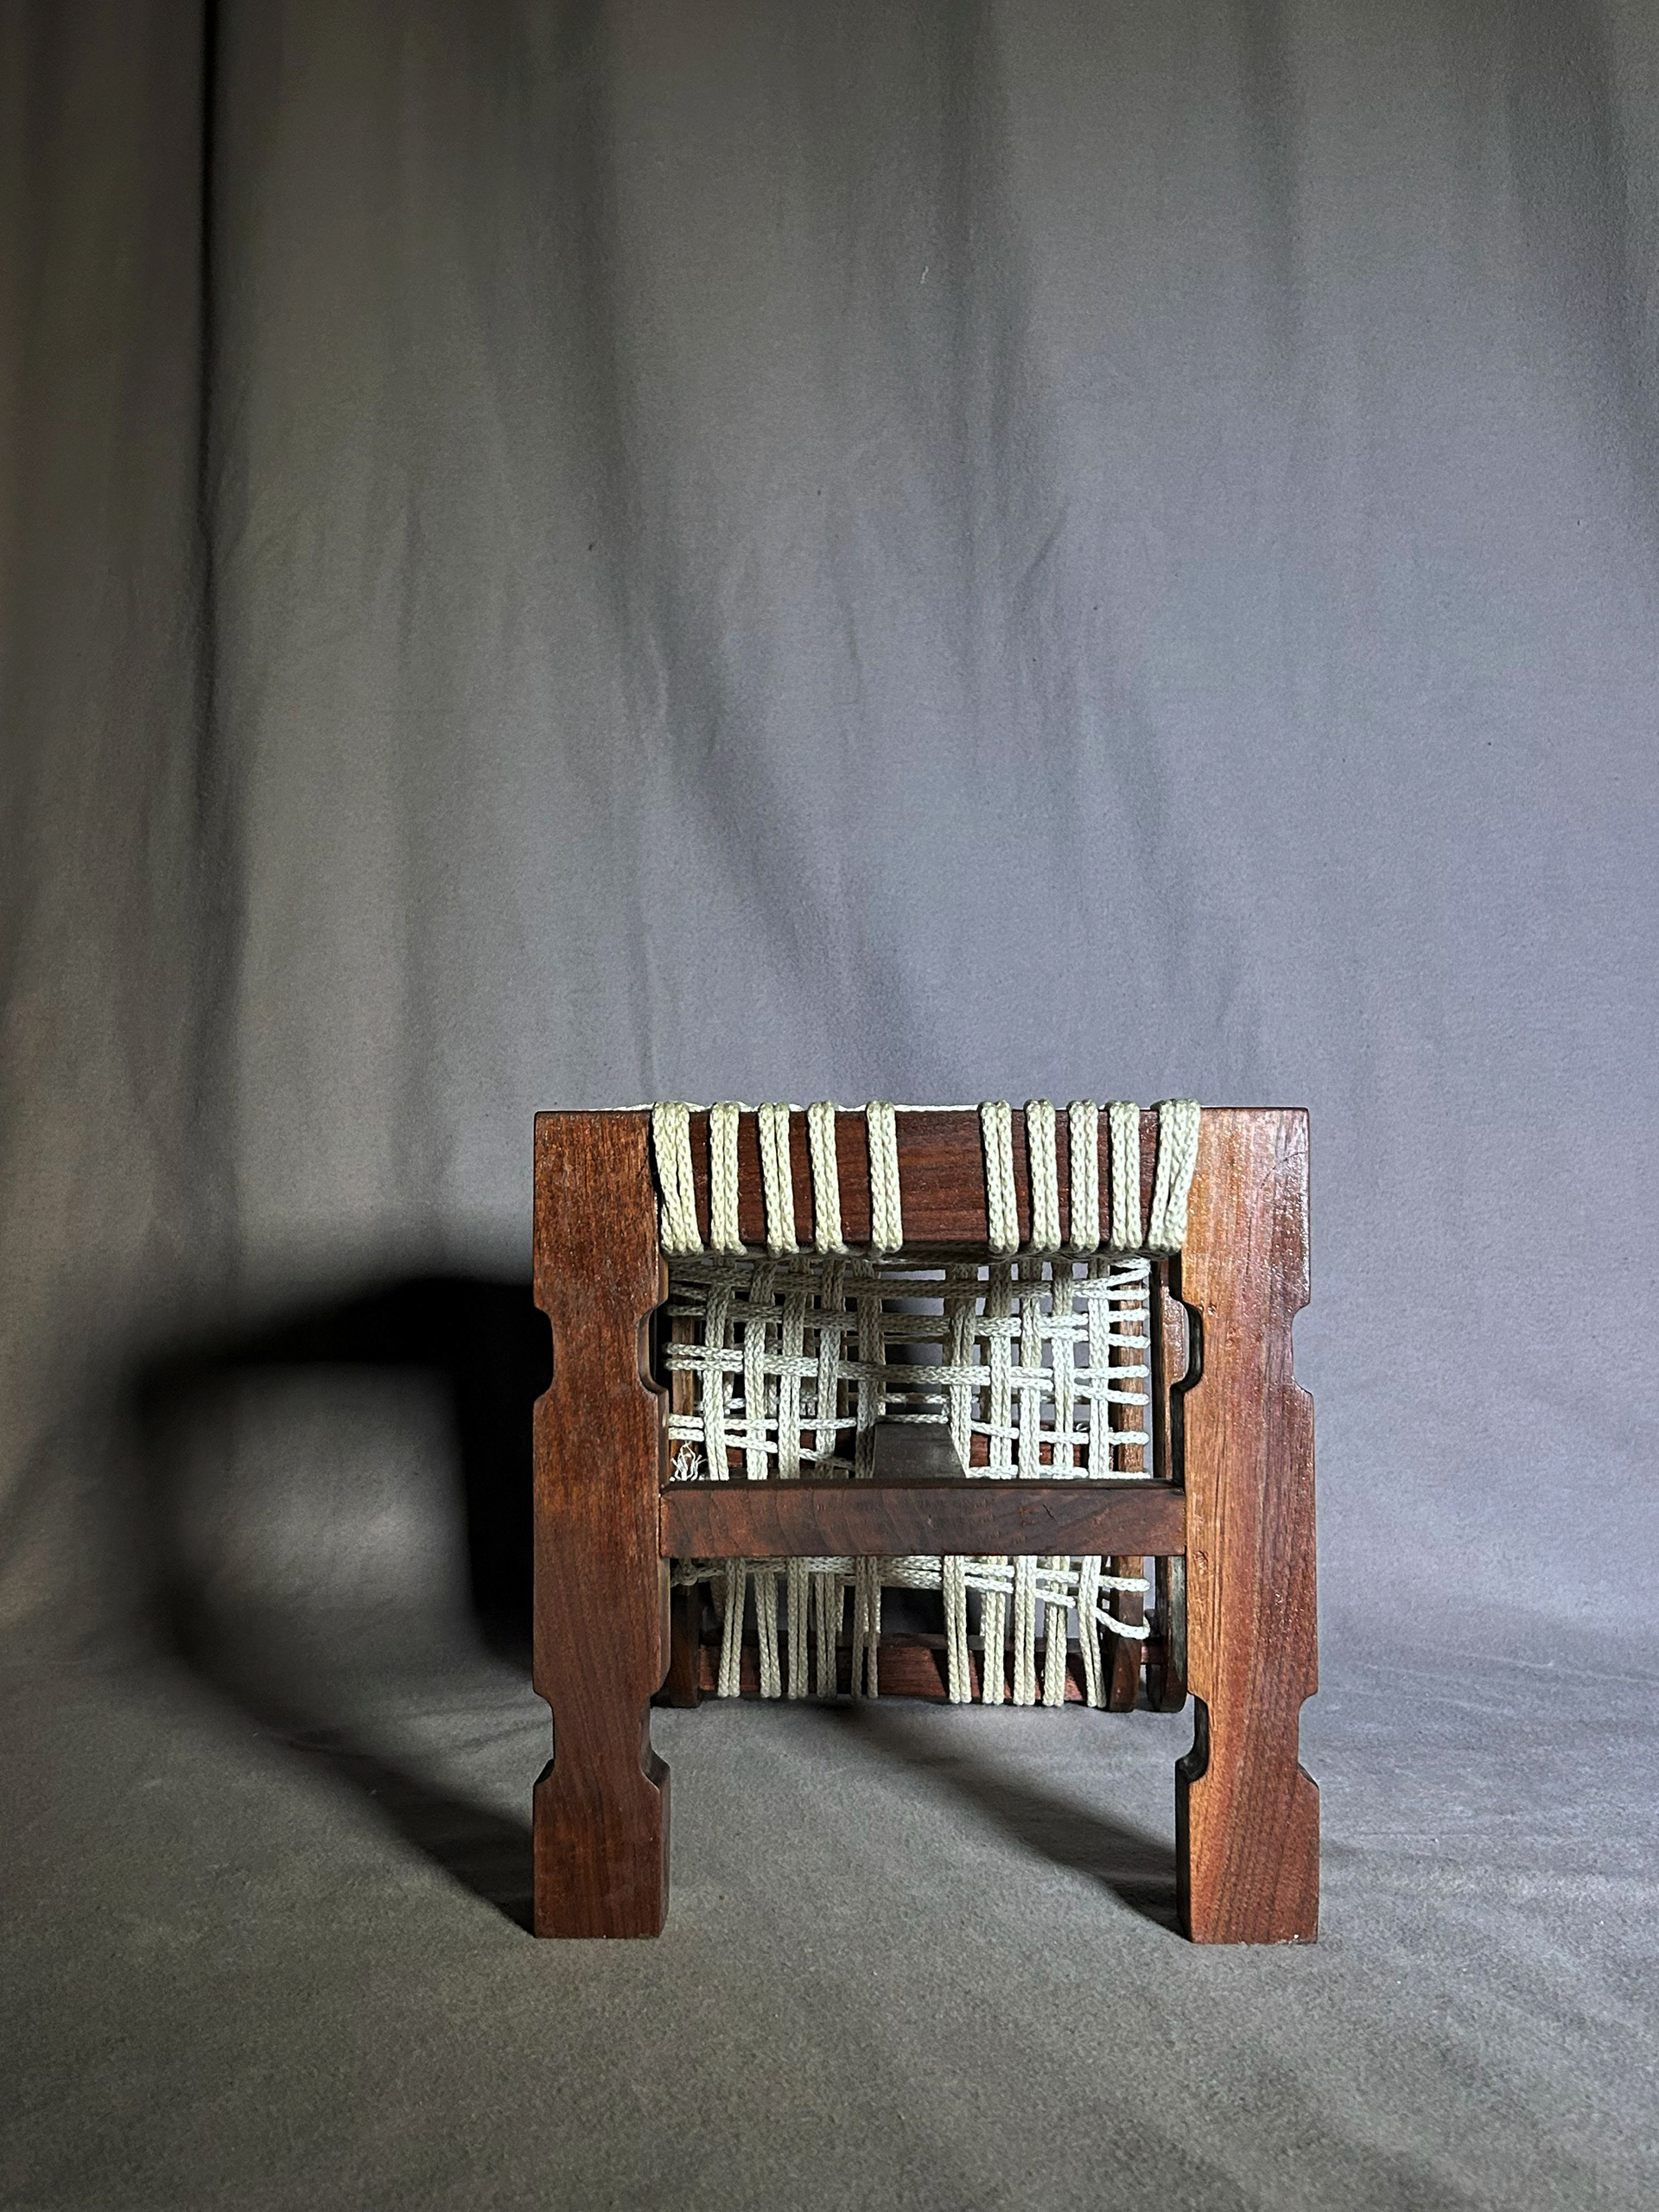
Image 3 | Back View
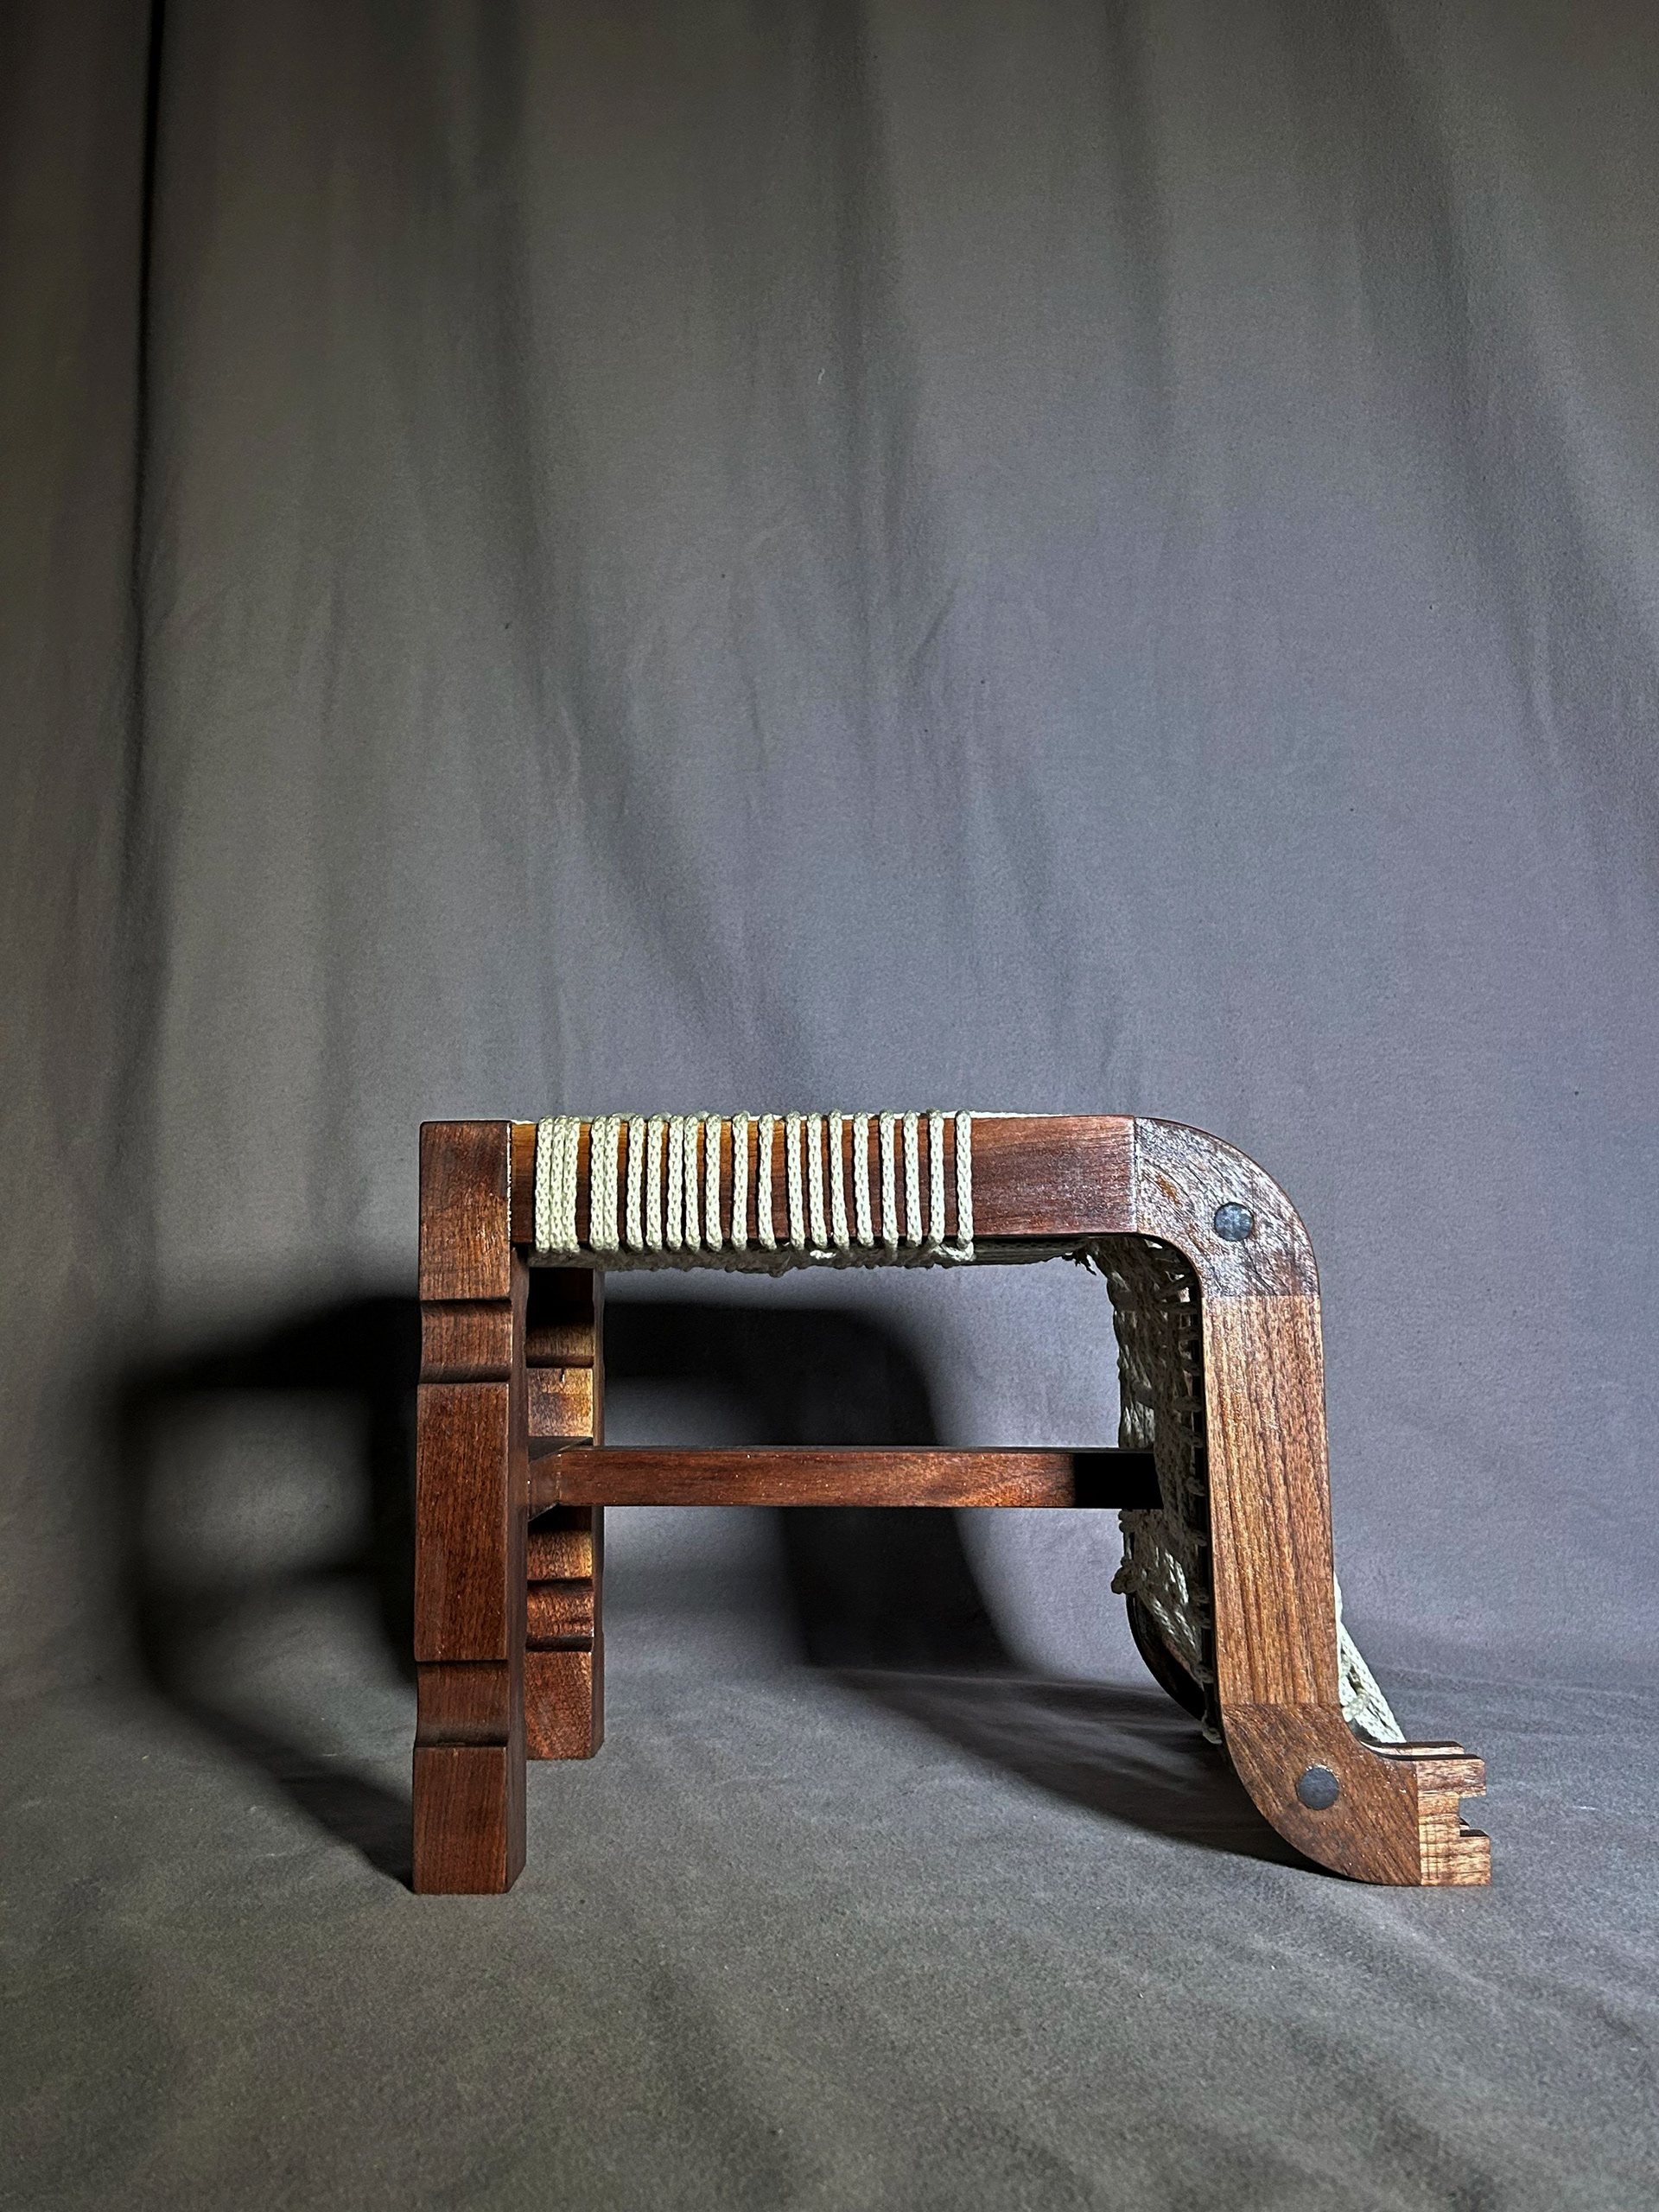
Image 4 | Side View 2
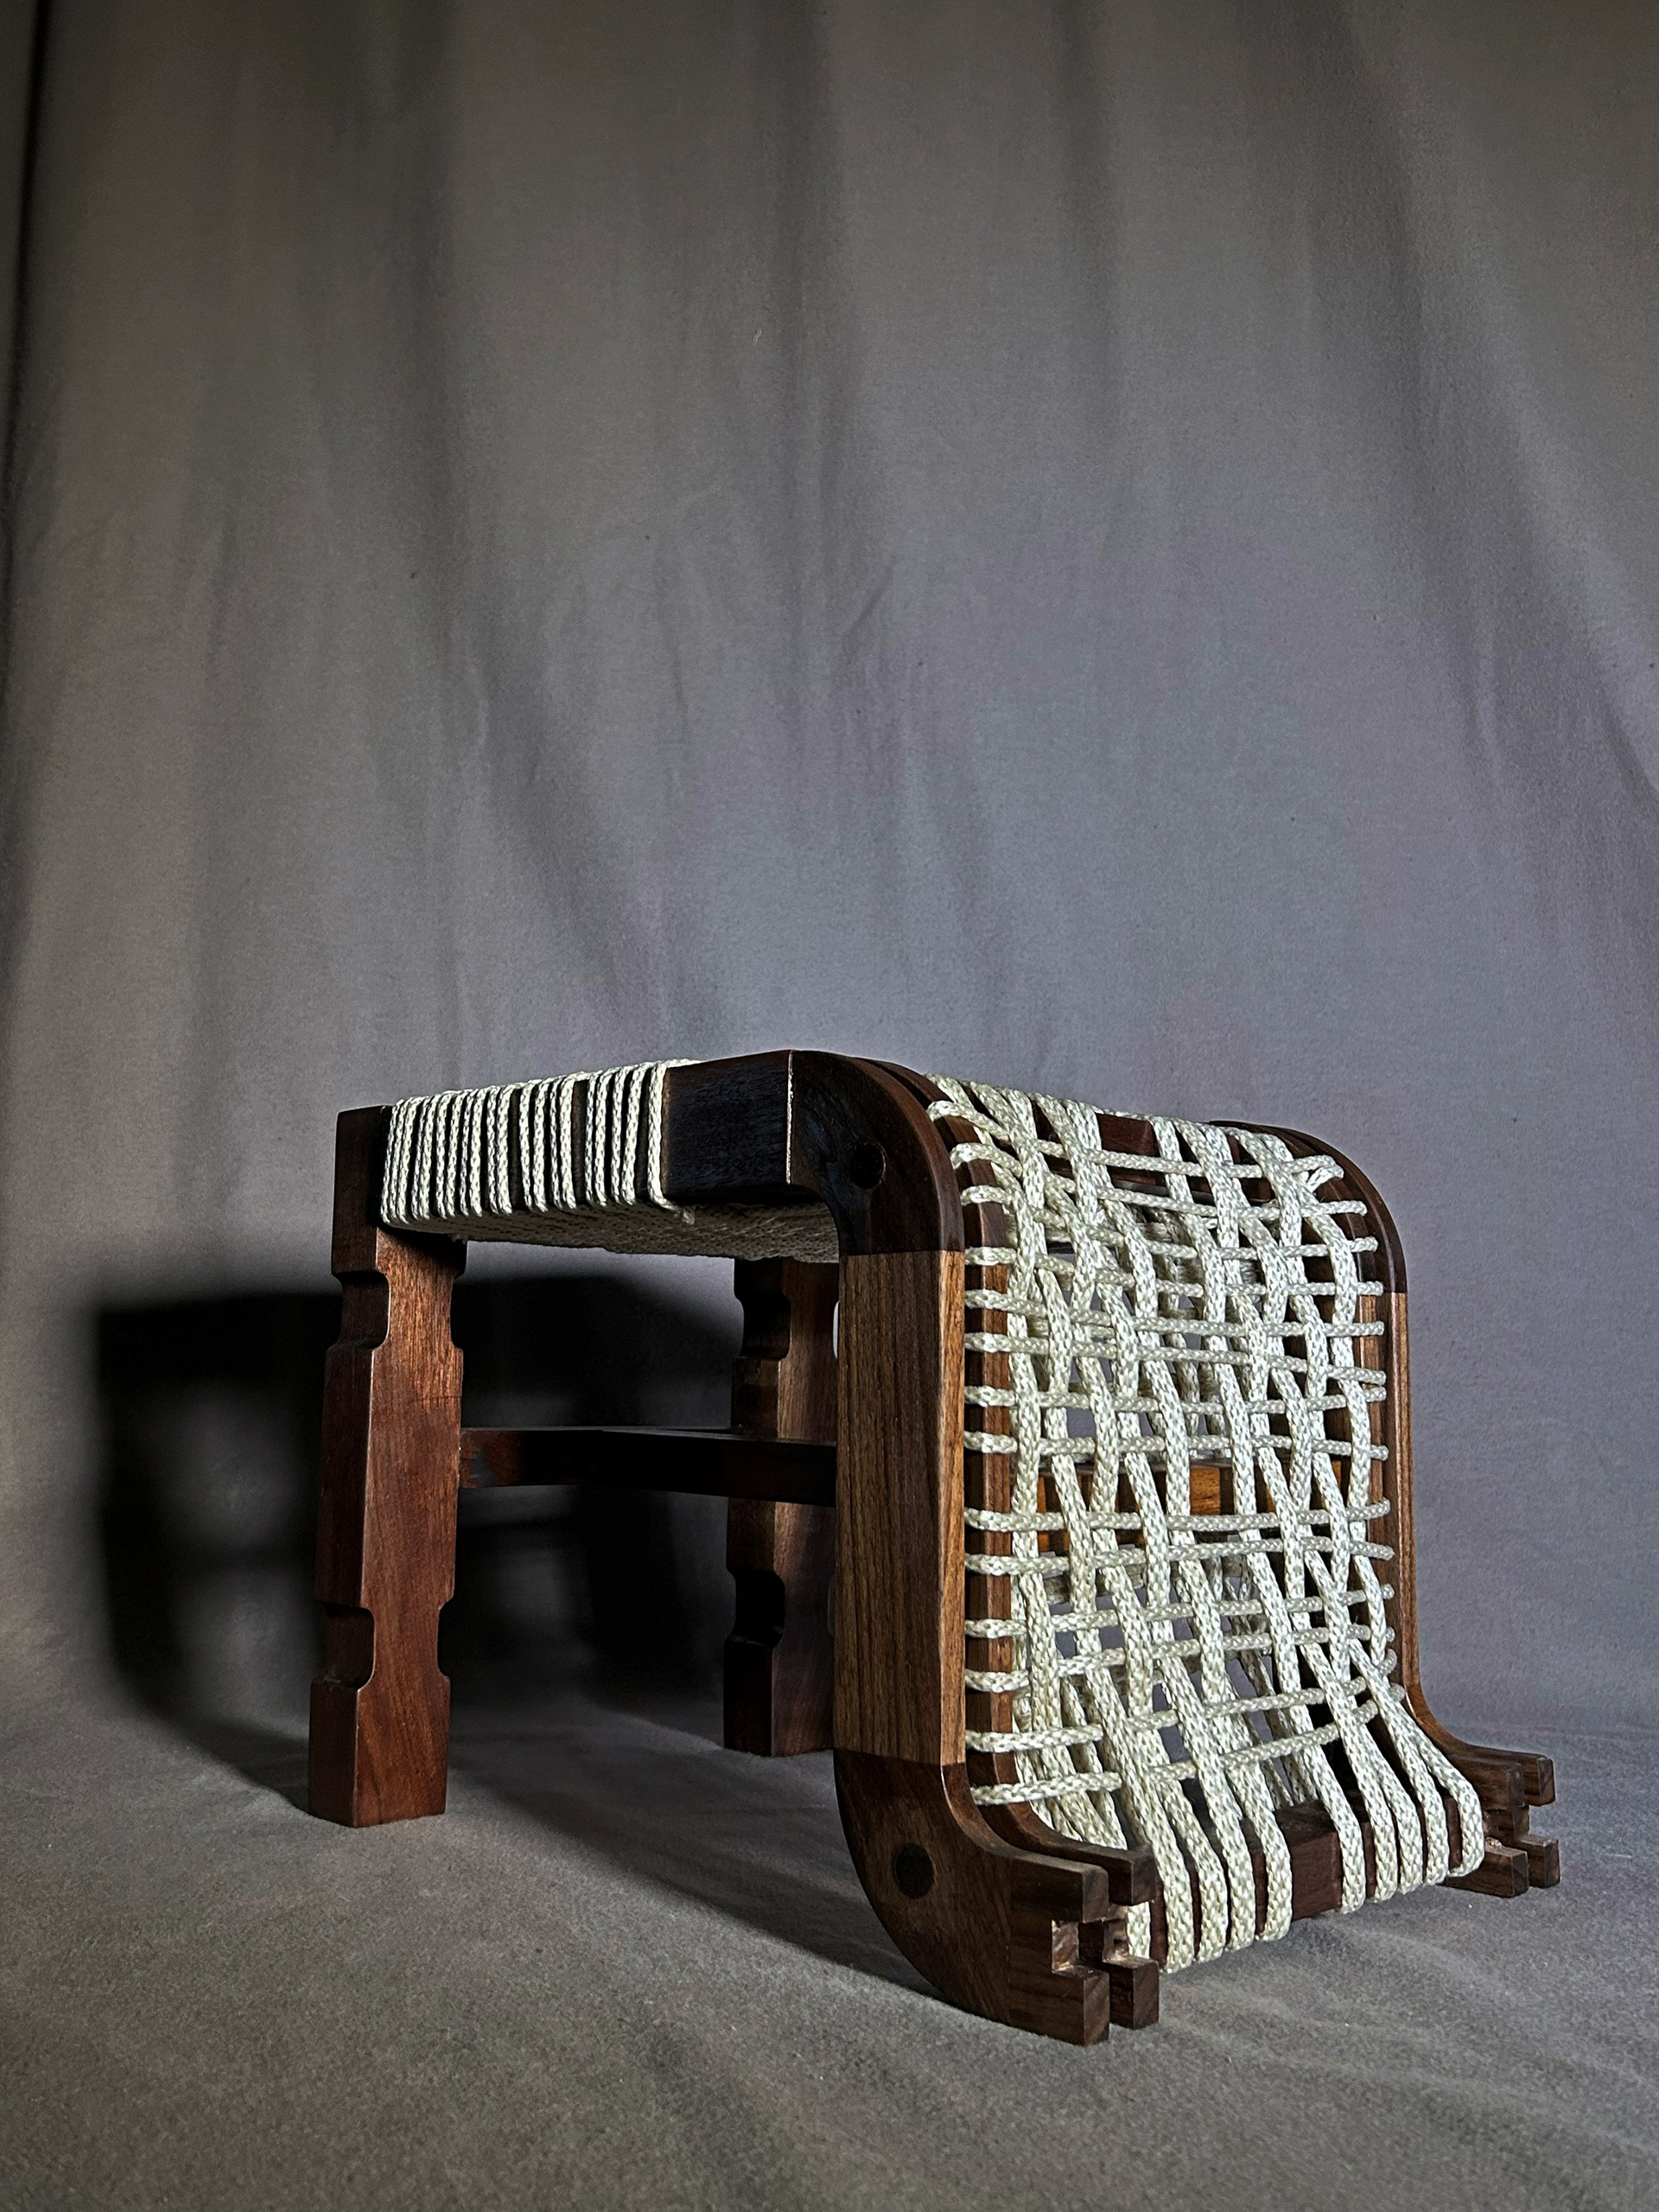
Image 5 | Perspective View 2
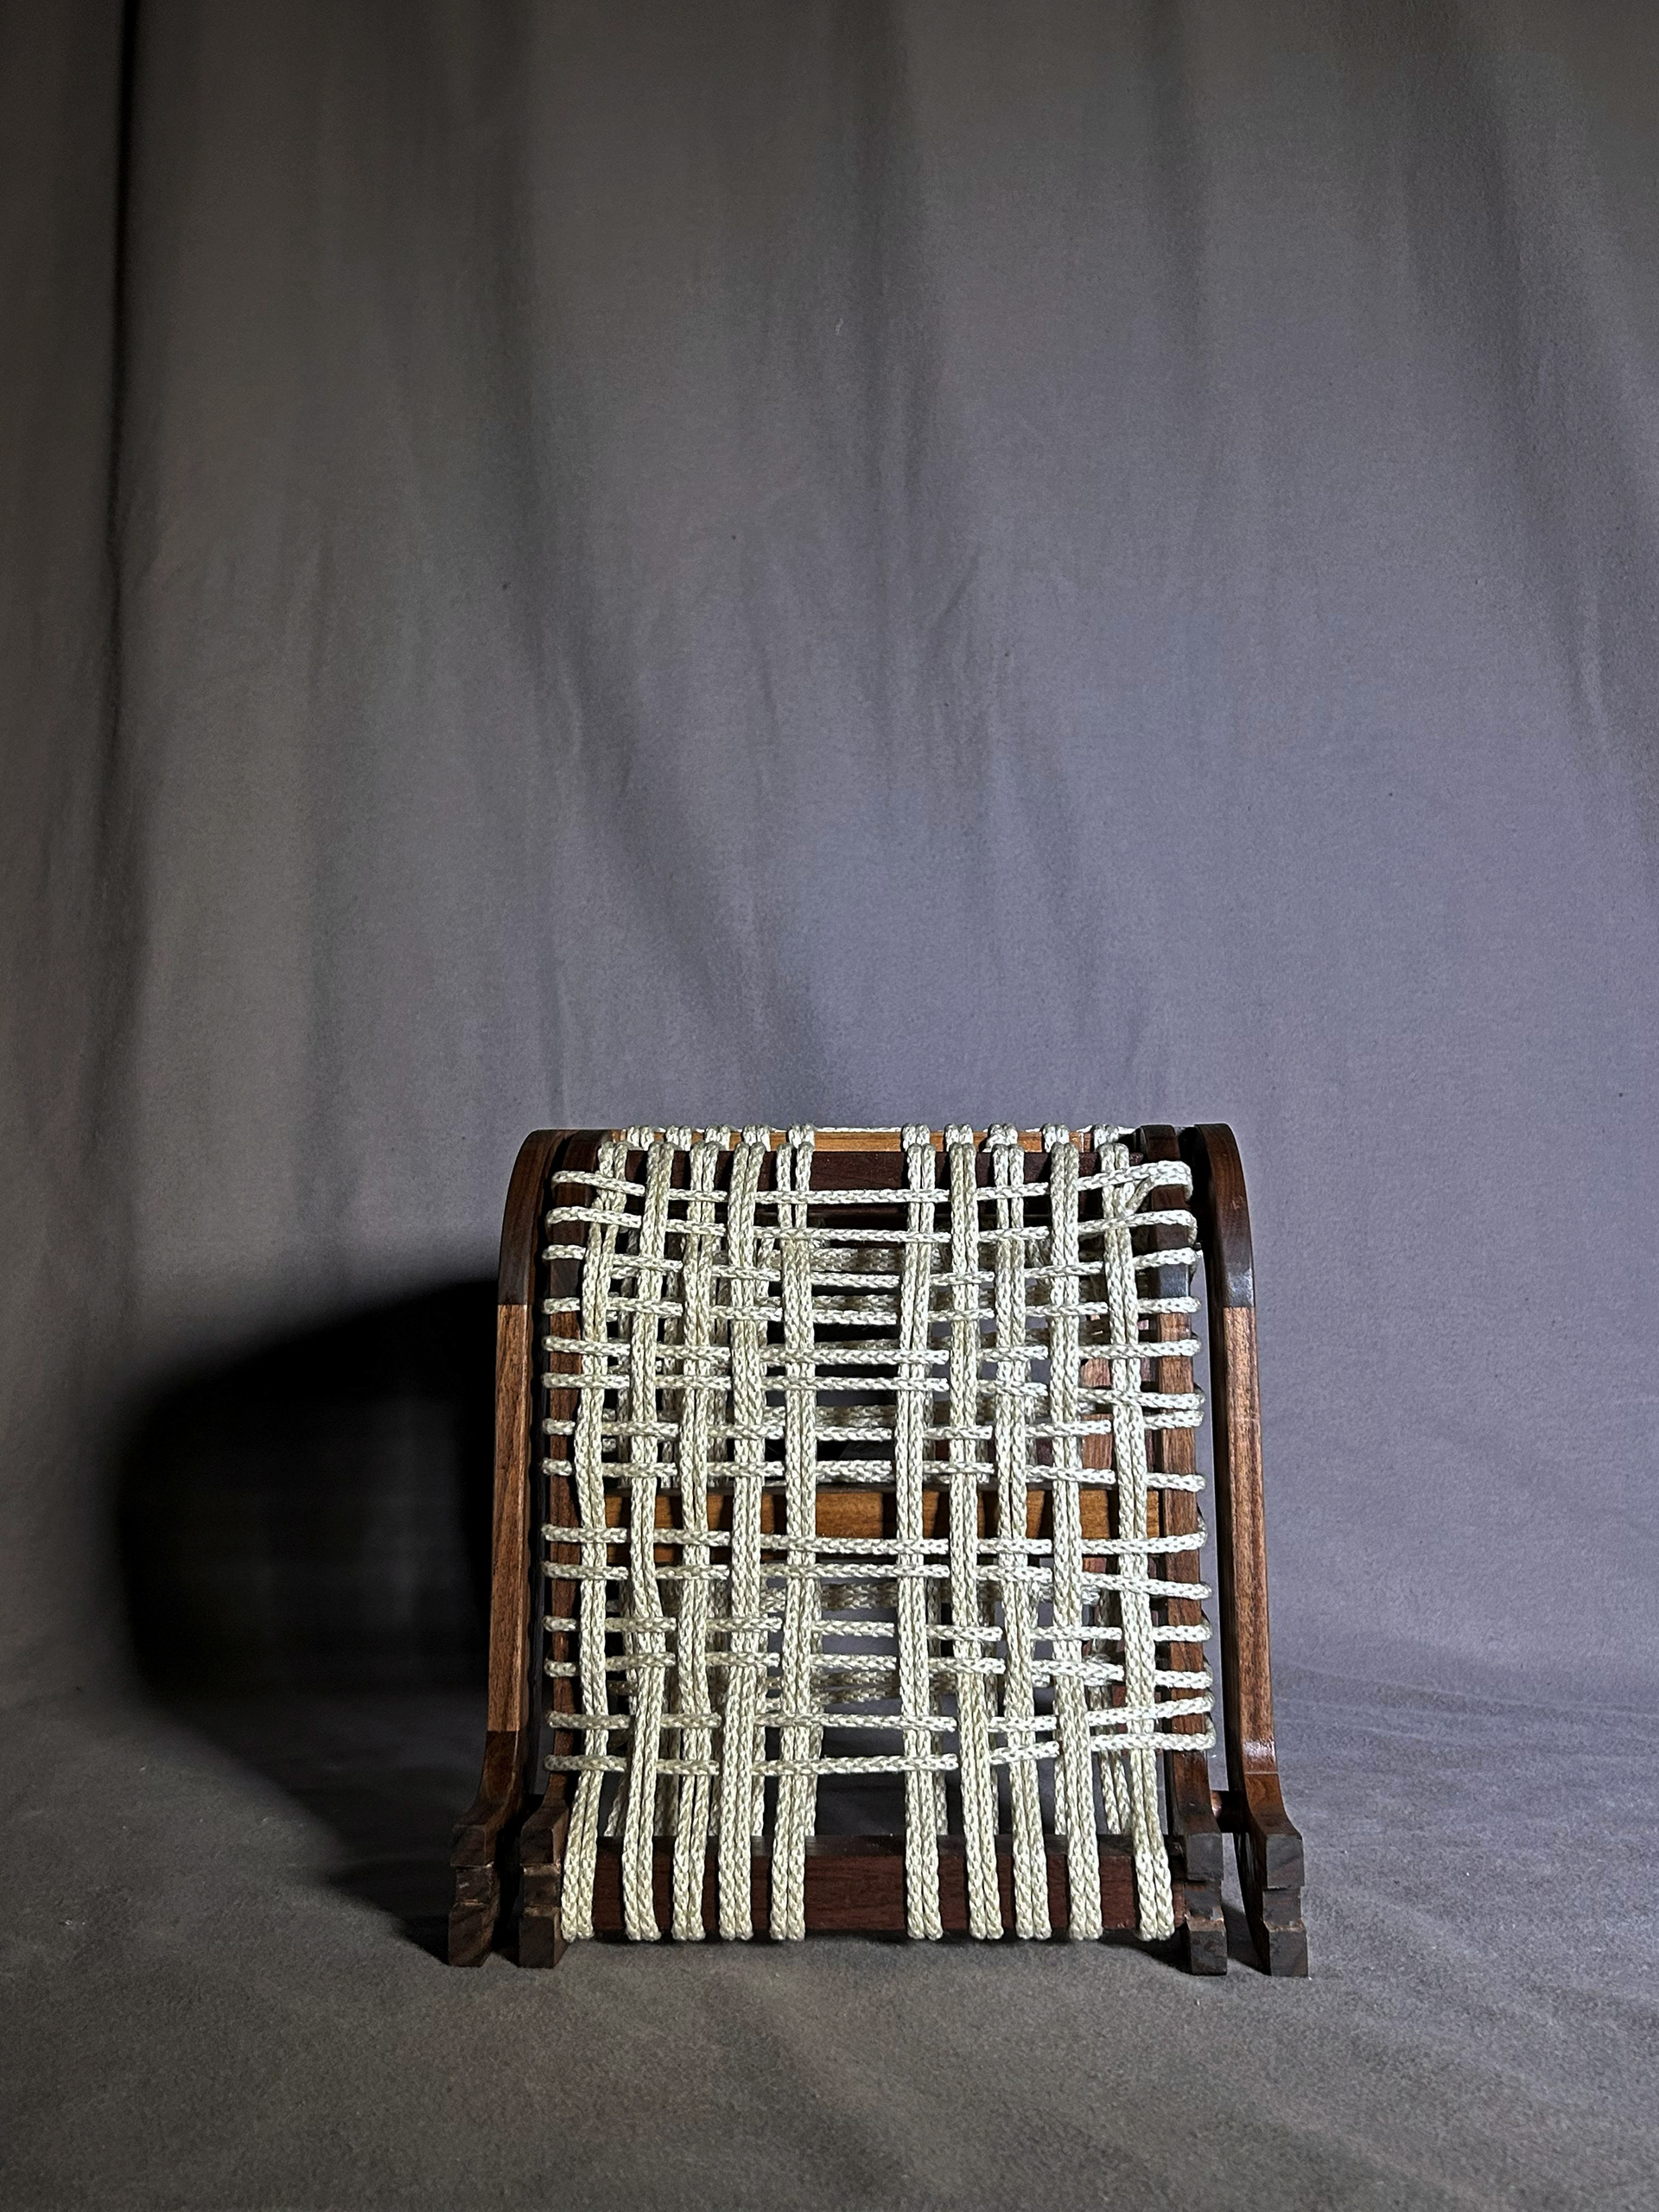
Image 6 | Front View
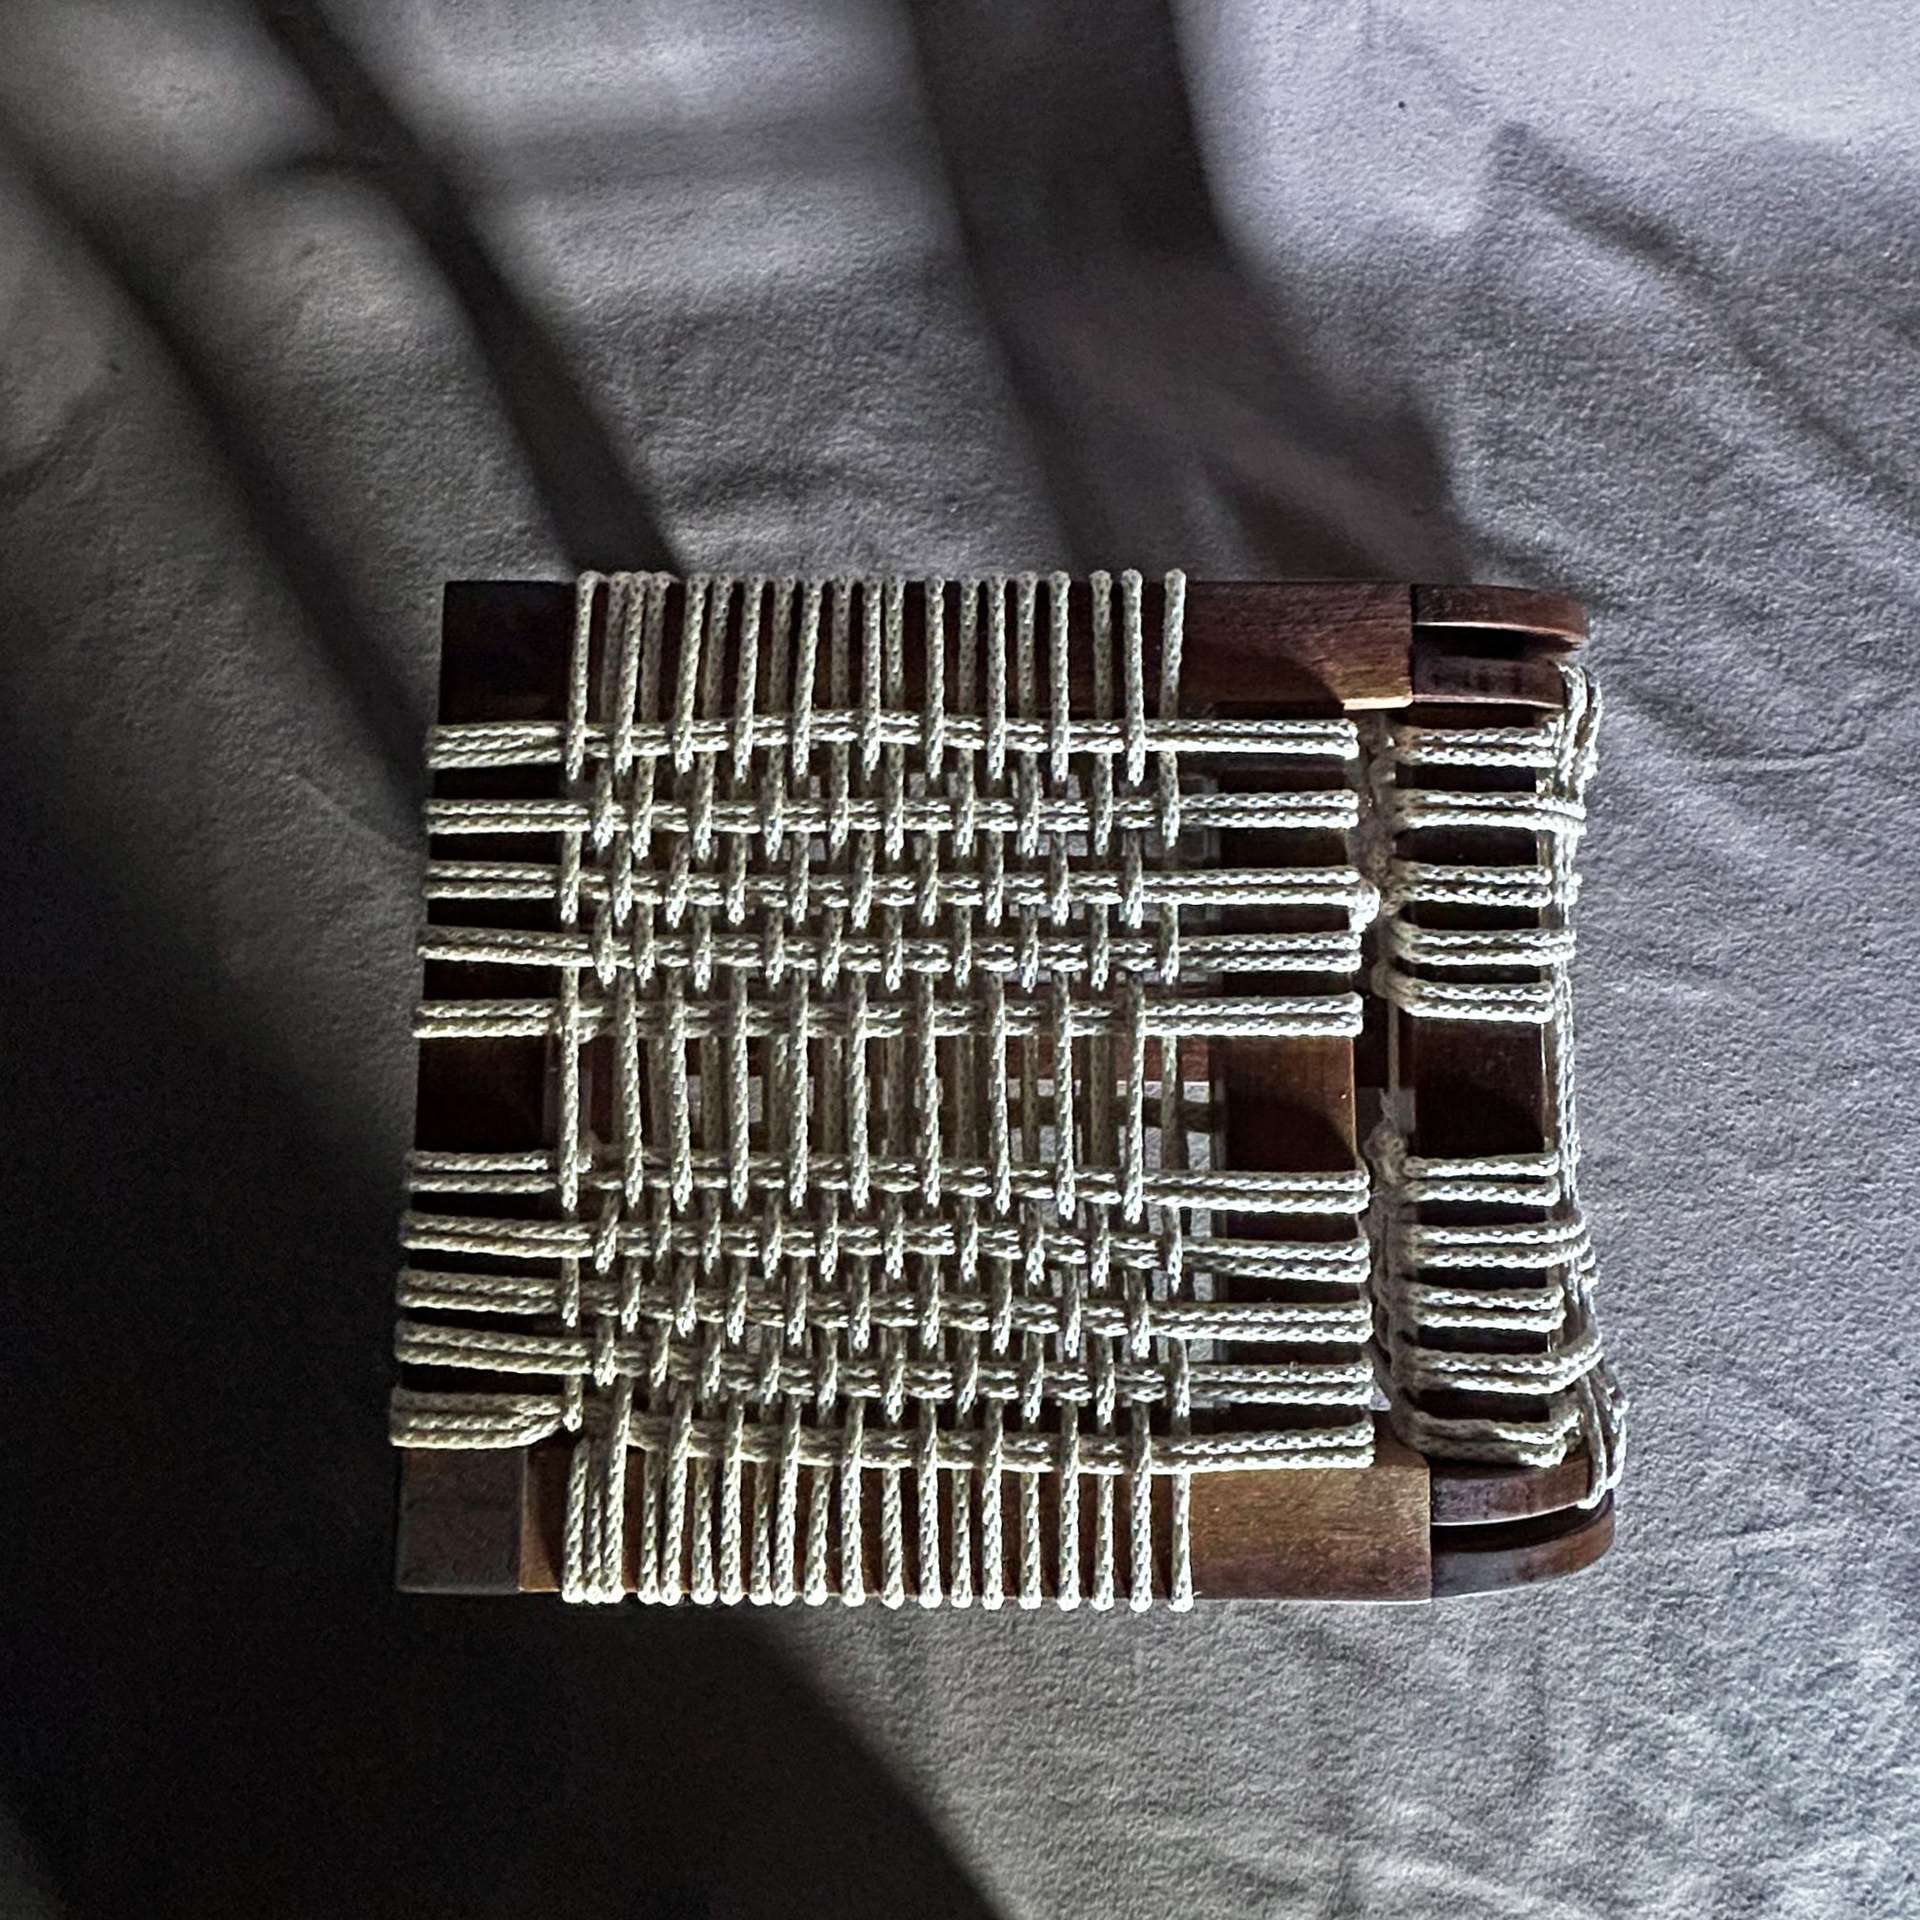
Image 7 | Top View
Detail Photos of Footstool 1
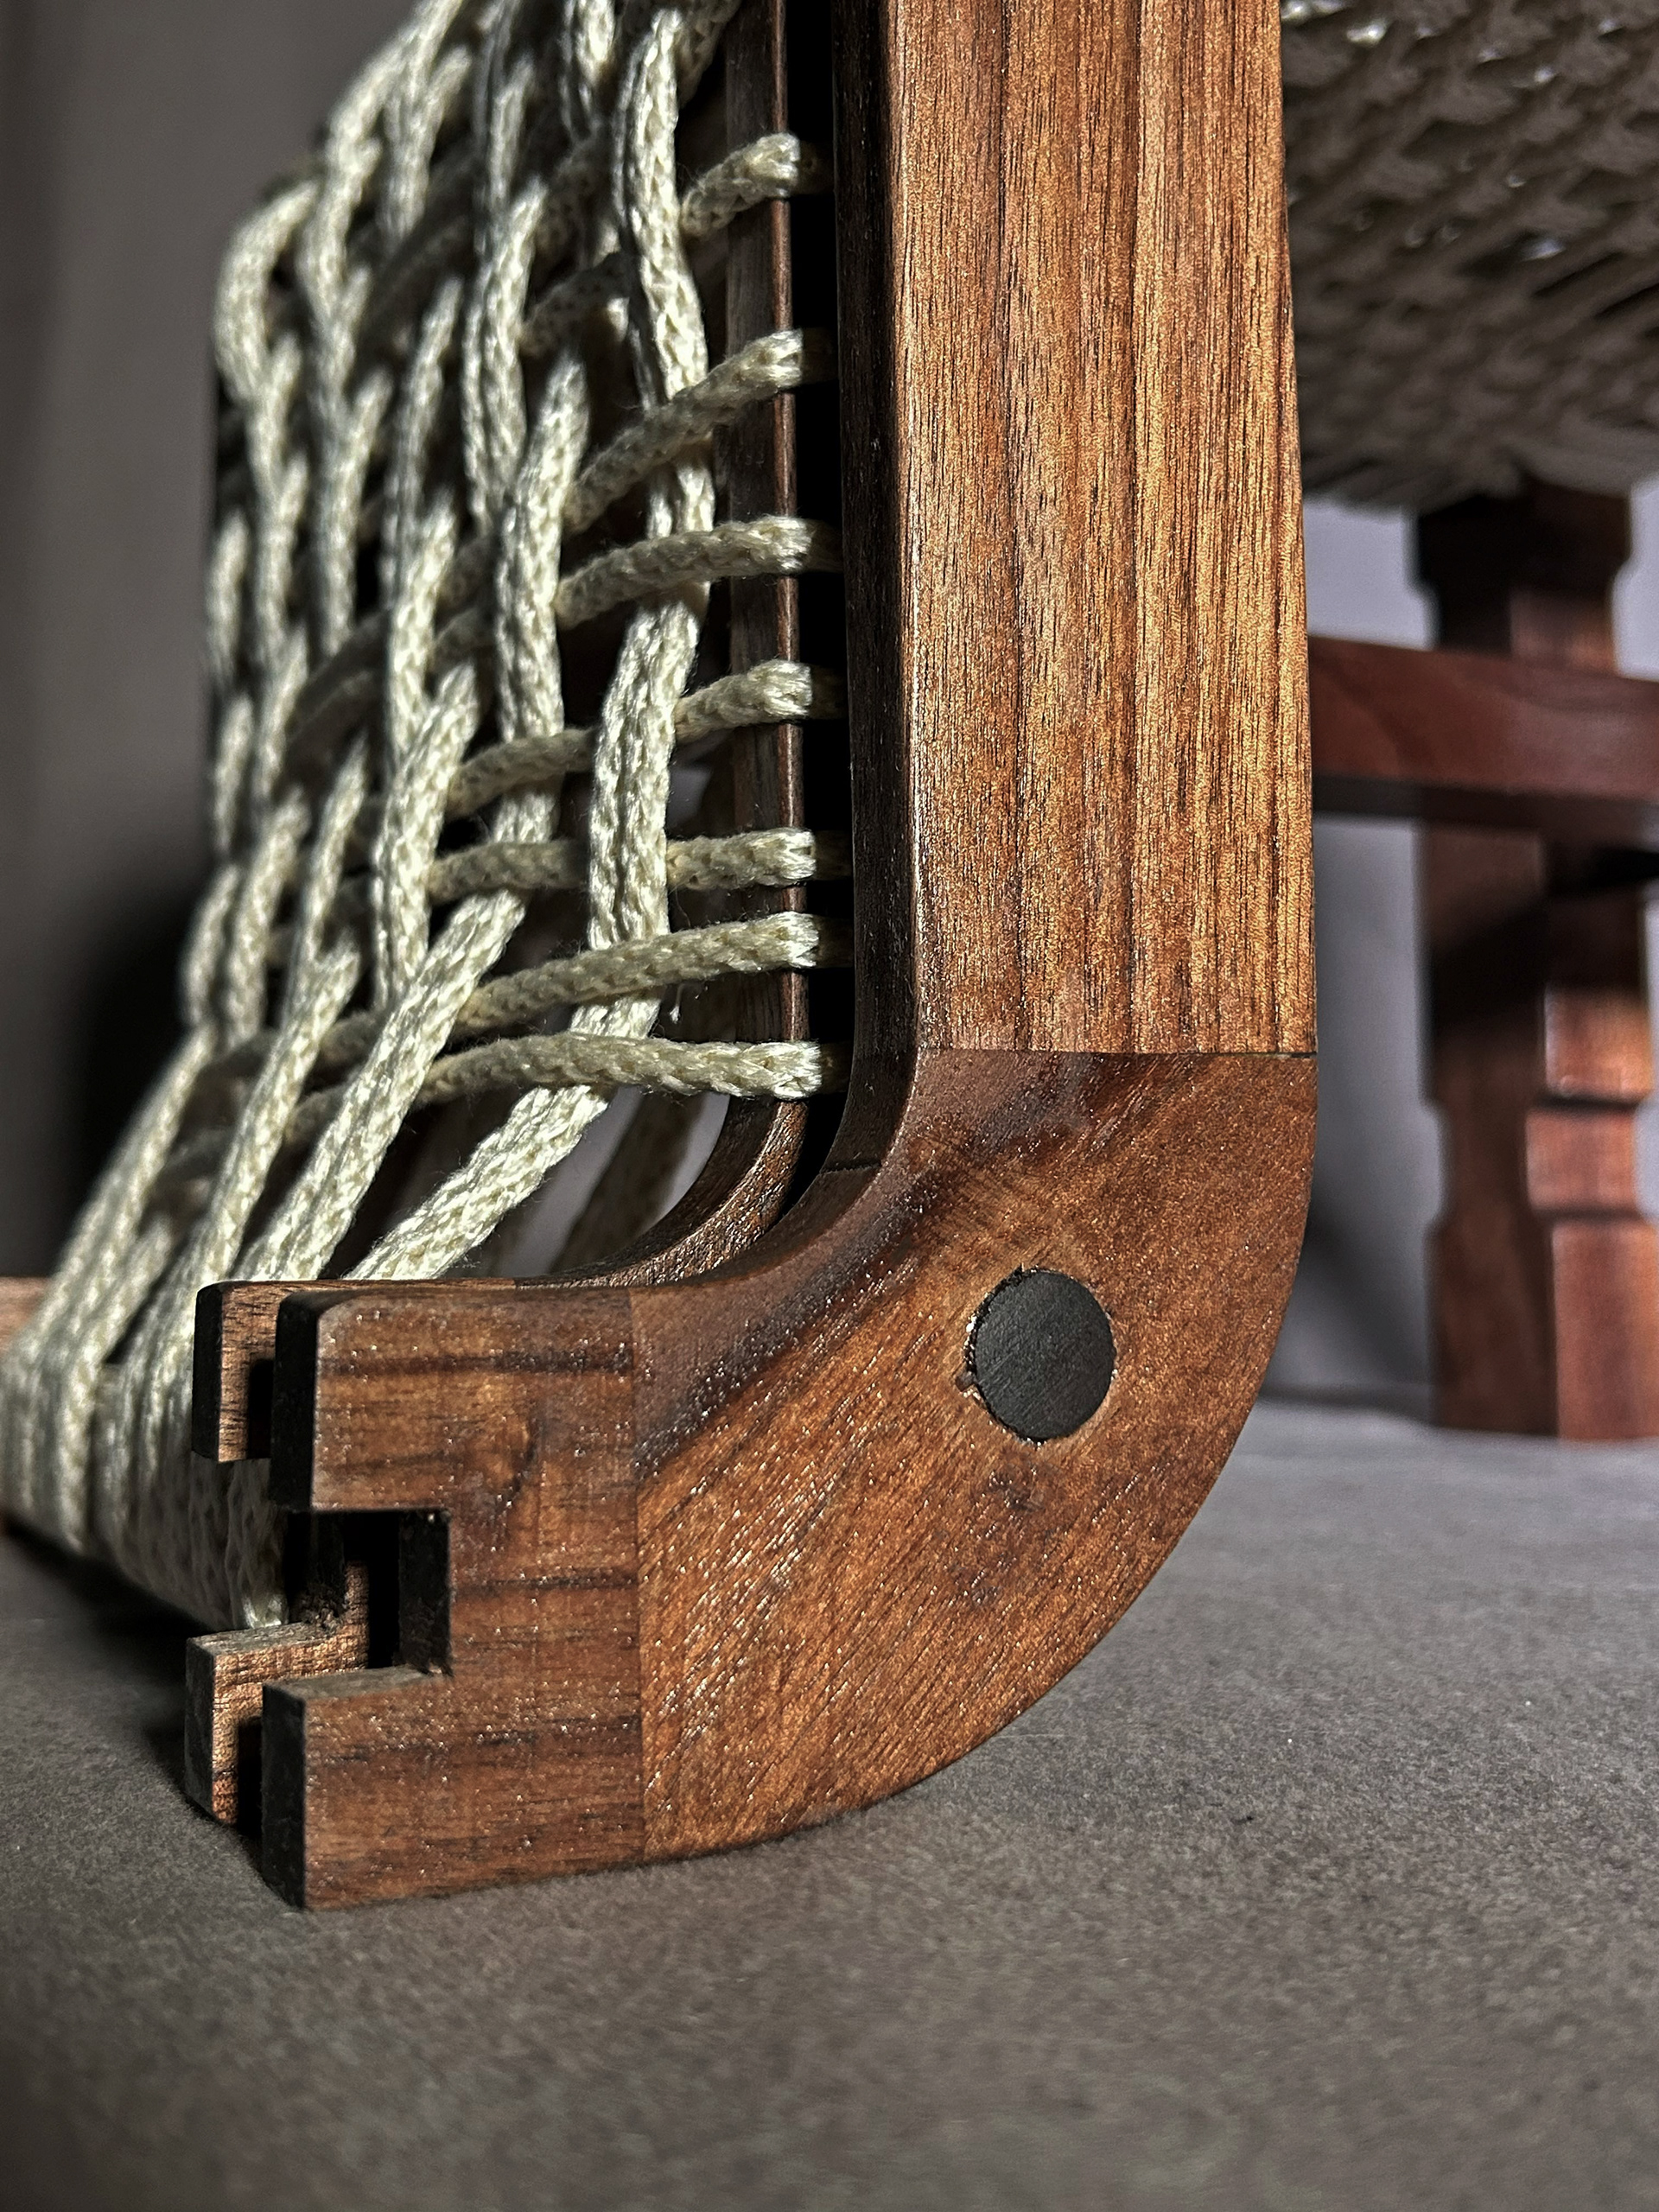
Image 1 | S-curve Leg Groove Joint & Bottom Dowel
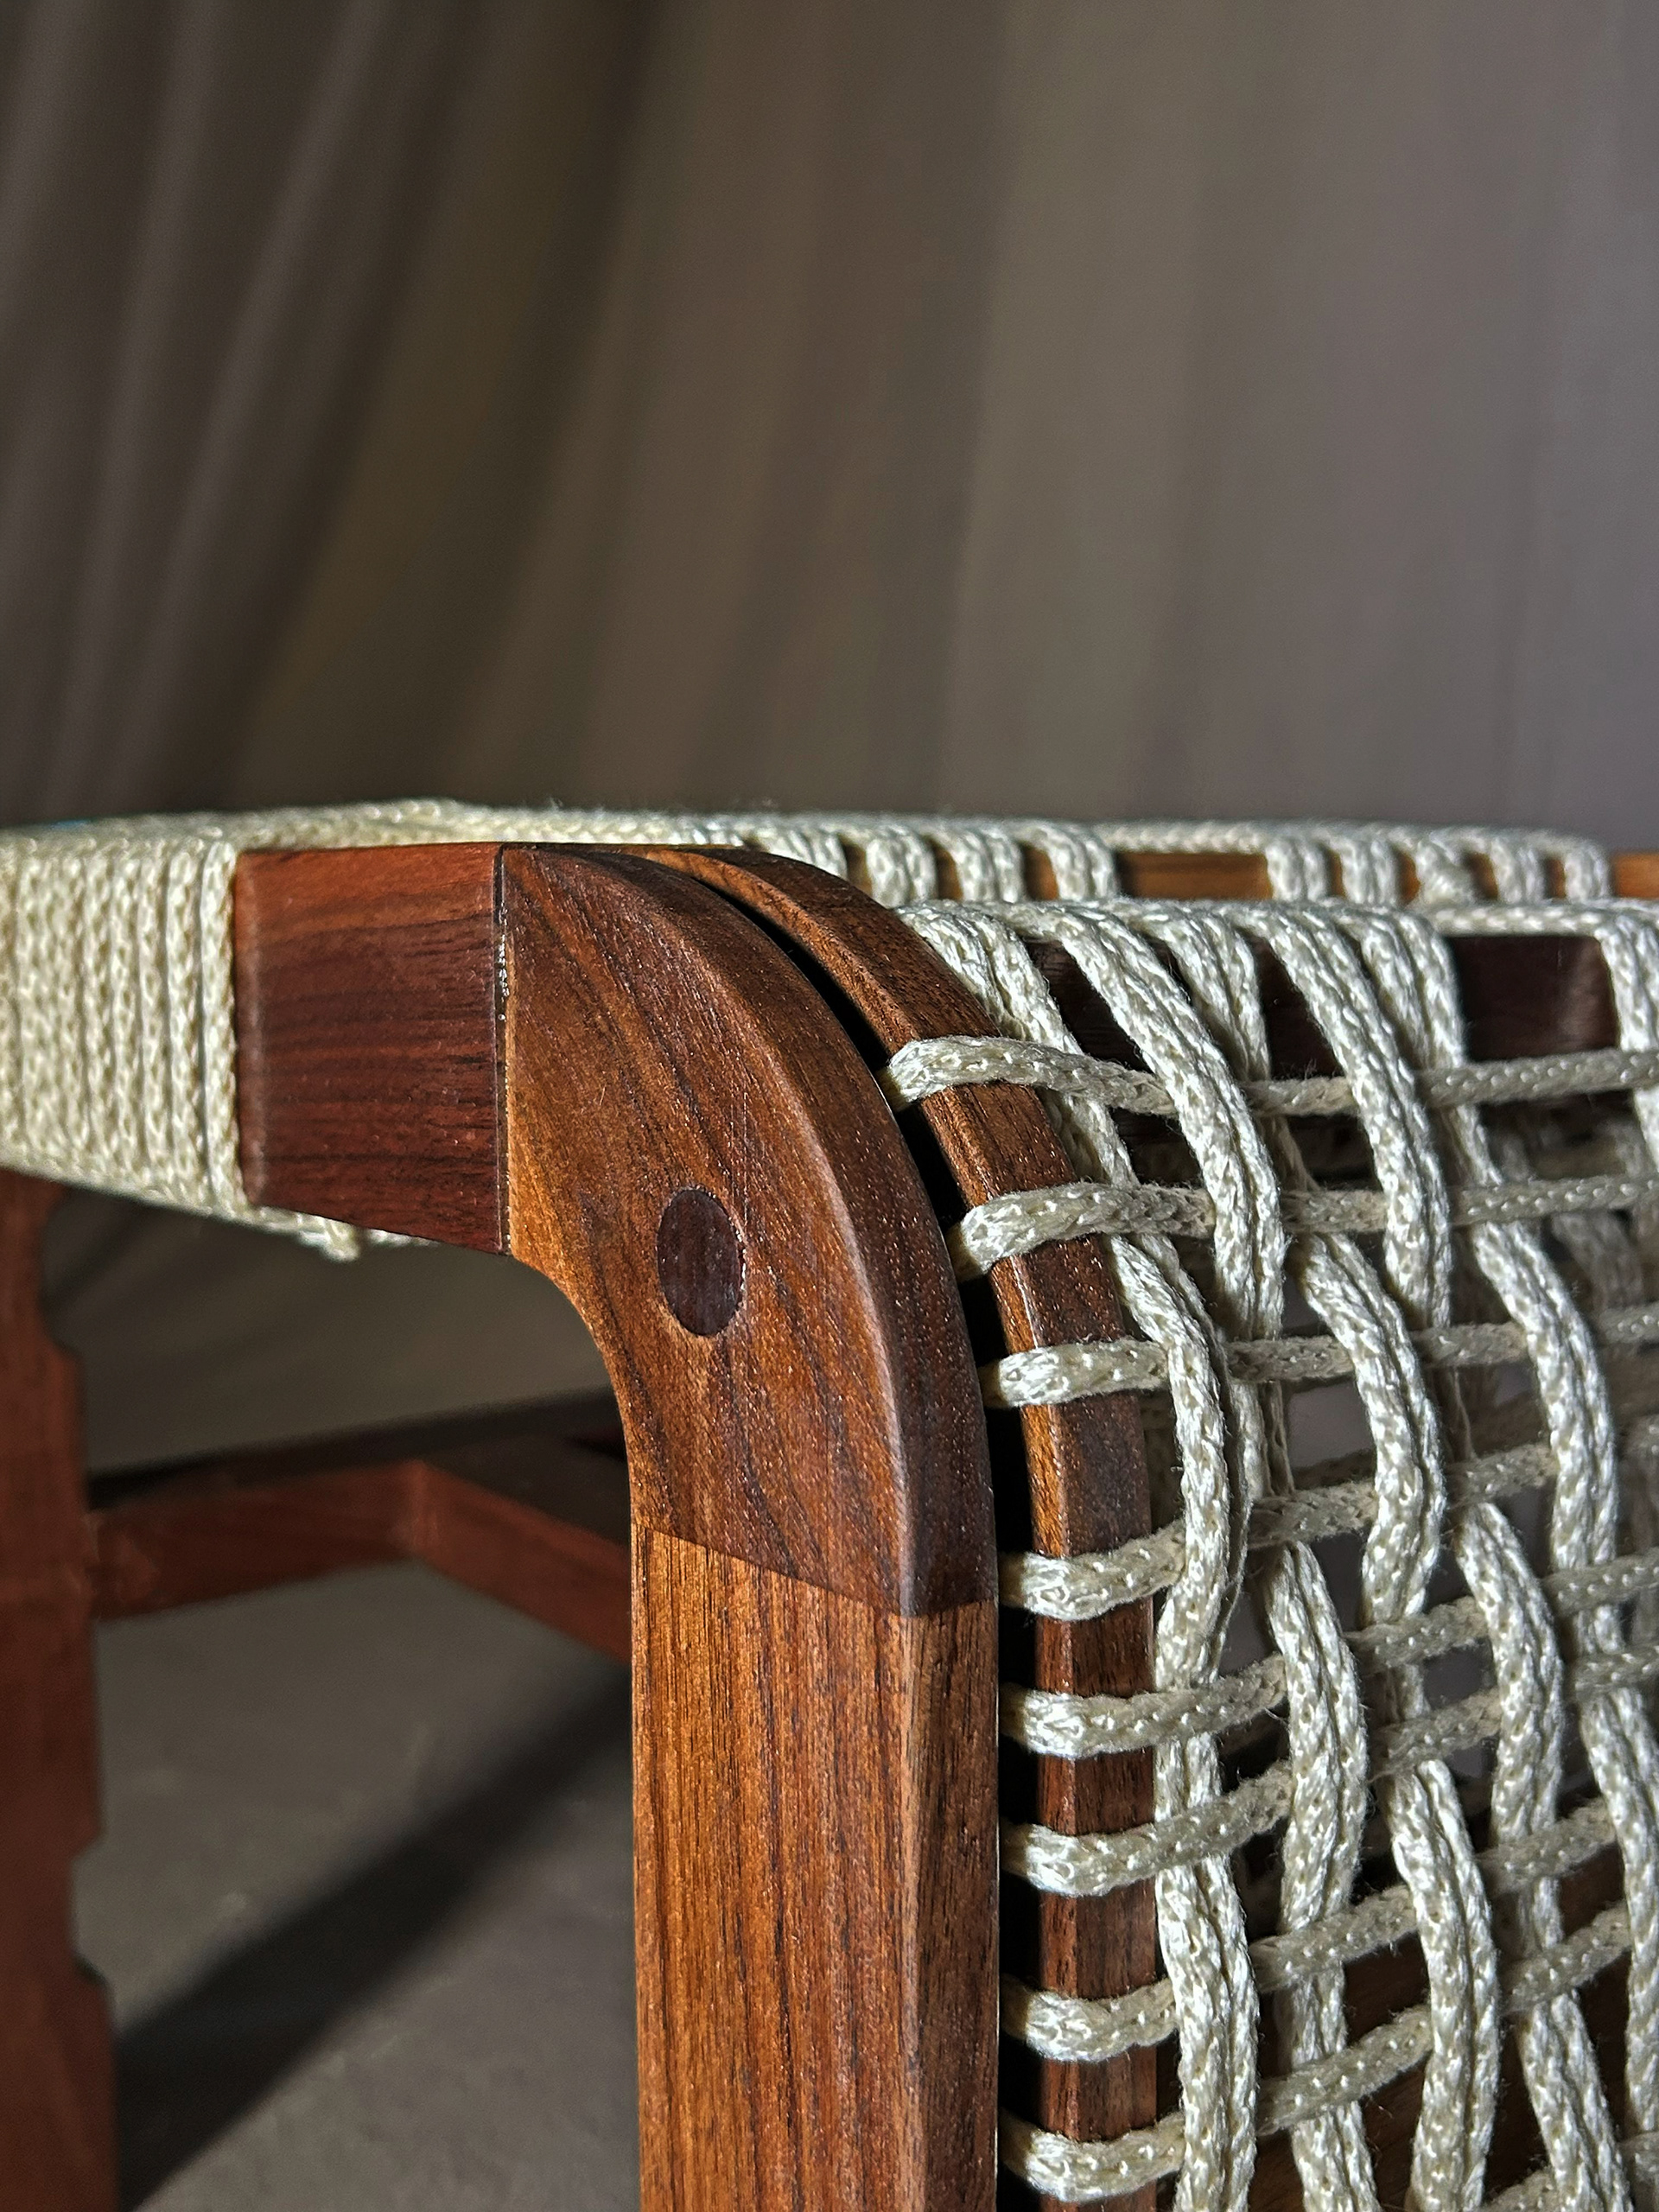
Image 2 | Top Dowel Stabilizing the S-curve Legs